
Simple registration/login system with Flask, MongoDB, and BootStrap
Introduction
Bootstrap is a free and open-source CSS framework directed at responsive, mobile-first front-end web development. It contains CSS- and JavaScript-based design templates for typography, forms, buttons, navigation, and other interface components.
Flask is a micro web framework written in Python. It is classified as a microframework because it does not require particular tools or libraries. It has no database abstraction layer, form validation, or any other components where pre-existing third-party libraries provide common functions.
MongoDB is a cross-platform document-oriented database program. Classified as a NoSQL database program, MongoDB uses JSON-like documents with optional schemas. MongoDB is developed by MongoDB Inc. and licensed under the Server Side Public License. Wikipedia
In this tutorial we will build a Registration system with Flask web framework the users will be saved in a NoSQL database(MongoDB) and Bootstrap will be there to support the front end layout.
Note: Some prior knowledge of web development and working with databases will make it easier to follow through.
MongoDB setup
To get started, you’ll need to get the MongoDB server to run on your local machine. Download MongoDB’s community-edition server here, and be sure to download and install the latest current version for the type of machine you’re running on.
To ensure that you have MongoDB installed correctly, run mongo --version and mongod --version. If you get an error for either, you’ll need to go back and reinstall the database server.
Then after easier workflow download MongoDB Compass here and open it once it's done. Create a free cluster and then connect to it
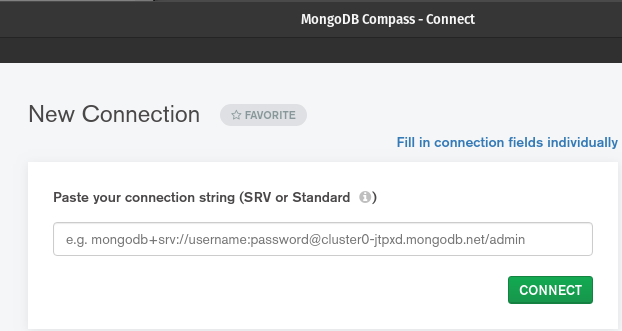
You don’t have to use MongoDB Compass it was just an easier option for me because of its intuitive UI and to check the new users etc.
Once logged in create a new desired collection that will store the users' data.
Use the tutorial if any issues arise here.
Bootstrap and Flask
Luckily bootstrap can be easier set and it just has to be added to the .html file <link> into your <head> before all other stylesheets to load our CSS.
Follow the procedure at
For flask just install the framework on your Python
Install and update using pip:
pip install -U Flask
So, once we import Flask, we need to create an instance of the Flask class for our web app. That’s what line 5 does. __name__ is a special variable that gets as a value the string "__main__" when you’re executing the script. We’ll go back to that in a moment.
The secret key is needed to keep the client-side sessions secure. You can generate some random key if wanted with os.random(24).
Flask App routing
Now we will do routing we will first write the route function and then after the .html file that the route will render to.
The app route defines the route name its common practice to set the default page as “/” the method GET is used to request data from a specific resource and POST is to send data to a server to create/update a resource.
Create variables that get the data from different input fields that were made.
If the user in session(logged in) redirects to logged in. We don’t want logging in users to register again while in session duhhhhhh…
Sessions
Unlike cookies, Session (session) data is stored on the server. The session is the interval at which the client logs on to the server and logs out of the server. The data that is required to be saved in the session is stored in a temporary directory on the server.
P.S would suggest not placing it now for test case the return (url_for(“logged_in”)) only after the route has been set!
As MongoDB stores data in documents more specifically JSON format have to search if the value exists as a “key” and “value” pairs. Finding it in MongoDB collection user_found = records.find_one({"name": user})
Query the user in the records collection if exists prompt the index.html that the user already exists. Same with email. otherwise, the password should be hashed for security reasons there are many hashing libraries hashlib, passlib, sha256, bcrypt. In this case, I choose bcrypt.
Encode(‘utf-8’) should be done because its the most effective way to archive data and as well minimizes the size of data thus you should be able to save space on your storage device
Add it in variables with “key” and “value” pairs that correspond to your collection name thereafter add it in the records.
With the newly created account redirect to the logged_in.html as the new user.

Main page surface design
Every route will inherit the base.html and that will be the Navbar because we need a static Navbar throughout all the routes luckily Bootstrap has us covered and you don’t have to dwell deep into the front end.

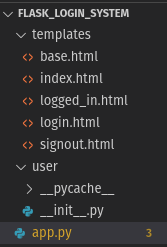
So the file will be called base.html that will be inherited in all other .html files.
So to start it off {% block content %} and {% endblock content %}
is used to override specific parts of the template the and because the {% block content %} is in the end other files will be able to extend the base.html file.
the
Reference link below about the responsive navigation header component.
Landing Page
The main page will be http://127.0.0.1:5000/ when you run the app.py and it applies to route(“/”)
We start it off by extending the “base.html”
In the {% block content %} we pass in the values for the registration form.
Remember how we passed message =’’ variable in the app.py and if the user already exists add value to the message and render_template with message=message? well that basically stands so the user can get notified if username(password not matching or false) to give appropriate notification for the user with the help of {% if message %}{% endif %} and inside pass in {{message }} to change the color or style of the message box check here.

Now finally we are heading towards the form section.
Note: method=”post” is needed for the form to send data to a server.POST is one of the most common HTTP methods.
In the form name=”fullname” is what is received by the index() function user = request.form.get(“fullname”) the rest is for the styling properties for this particular form that can be found here and the button styling from here.
Logged In
Ones registered or logged in reroute to ‘/logged_in’ and if the email is in current session render the logged_in.html with the email name otherwise redirect to login(because we don’t want anyone just typing ‘/logged_in’ to get in without authentication as an already registered user)
Hope you are still with me and I didn’t bore you!

Ones registered two things should happen
- You get redirected and displayed that you have logged in
2.Your database collection has been updated with the new user
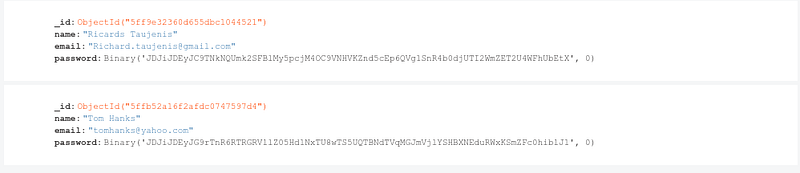
In MongoDB, each document stored in a collection requires a unique _id field that acts as a primary key.
The password is set as Binary(‘…’) because we encrypted it with bcrypt.
Login Page
Now the rest should come to a lot easier I promise to bear with me just a tad more. ❤❤❤
Prompt the message to log in at first. As always get the form data values in this case just the email and password.
Check if the email exists in our collection email_found=records.find_one({"email": email})
If so get the email value and the password from that email.
The last stage is to check if the given password matches the users' password with bcrypt.checkpw(password.encrypt('utf-8), passwordcheck)
If so redirect to logged_in as that particular user else prompt a corresponding message to it.
Logging out
Here we finally reached the endpoint of this project!
Same as before we only users who are logged in can logout. And to release a session variable, use the pop() method.

Conclusion
I hope this helped along the coding journey and a lot has been learned regarding Flask web-framework, Bootstrap, and as well as NoSQL databases like MongoDB. You can continue by making it more intuitive like asking for a specific number of characters for a password or as well build a user post blog or so forth.
Here is the link to the project:


