
Scanning Negative Film With a Macro Lens

This story compares the result of scanning negatives with a DSLR with a macro lens and by using a digital scanner (in this case an also perfectly great Reflect RPS 10M) to scan 35mm film. Finally, I also post a comparison of the result from scanning with the macro lens (from a Mammya RB67 6x7mm negative film) and a print from the same medium format negative.
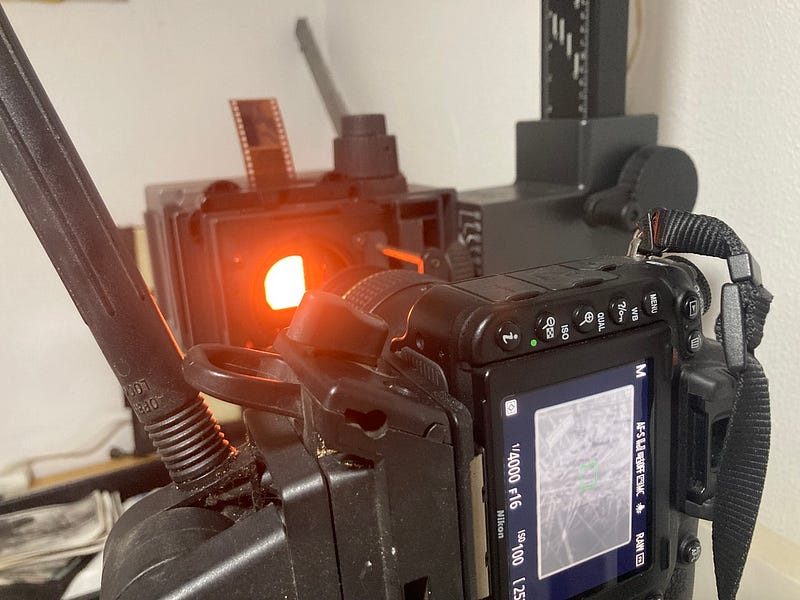
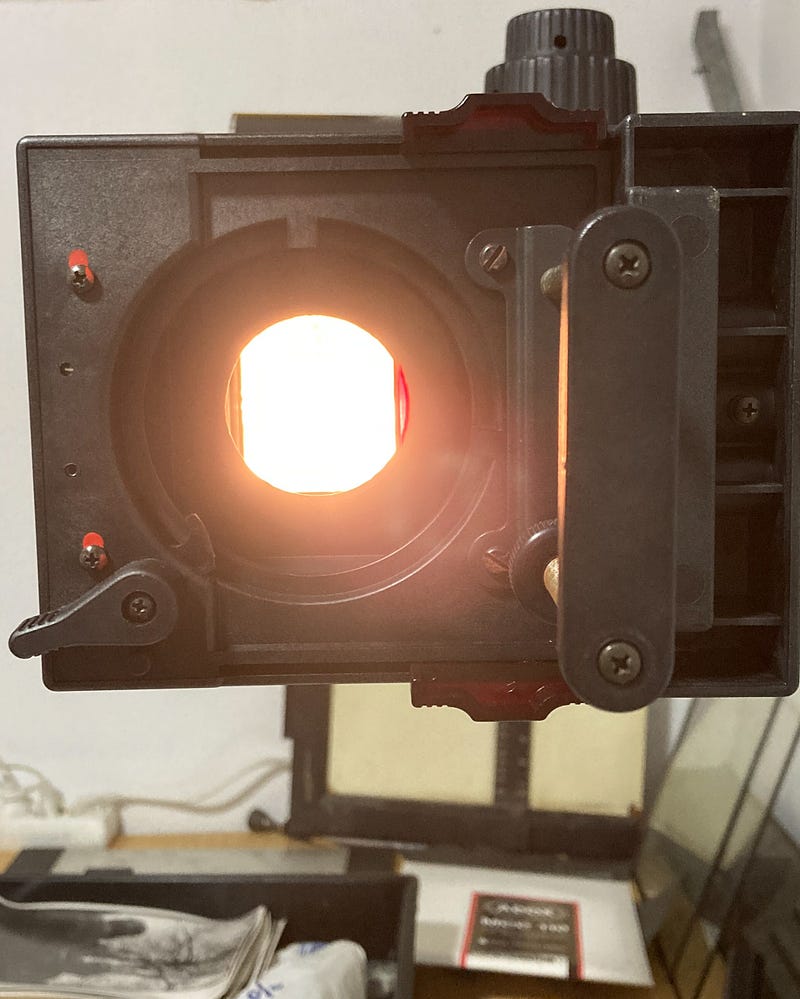
Macro lens scanning was performed with a Nikon D750 and a Tokina 100 mm f2.8 Macro lens capable of a 1:1 ratio and the parallel setup shown above. The negative is supported in a Kaiser System V amplifier capable of medium format negative (6x7 cm)using the internal lamp (75W) as a light source.
Important aspects to get a good result
Make sure to mask ALL the stray light from your light source. As I am using an amplifier with the correct mask for the negative this is correctly accomplished as no white light passes through. The light source of 75W is extremelly powerful in this setup and enabled me to get high shutter speeds.
I am using ISO 100, speeds of 1/4000, and apertures above f5.6 (which is the minimum for my Tokina lens in a macro setup). When not using this setup turning off all the lights in the room before capture is a must to reduce flare potential. Otherwise, if you have one also use your lens hood to reduce potential flare you should use it.
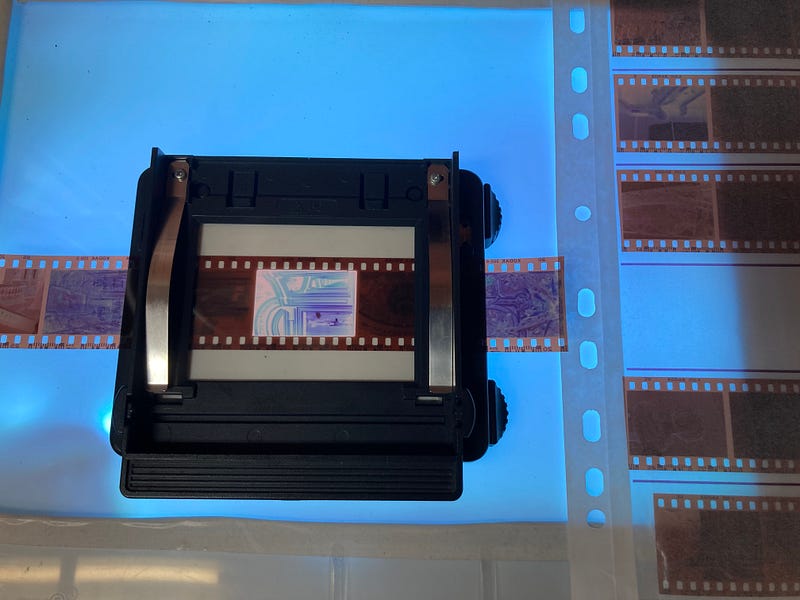
Below is the negative carrier from the enlarger with the 35mm mask and the negative loaded.
Get the camera perfectly parallel to the film. I confirmed this when cropping the negatives and assuring there is no angle distortion on the result RAW file(you can always get the black band to enforce the all negative, no crop, profile on your negative if you like it as most of us old school photographers do). The result I got from this setup was unnoticeable in a manner that I am perfectly confident was right in Lightroom as cropping to the final image posed no issues in ensuring a full negative was rendered.
Longer focal lengths are preferable to shorter focal lengths. They allow you to keep the lens further from the negative, thus reducing the likelihood of lens reflections. Again in my setup, I am achieving this with the 100mm macro lens in order to get no reflections or vignettes.
In this setup, by using a strong light source, tests showed that getting the emulsion (matte) side of the film facing outward the camera gets the best or at least a similar result as facing the emulsion towards the camera. In this setup, there is no need to flip the image in post-processing.
Lens filters (like protection UV filters) are of no need so take them out, as this can be a source of unwanted reflections.
Again, to be perfectly assured that the final result is not changed, use a remote trigger or camera countdown timer during the shot. The vibration caused by pressing the shutter button can cause blur in the capture.
Shoot RAW. I post-processed in Lightroom and inverted it to positive using the point curve. This is the starting point to get the agreeable contrast of the b&w negative film.
ISO: Are you still questioning this point? No doubt here! Set to your camera’s lowest ISO (100ASA in my Nikon D750) as the light source is strong enough to get a good exposure with high shutter speeds.
Last, and most important to get the best results is getting the SHUTTER SPEED/APERTURE right. Scanning under-exposed it’s possible to get better details from the negative. Starting with your camera meter’s recommendation, I got the best results with 1-stop higher to 3-step higher underexposure. Negatives that have a good density work well at one f-stop underexposure.
For the negatives that are less dense(under-exposed) using up to 3-stop under-exposure helped me to get the best results on the shadows. This is very important. Shoot the scanning between 1 to 4f-stops underexposed if you are not sure and tinker with what you can get from the negatives with Lightroom. A lot of the detail of the negative can be obtained with this by using masks only on the under-exposed areas.
Comparison of the Reflecta film scanner and the Tokina 1:1 Macro lens
Using the macro lens I got a perfect planarity of the reproductions, confirmed when cropping. Relation is maintained at 3:2 for the 35mm negative.
This is the setup I used on the negatives for this story. https://readmedium.com/meaning-in-photography-as-an-abstract-art-baaf7e51c34
Post-processing was done in Adobe Lightroom.
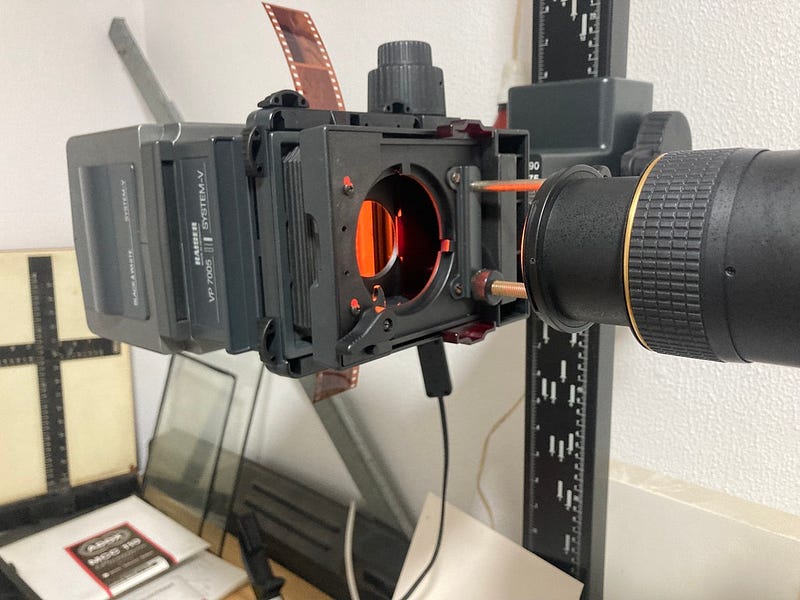
The setup I got in my darkroom is shown in the images below. The lens in the amplifier was removed as the objective is to shoot the negative directly:

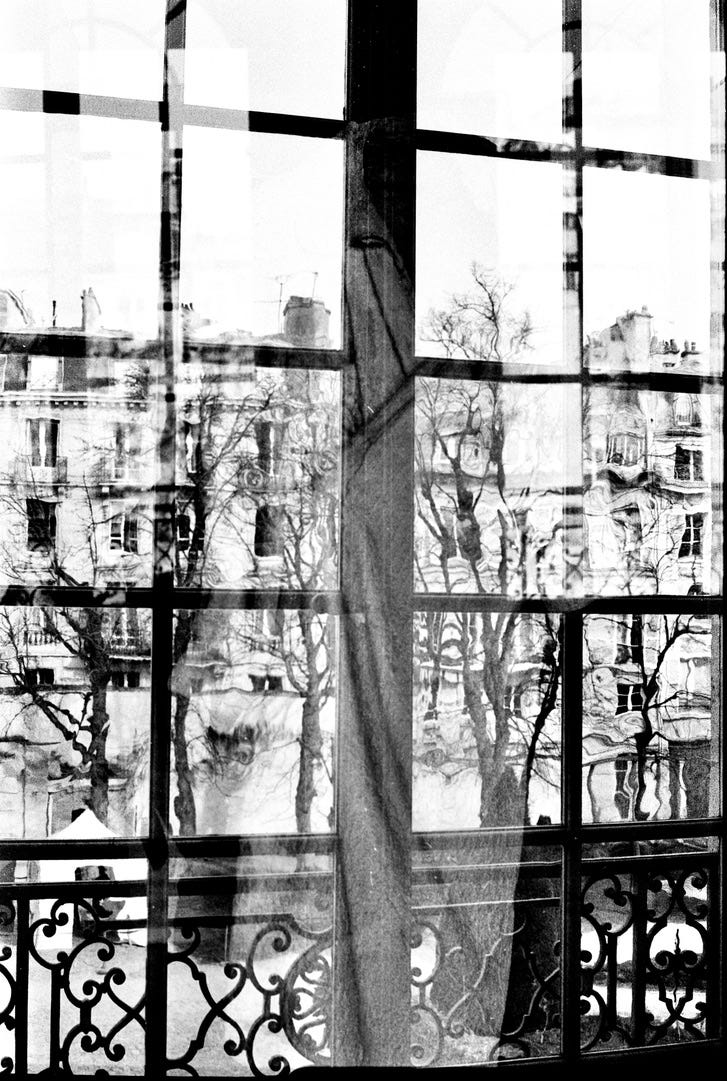
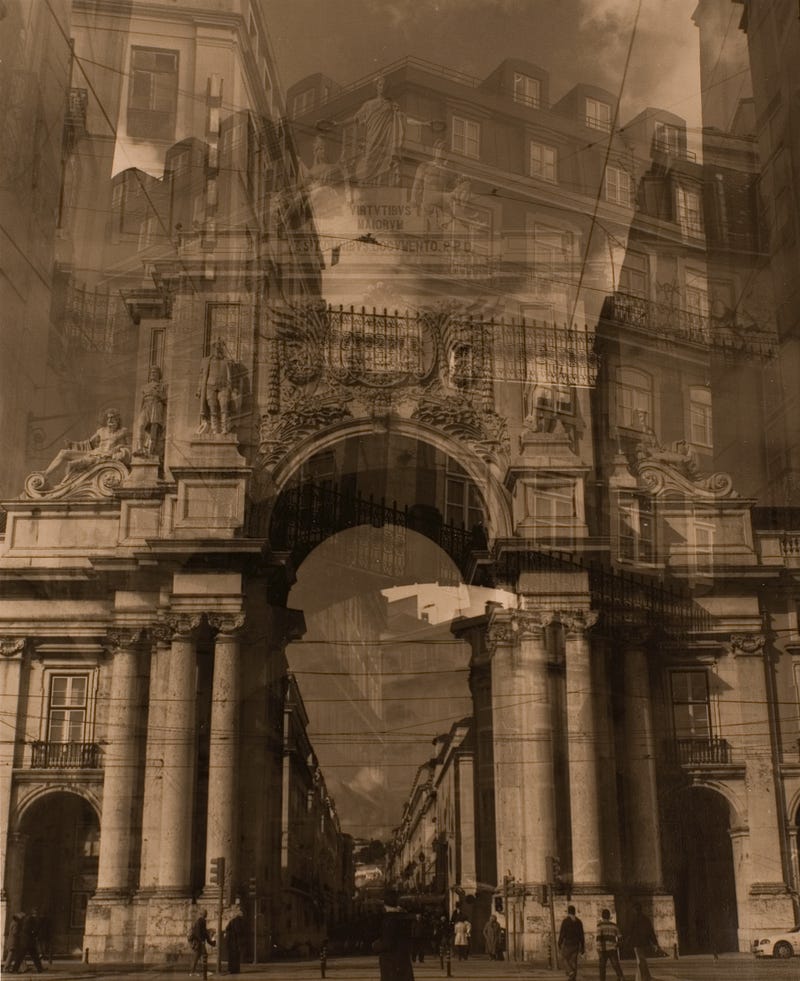
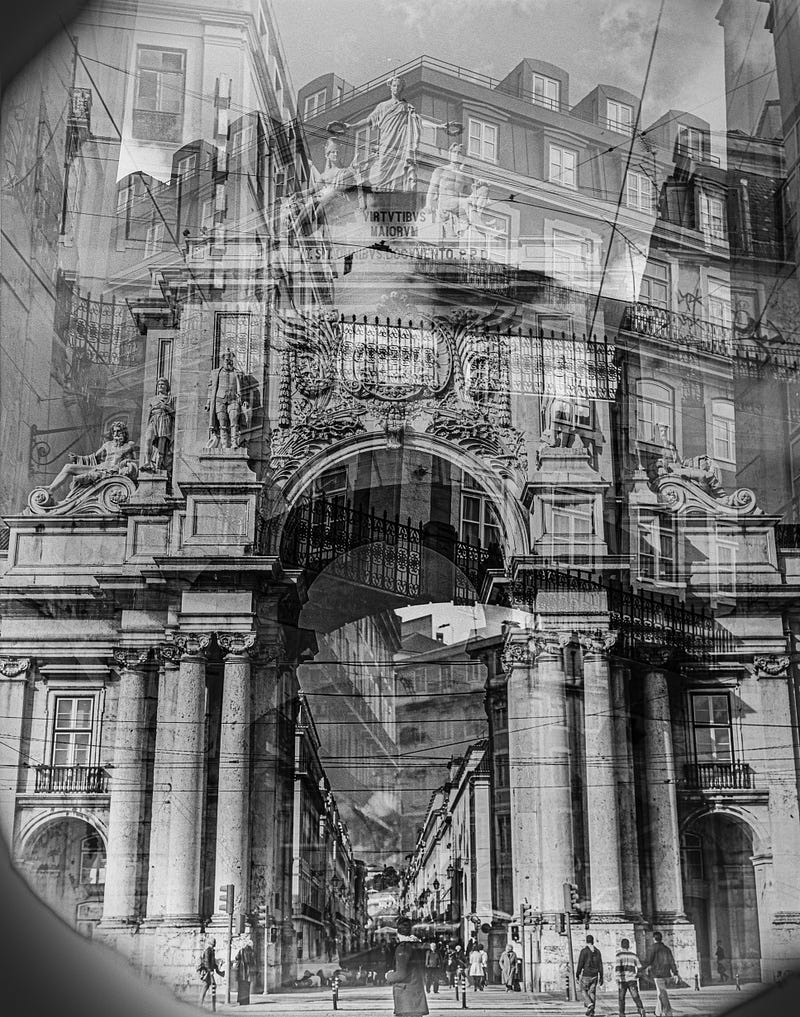
Below are the resulting photographs. The first image is from the scanner and the second is from the macro lens.
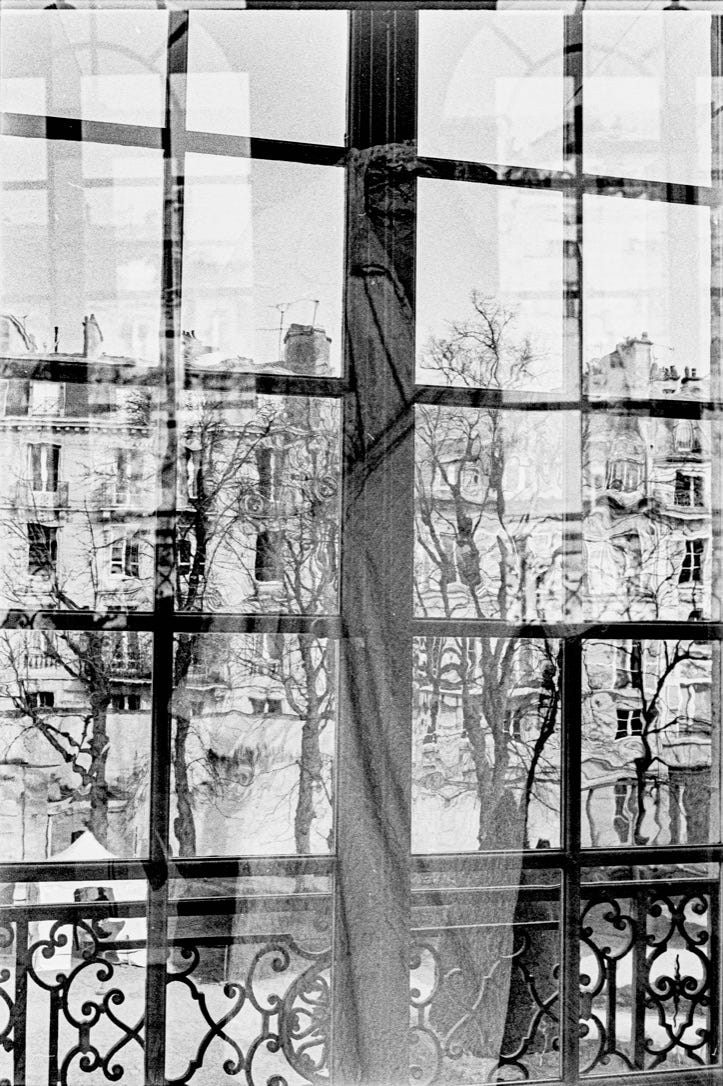
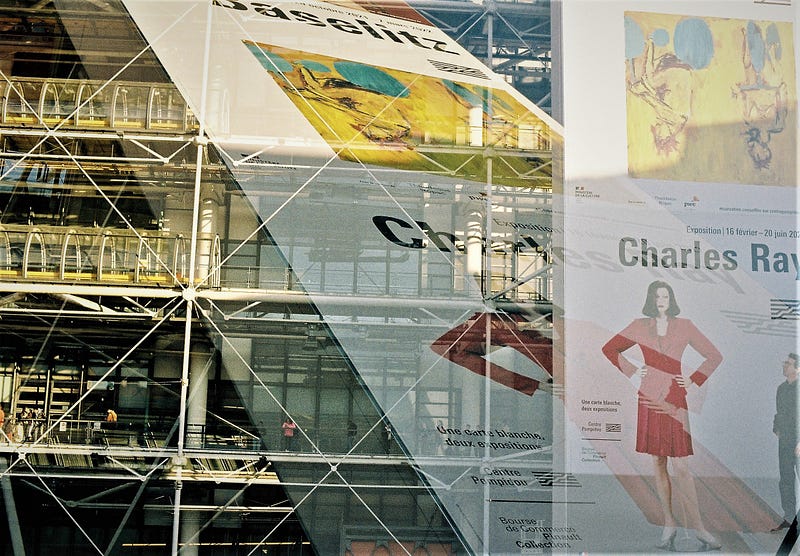
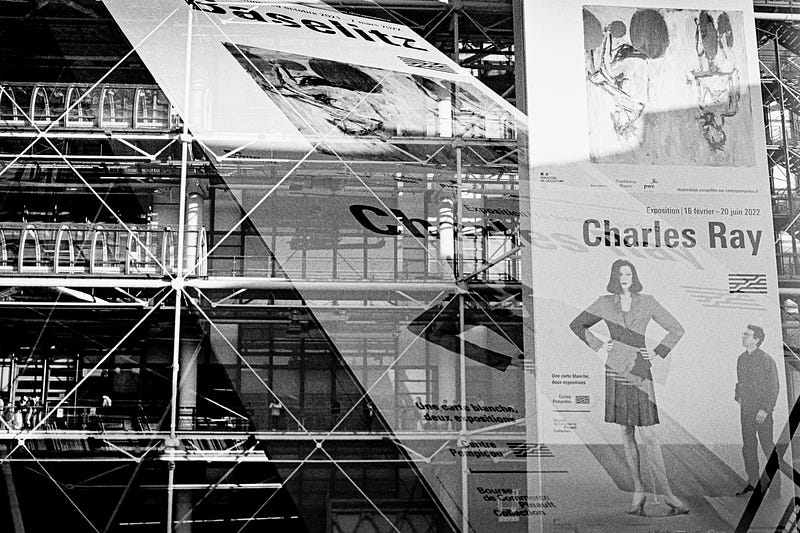

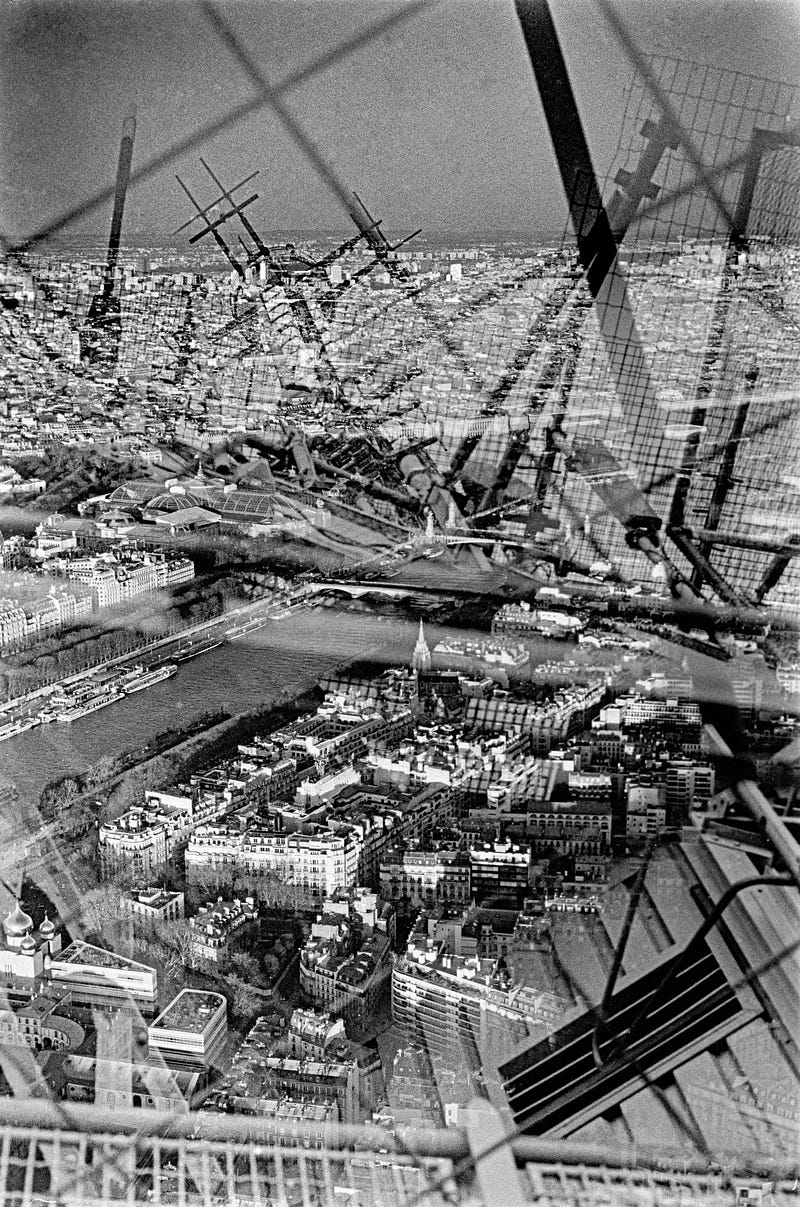
I used these images in another story I published last week here on Medium. If you are interested in the rest please check my essay here (it’s a personal reflection on photography as an abstract art).
A study was also made with medium format film. I run into a problem here because the enlarger has a circle mask so it’s not possible to get the full frame as shown in the next image. So to use this technique I will probably need to make some changes to the enlarger.
The result. In this case, I’m comparing the result of a print in silver halides (first image) and the resulting scanning with the macro lens(last image). It is noticeable in the vignette I explained before. The rest of the photographs of this work are available on another of my Medium stories here.
Conclusion
In my opinion, the result from the macro lens is as good as the scanner. The materials I used aren’t cheaper than the €1000 Reflecta scanner I borrowed from a friend but I reused most of them and only invested €300 in the Tokina macro lens. The enlarger can be replaced with a calibrated light table and a negative holder although the strong and homogeneous light source of the enlarger is a plus in my opinion. There are also some dedicated accessories for this you can get online at a relatively low cost.
The best surprise is the ability to control the exposure of the negative to easily obtain the best details from it. Proper exposure ensures that the image captured on the negative contains the right balance of light and shadow, resulting in a well-defined raw file. The ease of experimenting with various settings quickly to get the optimal exposure is definitely a plus on scanning with the macro lens over the table scanner.