
Running Kafka on Azure Kubernetes Service
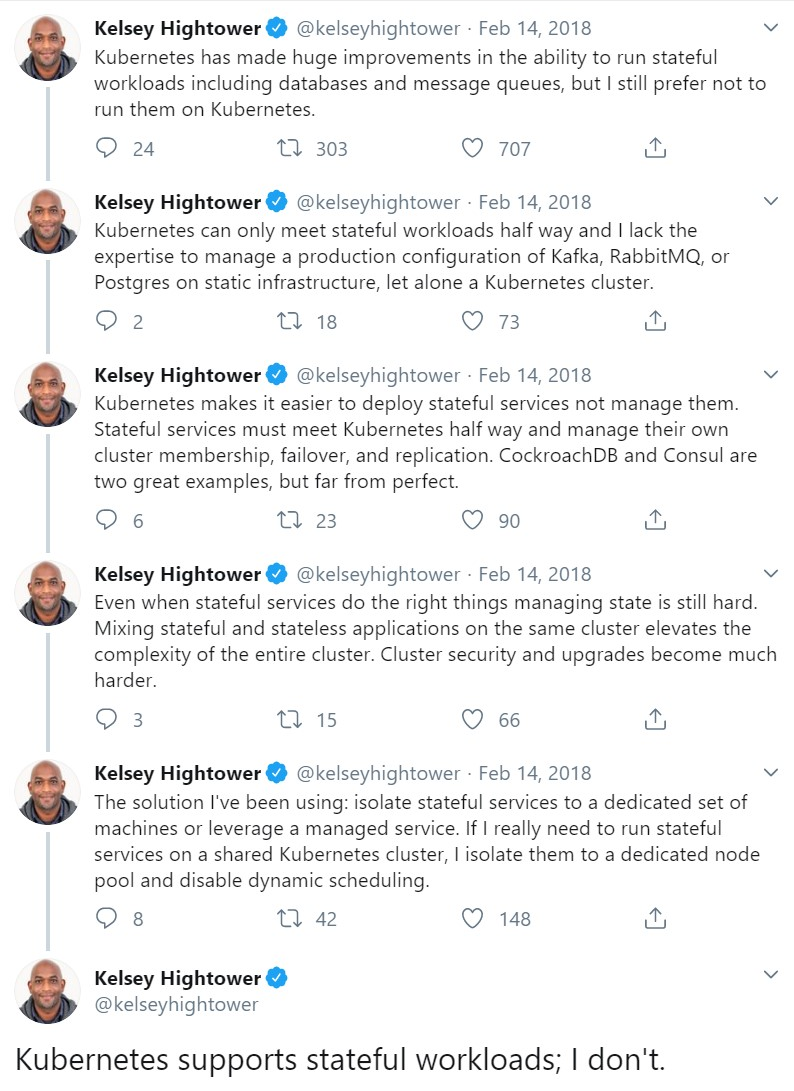
Yes, Kubernetes was not designed for Stateful workloads. Yes StatefulSets and PersistentVolumes can be hard to reason about. Also when Kesley HighTower cautions against running stateful applications on kubernetes, it makes us wonder if this is worth trying.
On the other hand, Confluent — the awesome company behind Kafka — is running Confluent Cloud by deploying Kafka on Kubernetes using Operators.
There have been several tech talks in past few KubeCons where people from different companies share their experiences with running Kafka on Kubernetes. If you have time, do check them out. I also highly recommend reading this whitepaper by Gwen Shapira on recommendations about running Kafka on Kubernetes.
With this background I decided to deploy Kafka on Azure Kubernetes Service (AKS) and without a doubt, I wanted to leave Helm charts and try out Operators to help me accomplish this task, and in my quest of choosing the right operator for my use-case I ended up with the awesome Strimzi Operator for Kafka.

Introduction to Operators
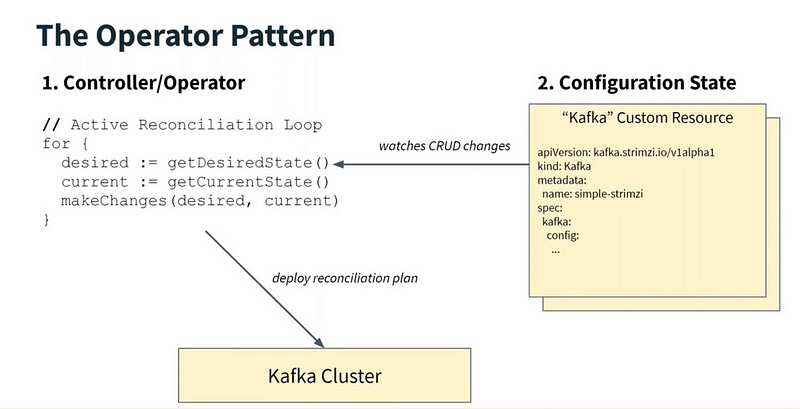
As you might already be aware, an Operator is a combination of some Custom Resources and a custom Controller that gets notified whenever some change (CRUD) happens in these resources or resources related to them. The controller then observes the state of the system and tries to achieve the desired state as specified by these declarative CRDs. If you are still wondering what an Operator is, checkout this introductory blog post about Operators.
Running Kafka on AKS
So without further ado, let’s get our hands dirty and deploy something basic like below on our AKS cluster — 3 Kafka Brokers & 3 Zookeeper pods running on Kuberenetes where the brokers support TLS Client authentication & the Kafka Producer/Consumer clients authenticate via Mutual TLS. Kafka’s default Simple authorization for Brokers (ACLs for Users) is also explored in this setup.
Step 1: Create a namespace
Let’s create a namespace for our experiment and name it tls-kafka
kubectl create namespace tls-kafkaStep 2: Install the Strimzi Operator
The first thing we must do is to install the Strimzi Cluster Operator which is responsible for creating the Kafka Broker pods and Zookeeper pods in our cluster. You can use kubectl to install using the latest released version or use Helm to achieve the same.
curl -L https://github.com/strimzi/strimzi-kafka-operator/releases/download/0.15.0/strimzi-cluster-operator-0.15.0.yaml \
  | sed 's/namespace: .*/namespace: tls-kafka/' \
  | kubectl apply -f - -n tls-kafka
If you go ahead and open the above yaml file, you’ll notice that it contains a bunch of stuff, namely some ServiceAccount, Roles, RoleBindings, ClusterRoles & ClusterRoleBindings necessary in an RBAC enabled kubernetes cluster for the Operator to function. Without these, the operator controller will not be able to watch for any changes in the corresponding custom resources. But more importantly this yaml file contains the CustomResourceDefinition or CRD for Kafka kind of resource. This is a new type of kubernetes resource that you can now create in your Kubernetes cluster. Before we proceed, let’s verify that our operator was created successfully

Step 3: Create the Kafka Cluster Now that our operator is running, we can create new Custom Resources corresponding to our Kafka Cluster, specifying the kafka version, number of brokers, enabling TLS/SSL on brokers and certain configuration using the following YAML file:
Note that the above CR although has a type of Kafka but it also contains configuration and spec for Zookeeper pods. Strimzi uses the same Custom Resource for both, since they are quite tightly coupled. But other operators are free to create a different custom resource for Zookeeper if they want.
For the impatient reader, all the code is available on Github so feel free to give it a try and skip reading this
Also note that we have enabled TLS on the Kafka Brokers just by specifying spec.kafka.listeners.tls.authentication.type as TLS — When the operator is notified of this Custom Resource and it tries to reconcile the differences, it will create the required certificate for the brokers and also create a Kubernetes Secret to hold the certificate. But first, let’s create the above resource by
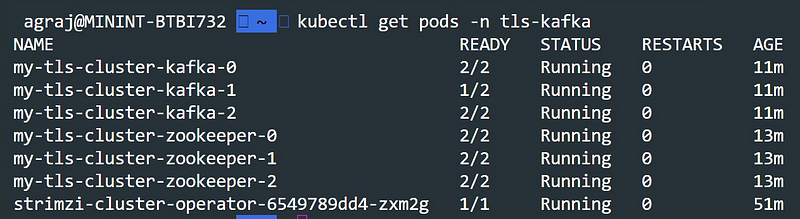
kubectl apply -f tls-kafka.yaml -n tls-kafkaAnd that’s it. The Strimzi Cluster Operator creates the Zookeeper and Kafka Broker Pods for you in your cluster. Checkout the current pods in the tls-kafka namespace.
The Cluster Operator also creates ClusterIP and Headless services for Kafka Brokers so that you don’t have to worry about the ephemeral Pod IP Addresses when addressing the brokers.

It’s good to know that ZooKeeper services are secured with encryption and authentication and are not intended to be used by external applications that are not part of Strimzi. If you really want to access ZooKeeper though, for example, using the Kafka Command line tools such has kafka-topics.sh you can connect to the local end of the TLS tunnel to ZooKeeper on localhost:2181
And finally, each Zookeeper and Kafka Pod typically has 2 containers — one for Kafka/Zookeeper and a sidecar for TLS.

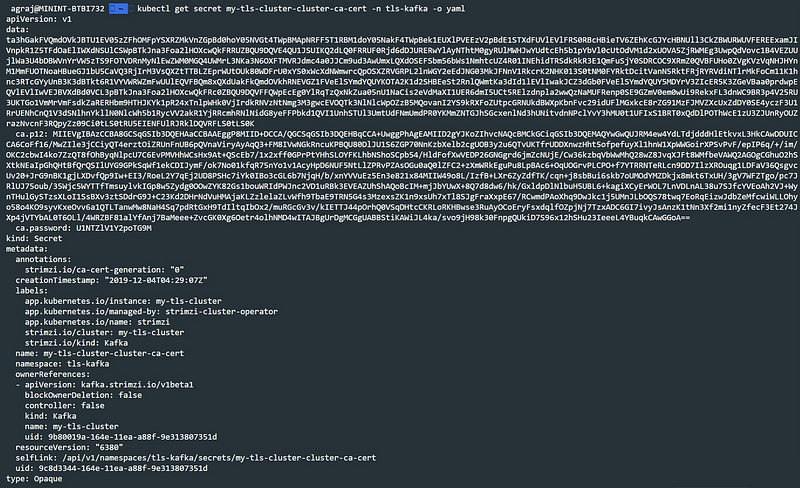
Since we enabled the TLS authentication for brokers, our Operator has created the CA certificate for our brokers and generated it as a Kubernetes Secret — we will use this when we try to connect to our broker in Step 7. The secret is named as <cluster-name>-cluster-ca-cert so in our case its my-tls-cluster-cluster-ca-cert The data field contains the ca.crt value which we will use later.
Step 4: Create some Topics
As it turns out, a Kafka topic is modeled as a Custom Resource in Strimzi — so you can create topics either by using kubectl or using any of the kafka utilities — we will create a Custom Resource for KafkaTopic and apply it via kubectl
kubectl apply -f kafka-topics.yaml -n tls-kafkaOne can specify the topic name, the number of partitions and replicas the topic should have and also any topic configuration in the Custom Resource object. Note that even when you create a Topic using kafka command line tools, the Strimzi Topic Operator will notice that and update the etcd store with that topic so when you get the list of topics using kubectl you will get the correct updated list.

Step 5: Create Users
Like Topics, User is also a Custom Resource and can be created in a similar fashion. Strimzi supports the default authorization mechanism offered by Kafka — Access Control Lists (ACLs) for Users on resources such as Topics , Clusters , ConsumerGroups and TransactionalIDs — in simpler terms you could control which users are able to do what operations on these resources. For a more detailed explanation checkout Confluent’s documentation on Authorization. To configure this, set spec.authorization.type to simple denoting SimpleACLAuthorizer Kafka plugin.
In this example, we define a user my-user which has authentication specified as tls (denoting TLS Client Authentication) and authorization specified as simple ( denoting Simple ACL Authorization ). Our user my-user in this example has complete access to perform any operation on the topics test and test-one-rep We create this user custom resource object in our namespace using kubectl
kubectl apply -f kafka-users.yaml -n tls-kafka The User Operator is responsible for creating the User object and also the related ACLs and generates secrets for the user with the same name as that of user — in our case it generates the secret my-user. This secret contains the user.crt and user.key which we will be using in our Kafka clients to connect to the brokers
Step 6: Create Kafka Clients
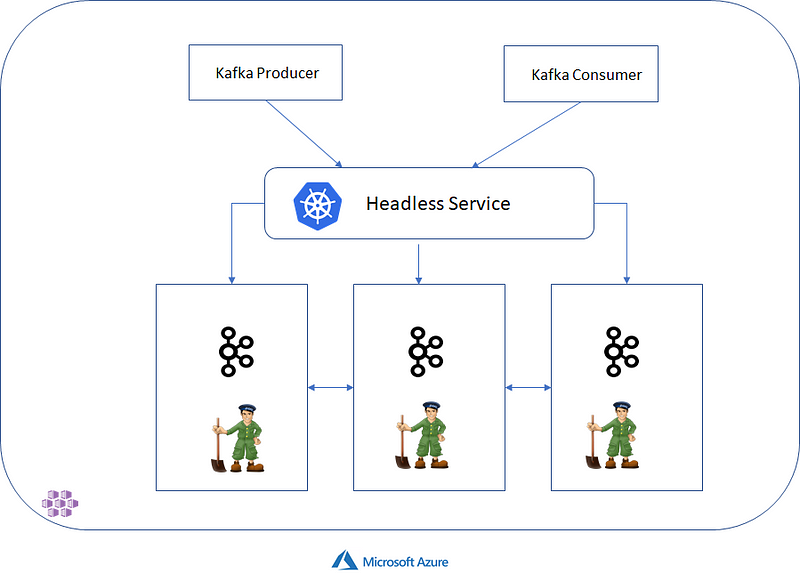
In this example, we do not have to expose the brokers to the outside world (outside the cluster) as our clients (both producers and consumers) are also pods/deployments running within the AKS cluster. So we can use the default generated headless service to connect to the brokers. But first, let’s create 3 Kafka clients and pass them the cluster CA certificate and my-user credentials in order to connect to the brokers successfully
Deploy this using kubectl
kubectl apply -f kafka-client.yaml -n tls-kafka This will deploy 3 replicas of our StatefulSet and every pod is injected with environment variables from the Kubernetes Secret for Cluster CA Certificate, User credentials. This is essential to successfully connect to the broker.

Step 7: Produce & Consume !
Before we can start sending messages and consuming messages, we need to configure the truststore and keystore of the Kafka clients created in the last step to use the secrets passed to it, via environment variables. To do so, we use the following script
With this script, we end up configuring out truststore and keystore and also create a config file ( at location /opt/kafka/config/ssl that we will use with our producers and consumers to connect with.
For this example, we run this script manually for all 3 replicas of our kafka client by running the following commands
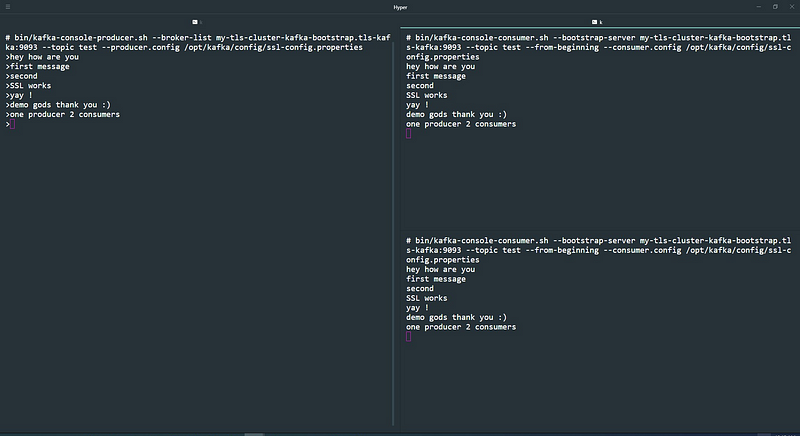
Now we can finally exec into our kafka clients and produce/consume data. To produce messages we will use kafka command line tools for this example
bin/kafka-console-producer.sh --broker-list my-tls-cluster-kafka-bootstrap.tls-kafka:9093 --topic test --producer.config /opt/kafka/config/ssl-config.propertiesRun a couple of consumers on the same topic test by
bin/kafka-console-consumer.sh --bootstrap-server my-tls-cluster-kafka-bootstrap.tls-kafka:9093 --topic test --from-beginning --consumer.config /opt/kafka/config/ssl-config.propertiesCouple of things to note here:
- We pass the
ssl-config.propertiesfile created with the required SSL credentials to the producer and consumers using--producer.configand--consumer.configoptions respectively - We are using the ClusterIP Kubernetes service
my-tls-cluster-kafka-bootstrapto connect to our brokers
And voila, we are done — End to end secure encrypted communication with Kafka brokers and Clients running on Kubernetes !
Bonus / Advanced Material
If you have reached this far, congratulations on creating your first Kafka Cluster on Kubernetes using Operators. That wasn’t really tough, was it? If you already know or deal with Kubernetes on a daily basis, then yes it was a breeze !!
There are a lot of things you should consider if you are planning to use this cluster for a Production workload. Some of them are:
- Configuring Pod Anti-Affinity to make sure the Kafka broker nodes are not scheduled on nodes which are already running other heavy applications like databases. Example here.
- Identify and Label your heavy-duty nodes that you would like to run Kafka brokers on and Use Node Affinity and Node selectors to schedule the pods on those targeted nodes only. Example here.
- Make Kafka Rack Aware.
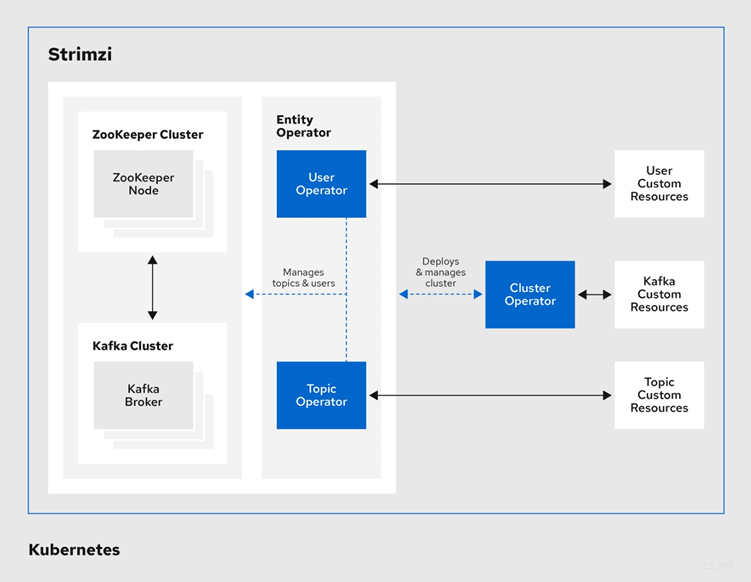
Architecture for Strimzi Kafka Operator
The Strimzi operator actually consists of 3 operators — to manage different aspects of a Kafka Cluster —
- Cluster Operator — for managing Kafka and Zookeeper Nodes
- Topic Operator — for managing Kafka Topics
- User Operator — for managing Users and Authorization/ACLs etc
This architectural choice helps them in keeping responsibilities and role of each operator separate and clear, following one of the most coveted design principle — Keep it Simple Stupid ! .
TO DO:
There is still a lot of things left to explore, that I plan to address in future blog posts:
- Monitoring Kafka using Prometheus ( yes we will use another Operator for deploying Prometheus ) — Added on December 9, 2019 — Check this blog post for details
- Exposing Kafka Brokers to Clients outside the Cluster — Added on 15th September, 2020 — Check this blog post on how to expose brokers securely with Mutual TLS Auth & consuming prometheus metrics via Azure Monitor.
- Configuring other pieces of the larger Confluent Ecosystem — Schema Registry, Kafka Connect etc.
Please feel free to reach out/comment if you would like to see something specific.


