
R Markdown Notebook in VS code

I am looking for a general-purpose editor that can integrate and customize different features across all programming languages that I often use (e.g., R, Python, Julia and Javascript), and Visual Studio Code seems to be the best candidate for me. Here I will give a quick overview of the key features for deploying my R markdown notebook in VS code. These settings can be easily generalized to other languages by adjusting the engines/compilers or adding the language-specific extensions.
Before I get started, it is necessary to install some extensions.
1. Install Radian Console
It is recommended to use the radian console as an alternative, since it supports rich syntax highlight for R script. You can directly install radian in your terminal via pip.
pip3 install -U radian
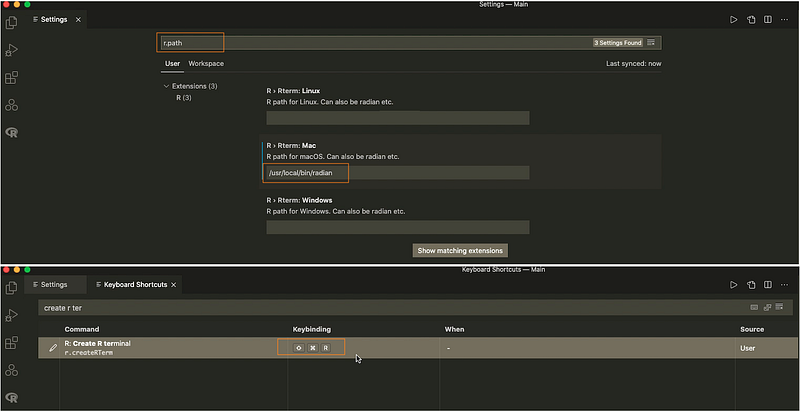
radianWith radian installed, you still need to specify the R path in your VS code settings. Just search for “r.path” in your settings (cmd + ,), and add the path (/usr/local/bin/radian) in specific cell. To see whether it works well, you can restart VS code and search for “create R terminal” in your command template (shift + cmd + p). You can also set a shortcut for this, as shown in the figure below.
With the radian console, you always need to open an interactive R terminal via the shortcut (shift+cmd+r). For the sake of convenience, we can set the working directory at the current workspace so that it will take the source file location as the default working directory. You can set this by changing the terminal workspace as ${workspaceFolder}.

It is important to know that radian is a python module, and you can specify a different version of python interpreter by directly modifying the radian script via (vim /usr/local/bin/radian). For example, I changed the header as “#!/usr/local/bin/python3”, since python3 is linked to python3.10 on my computer. More importantly, you may come across some other issues, e.g., it may fail to support for multi-threading when executing you R script via radian. Note: if you are using an Apple M1 machine, you may come across the problem of incompatibility. My solution is to install an intel VS code.
2. Chunk Navigation
It is quite straightforward to navigate between and within code chunks in VS code, but I am more interested in combining basic chunk movements (run current, previous or next chunks) with some additional adjustments, such as placing the cursor at the end of a chunk after the execution. This requires multiple command combinations via the multi-command extension. Here I just cover some chunk navigations that I often use, and you can also design your own movements.
(1) Insert a R code chunk
For inserting a R code chunk, you can make use of the code snippet in VS code by simply typing “rc” and Enter. Alternatively, you can create a key binding (cmd+shift+i) to insert code snippet by putting the following piece inside your keybindings.json file.
{
 "key": "cmd+shift+i",
 "command": "editor.action.insertSnippet",
 "when": "editorTextFocus",
 "args": {
 "snippet": "```{r}\n$0\n```"
 }
}
(2) Move between chunks
To go to previous or next code chunks, I designed a series of movements by (i) moving to previous/next chunk and (ii) centering the whole window at the current cursor position. To achieve this, you can first define your movements and bind these movements with specific shortcuts. For example, you can define the following multi-commands in your settings.json (search for "open settings" in the command template).
"multiCommand.commands": [
{
"command": "multiCommand.r.go.previous.chunk.center",
"sequence": [
"r.goToPreviousChunk",
"center-editor-window.center"
]
},
{
"command": "multiCommand.r.go.next.chunk.center",
"sequence": [
"r.goToNextChunk",
"center-editor-window.center"
]
}
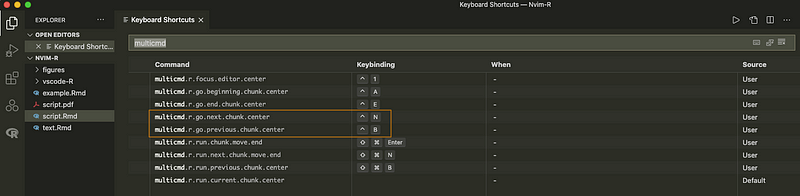
]Next, I set two key combinations for them (e.g., cmd + B for going to the chunk before, and cmd + N for next chunk).
(3) Move inside chunks
It is also useful to move inside a chunk, say quickly go to the beginning or end of a chunk, which is particularly helpful for me when one chunk is long. I did not see a direct command for this. The most intuitive way for me is to first select the whole chunk and move your cursor up or down a bit. You can directly append the following code in the scope of “multiCommand.commands” in your settings.json, and bind them with some shortcuts (cmd+A for beginning of a chunk and cmd+E for end of a chunk).
{
  "command": "multicmd.r.go.beginning.chunk.center",
  "sequence": [
   "r.selectCurrentChunk",
   "cursorLeft",
   "cursorDown",
   "center-editor-window.center"
  ]
},
{
  "command": "multicmd.r.go.end.chunk.center",
  "sequence": [
    "r.selectCurrentChunk",
    "cursorRight",
    "cursorLineStart",
    "cursorUp",
    "center-editor-window.center"
  ]
}
(4) Run current, previous and next chunk
The most important commands for me are the executions of current, previous and next code chunk. My personal preference is to run the current chunk and put the cursor at the end of the chunk. To do this, I simply follow the same steps by defining the movements in the settings.json and shortcuts.
{
  "command": "multicmd.r.go.end.chunk.center",
  "sequence": [
    "r.selectCurrentChunk",
    "cursorRight",
    "cursorLineStart",
    "cursorUp",
    "center-editor-window.center",
 ]
},
{
  "command": "multicmd.r.run.previous.chunk.center",
  "sequence": [
    "r.goToPreviousChunk",
    "center-editor-window.center",
    "r.runCurrentChunk"
  ]
},
{
  "command": "multicmd.r.run.chunk.move.end",
  "sequence": [
    "r.runCurrentChunk",
    "multicmd.r.go.end.chunk.center"
  ]
},
{
  "command": "multicmd.r.run.next.chunk.move.end",
  "sequence": [
    "r.goToNextChunk",
    "multicmd.r.go.end.chunk.center",
    "r.runCurrentChunk"
  ]
}
(5) Fold and unfold a chunk
To fold and unfold a code chunk, I directly use the default settings in VS code. With the key binding of alt+cmd+left-bracket, you can fold the current chunk, while you can unfold it via alt+cmd+right-bracket.

3. View Objects
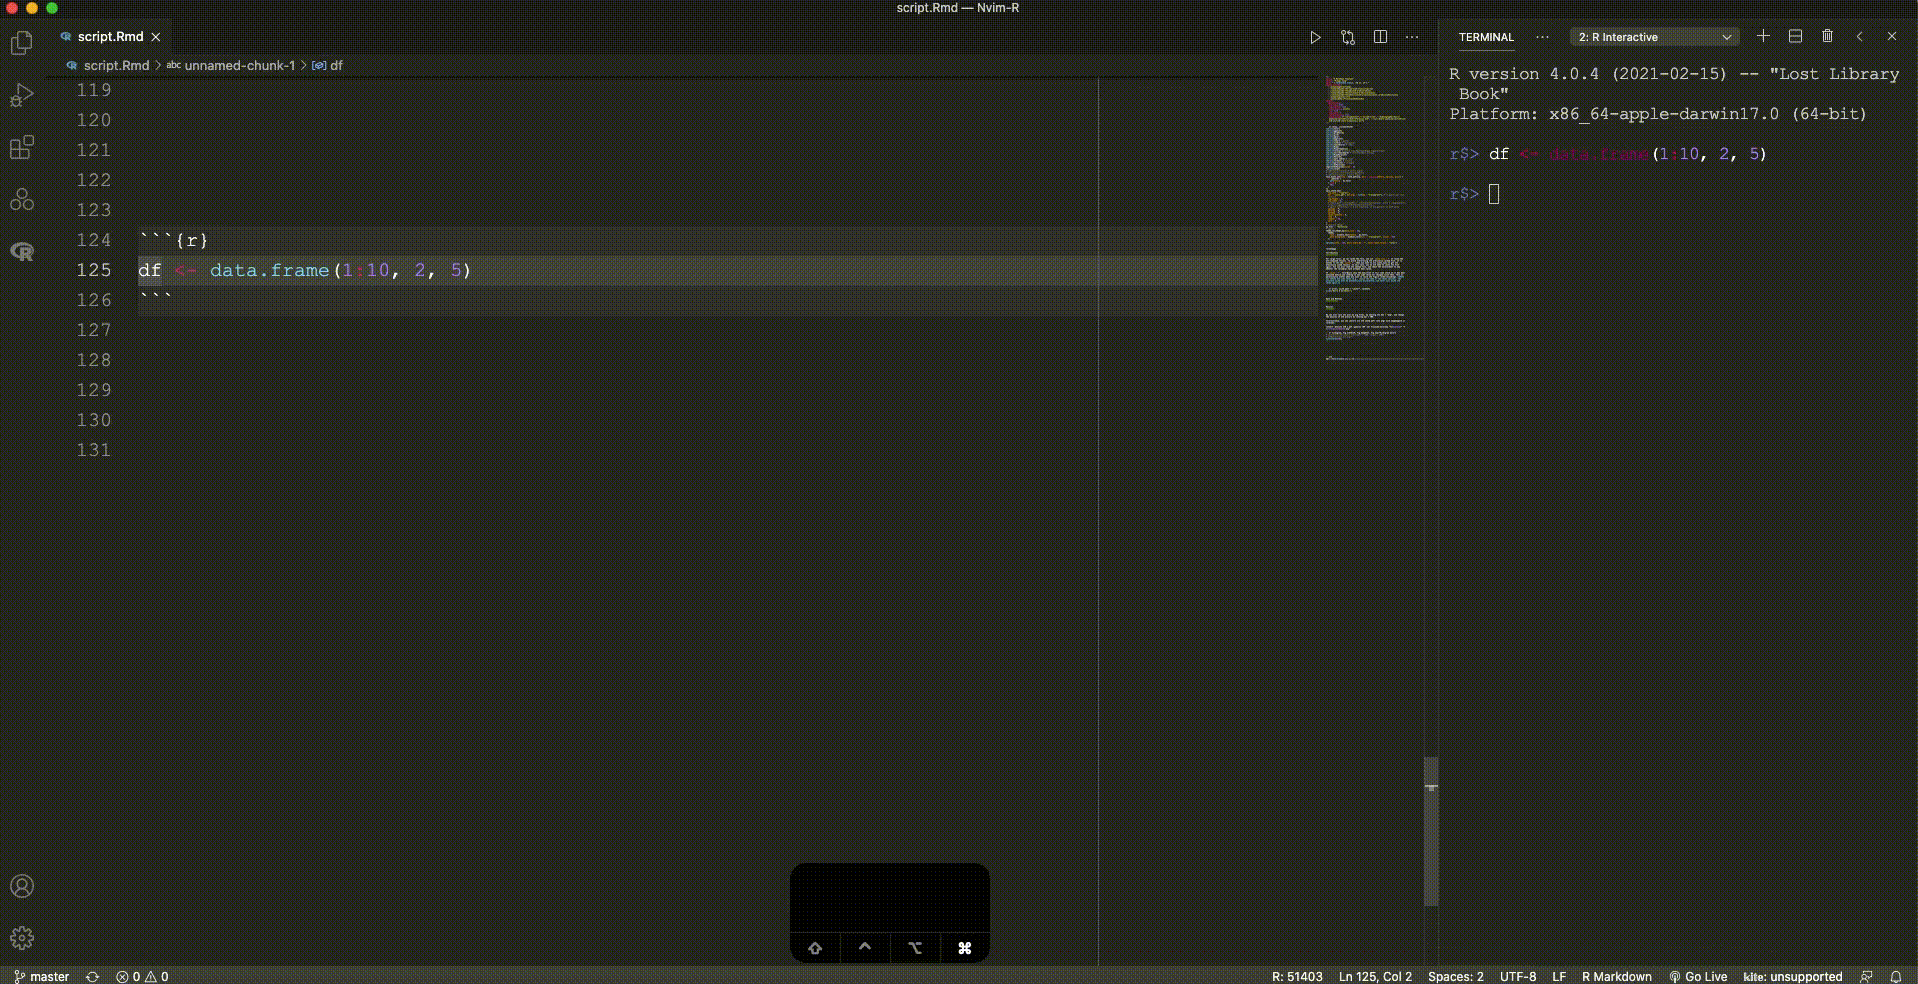
There is an experimental feature called r.sessionWatcher that allows us to view different objects (vector, matrix, data.frame and list), plots, documentations and source code of functions in a separate window. This provides us a lot of handy usages to quickly preview the output of a piece of code. But before that, you need to create a file called .Rprofile in the home directory of your computer, and add the following settings. The purpose for this configuration is to pop up a separate window/tab beside your current editor. The default setting will open a mini window, but I prefer to have a separate window to preview each object.
options(vsc.plot = "Active")
options(vsc.browser = "Active")
options(vsc.viewer = "Active")
options(vsc.page_viewer = "Active")
options(vsc.view = "Active")
options(vsc.helpPanel = "Active")
options(vsc.dev.args = list(width = 10, height = 8, units = "in", res = 300))
Alternatively, you can search for “view column” in your vs code settings and change all the item values as “Active”, except for pageViewer (see the settings below). This enables the objects (plots, data and helping pages) to be viewed in a separate window beside the current script.

(1) View an object (data.frame or list)
I set a shortcut (cmd+u) for viewing an object at the current selection or word. You can achieve this by adding the following chunk in the keybindings.json file (search for "open keyboard shortcuts" in the command template to open it).
{
"description": "view object",
"key": "cmd+u",
"command": "r.runCommandWithSelectionOrWord",
"when": "editorTextFocus",
"args": "View($$)"
}
(2) View a plot
This setting also allows you to view a plot, though the size of the plot is fixed. I do not have a good solution for this, since vscode-R cannot directly parse the figure settings in the header of Rmd code chunk. A temporary solution is to add the settings manually via options() at the beginning of a chunk, plus a global setting inside the .Rprofile, as shown above. It also supports interactive plots.

(3) View function documentation
This also supports a fast preview of function descriptions by adding the following configuration in keybindings.json with a shortcut of F1.
{
"description": "help document",
"key": "f1",
"command": "r.runCommandWithSelectionOrWord",
"when": "editorTextFocus",
"args": "help($$)"
}
(4) View source code
Similarly, we can also easily view the source code of a function by typing the shortcut of cmd+u.

Useful links:


