
How to Read and Write Static Data with Pyspark
Spark is being integrated with the cloud data platform in the modern data world. Manipulating data with Spark became curial to any data persona like data engineers, data scientists, and data analysts. Today, we will tackle the most trivial exercise in big data on reading and writing data on Spark.
In this article, we will learn:
- how to read using Pyspark
- how to write data using Pyspark
- examples on reading/writing data using Pyspark on Databricks
The core syntax for reading data in Apache Spark:
spark.read \
     .format() \ # this is the raw format you are reading from
     .option("key", "value") \
     .schema() \ # this is optional, use when you know the schema
     .load(path)
You might also see some other tutorials using spark.read.table, to notice, there is no difference between spark.table and spark.read.table function.
- Format — The default is parquet; it specifies the format you are reading from the data source; it can be CSV/JSON/Parquet/etc.
- Option — You can manually specify the data source that will be used along with any extra options that you would like to pass to the data source.
- Schema — optional, defines the structure of the data (column name, datatype, nested columns, nullable, e.t.c), and when it is specified while reading a file, DataFrame interprets and reads the file in a specified schema; once DataFrame is created, it becomes the structure of the DataFrame.
If you don’t know the schema for the data source, you can specify option("inferSchema”, True), and it will automatically ingest column types based on the data. If you know the file schema ahead and do not want to use the inferSchema option for column names and types, use user-defined custom column names and type using schema the option.
The core syntax for writing Data in Apache Spark:
df.write \
  .mode('overwrite') \ # or append
  .partitionBy(col_name) \ # this is optional
  .format('parquet') \ # this is optional, parquet is default
  .option("key", "value") \
  .save(path)
Pyspark has a method mode() to specify the saving mode:
- Overwrite — mode is used to overwrite the existing file.
- Append — To add the data to the current file.
- Ignore — Ignores write operation when the file already exists.
- Error — This is a default option when the file already exists; it returns an error.
Furthermore, it allows you to specify partition columns if you want the data to be partitioned in the file system where you save it. The default format is parquet, so it will be assumed if you don’t specify it.
That’s it! Now, we can start some actual implementation on reading and writing files.
Implementation on Databricks
To implement the syntax with real examples, here we will use Databricks and databricks-datasets as the data source to illustrate how to read and write data using Pyspark. Databricks comes with various tools to help you learn how to use Databricks and Apache Spark effectively, and Databricks holds the most incredible collection of Apache Spark documentation available online. More details are here.
If you don’t have an account yet, you can navigate to this link and select the free Community Edition to open your account. This option has a single cluster with up to 6 GB of free storage. It allows you to create an essential Notebook. You’ll need a valid email address to verify your account. More details can be found here.
Let’s assume you have your Databricks account set up and successfully spin a new cluster for computation. Now let’s go through the dataset that we’ll be working with.
Then, let’s read the datasets.csv using the inferSchema option.
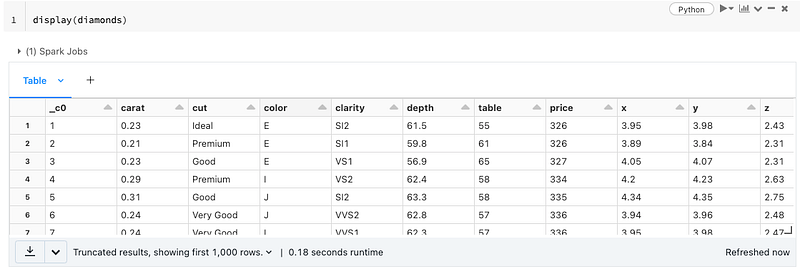
Let’s use the display() to output the sample.
Now, let’s write the data in par format to see how Spark writes the files.
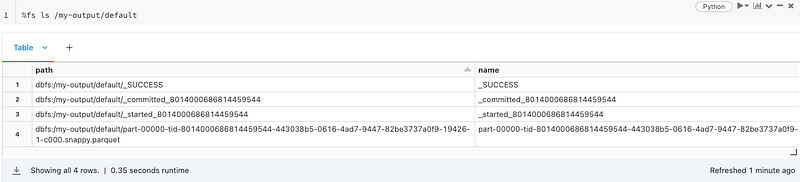
Then let’s take a look at the Parquet files that Spark wrote…
Also, let’s iterate more on different data formats reading and writing using databricks-datasets in the following examples:
Conclusion
This article showed how to read and write data from/to a static file format using Pyspark. I also put together another article to demonstrate how to read and write the streaming files using Pyspark. If you are interested in more reading/writing options, here are more details on the official tutorial. In the following articles, I will discuss more advanced data manipulation using Pyspark.
I hope you found what you were looking for in this article. Follow me on Medium if you like this story! Thanks for reading.