
Modern CRM in Ruby on Rails — Part 2 — Make it beautiful
We’re continuing the series on building a Customer Relationship Management system with Ruby on Rails.

Contents
- Part 1 — Settings up Rails, ActiveAdmin and create the Clients model
- Part 2 (this article)
Review
In the last article, we went through all the steps needed to set up our development environment with Ruby and Ruby on Rails, we installed ActiveAdmin into our application and created the model and AA resource for Clients. The code is available here.
In this tutorial we will
- Set up Invoker
- Integrate Webpacker with ActiveAdmin
- Use a modern theme for ActiveAdmin
1. Setting up Invoker
This is a huge quality of life improvement for every developer. Remember that in the first part of the tutorial, we talked about having to start 2 processes to run the application (one for Rails — bin/rails s and one for Webpacker — bin/webpack-dev-server). Down the road, we will need to set up Sidekiq as well for processing background jobs (like cron jobs or sending emails). At that point, we will have to start 3 processes in 3 different terminal windows.
Introducing Invoker. You can install it through Ruby Gems:
$ gem install invokerInvoker is a utility for managing processes in a development environment. Invoker supports DNS and proxying HTTP/HTTPS requests over a .test TLD. After installing the gem, you need to set it up (only needs to run once) using: sudo invoker setup.
In order to set up Invoker for our application, we’ll need to create a .ini file in our root folder. For now, we’ll instruct it to start the Rails and Webpacker processes.
[webpacker]
directory = /Users/work/modern-rails
command = bin/webpack-dev-server
[modern-rails]
directory = /Users/work/modern-rails
command = bundle exec rails s -p $PORTWe’ll save the file above in invoker.ini. Now, instead of running two processes, we’ll only need to run invoker start invoker.ini and the application will be accessible at modern-rails.test rather than localhost:3000.
Pro tip:
If you get the following error, then you are running into the Host Authorization, a new middleware included in Rails to prevent DNS attacks. By default, the middleware allows requests from 0.0.0.0 and localhost.

The solution is simply adding the config into config/environments/development.rb:
config.hosts << "modern-rails.test"This commit summarizes the work done in this chapter.
2. Integrating Webpacker with ActiveAdmin
Starting with Rails 6.0, Webpacker has become the default asset generator. We will enable using webpacker in config/initializers/active_admin.rb by uncommenting the following line:
config.use_webpacker = trueWe now need to run the generator to create the pack files:
$ bin/rails generate active_admin:webpackerAt the same, let’s do some cleanup. The original rails new generator created a hello_react.jsx and the default Sprockets assets for ActiveAdmin. These are the files I deleted:
deleted:    app/assets/javascripts/active_admin.js
deleted:    app/assets/stylesheets/active_admin.scss
deleted:    app/javascript/packs/hello_react.jsx
This commit summarizes the work done in this chapter.
3. Using a modern theme for ActiveAdmin
I’m going to use the Flat Skin by Armand Niampa theme for Active Admin, but the process of changing the theme is similar no matter which one you pick. Here’s a list of some of the theme options.
It would be so easy if we could just install the gem, import the assets and be done with it. Unfortunately, the gem is importing assets through Sprockets. Since we switched to Webpacker, we should be consistent and use a single way of bundling assets to avoid any issues down the road. The easiest solution here is simply to pick the asset files and include them, by hand, in our pack files. This could potentially be a problem if the assets were to change over time, but the Flat Skin repository was last updated on September 2017.

This already looks so much better. Here’s what we had to do in order to add this theme.
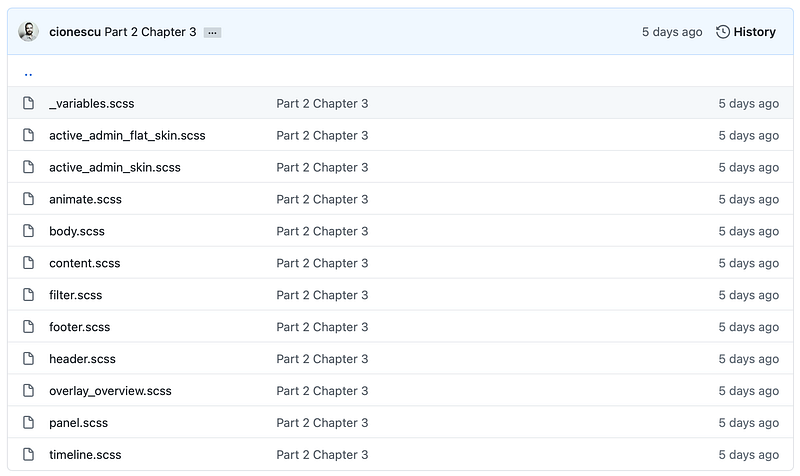
First of all, I copied all the assets in Flat Skin into app/javascript/stylesheets. The result should look like this
Then, I referenced the new theme in app/javascript/stylesheets/active_admin.scss:
@import "~@activeadmin/activeadmin/src/scss/mixins";
@import "~@activeadmin/activeadmin/src/scss/base";
+ @import './admin_flat_skin/active_admin_flat_skin.scss';That’s all I had to do to get the screenshot above. Supporting commit for this chaper.
3.1 Bonus: Use the built-in Date Picker for the Client’s birthday
Our Client Active Admin definition has been very thin so far. Let’s go override the default form generator to leverage the built-in Active Date Picker. ActiveAdmin offers the datepicker input, which uses the jQuery UI datepicker. I will make the following changes inapp/admin/clients.rb
form do |f|
  f.semantic_errors *f.object.errors.keys

  f.inputs do
    f.input :name
    f.input :phone_number
    f.input :email
    f.input :birthday, as: :datepicker
  end

  f.actions
end
Active Admin uses Formtastic to build it’s forms. The one clear benefit of it is that form.input automatically detects the field type and generates the appropriate input field. For example, f.input :email generates an input field with type email:
<input id="client_email" type="email" value="" name="client[email]">In some cases, we might want to override the default values and then we will use the as: parameter like we do for the birthday. This will yield the following datepicker:
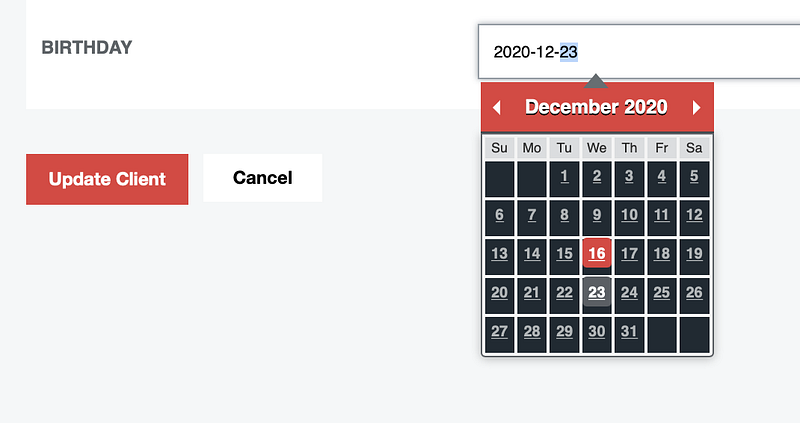
Supporting commit for this subchapter.
3.2 Bonus: Make the admin be the root path
We are planning to make Active Admin (and the /admin path) be the center of our universe. It seems fit that we will make it be the root path as well. In our config/routes.rb we will add the following line at the top:
root to: "admin/dashboard#index"Per the Rails documentation: ‘You should put the root route at the top of the file, because it is the most popular route and should be matched first’.
This commit summarizes the change.
Recap
In this tutorial, we made a big improvement to our development setup by adding the configuration needed to use Invoker. We also made the necessary setup to transition Active Admin to Webpacker, ensuring our application follows the current best practices. Finally, we added a solid looking theme on top of Active Admin, ensuring a good UI and UX.
As always, there’s a release tag on Github if you want to follow the code changes up to this part: Link to Github.
In the next part, we will focus on setting up RSpec, Capybara (to run end-to-end system tests), FactoryBot for creating test data and write our first system test for the Clients resource.
Catalin (@cionescu1) is a Ruby on Rails consultant, founder of Organisely — A Free Appointment Management Software and author of Modern Rails — Building a CRM in Ruby on Rails.


