
Migrating PHP websites from an old LAMP stack to AWS Elastic Beanstalk
How adopting Docker and Elastic Beanstalk have enabled me to migrate old PHP websites from a very outdated cPanel EC2 instance.

In one of my previous posts, I mentioned that I’ve been running a cPanel based LAMP stack since 2005, which I use to host all my PHP websites. As technology progressed (and the dedicated hardware kept having issues), I eventually migrated from a dedicated rack to an on-demand AWS EC2 instance as a way of saving costs. This happened way back in 2014, and back then I was very happy with the cost savings I was making for a self-managed cPanel server!
Bear in mind, this was initially costing me around $190 per month for the instance and $45 a month for the cPanel license. It was a c3.large instance with a 200gb magnetic storage attached to it and a number of Elastic IPs. It also had a load balancer in front of it (yep, no idea why…).
Fast forward to the last year or so, and I’ve put a lot of effort into learning about scalability, reliability, resiliency, and performance — all of which AWS provides (check the post above).
However, there are still a few websites that I look after which are still running on my old cPanel EC2 instance, so I’ve kept it running alongside all my other projects. Because the LAMP stack doesn’t have as much on it anymore, I took the opportunity to downgrade it to an m3.medium instance in early 2018. This was the best option at the time that didn’t require me to configure a completely new instance.
Last year, cPanel’s WHM started warning me that CentOS 6 would no longer be supported as of November 2020. Naturally, I saw this as an opportunity to potentially migrate away from PHP and use the React/Node.js combo I’ve come to love over the years. However, my clients simply don’t have the budget to support it until nearer the time. I certainly played with the idea of doing the work anyway, but I had to admit defeat as it would be too much work considering I have plenty of other projects that need to take priority.
Last week, I was investigating whether Elastic Beanstalk supported .NET core (for work), and discovered that PHP was also supported… after a quick experiment, I had finally found what I was looking for!
As of right now, my AWS bill is around $220 per month, with the old server contributing around $80. It’s a substantial chunk which I can replace with t2.nano instances for about $15 per website (there are 4 in total). While that doesn’t seem like much of a cost saving, it means that I no longer need to pay $45 for the cPanel license as well. Furthermore, each website now benefits from scalability, reliability, resiliency, and performance.
I’ve got one more site to migrate before the end of the month, and then I can celebrate! So I figured I would share my process with you…

Migrating PHP websites from an EC2 instance to Elastic Beanstalk
It’s worth mentioning at this point that my PHP websites didn’t make use of Composer or any PHP frameworks, so in a way, it’s fairly vanilla PHP.
It’s also worth mentioning that I had already migrated the databases to Amazon RDS.
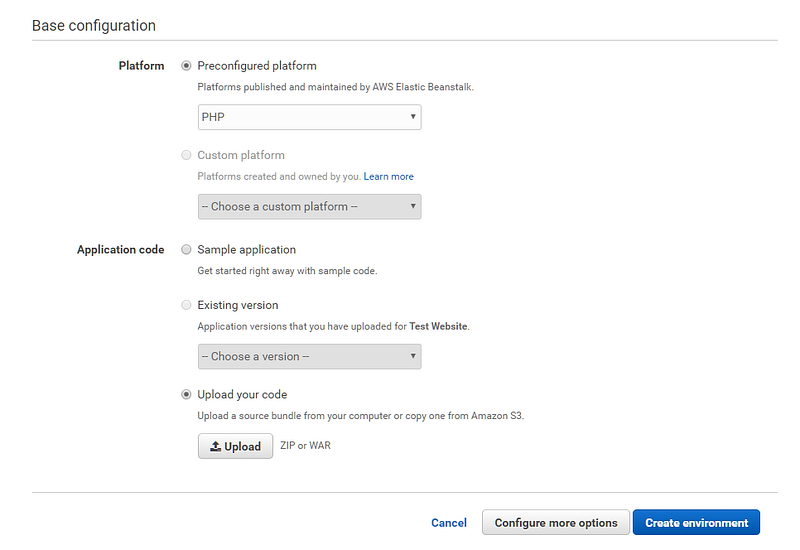
I wasn’t sure whether it was even possible, so I decided to do a proof of concept. For this, I focused on migrating the most recent PHP website I developed. I wasn’t quite sure how easy it was, but it seemed like it was as easy as zipping up the public_html folder and uploading the zip to Elastic Beanstalk. So I did just that and it almost worked!
There were a few hardcoded /home/user/public_html/... paths which I needed to update, but now that the instance was up and running, I made use of the Elastic Beanstalk CLI, which meant I could push up the code within Visual Studio Code using eb deploy.
In a matter of minutes, I could navigate my way around the website using the elastic beanstalk domain:

I double checked all the functionality and discovered that images over 2MB couldn’t be uploaded, so I needed to change the default PHP configuration to something much higher to support high-resolution images. Worth noting that the images are only temporarily stored on the server, as they are uploaded to S3 after being resized.
To increase the default, create a .ebextensions/change_upload_size.config file with the following configuration:
files:
    "/etc/php.d/99uploadsize.ini":
        mode: "000644"
        owner: root
        group: root
        content: |
            upload_max_filesize = 100M
            post_max_size = 100M
commands:
    remove_old_ini:
        command: "rm -f /etc/php.d/99uploadsize.ini.bak"
That now resolves the issue with uploading photos, so everything now worked perfectly. I was extremely confident at this point that it was now ready for production, so I just needed to configure the SSL certificate on the load balancer, and finally jump into Route 53 to point the domain to the new environment. Worth noting that you will need to configure an SSL certificate within the same region for it to be available to Elastic Beanstalk
Within a few moments, it had switched over… and you could really tell the difference because it loaded so much quicker than before.
I had forgotten one thing though, which was to automatically redirect users to HTTPS. Worth noting that .htaccess files work as expected, but I wanted to make sure I wasn’t going to get caught out by anything and found this can be achieved by creating another config file .ebextensions/https-redirect-php.config with the following:
files:
   /etc/httpd/conf.d/http-redirect.conf:
     mode: "000644"
     owner: root
     group: root
     content: |
       RewriteEngine On
       RewriteCond %{HTTP:X-Forwarded-Proto} !https
       RewriteCond %{HTTP_USER_AGENT} !ELB-HealthChecker
       RewriteRule (.*) https://%{HTTP_HOST}%{REQUEST_URI}
I’m honestly not sure if the naming is config filename is important, but I have a feeling you could roll up all configuration into one file if you wanted.
That’s it up and running, completely seamless without any downtime either!
Onto the next websites…
The next website, although a little older was a breeze using what I had already learned. Within about 30 minutes it was successfully up and running.
The one I’ve been working on tonight is definitely a little more challenging as it was a website I inherited back in 2008, so the source code was overly complicated and very much outdated. This became more apparent when I was met with quite a few errors, as most of the methods used were removed in PHP 7.
I decided it would be too much work to support 7.2, and found that you could configure the Elastic Beanstalk environment to use PHP 5.6. This was all that was needed to get it up and running!
There’s just one more thing…
I completely forgot that all of the websites stored any uploaded images directly onto the server. This is a problem for elastic beanstalk as the images would be lost if the instance gets destroyed or not be copied across to the replicas.
So I basically had one option, which was to modify the websites to upload the images to an S3 bucket instead of storing them locally and deliver the images via CloudFront instead. This, in turn, helps reduce the load on the servers and increases scalability and load times.
Now that I had already made the websites live, I wanted to test my changes locally as I had no doubt it would be a trial and error. The problem was, my machine isn’t actually configured to run PHP websites locally.
Enter Docker
Having played with Docker over the last few weeks, I decided to investigate this as an option. It didn’t take long to discover that there is a Docker image already configured for PHP/Apache, but doesn’t quite have what I need (mysql/mysqli), so I created a Dockerfile with the following configuration:
FROM php:5.6-apacheRUN apt-get update
RUN apt-get upgrade -y# enable mod_rewrite
RUN a2enmod rewrite# install gd library and extensions for image manipulation
RUN apt-get install -y build-essential libssl-dev zlib1g-dev libpng-dev libjpeg-dev libfreetype6-dev
RUN docker-php-ext-configure gd --with-freetype-dir=/usr/include/ --with-jpeg-dir=/usr/include/ \
&& docker-php-ext-install gd# install mysql libraries
RUN docker-php-ext-install mysql mysqli pdo pdo_mysqlThen you just need to build it with docker build -t websiteimage . and run it with:
docker run -d -p 8080:80 --name website websiteimageHead to http://localhost:8080/ and it should be up and running!
If you want to deploy changes to the running container (instead of having to rebuild every time) just run the following in the command line:
docker cp . website:/var/www/html/That’s all folks…

I hope you’ve enjoyed this little insight into what I’ve been working on this weekend. If you appreciate it, please do give a couple of claps and perhaps follow me for even more stories and guides!


