
Midjourney: The ultimate guide to Layout and Composition
How and where do you put things in the picture?
The ability to direct where the subject or object is placed makes a difference. Midjourney usually places your main subject in the center of the image (focal point), but sometimes you want something different.
You can try to direct the placement by using propositions like left, right, upper-left, in front of, and so on. However, these words are frequently unreliable due to Midjourney’s limited understanding of prepositional phrases/words.
So, how do you control the subject’s or object’s placement?
(1) Put your main subject first in the prompt
(2) Make a massive object or subject to push your main subject to the side
(3) The super creative use of the invisible space
(4) Manipulate the aspect ratio, then use [Make Square] or [Custom Zoom]
(7) Layout keywords for digital assets
(8) [Custom Zoom] for mock-up layout
(1) Put your main subject first in the prompt
Typically, the first subject in your prompt will remain in the image’s center (or focal point).
The most straightforward and easiest-to-manage composition has only one subject and one scene.
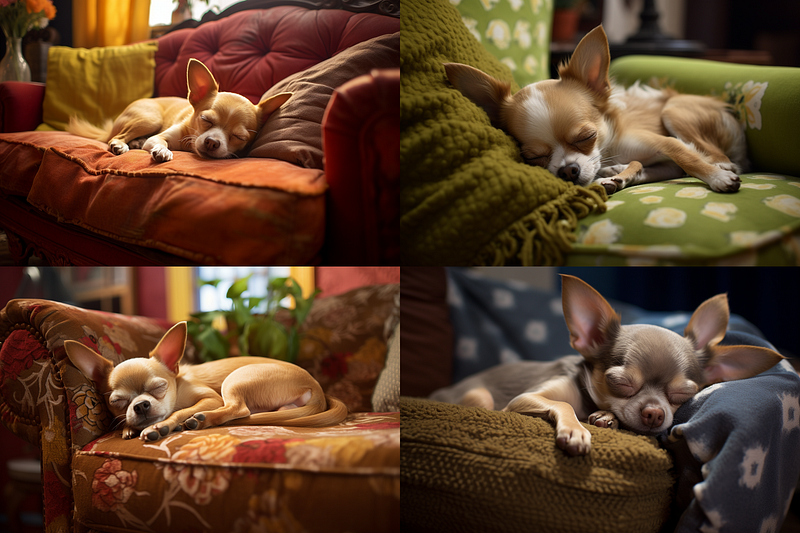
For example, the two prompts below produced a similar type of image, with a Chihuahua as the main focal point. Midjourney recognizes that the living room is in the background (not a subject) and places the Chihuahua in the center of the focal point regardless of the order of the words in the prompt.
Prompts:
(a) A Chihuahua sleeping in the living room --ar 3:2
(b) In the living room, a Chihuahua sleeps --ar 3:2
When there is more than one subject, things become more complicated.
If there are two subjects, they could become blended.
If there are three or more subjects, multi-prompts or weighted promptlets that are topics for advanced users should be used. Otherwise, some subjects will not appear (be expressed) or appear in a strange or unexpected way.
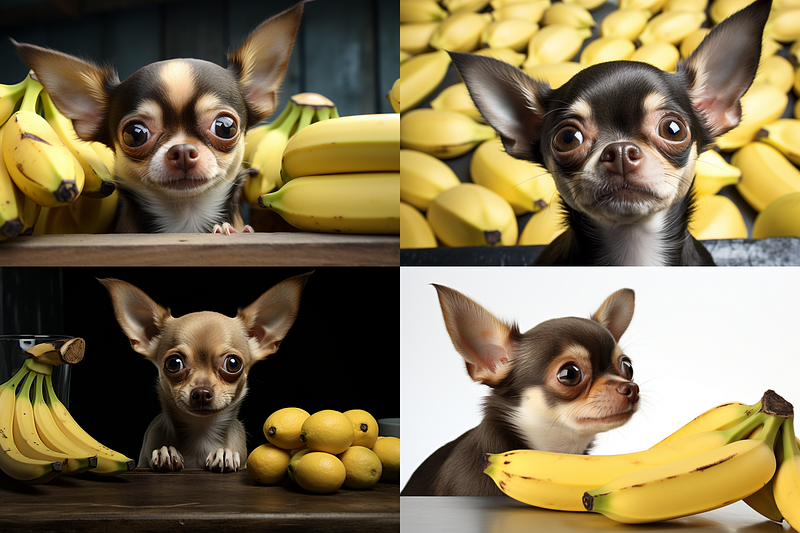
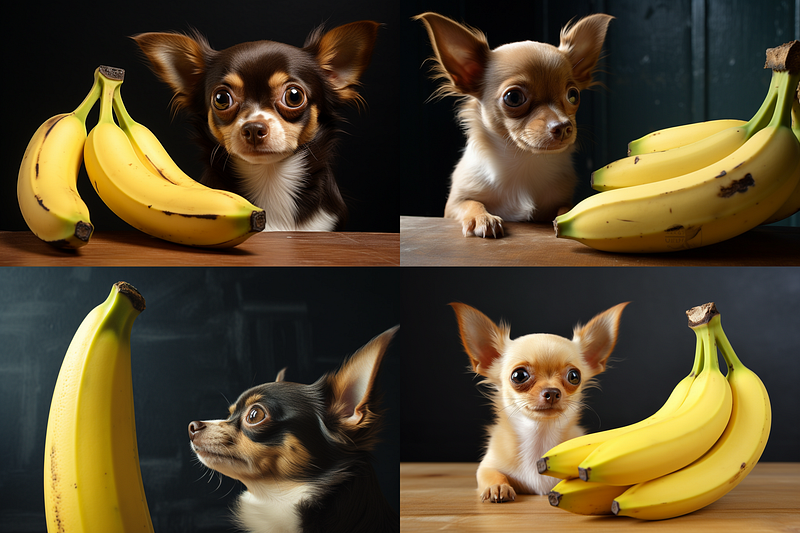
We’ll stick to two subjects: one dog and one banana to keep things simple. Having one living subject + one non-living object + (one optional scene) will reduce many issues of a prompt containing two subjects.
Prompts:
(a) A photograph of a Chihuahua looking around for a banana --ar 3:2
(b) A photograph of a banana while the Chihuahua looking around --ar 3:2
The dog is the focal point because prompt (a) mentions Chihuahua first. The banana is the focal point because prompt (b) mentions the banana first.
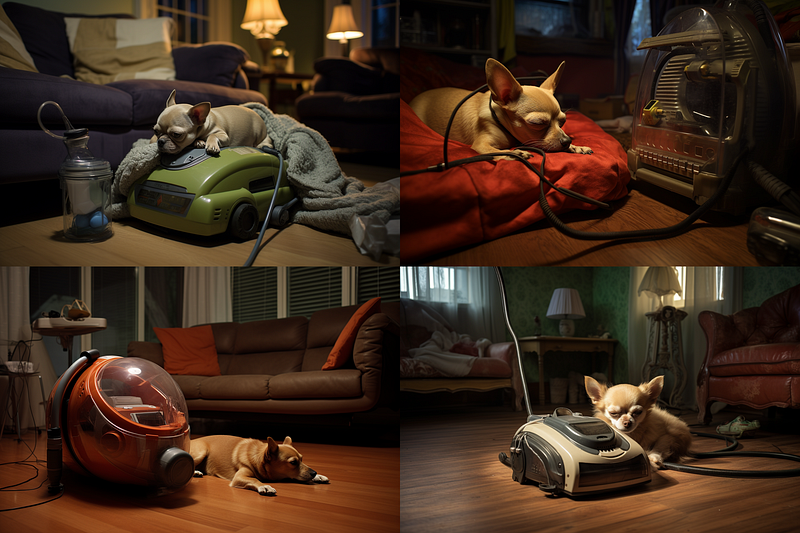
In the example below, I’m using multi-prompts to control two subjects: a dog and a vacuum. The vacuum is given more weightage (1.5) than the dog (1.0), making it more visible in the images.
On the surface, multi-prompts appear to be simple, but they can quickly become quite complicated if you want more control. If you’re interested to learn more about multi-prompts/promplets, please follow me on Medium.
(2) Make a massive object or subject to push your main subject to the side
Sometimes you want your main subject/character to stand at the side of the image rather than in the center.
You can make a large object or subject occupy the center area, forcing your main subject to move aside.
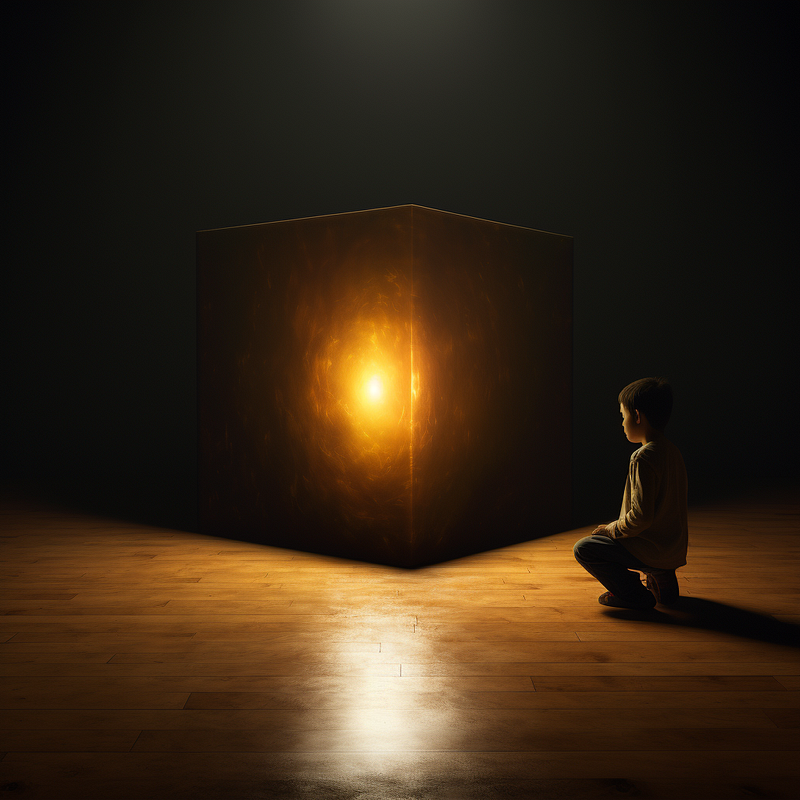
The first example below has a large glowing box in the center of the image. The main subject (the boy) has been shifted to the box’s side. You can change the large box to something more familiar in everyday life, like a big dining table, a sofa, etc.
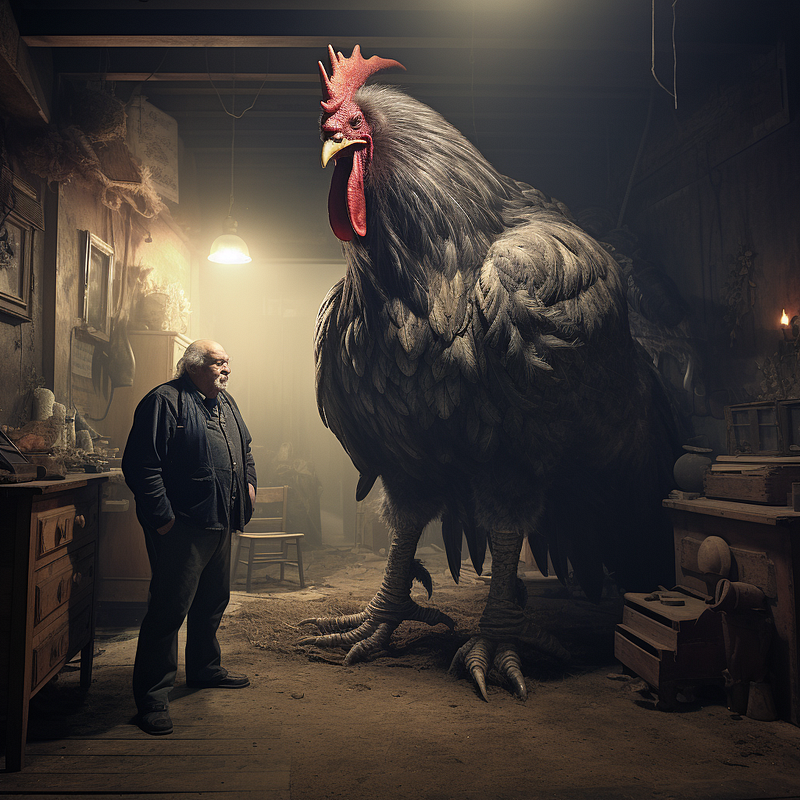
The second example employs a similar strategy: constructing a massive chicken/subject to occupy the center space, forcing the main subject (the farmer) to stand at the side.
The drawback of this method is: “What if you don’t want a massive object in the center?” See Point (3) for an answer.
(3) The super creative use of the invisible space
Moving your subject to the side at the default aspect ratio (1:1) was nearly impossible before the Outpainting feature [Pan] was introduced. Midjourney always places your main subject in the center of the image.
Don’t believe me? Try creating a simple prompt (one subject, one scene) and seeing where your main subject will end up. Example: /imagine prompt: A young man stands on the far left side of the room
What if I told you that you could move your subject around and stay away from the center without using [Pan]?
It’s true; it’s possible.
Here’s how it’s done:
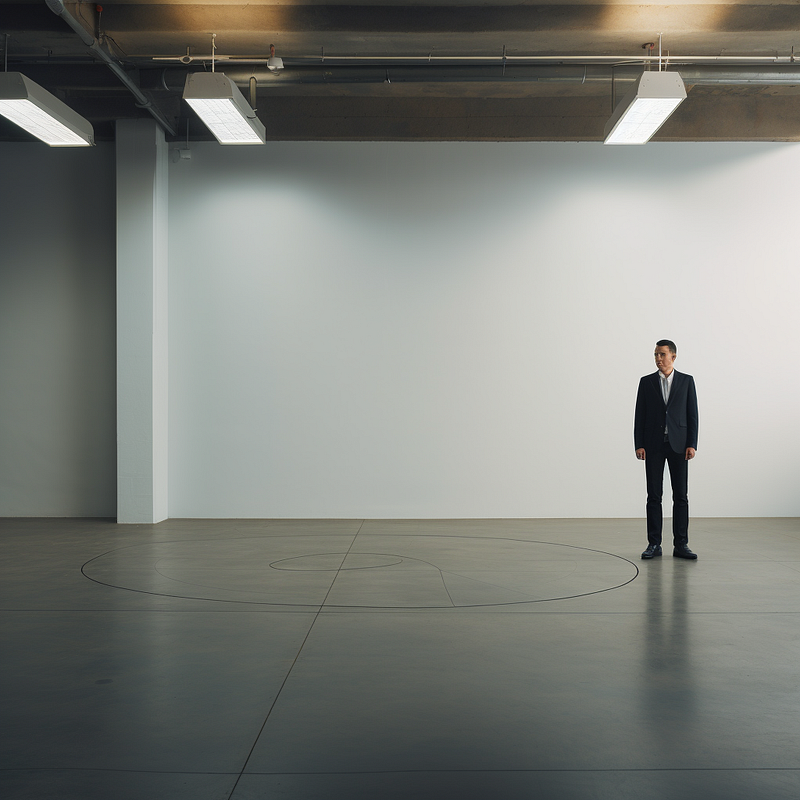
Yes, it is the imaginative use of “invisible spaces.”
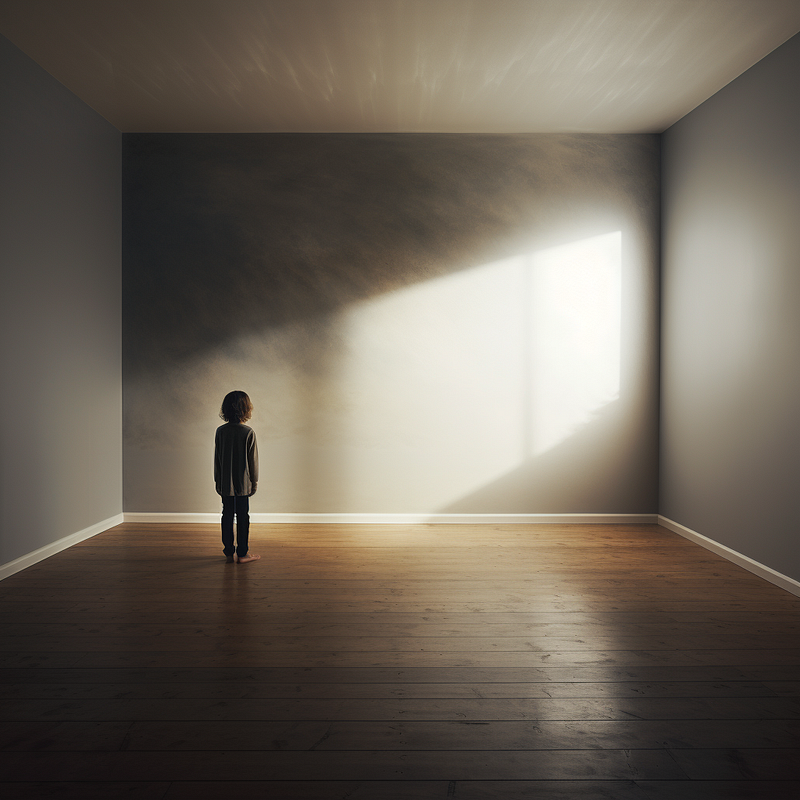
Remember how you needed to create a large subject/object in the center to push your main subject aside in the previous section? But what if the “huge subject” is invisible?
The two photos above use invisible spaces to creatively block out the main subject from occupying the center and force the boy/guy to stand aside, emptying the center area.
To push your subject(s) to the side, add the following phrases to the front of your prompt, assuming the invisible space is the main subject:
a (huge) invisible area in the room an imperceptible invisible center area
This discovery opens up new creative possibilities. Do you want to learn more about its other uses? Follow me on Medium :-)
Note: You can use left side blank, right side blank, use of negative space to push your subject aside for horizontally wider images, such as the 16:9 aspect ratio. However, these terms do not work for images at a 1:1 default aspect ratio.
(4) Manipulate the aspect ratio, then use [Make Square] or [Custom Zoom]
If you have several elements/subjects/objects to include in an image, the Midjourney bot will automatically position them to fill in the available canvas. Most people will not even consider manipulating this typical bot response because it is so mundane.
You can make use of this phenomenon to “clump” or “group” your elements tightly together or spread them out. You can make the elements touch each other or leave some spaces in between them.
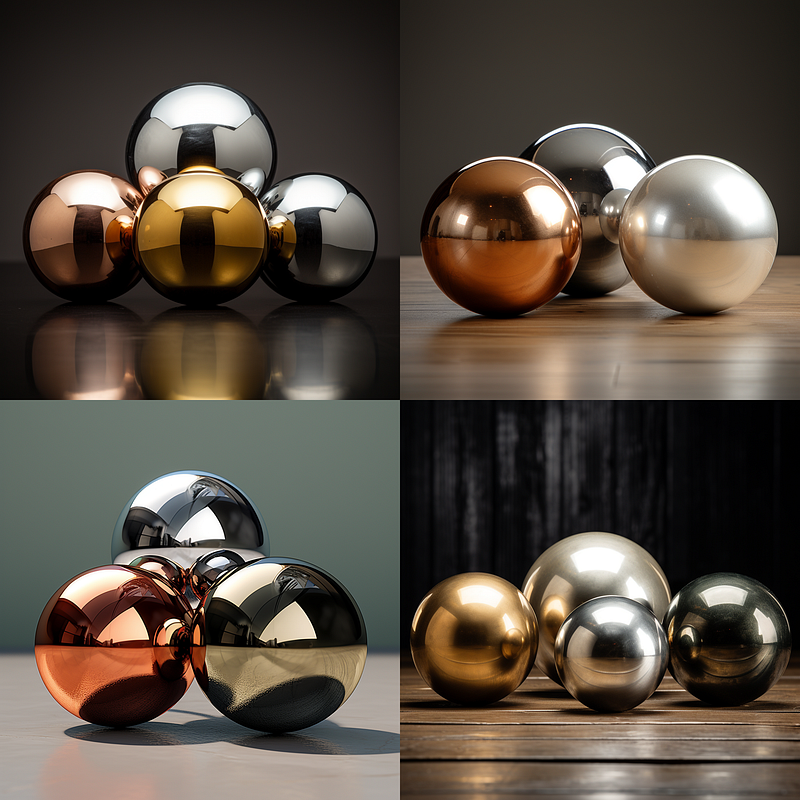
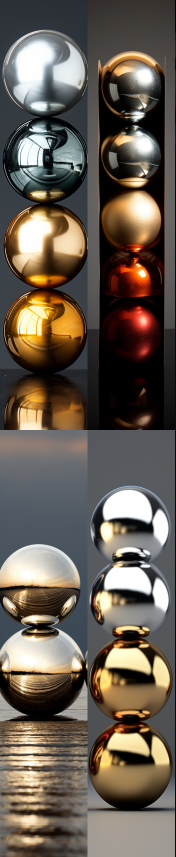
Let’s start with an image of 4 metallic balls.
You’ll notice that two of the grid images only have three balls. This is due to Midjourney’s inability to count reliably at this time. For a moment, ignore the exact number of balls and concentrate on the composition.
Midjourney generated an image of the four balls and filled the space as we would expect. The first photo is at default size (aspect ratio of 1:1).
When we switch to a wide/landscape aspect ratio of 16:9, the balls will be automatically spread out.
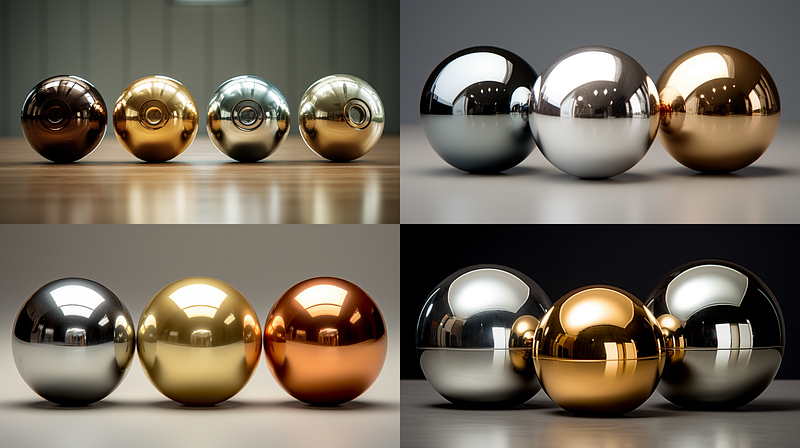
When we change the aspect ratio to 2:3, some balls will start to stack on top of others because the horizontal space shrinks.
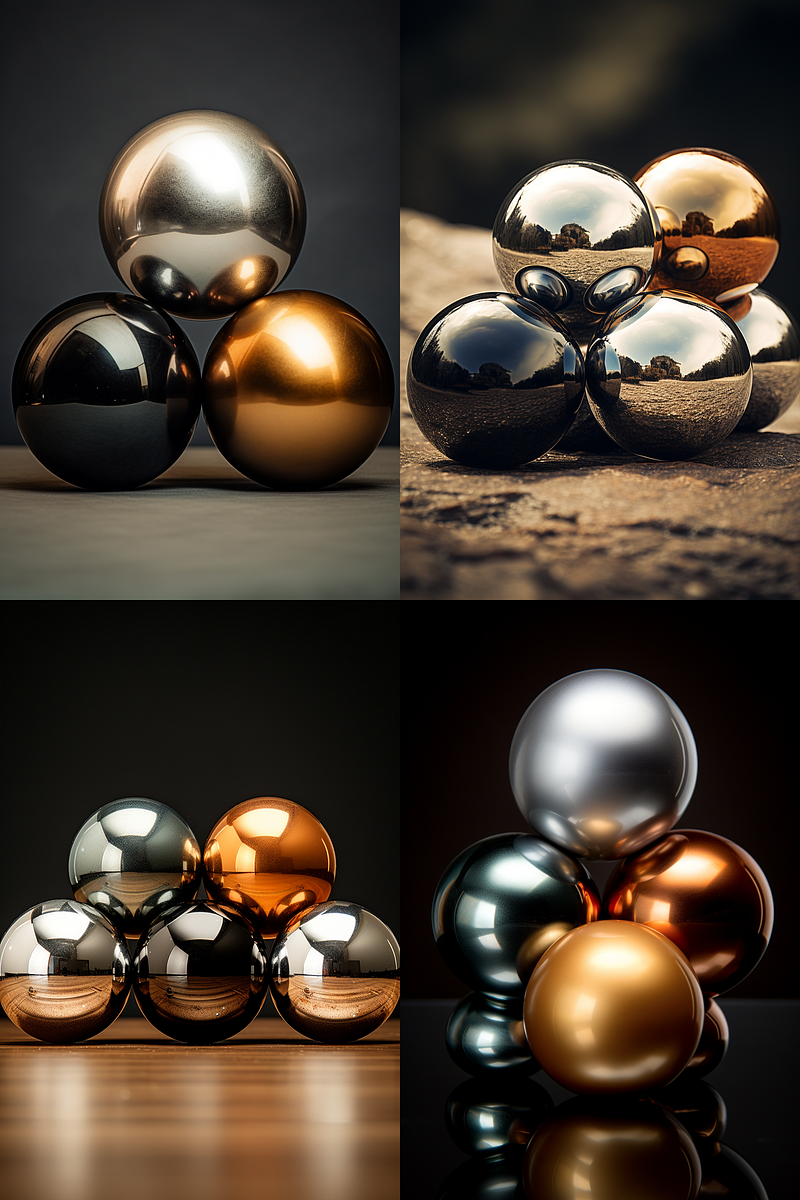
Following the same logic, the balls will be stacked vertically when we change the aspect ratio to 1:5.
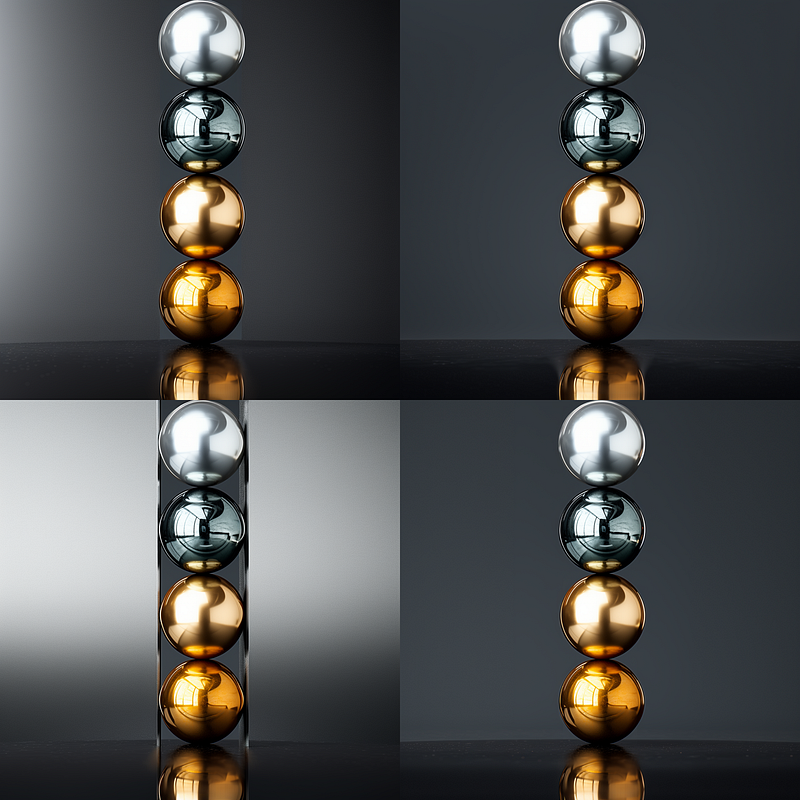
Now, assume you want to make a picture of four metallic balls stacked vertically. Upscale an image from the grid above (1:5 aspect ratio). Then click the [Make Square] button to expand the canvas and set the aspect ratio to 1:1. [Make Square] will change the image’s aspect ratio back to its default.
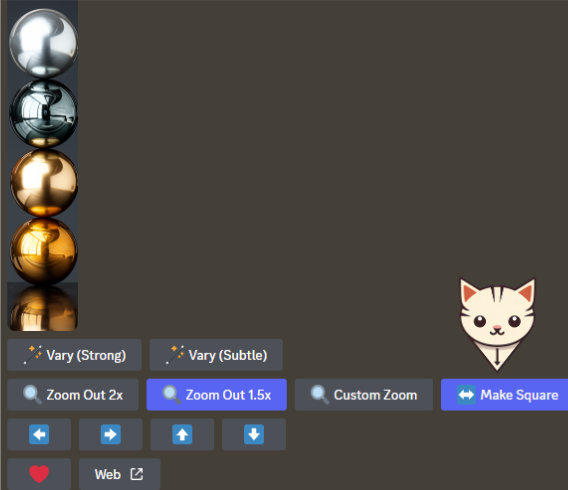
The [Make Square] button will generate four squarish images. Pick one to upscale as your final image.
You can also change the aspect ratio with [Custom Zoom]. It gives you more options to change the aspect ratios than simply making the image square. You can add new elements outside the original image.
Remember that [Zoom Out 1.5x] and [Zoom Out 2x] will only zoom out images with the same aspect ratio, making the original image smaller. As a result, they are not useful in this case.
[Pan] will add pixels horizontally or vertically, but it is ineffective in changing the aspect ratio even if you change the prompt in the dialogue box with /remix on.
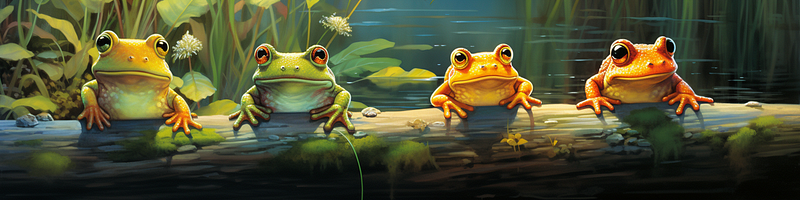
Here’s another example of manipulating the aspect ratio to create a layout/composition.
First, create an image that has an odd aspect ratio (4:1) to limit the canvas size so that the subjects/elements will self-organize in the tight space.
Then, use [Custom Zoom] to change its aspect ratio from 4:1 to 4:3. You can also change it to any other aspect ratio as you wish.
Midjourney bot will automatically add details to the background when the canvas has been expanded, even when you don’t specify them in your prompt.
(5) [Pan] your subject aside
[Pan] is the technique for moving your subject/object aside in your layout. I’ve covered this Outpainting feature in depth in other stories.
In short, you can move your subject to the left, right, up, and down. You can also add new elements to the composition when panning.
You can learn more about [Pan] here:
(6) /remix mode
This is a very effective method for creating a new image by utilizing the layout and composition of another existing image created in Midjourney.
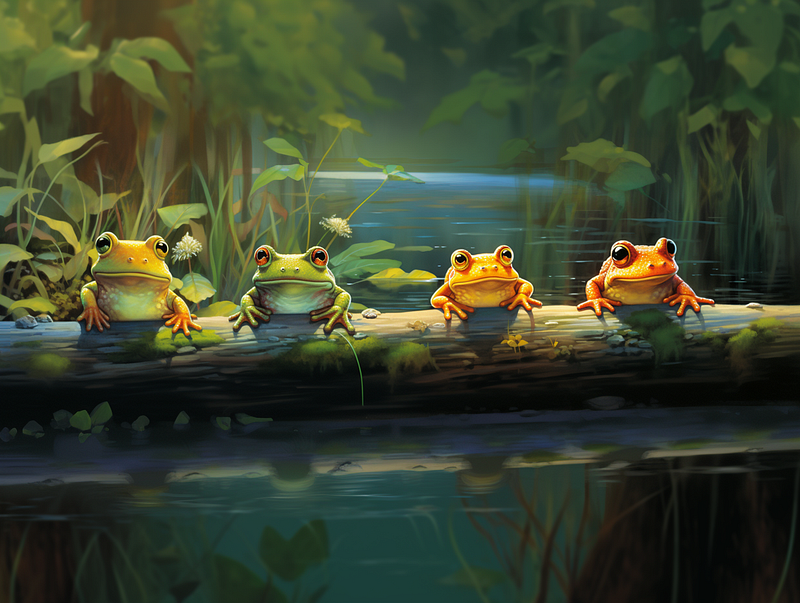
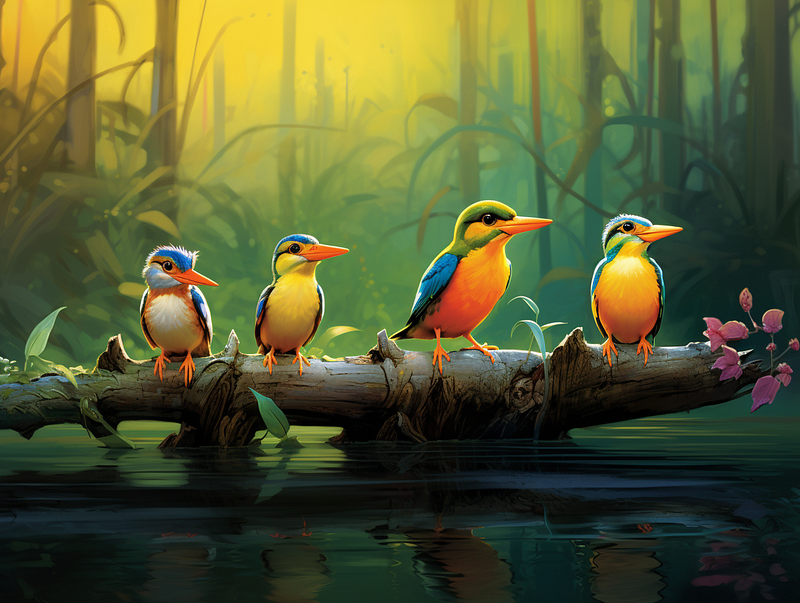
If you like the layout of the toads in Point (4), you can re-use that image to create a new image with a similar layout and composition without having to start over from scratch.
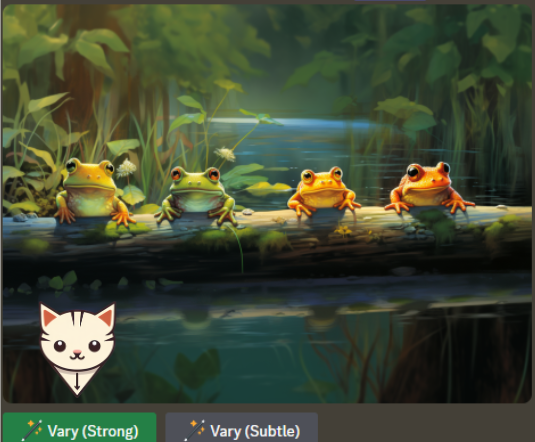
Turn on the remix mode by typing /remix and press enter. To deactivate, re-type /remix.
After an image has been upscaled, a Vary (Strong) button will be at the bottom. Click that and change the subject (“toads”) to (“birds”) in the dialogue box.
You can find out more about the /remix method at:
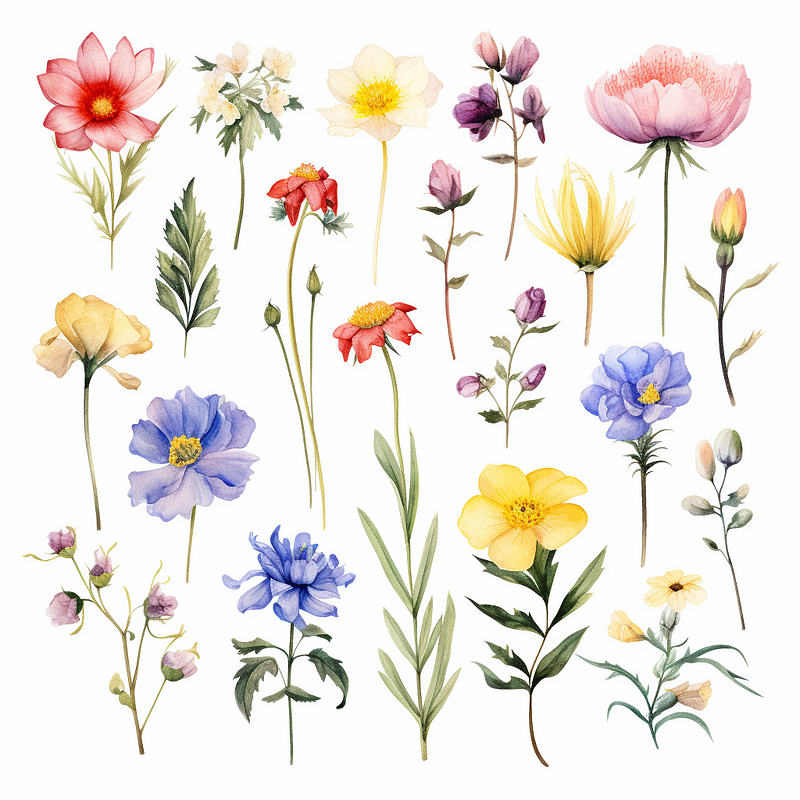
(7) Layout keywords for digital assets
Try these keywords to create a set of items/ icons/ assets/ stickers. Use them at the prompt’s opening.
A collection of Set of Asset of Grid of Grid layout of
There are many other keywords to create digital assets for creating clipart, game assets, character design, and so forth. I’ll cover them in another story as they are outside the scope of this article.
(8) [Custom Zoom] for mock-up layout
If you need to create a layout for mock-up purposes, look no further than the [Custom Zoom] feature.
It can be used to generate mock-up layouts for t-shirts, mugs, framed photos, book covers, stickers, and many other items. See this story for more details about Midjourney’s powerful mock-up generator:
(9) Use the Midjourney Vary (Region)
The new feature was released on 22nd August 2023 to allow users to change the details of the image with the inpainting feature.
With Vary (Region), you can place a new subject/item anywhere in the image.
Read the story about this new feature here.
Related stories
Conclusion
You can use the following techniques to create a layout and composition for an image in Midjourney:
- Put your main subject first in the prompt.
- Create a large object to occupy the center of the image and push your main subject to the side.
- Use an invisible space to block out the center area.
- Manipulate the aspect ratio to position the elements.
- Use [Pan] to shift your subject aside.
- Use
/remixmode to create a new image by re-using the layout and composition from another image. - Use keywords to create a layout for digital assets.
- Use [Custom Zoom] to create a layout for mock-up.
I hope you enjoyed this story!
Please give me a clap or leave a positive comment to let Medium’s algorithm know that this story is helpful and has contributed to its platform’s success.
Your support inspires me to create similar or higher-quality content in the future!
Never miss a story. Follow me on Medium for updates, stories, and tips about Midjourney.
Join Medium today and read all my stories:


