
Master Python GUI Development with Tkinter
Step-by-step guide to building a user-friendly document generator GUI in Python
Welcome to the second part of our three-part Python series, “Build Your Own Application in Python.” In this installment, we’ll guide you through creating a graphical user interface (GUI) using the Tkinter package.
If you’re new to this series, you can catch up on the first part here:
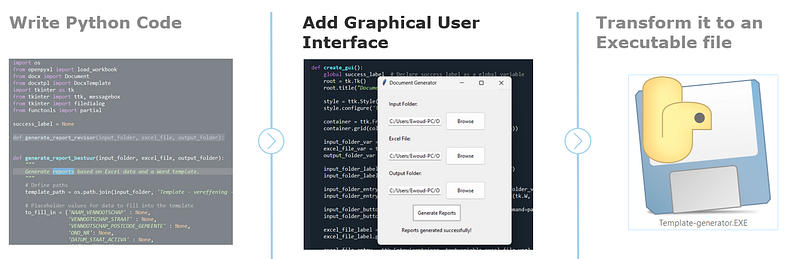
- Automate Filling in Word Templates Using Python
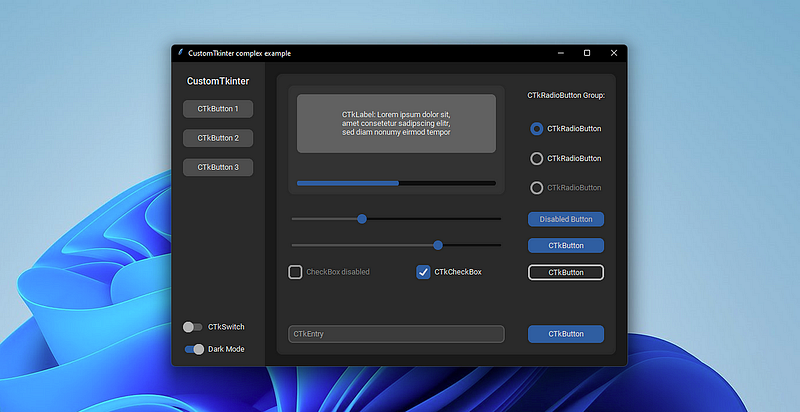
- Create a Graphical User Interface (GUI) using the Tkinter package
- Python Code to Standalone Executable: How to Use PyInstaller
Methodology
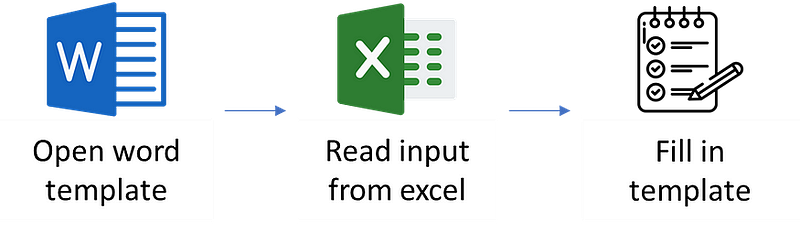
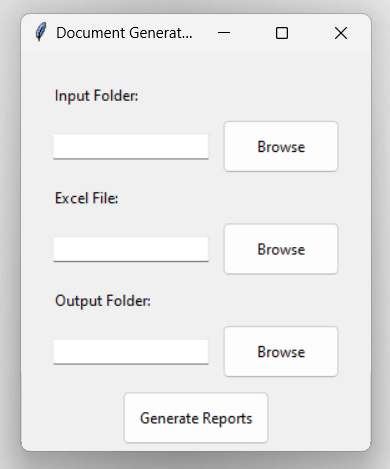
This article’ll walk you through the steps to create a GUI for a document generator application. The script we’ll develop allows users to fill in templates with data from an Excel file, select input and output folders conveniently, and generate reports with just a few clicks.
Downloadable files
Before we dive into the code, you can download the example files we’ll be using at these links:
These files will help you follow along with the code and understand how the GUI interacts with them.
Step 1: Import necessary libraries
To get started, you need to import the necessary libraries:
import tkinter as tk
from tkinter import ttk
from functools import partialtkinter: This library provides you with tools for creating GUI applications.ttk: A submodule of tkinter that offers enhanced widget styles.functools.partial: You can use this to create functions with predefined arguments.
Step 2: Define the create_gui function
You then define a function called create_gui that will create the graphical user interface.
def create_gui():Step 3: Set up the main window
- You declare
success_labelas a global variable so that you can access it inside functions. - You create the main application window (
root) and set its title to "Document Generator."
    global success_label  # Declare success_label as a global variable
    root = tk.Tk()
    root.title("Document Generator")
Step 4: Configure button style
Here, you configure the style of buttons in the GUI. They will have padding and a flat relief style.
    style = ttk.Style()
    style.configure('TButton', padding=10, relief="flat")
Step 5: Create a container for widgets
Now, create a container (a frame) to hold all the widgets in the GUI, set padding, and arrange it using a grid layout.
    container = ttk.Frame(root, padding=20)
    container.grid(column=0, row=0, sticky=(tk.W, tk.E, tk.N, tk.S))
Step 6: Define variables for user inputs
Create three StringVar variables to store your input for the input folder, Excel file, and output folder.
    input_folder_var = tk.StringVar()
    excel_file_var = tk.StringVar()
    output_folder_var = tk.StringVar()
Step 7: Create labels and entry fields for input
For the input folder, create a label and an entry field. Labels display text, while entry fields allow you to input text.
    input_folder_label = ttk.Label(container, text="Input Folder:")
    input_folder_entry = ttk.Entry(container, textvariable=input_folder_var)
Step 8: Add a browse button for input folder
Create a “Browse” button that, when clicked, calls a function (select_input_folder) to select an input folder.
input_folder_button = ttk.Button(container, text="Browse", command=partial(select_input_folder, input_folder_var))Step 9: Repeat steps 7 and 8 for Excel file and output folder
Repeat the same steps for the Excel file and output folder, creating labels, entry fields, and browse buttons (see the full code below).
Step 10: Create a button to generate reports
Create a button labeled “Generate Reports” that, when clicked, will call a function (generate_reports) to generate reports based on your input data.
generate_button = ttk.Button(container, text="Generate Reports", command=partial(generate_reports, input_folder_var, excel_file_var, output_folder_var))Step 11: Create a label for success message
Create a label displaying a success message when the reports are generated.
success_label = ttk.Label(container, text="")Step 12: Configure widget placement and appearance
To ensure a consistent appearance, configure the placement and appearance of all widgets within the container.
    for child in container.winfo_children():
        child.grid_configure(padx=5, pady=5)
Step 13: Start the GUI application
Now, start the main event loop, which keeps the GUI running and responsive to your interactions.
root.mainloop()
Step 14: Run the GUI if the script is executed directly
Finally, add a conditional block to ensure that the create_gui function is called only if the script is executed directly (not imported as a module).
if __name__ == '__main__':
    create_gui()
That’s it! You now understand how the script creates a GUI for a “Document Generator” application. Users can input paths, select files, and generate reports through this user-friendly interface.
Conclusion
In this article, we’ve walked you through creating a GUI for a document generator application using Python and Tkinter. You’ve learned how to set up the GUI, handle user inputs, and trigger actions with the click of a button. Feel free to explore and customize the GUI to suit your needs.
Happy coding!
Graphical interface code block
import os
from openpyxl import load_workbook
from docx import Document
from docxtpl import DocxTemplate
import tkinter as tk
from tkinter import ttk, messagebox
from tkinter import filedialog
from functools import partial

success_label = None

def generate_report(input_folder, excel_file, output_folder):
    """
    Generate reports based on Excel data and a Word template.
    """
    # Define the template path
    template_path = os.path.join(input_folder, 'Template.docx')

    # Load the Excel workbook and template
    workbook = load_workbook(excel_file)
    template = DocxTemplate(template_path)
    worksheet = workbook["Template"]

    # Placeholder values for data to fill into the template
    to_fill_in = {
    "BUSINESS_NAME": None,
    "Date": None,
    "Customer": None,
    "Customer_ID": None,
    "Address": None,
    "Phone": None,
    "Recipient": None,
    "Payment_Due": None,
    "Salesperson": None,
    "Payment_Terms": None,
    "Delivery_Date": None,
    "Shipping_Method": None,
    "Shipping_Terms": None
}


    # Iterate over columns in the worksheet
    column = 2
    print(worksheet.max_column)
    while column <= worksheet.max_column:
        col_index = chr(column + 64)
        row_index = 1

         # Retrieve the values from the Excel document and store in dict
        for key in to_fill_in:
            cell = '%s%i' % (col_index, row_index)
            to_fill_in[key] = worksheet[cell].value
            row_index += 1

        # Change the words in the template
        template.render(to_fill_in)

         # Output the file to a DOCX document
        filename = str(to_fill_in['BUSINESS_NAME']) + '.docx'
        filled_path = os.path.join(output_folder, filename)
        template.save(filled_path)
        print("Done with %s" % str(to_fill_in['BUSINESS_NAME']))
        column += 1


# Define success_label as a global variable
success_label = None

def select_input_folder(input_folder_var):
    folder = filedialog.askdirectory()
    input_folder_var.set(folder)

def select_excel_file(excel_file_var):
    file = filedialog.askopenfilename(filetypes=[("Excel files", "*.xlsx")])
    excel_file_var.set(file)

def select_output_folder(output_folder_var):
    folder = filedialog.askdirectory()
    output_folder_var.set(folder)

def generate_reports(input_folder_var, excel_file_var, output_folder_var):
    input_folder = input_folder_var.get()
    excel_file = excel_file_var.get()
    output_folder = output_folder_var.get()

    generate_report(input_folder, excel_file, output_folder)

    # Call other report generation functions here if needed

    # Show success message
    success_label.config(text="Reports generated successfully!")

def create_gui():
    global success_label  # Declare success_label as a global variable
    root = tk.Tk()
    root.title("Document Generator")

    style = ttk.Style()
    style.configure('TButton', padding=10, relief="flat")

    container = ttk.Frame(root, padding=20)
    container.grid(column=0, row=0, sticky=(tk.W, tk.E, tk.N, tk.S))

    input_folder_var = tk.StringVar()
    excel_file_var = tk.StringVar()
    output_folder_var = tk.StringVar()

    input_folder_label = ttk.Label(container, text="Input Folder:")
    input_folder_label.grid(column=0, row=0, sticky=tk.W)

    input_folder_entry = ttk.Entry(container, textvariable=input_folder_var)
    input_folder_entry.grid(column=0, row=1, columnspan=2, sticky=(tk.W, tk.E))

    input_folder_button = ttk.Button(container, text="Browse", command=partial(select_input_folder, input_folder_var))
    input_folder_button.grid(column=2, row=1, sticky=tk.W)

    excel_file_label = ttk.Label(container, text="Excel File:")
    excel_file_label.grid(column=0, row=2, sticky=tk.W)

    excel_file_entry = ttk.Entry(container, textvariable=excel_file_var)
    excel_file_entry.grid(column=0, row=3, columnspan=2, sticky=(tk.W, tk.E))

    excel_file_button = ttk.Button(container, text="Browse", command=partial(select_excel_file, excel_file_var))
    excel_file_button.grid(column=2, row=3, sticky=tk.W)

    output_folder_label = ttk.Label(container, text="Output Folder:")
    output_folder_label.grid(column=0, row=4, sticky=tk.W)

    output_folder_entry = ttk.Entry(container, textvariable=output_folder_var)
    output_folder_entry.grid(column=0, row=5, columnspan=2, sticky=(tk.W, tk.E))

    output_folder_button = ttk.Button(container, text="Browse", command=partial(select_output_folder, output_folder_var))
    output_folder_button.grid(column=2, row=5, sticky=tk.W)

    generate_button = ttk.Button(container, text="Generate Reports", command=partial(generate_reports, input_folder_var, excel_file_var, output_folder_var))
    generate_button.grid(column=0, row=6, columnspan=3, pady=10)

    # Label to display success message
    success_label = ttk.Label(container, text="")
    success_label.grid(column=0, row=7, columnspan=3)

    for child in container.winfo_children():
        child.grid_configure(padx=5, pady=5)

    root.mainloop()

if __name__ == '__main__':
    create_gui()


