In the Kitchen with The Anxious Enthusiast
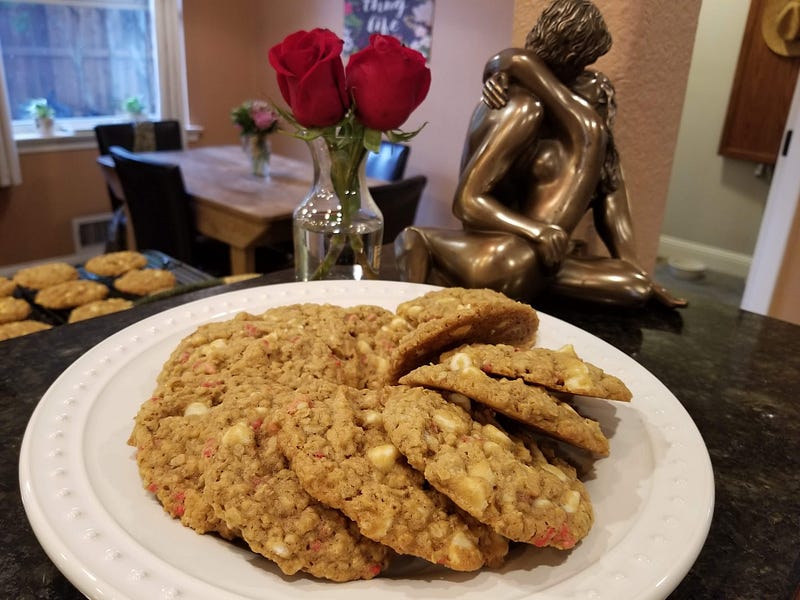
Lovers’ White Chocolate Oatmeal Cookies
Recipes for Anxious Chefs #4
I don’t bake often, but when I do it’s because cookies.
Baking is not a strength of mine because I don’t love measuring. Anyone who knows anything about the science of baking will tell you that you can’t just throw a bunch of stuff into a bowl, stir, and bake, and come out with something remotely edible.
Because of this, baking makes me anxious.
My style of kitchen puttering is putting together, creating instead of following recipes. I hate to make mistakes that I can’t correct and in this way baking feels unforgiving.
As much as baking is not my idea of kitchen therapy, cookies are worth the struggle. These cookies are particularly worth it because they are my partner’s favorite.

Jeremy lets me be silly. He lets me be me. I call him Lover and when I make these cookies, it is often when I want to treat him. This is his Valentine’s Day box of chocolates.
Lover’s White Chocolate Oatmeal Cookies are an excellent birthday treat, but we also like to take them camping and roadtripping with us because they are good for breakfast, second breakfast, snackies, and after-dinner sweetness.
One year I did make some to take to his family for Thanksgiving, although they never made it to Thanksgiving dinner. The seven of us ate the entire batch of them the Wednesday we arrived.
Lover or no Lover, I hope you make these cookies. They are fabulous.
Let’s get in the kitchen.
The Recipe, Makes approximately 24 cookies
What you need for Lovers’ White Chocolate Oatmeal Cookies:
1 stick plus 6 tablespoons salted butter, softened (I use Kerrygold)
3/4 cup packed dark brown sugar
1/2 cup granulated cane sugar
2 large eggs, at room temperature
1 teaspoon vanilla paste (you may substitute good vanilla extract)
1 cup all-purpose flour
1/2 cup whole wheat flour
1 teaspoon baking soda
1 teaspoon ground cinnamon
1/2 teaspoon kosher salt
1 1/2 cups quick oats
1 cup old-fashioned oats (you may use more quick oats)
Full 12 ounce bag of white chocolate chips
Stand Mixer: or strong arm with a large bowl.
Cookie Sheets: at least one, but I like to use two so there are always cookies in the oven. At our house, we have half-sheet trays that we use instead of cookie sheets.
Reusable Silicon Baking Mats: like these are a fabulous addition to any kitchen. You may use parchment paper instead.
Cling Film: you may also use a damp tea towel in a pinch.
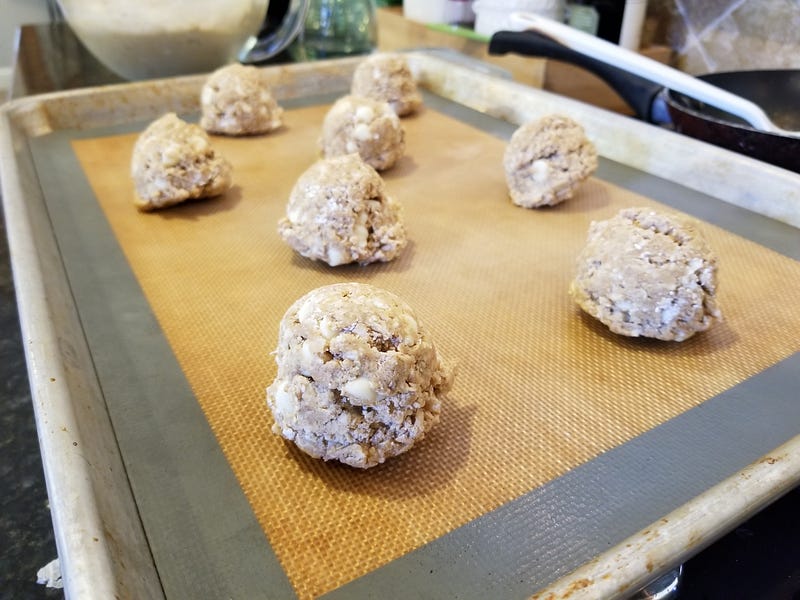
Ice Cream/Cookie Scoop: if you are a cookie monster like me, invest in a scoop like this. It will elevate your cookie game.
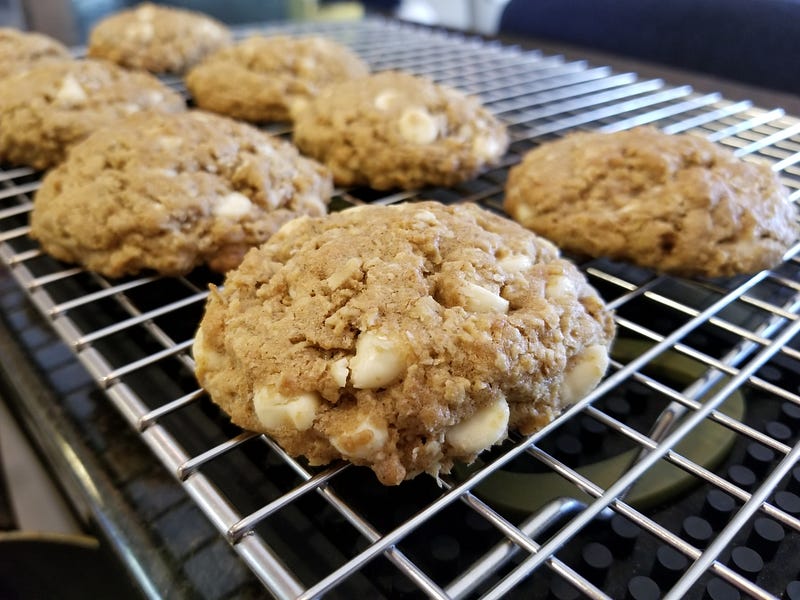
Drying Rack: a metal rack like the one shown below allows the bottoms of cookies to crisp, adding to the texture and chew of your Lovers’ cookies.
Step 1: Blending Wet Ingredients
Place softened butter and sugars into the bowl of a stand mixer with a paddle attachment and blend for 3-5 minutes on medium speed or until the butter looks whipped and the mixture has increased in volume. You may stop halfway through to scrape down the paddle and the sides of the bowl to incorporate rogue bits of butter.
Add vanilla paste or extract and one egg. Blend until homogenous and add the second egg. Blend again.
Step 2: Dry Ingredients In
In a separate bowl, combine flours, baking soda, cinnamon, and salt (a fork or tiny whisk works great). Add the mixture to your wet ingredients. Blend until smooth.
Add oats and blend on slow. Add the entire bag of white chocolate chips and blend on slow again. When the chips look evenly distributed, scrape the paddle and sides of the bowl and remove the bowl from the stand mixer.
Step 3: The Cold Ferment
Cover the cookie dough with plastic wrap like you would a pudding or custard, so that the plastic wrap is directly on the dough and climbs up the sides of the bowl. This ensures that your dough will not dry out. Put the bowl in the refrigerator and let the cookies cold ferment (sit in the fridge) for 24 hours.
***This is a key step. These are Lovers’ cookies. Take your time. Much like a good roll-about, the development of flavor is worth the wait.
Step 4: Bake & Serve
When the cold ferment is complete, set your oven to 180C/350F and take your bowl of cookie dough out of the fridge. Let the dough rest on the counter until the oven is preheated so that it comes to a scoopable temperature. Scoop cookies with an ice cream scoop onto your cookie sheets, 6–8 per tray.
Bake cookies for 10–18 minutes. The colder the dough was when it was scooped, the longer the time it takes to bake. I like to put them in for 10 minutes, spin the tray and bake them for another 5 minutes. This yields a cookie that is golden brown on the outside and soft and melty in the center. Allow hot cookies to rest on the cookie sheet for 1–2 minutes and transfer to a drying rack to cool. Bon Appetit!

Serving Options:
Serve it For Any Holiday or Celebration: with colored sprinkles folded into the dough just before Step 3: The Cold Ferment.
Serve it To Your Inner Child: scooped half size, baked, and kept in your favorite cookie jar for constant, greedy snacking and juvenile bliss.
Serve it For Breakfast: pretending white chocolate is kind of like milk, enjoy your plump “cereal bar” with an espresso and a cheeky grin.
Serve it In the Summer: cooled completely and sandwiched around a scoop of vanilla or cinnamon ice cream, with an option to roll the sides in sprinkles, wrap, and refreeze for a sweet, creamy end to an easy dinner party with friends.
Serve it In the Fall: oven-warm, with 1/2 teaspoon nutmeg added to the dough’s dry ingredients or using butterscotch chips instead of white chocolate chips.
Serve it like The Anxious Enthusiast: for your Lover, and for you. Because you liked them first and you love sharing your life with someone who shares and feeds your cookie fetish.
Please feel free to check out my profile: Brett Jenae Tomlin. Comment below if we have something in common, if you have anxiety or if you like what you’ve read. Do you have any questions for me?
If you love, love, love my writing and want to shout out, “You get it, anxious girl!” You can contribute to my cookbook collection here.
A Few More Articles for the Anxious Reader
More Comfort Food: Every Season Vegetable Shakshuka
On Wine: The Anxious Beginner’s Guide to Wine
On Learning to Let Go: Six Mental Health Benefits of Learning to Play
On Body Image: Summer Body, Part 1
On Coming Out: My Bi Life, Part 1