
Ionic Framework with Vue 3 and Firebase - Photo Sharing App
Part 1 — App Setup and Authentication

In my last series, we built out a cocktail recipe app using the Ionic Framework and VueJs. While this was a good introduction to what you can do with Ionic, it did not cover any native features. In this series, we’ll be taking a deeper dive and accessing features such as the camera and GPS. To persist the data in our app and provide authentication, we’ll be utilizing Firebase.
Ionic App Setup
To create the Ionic app, you’ll need to have the Ionic CLI installed. To install it, you’ll need to have NodeJS installed. After you’ve installed NodeJS, open a terminal and run the following command:
npm install -g @ionic/cliNow that you have installed the CLI, we can use it to generate our project. We’ll need to tell it that we want to use the tabs template with VueJs. To do so, open a terminal, cd into the desired directory, and run the following command:
ionic start photo-sharing-app tabs --type vueInstalling Dependencies
Next, we’ll install the Firebase packages we’ll need. Cd into the root of your project and run the following command:
npm install firebaseLaunching the App
Now that we have our app created, open it in your favorite code editor (I’ll be using VS Code). Then open a terminal in the root directory (In VS Code: Terminal => New terminal) and run the following command:
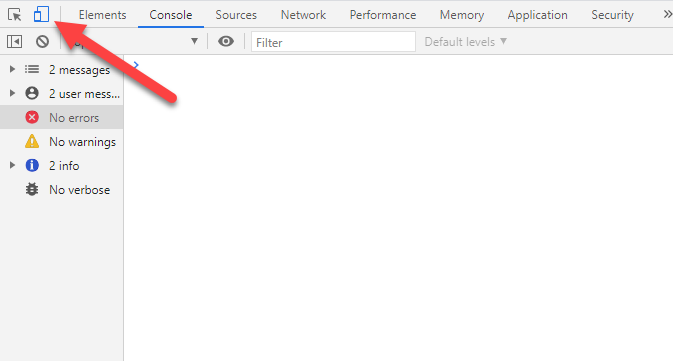
ionic serveThis will launch a new browser window (I’m using chrome). To make the browser look like a phone, hit F12 to launch the dev tools and click on the device toggle button.
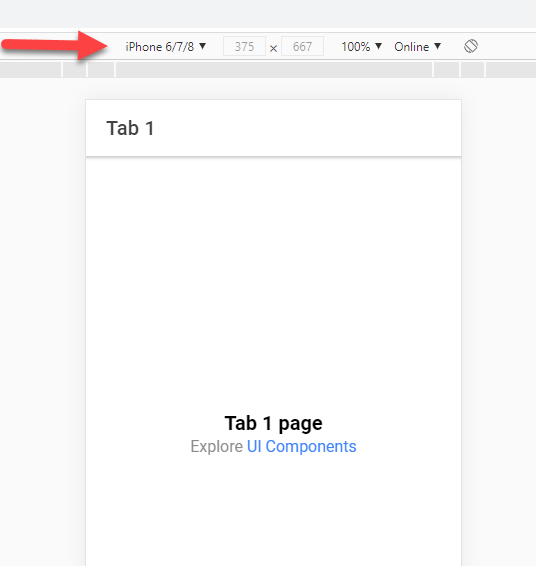
At the top of the browser, select the phone of your choice. I’ll be using iPhone 6/7/8 but you can use whatever you’d like. You can also click edit to add screen sizes of other devices.
Firebase Setup
Now that we have our Ionic App created, let's set up our Firebase project. In our application, we’ll be utilizing Firebase Authentication, Firestore, and Firebase Storage. To set this project up, head over to https://firebase.google.com/ create an account and then click “Go to console”. Next, click on the “Add project” button and name it whatever you’d like. Click through the other options choosing the defaults.
Authentication
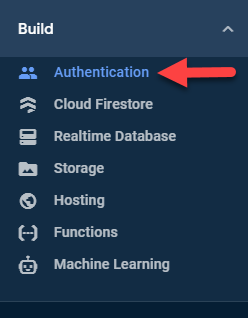
After the project has been set up, click on Authentication in the left-hand menu.
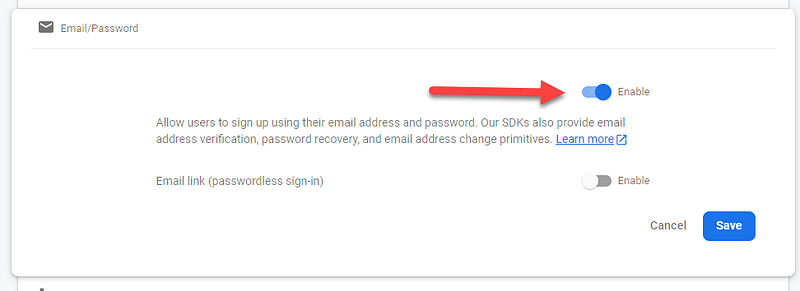
Then, click the “Get Started” button in the middle of the screen. It will take you to a login methods page. After you’re there click on the Email/Password method, enable it, and hit save.
Firestore
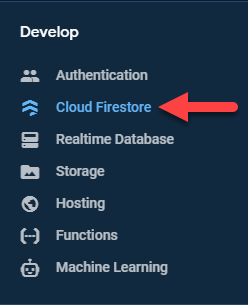
Next click on “Cloud Firestore” in the left-hand menu.
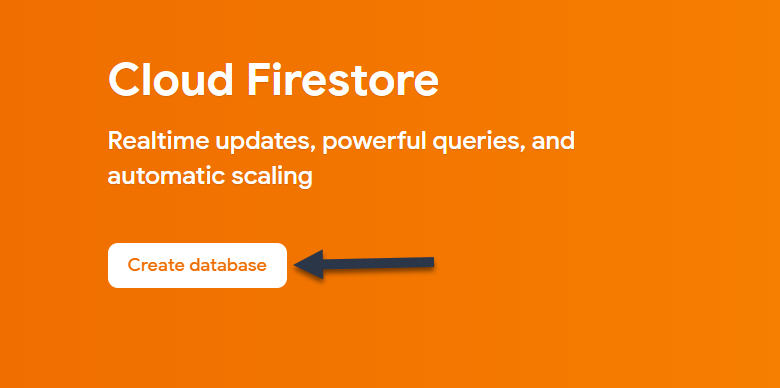
Then, at the top of the screen click “Create database”.
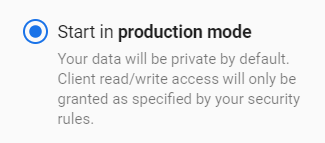
Since we’ll be implementing authentication, choose Start in production mode and pick the default server location.
Cloud Firestore Rules
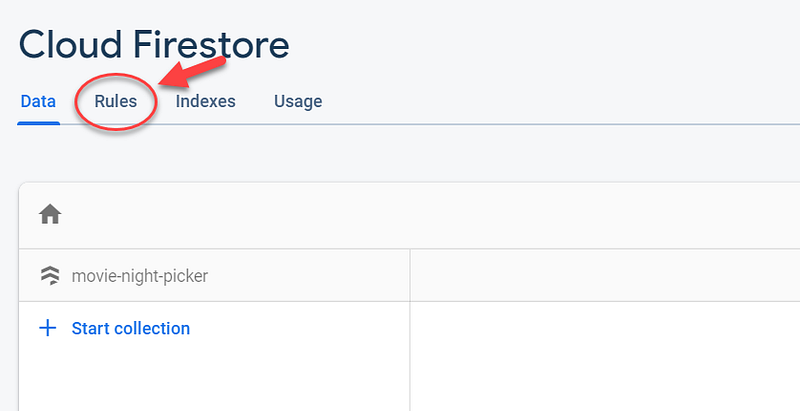
After Firestore has been provisioned, let set up some Firestore rules. To do so click on the rules tab under Firestore.
The only rule we’re going to add is that the user is authenticated. This will ensure that the user is logged in before they can read or write anything. To do that, select everything and rules and replace it with this:
rules_version = '2';
service cloud.firestore {
  match /databases/{database}/documents {
    match /{document=**} {
      allow read, write: if request.auth != null;
    }
  }
}
Warning this will allow any authenticated user to read and write any documents. Before releasing to production, I would recommend you do a user id based rule as well. Please check out their docs.
Storage
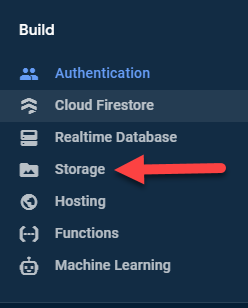
The last Firebase feature, we’re going to set up is storage. To do so, click on storage in the left-hand menu.
Then, click the “Get started” button in the middle of the screen. After you click that, a modal will popup. Choose the default option for rules and a storage location. I will choose the default of nam5 (us-central) for mine as I’m located in the US.
Adding Firebase to the Ionic App
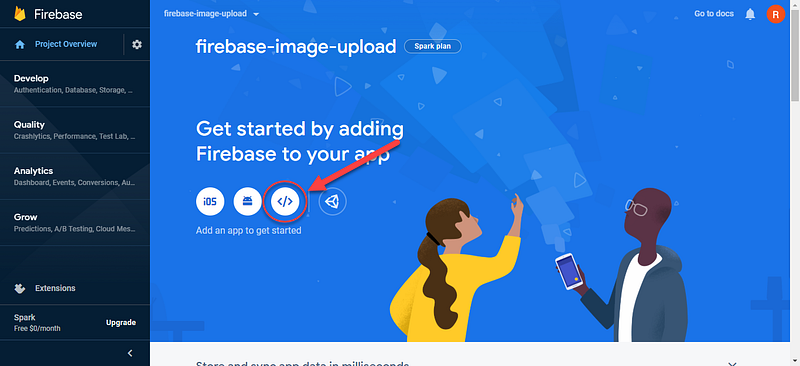
Now that we have all of our Firebase features setup, it's time to import our settings so we can use them in our Ionic App. To do so, head to your Firebase project overview. There you will see a web icon. Click on that, give your app a Nickname, and hit the register button.
Next, you will then be presented with some configuration code. Inside of the
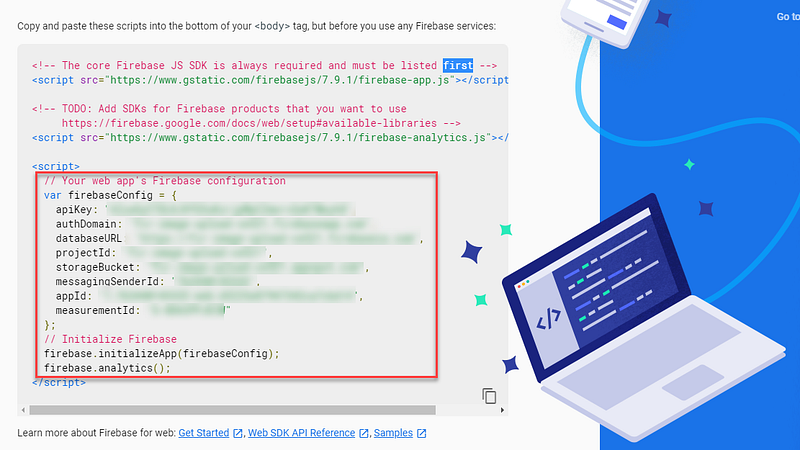
Back in the Vue Project, inside of the src/main.ts add the following code:
import firebase from 'firebase'const firebaseConfig = {
apiKey: '<your-api-key>',
authDomain: '<your-auth-domain>',
databaseURL: '<your-database-url>',
projectId: '<your-cloud-firestore-project>',
storageBucket: '<your-storage-bucket>',
messagingSenderId: '<your-sender-id>',
appId: '<your-app-id>',
measurementId: '<your-measurement-id>'
};firebase.initializeApp(firebaseConfig);export const db = firebase.firestore();
export const auth = firebase.auth();Authentication
Now that we have our application setup. Let's work on authentication. The first thing we’ll do is create our page for sign-in/sign-up. Head over to src/views and create a new file called Authentication.vue.
Script Logic
Create your template and script tags. Remember to add lang=”ts” on the script tag. Then, at the top of the script tag, import the following:
import {
 IonPage,
 IonHeader,
 IonToolbar,
 IonTitle,
 IonContent,
 IonCard,
 IonCardSubtitle,
 IonCardTitle,
 IonCardHeader,
 IonCardContent,
 IonInput,
 IonButton,
 IonLabel,
 IonItem,
}
import { auth, db } from "../main";
import { reactive, toRefs } from "vue";
import { useRouter } from "vue-router";Next, we’ll create an enum so we can use the auth page for sign-up and sign-in.
enum AuthMode {
 SignIn,
 SignUp,
}
Now we can add our export default with our page name, components, and setup method:
export default {
 name: "Authentication",
 components: {
  IonHeader,
  IonToolbar,
  IonTitle,
  IonContent,
  IonPage,
  IonCard,
  IonCardSubtitle,
  IonCardTitle,
  IonCardHeader,
  IonCardContent,
  IonInput,
  IonItem,
  IonLabel,
  IonButton,
 },
 setup() {}
}
Onside the setup method, we’ll add our router and some state:
const router = useRouter();
const state = reactive({
 name: "",
 email: "",
 password: "",
 mode: AuthMode.SignIn,
 errorMsg: "",
});
Then, we’ll create our sign method:
const signInWithEmailAndPassword = async (
 email: string,
 password: string
 ) => {
  try {
   if (!email || !password) {
    state.errorMsg = "Email and Password Required";
    return;
   }
await auth.signInWithEmailAndPassword(email, password);
router.push("/tabs/tab1");
} catch (error) {
state.errorMsg = error.message;
}
};Next, we’ll add our sign up method. On successful sign-up, we’ll add the user to a database collection with a document id set to our user’s id.
const signUpWithEmailAndPassword = async (
 name: string,
 email: string,
 password: string
) => {
 try {
  if (!name || !email || !password) {
   state.errorMsg = "Name, Email, and Password Required";
   return;
  }
const authRes = await auth.createUserWithEmailAndPassword(
email,
password
); db.collection("users").doc(authRes.user?.uid).set({
name,
email,
}); router.push("/tabs/tab1");
} catch (error) {
state.errorMsg = error.message;
}
};The last thing we need to do in our setup method is to return everything to the template:
return {
 ...toRefs(state),
 signInWithEmailAndPassword,
 signUpWithEmailAndPassword,
 AuthMode,
};
Styles
Now that we have our script tag logic, we can add some styles the template can use:
<style  scoped>
.center {
 display: flex;
 height: 90vh;
 width: 100%;
 align-items: center;
 justify-content: center;
}
.error-message {
color: #842029;
background-color: #f8d7da;
border-color: #f5c2c7;
text-align: center;
}
</style>Template
In the template, we’ll have a card. Inside the card will be 3 fields and 2 buttons. We’ll toggle certain elements based on whether the user is signing in or signing up. I won't explain everything we’re in the template. Instead, this is what your final file should look like:
Navigation Guard
To protect our routes, we’ll have to set up a navigation guard. Inside of the src/router/index.ts import the following:
import { RouteRecordRaw, RouteLocationNormalized, NavigationGuardNext } from 'vue-router';import { auth } from '../main'Then, create your guard method:
const guard = (to: RouteLocationNormalized, from: RouteLocationNormalized, next: NavigationGuardNext) => {
 try {
  if (auth.currentUser) {
   next();
  }
  else {
   next("/")
  }
 } catch (error) {
  next("/")
 }
}
Lastly, apply it to any route that needs to be guarded. Your final file should look like this:
Video Tutorial
Conclusion
That’s going to wrap up our app setup. In part 2, we’ll be focusing on getting photos into our app and displaying them. If you have any comments, questions, or concerns, be sure to drop a line below. And, until next time, Happy Coding!


