Installing Git in a Container
ACM.278 Installing software in a container
~~~~~~~~~~~~~~~~~~~~~~~~~~~~~~~~~~~~~~~~~~~~~~~~~~~~~~~~~~~
⚙️ Part of my series on Automating Cybersecurity Metrics. The Code.
🔒 Related Stories: Git Security | Application Security | Secure Code | AWS Security | Container Security
💻 Free Content on Jobs in Cybersecurity | ✉️ Sign up for the Email List
~~~~~~~~~~~~~~~~~~~~~~~~~~~~~~~~~~~~~~~~~~~~~~~~~~~~~~~~~~~
In the last post I wrote an introduction to containers and why you might want to use them. I also explained some related terms like images, registries, engines, runtime, and microservices.
In this post we’re going to create a container that installs git.
Note that I am going to keep things very simple to start and build on these concepts. This is not the image we are going to use with our Lambda function. You’ll see why if you follow along.
Development Environment
For this example, I’m going to use and AWS EC2 Amazon Linux VM and install docker on that. I explained how and why you might want to use a virtual machine in the cloud for your developer workstation here:
If you’ve been following along, you’ve got a VPC set up with Flow Logs enabled. This may come in handy if you want to inspect network traffic as I’m going to do in a future post.
Install Docker
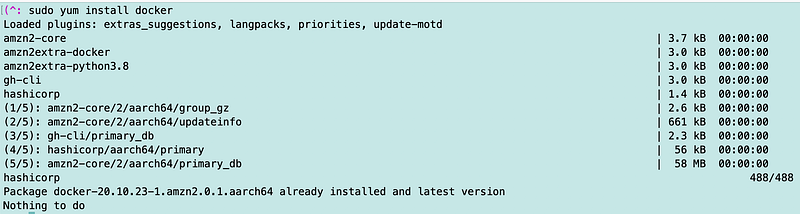
Type the following command:
sudo yum instal dockerAs you can see, in my case, it is already installed.
You can check using the following command:
docker --version
Great. Now we have docker but is it running?
If I try to run a command which lists running containers, you can see I get an error message asking me if the docker daemon is running.
docker ps
Run this command to start docker:
sudo service docker startRun this command to ensure docker starts whenever you start your VM:
sudo systemctl enable docker
We also need to grant the ec2-user permission to execute docker commands:
sudo usermod -a -G docker ec2-userNow if I run the ps command again it works, but I have no docker containers running:
docker ps
Create a Docker image
I’m just going to keep everything really simple to start and then we’ll improve on our container security in the upcoming posts — so please stay tuned! This post is just getting us started.
I explained what Dockerfiles and docker images were in the last post. We’re going to create a Dockerfile with default name of “Dockerfile”. That way when we run docker commands we don’t have to specify a file name. You can change the name if you want but then your docker commands are going to be a bit longer.
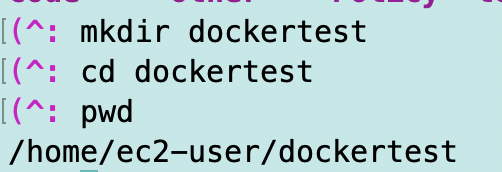
Navigate to the directory where you want to store the contents of your Docker image.
I made a directory named “dockertest” and changed into that directory.
Edit a new file named Dockerfile in that directory.
vi DockerfileHit letter i (lowercase I as in Iceland) to get into insert mode in vi:

Now to construct our Dockerfile.
Recall that the Dockerfile reference is here:
Most docker images are created for a “parent image” — meaning you’re building on top of another image that someone else already created. You can also build an image from scratch if you need. For this example, I’m going to create a docker file from an existing Ubuntu image. So the first line of my Dockerfile is:
FROM ubuntuNote that my container is going to run using the Ubuntu operating system while my host is running Amazon Linux 2. If we were installing git on Amazon Linux2 we would use yum. But because our container is running Ubuntu we need to use apt. We would first want to update Ubuntu to get the latest available software like this:
apt-get updateThen we would install git like this:
apt-get install gitBut if we run the above commands we would get a question that we’d have to answer with a “y”. To automatically answer the question and proceed we can use this command with the -y added.
apt-get install -y gitI can use RUN in the Dockerfile to execute the above commands.
RUN [command]So I could put this in my file:
RUN apt-get update
RUN apt-get install -y git
Or I can combine them like this:
RUN apt-get update && apt-get install -y gitLet’s stop there and test what we have in our container so far.

Hit the escape key and type :wq! to exit and save your file.
wq!
Now use that Dockerfile to build an image. I’m going to tag the image with the name “docker-test” which is a bit easier to remember than the docker if made up of random letters and numbers. Use the following command to build the image. Note there is a period at the end of the command [.] indicating to look in the current directory for the Dockerfile.
docker build -t docker-test . After that runs successfully you should see something like this:

List the docker images on your system with this command:
docker imagesBecause I’ve got a lot of docker images on my test system, I’m going to grep for the specific image I want to see, plus one of the headings so I can see those as well:
docker images | grep 'TAG\|docker-test'
We have an image. Now run a container.
Ok now we have an image. Let’s run a container based on that image.
If I run the following command, the image runs and then stops.
docker run docker-testAdd -t (terminal) and -i (interactive) to run the container with an interactive terminal. When run this way, it will be as if you are inside he container and can run commands in it.
docker run -t -i docker-test
Now you’re inside a container and you cna run a command like this one to list the files in the current directory, including hidden files:
ls -al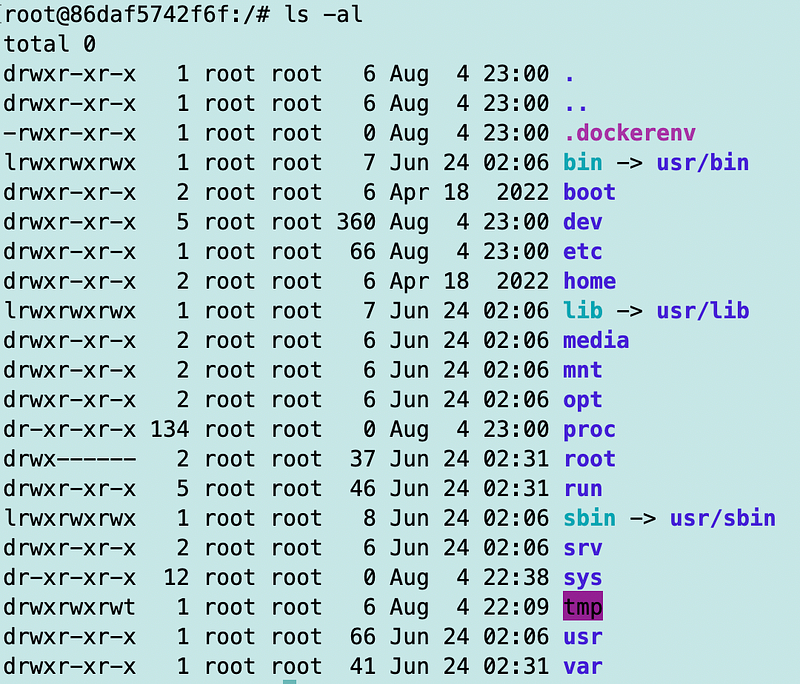
Testing to see if git is installed
Next we can test to see if git is installed.
git --versionAnd it looks like we have git installed and working.

View running containers
Open a new terminal window.
- On a Mac you can type ctrl-t.
- On Windows you can type ctrl+shift+t.
Make a new connection to your Amazon Linux EC2 instance. Now in this window you’re not running in the container you’re running directly on the EC2 instance. Type the following command to list the running containers.
docker psYou’ll get a list of running containers and in my case, there’s only the one I’ve been testing with above:

Note that docker randomly assigned the name “eloquent_fermat”. If you run a new container the name will be different. You can also assign your own name.
When you want to exit the container — type exit. Return to the terminal window where you are inside your container and type exit.
exitNow type the docker ps command again.

No containers running.
This was the tippy tip of the iceberg of information about containers, but hopefully it helps us have a solid starting point for the next topics related to network traffic and the type of containers we need to use for a Lambda function.
Follow for updates.
Teri Radichel | © 2nd Sight Lab 2023
About Teri Radichel:
~~~~~~~~~~~~~~~~~~~~
⭐️ Author: Cybersecurity Books
⭐️ Presentations: Presentations by Teri Radichel
⭐️ Recognition: SANS Award, AWS Security Hero, IANS Faculty
⭐️ Certifications: SANS ~ GSE 240
⭐️ Education: BA Business, Master of Software Engineering, Master of Infosec
⭐️ Company: Penetration Tests, Assessments, Phone Consulting ~ 2nd Sight Lab
Need Help With Cybersecurity, Cloud, or Application Security?
~~~~~~~~~~~~~~~~~~~~~~~~~~~~~~~~~~~~~~~~~~~~~~~~~~~~~~~~~~~~~
🔒 Request a penetration test or security assessment
🔒 Schedule a consulting call
🔒 Cybersecurity Speaker for PresentationFollow for more stories like this:
~~~~~~~~~~~~~~~~~~~~~~~~~~~~~~~~~~~~~~~~~~~~~~~~~~~~~~~~~~~~~
❤️ Sign Up my Medium Email List
❤️ Twitter: @teriradichel
❤️ LinkedIn: https://www.linkedin.com/in/teriradichel
❤️ Mastodon: @teriradichel@infosec.exchange
❤️ Facebook: 2nd Sight Lab
❤️ YouTube: @2ndsightlab