
Install Python on Windows (Anaconda)
This tutorial is split into three sections. The first part is installing Anaconda. The second part is testing your installation (making sure conda works, dealing with path issues etc). Finally, the last part of the tutorial goes over installing packages, and environment management. As always, feel free to ask questions either here or on the youtube video page. I should note that there is an updated version of this tutorial if you click on this link.
- Download and install Anaconda (windows version) from
Choose either the Python 2 or Python 3 Version depending on your needs. It doesn’t effect the installation process.
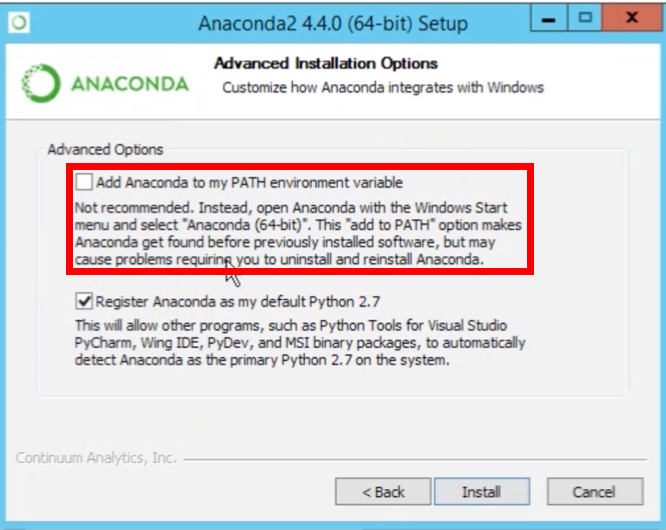
2.Select the default options when prompted during the installation of Anaconda.
Note: If you checked this box, steps 4 and 5are not needed. The reason why it isn’t preselected is a lot of people don’t have administrative rights on their computers.
3. After you finished installing, open Anaconda Prompt. Type the command below to see that you can use a Jupyter (IPython) Notebook.
jupyter notebook
If you want a basic tutorial going over how to open Jupyter and using python, please see the video below.
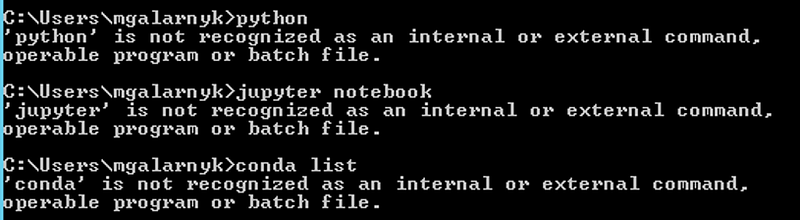
4. If you didn’t check the add Anaconda to path argument during the installation process, you will have to add python and conda to your environment variables. You know you need to do so if you open a command prompt (not anaconda prompt) and get the following messages
5. This step gives two options for adding python and conda to your path (only choose 1 option).
If you don’t know where your conda and/or python is, you type the following commands into your anaconda prompt

Option 1:
You can manually modify your environment variables. See this video for a walk through.
Option 2:
You can add Python and Conda to your path by using the setx command in your command prompt.

6. Close the current command prompt and open a new one. Try typing python and conda in your command prompt to see if the paths are saved. Done!
Further Steps (Optional)
- If you want to use PyCharm (a python IDE), please see this tutorial on Integrating Anaconda with PyCharm.
2. If you want to use both python 2 and 3, please see the following tutorial on Environment Management with Conda.
3. I recommend the following tutorial if you plan to Install Git on Windows. It will also give you access to some unix tools like ls, cat, pwd, nano, and ssh on your command prompt.
4. If you want to learn how to use Anaconda, I have a LinkedIn Learning course on Pandas and Matplotlib called Python for Data Visualization. Here is a free preview video.
Please let me know if you have any questions! You can either leave a comment here or in the comments section of YouTube or through Twitter.


