
How to Start a Splash Microservice for Scraping JavaScript Webpages in Google Cloud Run
Learn a simple way to build a production-ready Splash server in the Cloud

In previous posts, we introduced how to start Splash locally using Docker. In production, we would want to put the Splash server somewhere all our scraping projects can access. Since Splash is Dockerized, a simple solution is to start a Splash microservice in Cloud Run.
It may seem simple to do so, however, it is not straightforward to get everything done correctly in a short time. In this post, we will introduce how to write a custom Dockerfile for Splash, how to create secrets to store proxies, and how to spin up a Cloud Run service for Splash in great detail. Hopefully, it will make it much easier for you to use Splash in Cloud Run.
Moreover, the strategies introduced in this post can be applied to starting any third-party Dockerized service in Cloud Run, especially writing custom Dockerfile and mounting secrets as volumes.
Writing a custom Splash Dockerfile
It may be tempting to use the official Splash Docker image in Cloud Run directly. However, it won’t work as expected. Two issues will occur:
- The folders for the default filters or profiles cannot be created automatically in Cloud Run and we need to create them manually. And importantly, we need to switch users before and after creating these folders.
- The default port 8050 cannot be accessed automatically, we need to specify it explicitly. A better way is to use the
$PORTmagical environment variable in Cloud Run which will work with any port set in Cloud Run. However, it should be noted that in order to use$PORTthe shell form of theCMDcommand should be used, and we need to setENTRYPOINTto be an empty array so the original command will be ignored.
FROM scrapinghub/splash:3.5

# Need to create the folders explicitly for Cloud Run.
USER root
RUN mkdir -p /etc/splash/proxy-profiles /etc/splash/filters
USER splash

# Copy the ADs filters to the Docker image.
COPY ./easylist.txt /etc/splash/filters/easylist.txt

# Ignore the ENTRYPOINT specified in the source Docker image.
ENTRYPOINT []
# Need to specify the port explicitly for Cloud Run.
# To use $PORT, we need to use the shell form.
CMD python3 /app/bin/splash --proxy-profiles-path /etc/splash/proxy-profiles \
    --filters-path /etc/splash/filters \
    --port $PORT
Now we can use gcloud builds to build and push the Docker image to an Artifact Registry. Note that you need to create an Artifact Registry repository in advance as introduced in this post.
gcloud builds submit --tag europe-north1-docker.pkg.dev/superdataminer/standard-docker-repo/scrapinghub/splash:cloud-run-3.5
The above command is equivalent to the following commands using the docker command directly:
docker build --no-cache -t europe-north1-docker.pkg.dev/superdataminer/standard-docker-repo/scrapinghub/splash:cloud-run-3.5 .
docker push europe-north1-docker.pkg.dev/superdataminer/standard-docker-repo/scrapinghub/splash:cloud-run-3.5
These two commands are useful when you want to build the Docker image and test it locally first.
Create secrets for Splash proxies
Splash proxies are sensitive information and should not be exposed in the code base. A good solution on GCP is to create secrets using Secret Manager and then mount them as a volume in the Cloud Run service.
However, Cloud Run does not allow mounting multiple secrets at the same path because two volume mounts cannot be mounted at the same location. As a workaround, we will create a secret with multiple versions, each of which corresponds to a proxy file in a specific country. Each version can then be mounted at a different path in the same volume as we will show soon.
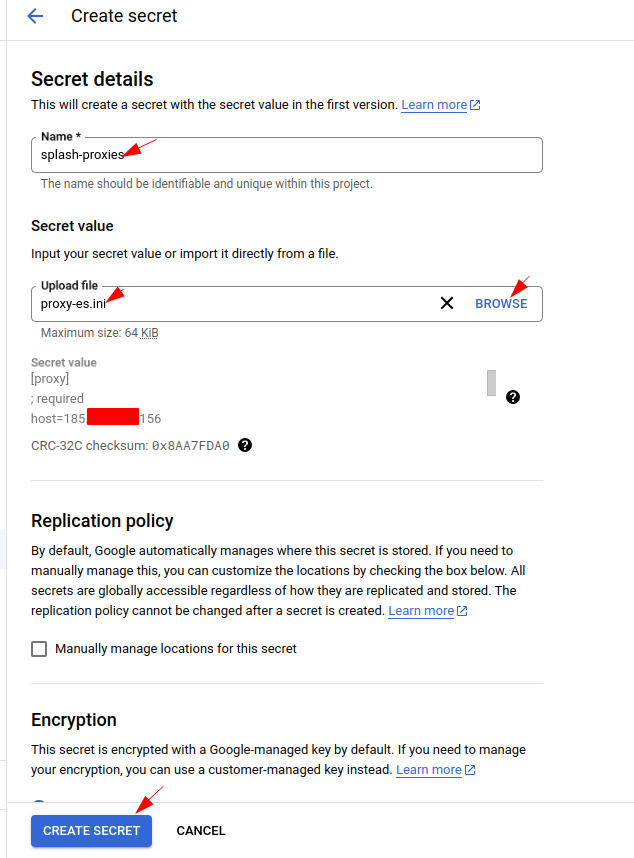
Try to find “Secret Manager” in the GCP console and click “CREATE SECRET” to create a new one. Note that the secret value entered when a secret is created will be the first version. We need to add other versions after the secret is created:
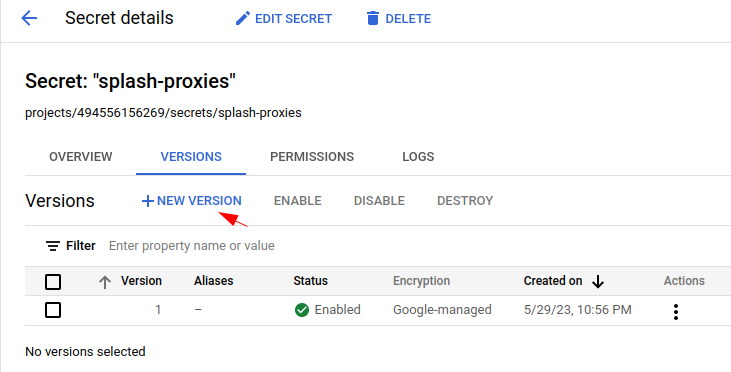
After the secret is created, we can click “NEW VERSION” to create new versions of the secret.
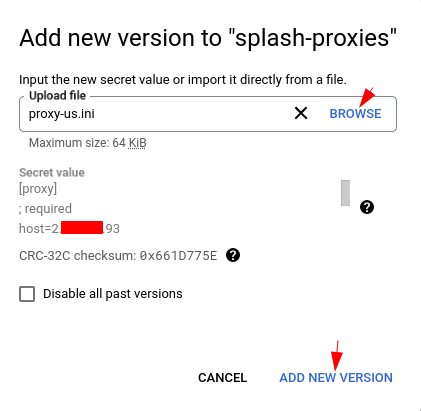
In this post, each version would correspond to a proxy file in a country. So in the second version, we can upload the proxy profile of another country:
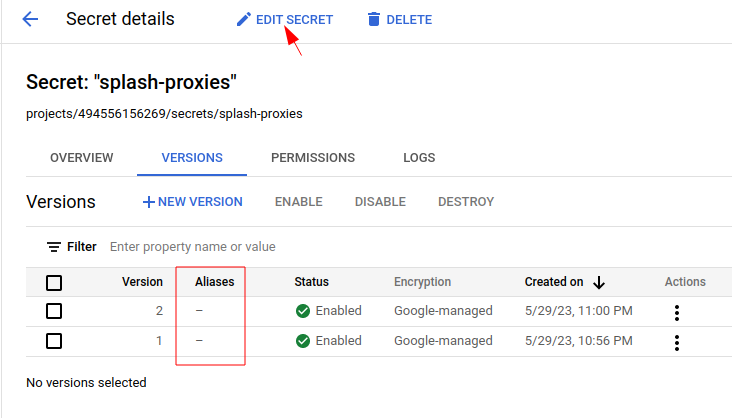
By default, the aliases are empty for the versions and thus it’s difficult to tell them from each other. We can click “EDIT SECRET” to edit the secret and add aliases for the versions:
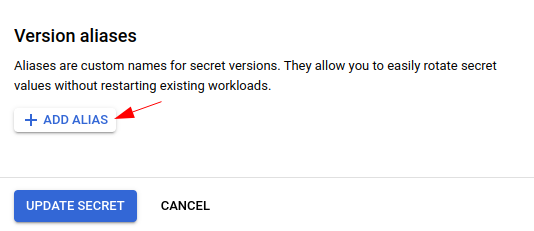
Add some descriptive alias for each version:
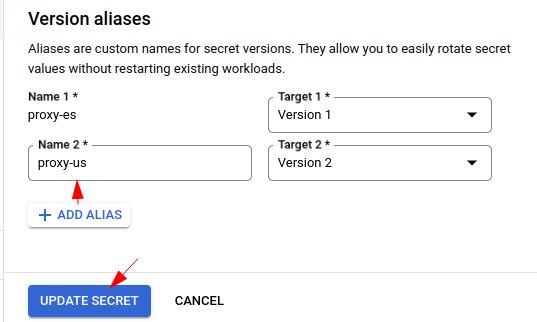
And finally, click “UPDATE SECRET” to update the secret.
Create a Cloud Run service for Splash
Now that the custom Docker image and proxy profile secrets are set up, we can proceed to create a Cloud Run service for Splash.
Try to find Cloud Run in the GCP console and click “CREATE SERVICE” to create a new one:

Follow the instructions below to choose the required options according to your requirements. Importantly, choose the custom Docker image we just built for Cloud Run, rather than the official Splash Docker image:
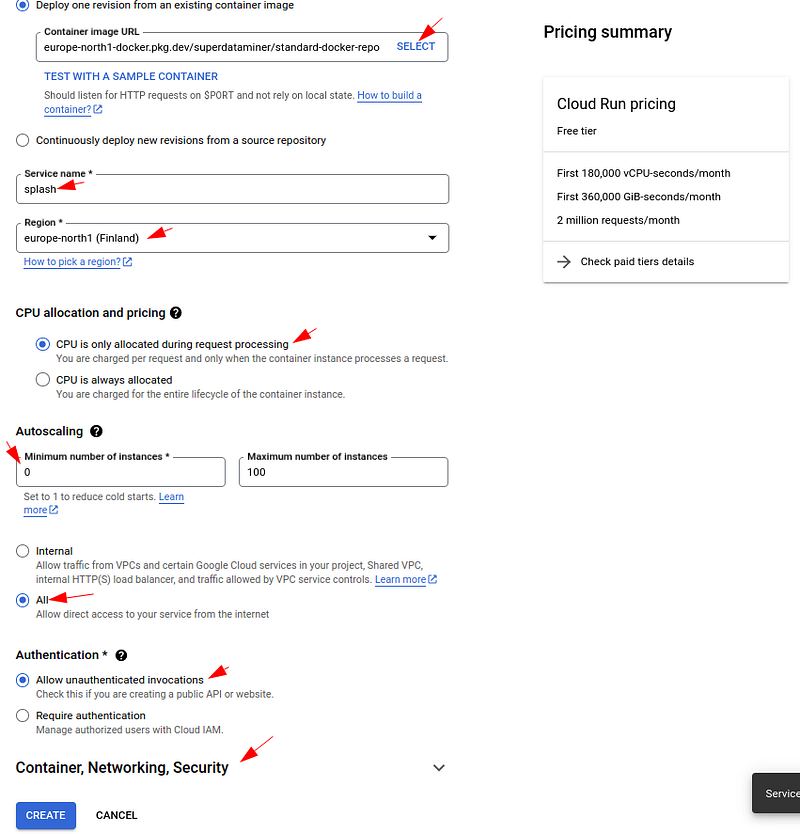
A good thing about using the GCP console rather than the command line to create a new Cloud Run service is that you can get instructions more easily. Do click on the question marks if you are unclear about any option. Note the options may impact the performance, pricing, or security of the service created. For more detailed instructions on each option, this post can be helpful.
After the above the options are set as instructed, don’t click the “CREATE” button yet, we need to have some more settings for the container.
Click on the “Container, Networking, Security” header to expand it:
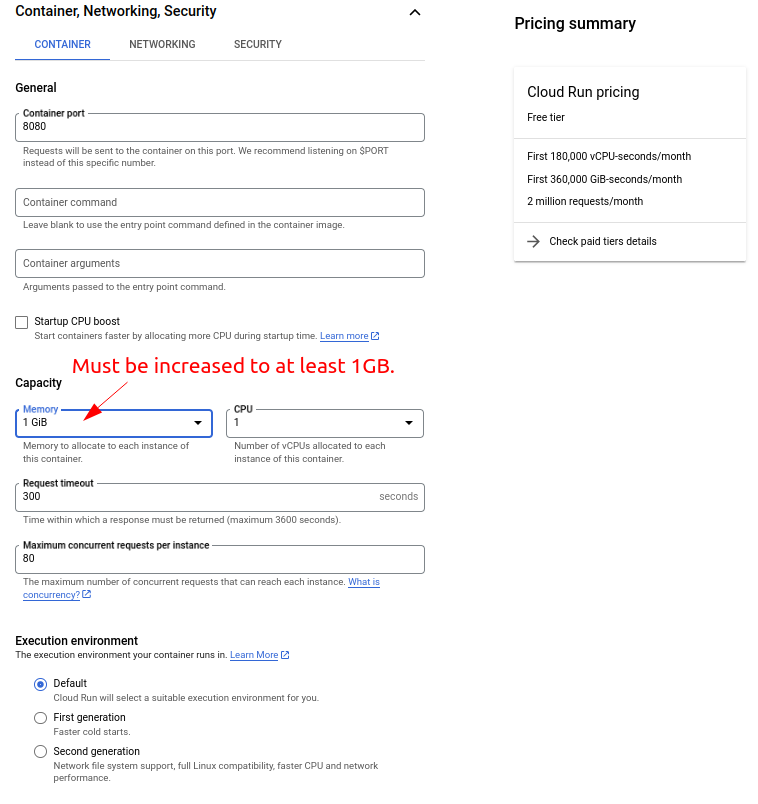
We don’t need to change the port here because we are using the $PORT environment variable in the container to match the port automatically.
An important setting is memory. Splash requires quite some memory to work properly. Therefore, you need to specify at least 1GB of memory for the Cloud Run service otherwise it cannot be started successfully.
Then scroll down a bit to the “Secrets” section. Click “ADD A SECRET REFERENCE” to create a reference to a secret:
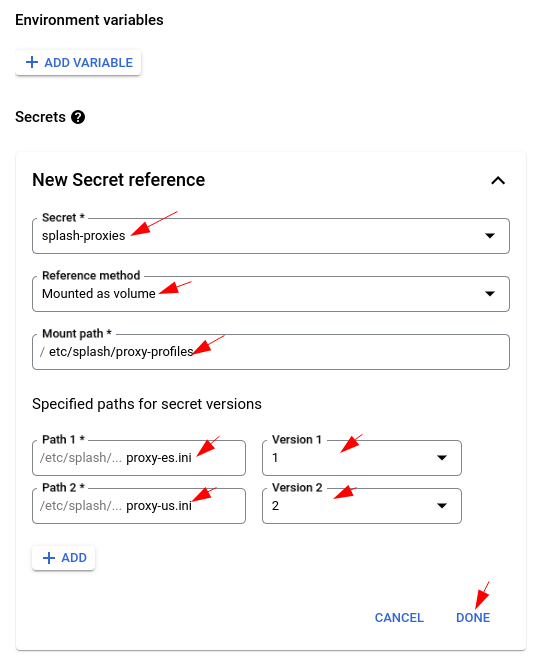
Important settings for creating secret references:
- We need to mount the secret as a volume inside the Docker container of Cloud Run.
- The mount path should be the absolute path of the proxy profile folder, which is
/etc/splash/proxy-profiles. Remember to remove the proceeding and ending slashes as they are added by Cloud Run automatically. - Each version will be mounted as a separate file inside the same volume of the secret. For each version specify the filename as the path, without the leading slash. The relative path is used for each version, therefore just specifying the filename would be enough.
Now everything is ready, we can finally click the “CREATE” button at the bottom to create the Cloud Run service.
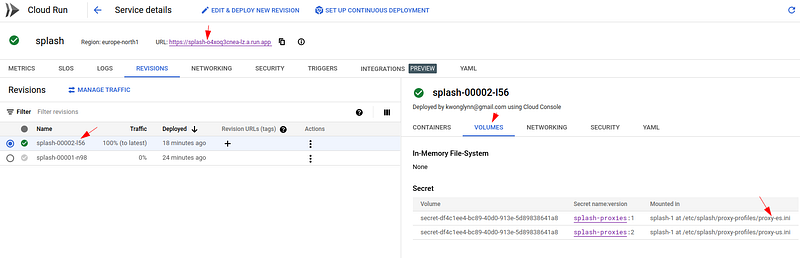
If everything works as expected, the Splash microservice should be started successfully:
Do check the log carefully if something goes wrong, most of the time you can find the hint for solutions there.
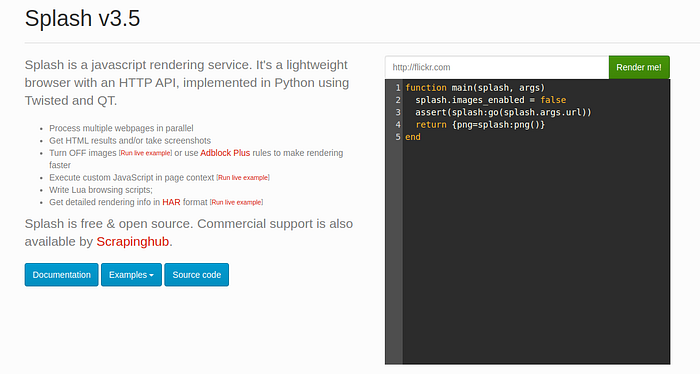
Now if you click the Cloud Run URL, you will see the Splash UI:
This means Splash is set up successfully in Cloud Run, and you can use it in all your scraping projects now.
Related articles:
- How to Scrape JavaScript Webpages with Splash, Requests, and lxml in Python
- How to Use Splash with Proxies for Scraping JavaScript Webpages
Level Up Coding
Thanks for being a part of our community! Before you go:
- 👏 Clap for the story and follow the author 👉
- 📰 View more content in the Level Up Coding publication
- 💰 Free coding interview course ⇒ View Course
- 🔔 Follow us: Twitter | LinkedIn | Newsletter
🚀👉 Join the Level Up talent collective and find an amazing job