
How to Setup Master and Slave Architecture using Jenkins? (CI/CD: Part 1)
Jenkins is an essential tool to run CI/CD pipelines for your projects.
However, if you have more and more pipelines running in single Jenkins, you may encounter some problems in availability and scalability.
Given that one Jenkins can cause a single point of failure problem and longer building time when executing the increasing number of CI/CD pipelines.
How to set up a superior architecture to resolve these problems?
You can set up master and slave architecture for Jenkins.
In this post, we will explore
- Master-Slave architecture of Jenkins
- Advantages of using Master-Slave architecture in Jenkins
- 2 Steps to setup Slaves with Jenkins Master
Master-Slave architecture of Jenkins
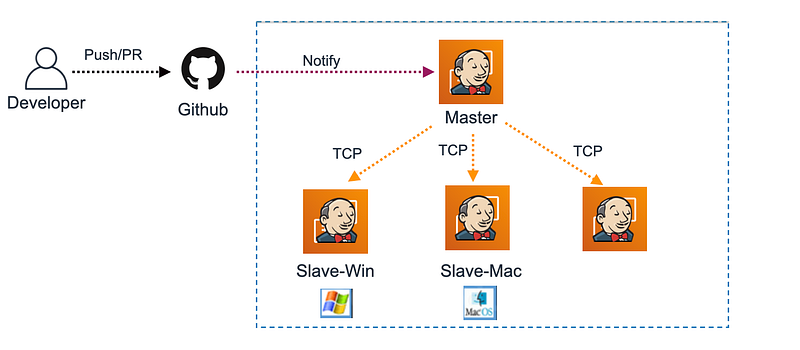
This architecture is composed of two components — one master and multiple slaves below.
Master Jenkins:
- Can define the jobs and assign which slave machine to actually execute the pipelines.
- Requires to set up the connection to a slave beforehand via SSH in TCP.
- Needs to save pipelines.
Slave Jenkins:
- does not need to save jobs or pipelines.
- requires to keep the same environment configuration as the master.
- can be hosted on a different OS for your needs.
For instance, a developer makes any code change in PR to Github, Github will notify Jenkins Master via webhook.
Then Jenkins Master can assign a slave Jenkins to run a specific pipeline such as building games for Android on Slave-Win and iOS on Slave-Mac to speed up your workflow.
Note:
- If you don't know how to set up a pipeline from the ground up in Jenkins, refer to the tutorial below.
Advantages of Master-Slave architecture in Jenkins
Availability:
- Jenkins Slave can achieve high availability while Jenkins Master can’t.
- If one of Jenkins's slave machines goes down, Jenkins master will automatically find an available one.
- Be careful that Jenkins Master may go down if having no standby server to take over.
- Of course, it’s recommended to set up two masters (master-standby)and multiple salves when needed.
Scalability:
- It’s simple to scale capacity to ensure the same performance by adding a new Jenkins slave.
2 Steps to setup Slaves with Jenkins Master
Step1: Add a Jenkin Slave to Jenkins Master
- Log in to Jenkins Web
- Go to Manage Jenkins → Manage Nodes and clouds → Click New Nodes
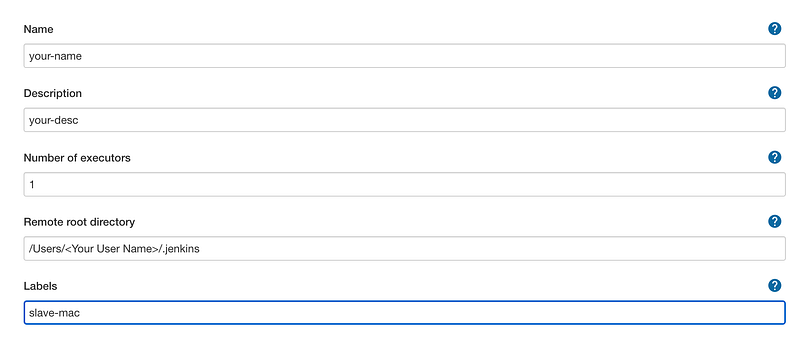
- Fill in the following
Name:
Description:
Remote root directory:
Label:
Usage: Select Only build jobs with label expression matching this node
Launch method: Choose Launch agent via SSH
Host:
Host: Credentials:
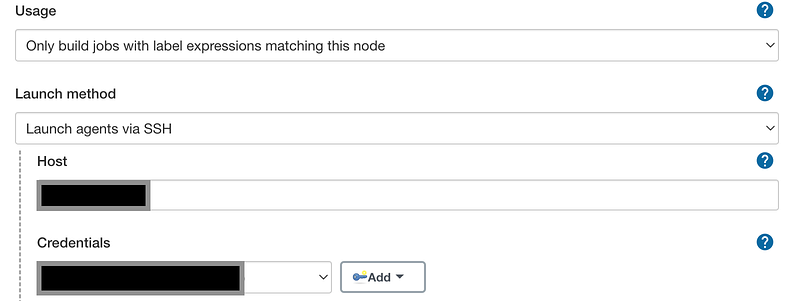
- Then click the Save button.
Note:
- Labels are used for Jenkins Master to assign which Jenkins Slave to run CI/CD.
- Remember you need to check the slave node’s connection status is fine or not on the dashboard.
- If not, check the logs to debug.
Step2: Specify Slave Label in Pipeline
Once you have a slave node ready, you can specify Jenkins Slave’s label below to allow your pipeline to execute CI/CD on a specific Jenkins Slave.
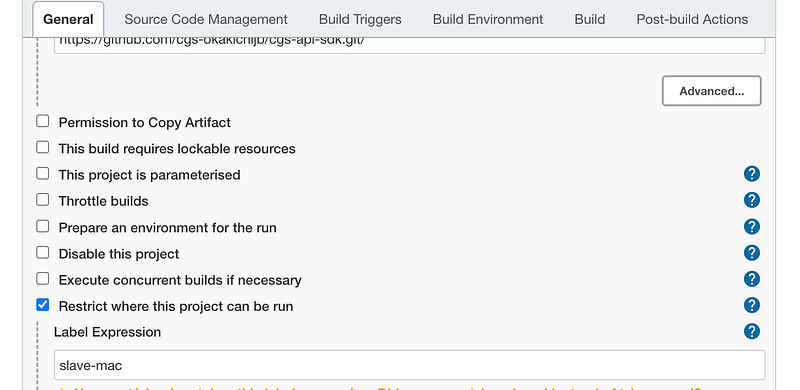
If you use a free-style project to create jobs (not pipeline), you can check in Restrict where this project can be run and specify your Jenkins Slave Label in Label Expression.
That’s all. With only two steps you can set up a master and slave architecture for Jenkins.
Conclusion
In this post, you should have learned how to set up the master-slave architecture for your Jenkins and know the benefits of utilizing this architecture.
I hope this post can be helpful for you to ensure the high availability and scalability of your CI/CD backends.
But there are still some points you can improve
- Because the Master node may go down at some time due to a single point of failure.
- How do we scale slave nodes to run multiple jobs?
You can refer to how to scale Master and Slave architecture using Jenkins? for details to make your CI/CD backends even better.
If you liked this story, please show your support by 👏 this story or subscribe to our email to get the latest tutorials in the future.
Thank you for reading!
Related posts:
- How to Scale Master and Slave Architecture using Jenkins? (CI/CD: Part 2)
- How to Reduce Unity build times for Jenkins? (CI/CD: Part 3)
You might be interested in


