
How to prepare a ‘helloworld.c’ recipe with Yocto Project

Introduction
The following example shows how to include a simple helloworld.c (written in C programming language) program in a new Linux Operating System Image you build specifically targeting the BeagleBone Black development board.
There a step by step example. It can be extended with any C (or C++) program with the functionality of your choice.
The practical outcome is a Linux Operating System that can be deployed at once with your application and functionality.
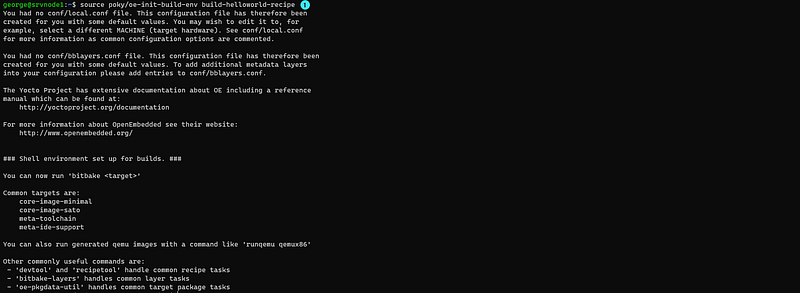
Step 1. Source the poky build script
Step 1.1 Examine the contents of the new directory

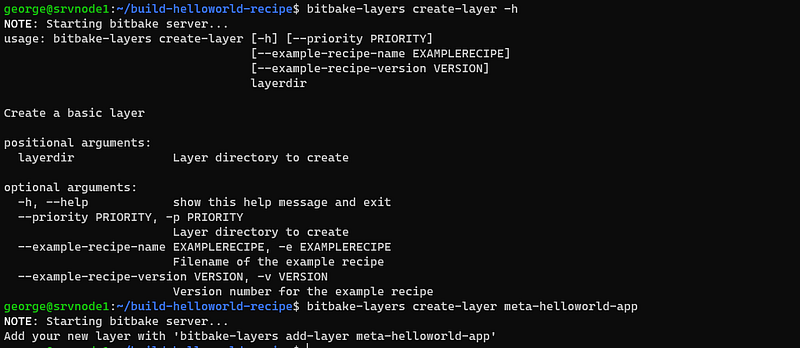
Step 2. Create a new layer that will hold the functionality of helloworld.c program
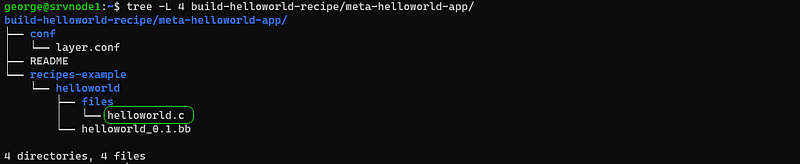
Step 2.1 Examine the structure of the new directory constructed for the new layer

Step 3. Change the name of the recipe


Step 4. Create the directory for storing code files inside the recipe directory

Step 5. Add the code file in the ‘files’ directory
Not: You can either copy these from some other directory or just create them from scratch


For straightforwardness and simplicity I am using a basic c program. Though, you can extend this practical example for including any .c code file in your desired custom Linux Operating System Image.
Step 6. Rename the recipe .bb file
Note:
There is a convention that uses the following parts of the recipe’s name for variables and further actions.
<package-name>_<package-version>.bb
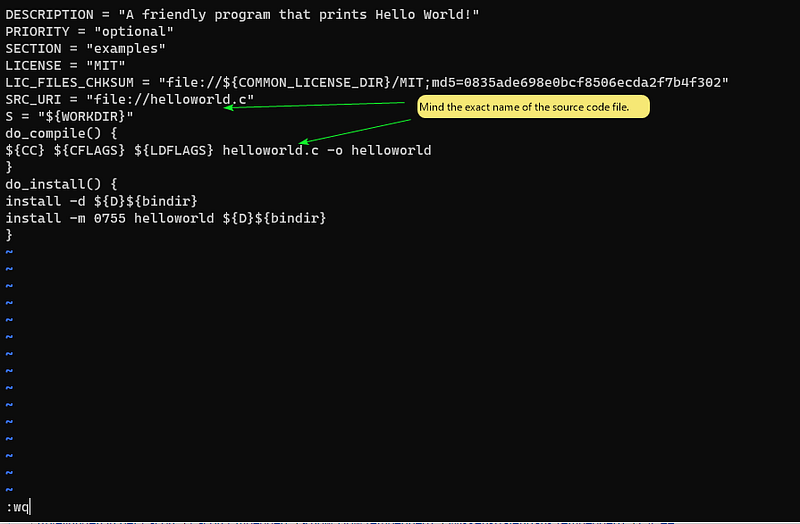
Step 7. Set the content of the recipe .bb file
Variables in the recipe file:
- DESCRIPTION DESCRIPTION: This variable contains a string value. For any recipe you should provide a description to let the users know what this recipe is about.
- SECTION SECTION: In this variable, you define what type of recipe it is. In our case, it is an example. In other cases, it can be utilities, graphics, kernel, and so on.
- LICENSE LICENSE: Here, you specify the type of license you want to use for your recipe. In our case, it is MIT. Other values can be BSD, GPL, etc or your custom license. However, you need to provide a license file for your selected license in the next variable.

Note: If LICENSE='CLOSED', then BitBake does not account the value of LIC_FILES_CHKSUM.
- LIC_FILES_CHKSUM LIC_FILES_CHKSUM: You need to provide a license file along with its md5 sum command. Here, we will use the MIT license file from a common collection of licenses.
The collection of licenses can be found under poky in meta/files/ common-licenses/. You can get the file’s MD5 Sum using the md5sum command as follows:
$ md5sum meta/files/common-licenses/MIT
0835ade698e0bcf8506ecda2f7b4f302 meta/files/common-licenses/MIT
- PR PR: This is a package that is a helloworld revision. We are setting it to r0 in this case, which is the default assignment. You can override its value in your recipe.
- SRC_URI SRC_URI: In this variable, you specify what sources you want to build. In our case, we want to build helloworld.c.
- S S: Here, you specify the source directory, where you can do all the building and expect sources to be placed there. In our case, we are setting it to WORKDIR.
- do_compile do_compile: This is a BitBake task. You are overriding the default task and supplying our own command for compilation here. You are invoking the compiler to compile helloworld.c into a helloworld binary. The variables CC, CFLAGS, and LDFLAGS are set by Yocto to defaults for the machine that is specified.
- do_install do_install: This is another BitBake task. You are again overriding the default behavior and supplying your own commands. In the first command, we are creating a directory, under the path to which variable D points. The directory created at this location will be as set in the bindir variable, which is in /usr/bin. In the next command, we will copy the helloworld binary created earlier to the directory created just now.
A working example of recipe .bb file
For recipe file with the name: helloworld_0.1.bb
DESCRIPTION = "A friendly program that prints Hello World!"
PRIORITY = "optional"
SECTION = "examples"
LICENSE = "MIT"
LIC_FILES_CHKSUM = "file://${COMMON_LICENSE_DIR}/MIT;md5=0835ade698e0bcf8506ecda2f7b4f302"
SRC_URI = "file://helloworld.c"
S = "${WORKDIR}"
do_compile() {
${CC} ${CFLAGS} ${LDFLAGS} helloworld.c -o helloworld
}
do_install() {
install -d ${D}${bindir}
install -m 0755 helloworld ${D}${bindir}
}
Write the recipe .bb file
Step 8. Verify that the recipe compiles correctly

Possible errors and their solutions
In case of an error similar to this one:
ERROR: Nothing provides … then, make sure that the new layer still appears in the list of layers from conf/bblayers.conf


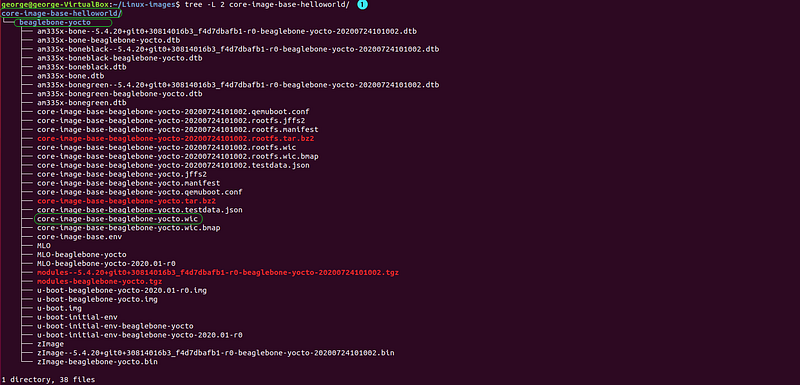
Step 9. Locate the package in the package build
Working directory constructed here:
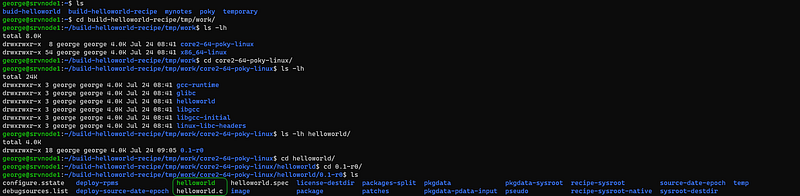
Installation packages directory constructed here:

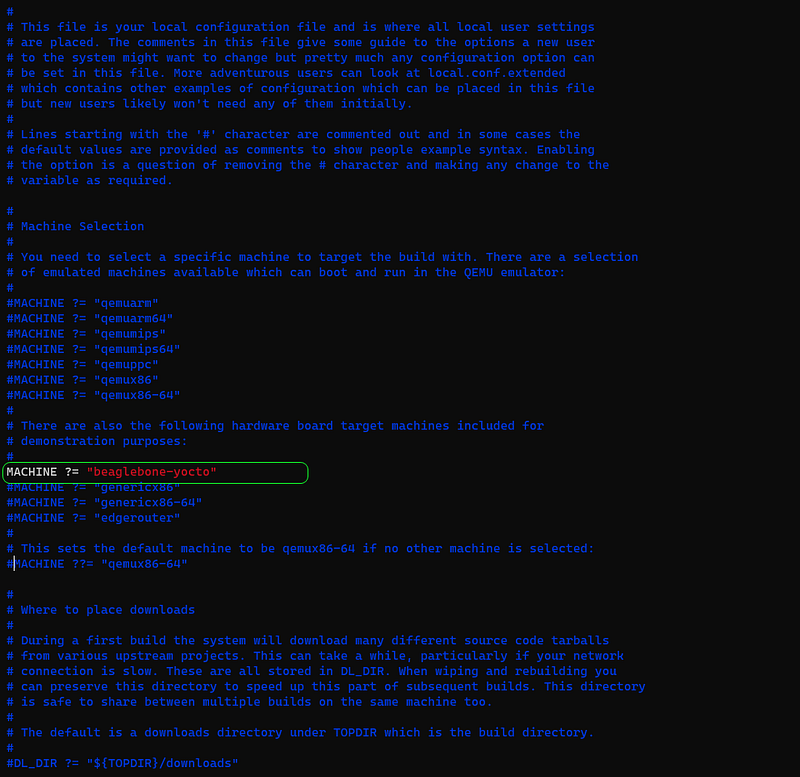
Step 10. Add package to conf/local.conf in variable IMAGE_INSTALL and set the details for next image
The list of packages to be installed in the image is stored in the variable IMAGE_INSTALL.

Step 11. Build the image that includes the package
The package will be added to any image that you bitbake.

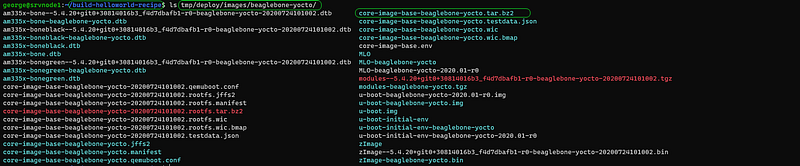
Step 12. Locate the package in the new Linux image you have just built

Step 13. Deploy image to target machine and verify if helloworld-c program exists and functions
Make a new directory to store the image files


Check for configuration of devices to get the drive of the microSD card


Step 13.1 Write Linux Image to micro SD card

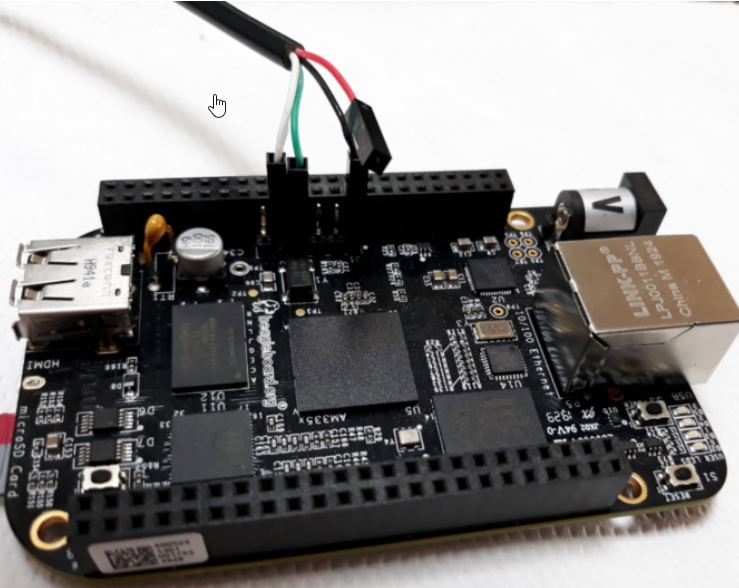
Step 13.2 Beaglebone Black target machine
Connect USB-to-TTL cable
Set up Putty for connection

Note: my serial cable connects via COM5, you might have a different port on your machine and this PuTTY config might not work.
Check the following tutorial for setting up the USB-to-Serial TTL connection with BeagleBone Black.
Power on your BeagleBone Black
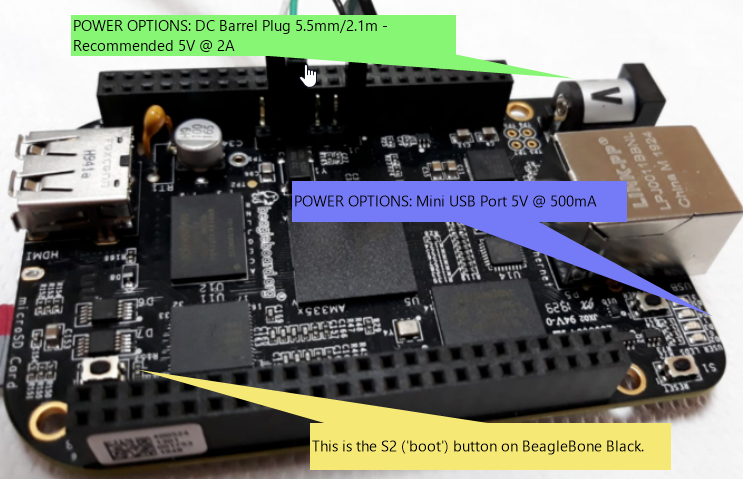
- Press S2 (‘boot’) button
- Apply power (either using the DC Barrel Plug 5.5mm/2.1m -Recommended 5V @ 2A or through the Mini USB Port 5V @ 500mA)
- Wait 2s before release S2 (‘boot’) button
Beaglebone Black boots with the new Linux Image. Verify if helloworld package has been added to the image and if you can access it.


