How to Connect BeagleBone Black Development Board to PC Using USB-to-TTL Serial Cable
Introduction
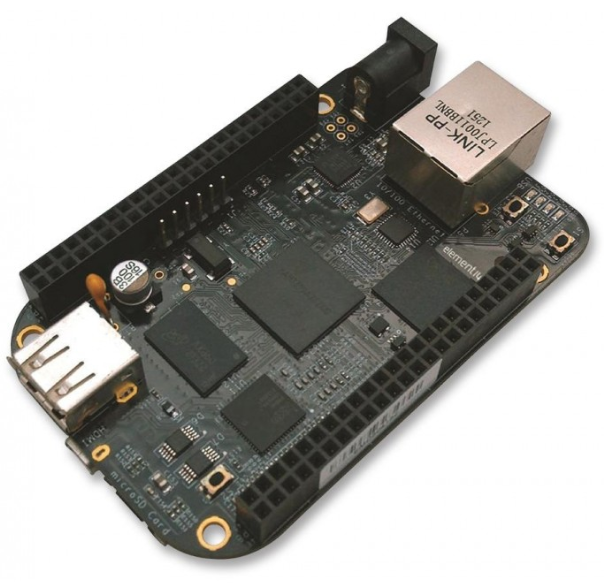
BeagleBone Black is an excellent board for starting your practice in embedded development. This will likely extend as an invitation into a long, but rewarding adventure.
BeagleBone Black is simple to configure, easy to use and gives you lots of possibilities for trying out. Along the way, it provides you with the much needed sense of progress.
Problem with starting over as a newbie in embedded world, there is an ocean filled with pieces of information available out there on the world wide web, but each and every piece of information is cryptic . I got myself in this position, as I am switching from C# and .NET.
Masters of embedded trade tend to forget that themselves were beginners at some moment, and they keep on pouring the jargon within most of the tutorials, as if you were knowing half of the question you already asked.
This is where my posts will try to help you. At some point we all are beginners in something, and we should not forget that knowledge builds up with patience and linearity.
I will help you figure out the much needed linearity to build knowledge in areas, where I had the same problems as a beginner.
Note to self: Behind every specialist there was a courageous beginner.
Connect BB with PC via USB-to-Serial TTL
There are multiple possibilities to connect the PC with the BeagleBone, in this tutorial I shall present the manner of interacting via a USB-to-Serial TTL cable.
Bill of Materials:
- 4 Pin PL2303 USB-to-TTL cable
- PuTTY application (for Windows) or
- Picomon application (for Linux)
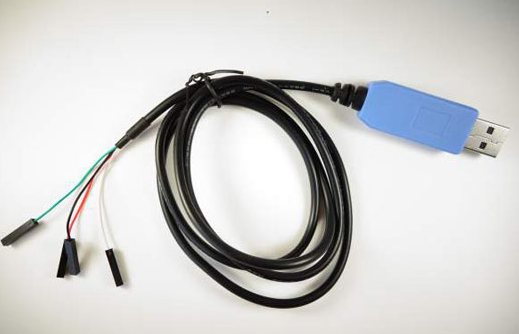
Particular wires explained:

Step 1: Connect the USB side of the TTL cable to your computer
Step 2: Connect the wires to the J1 headers on your BeagleBone Black
- Black wire to Pin 1
- Green wire to Pin 4
- White wire to Pin 5
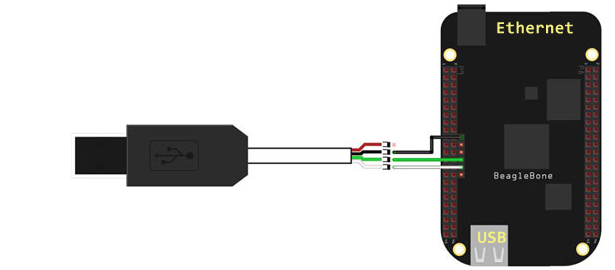
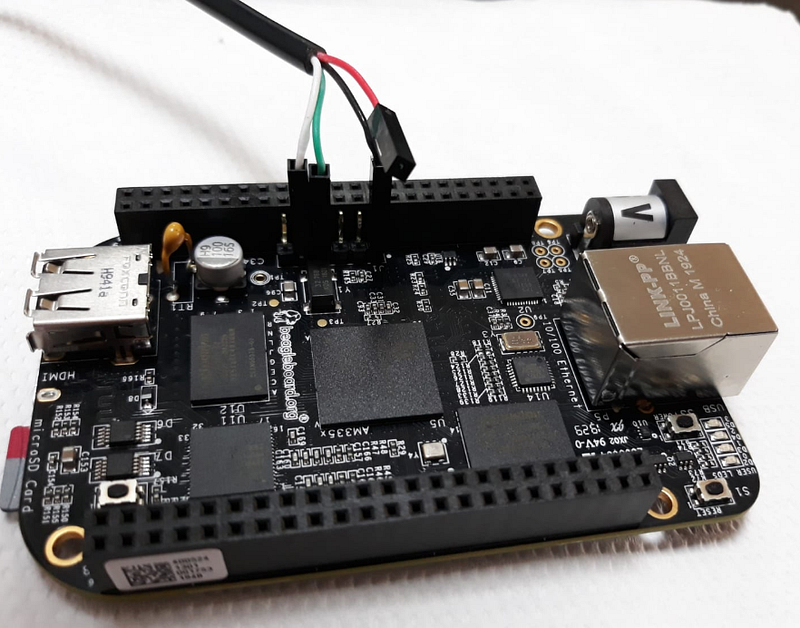
Step 3: Establish serial communication with BeagleBone Black
Windows Operating System: use PuTTY (or equivalent, I shall explain how to do it with PuTTY)
Linux Operating System: use Picomon (or equivalent, I shall explained how to do it with Picomon)
How to set up Putty to connect with BeagleBone Black
Download and install PuTTY from https://www.putty.org/
Open PuTTY
1. In the PuTTY Configuration dialog box, select Serial.
2. Type 115200 in the Speed field.
Get the name of the serial port used by the PC for communication
- Open Windows Device Manager : Press Windows+R, type devmgmt.msc, and press Enter.
- Get the name of the port: The name of your BeagleBone’s serial port is listed below Ports.
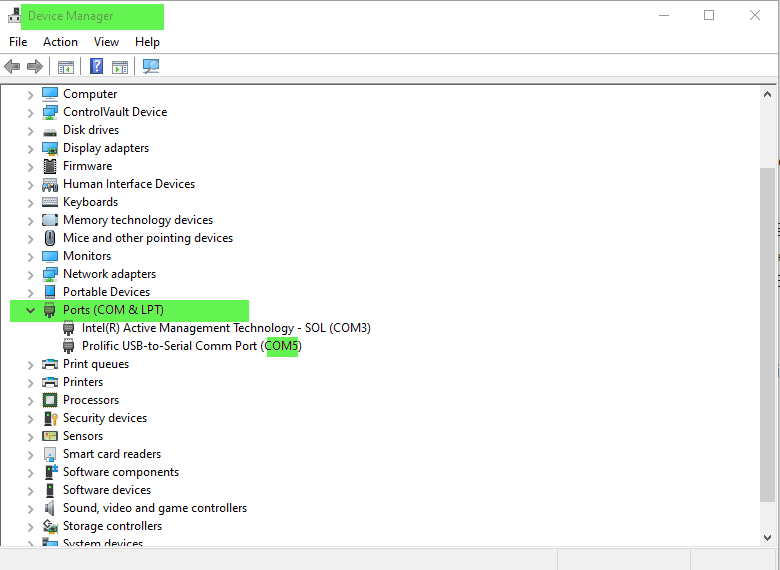
3. Type the name of your BeagleBone Black’s serial port.”COM?”
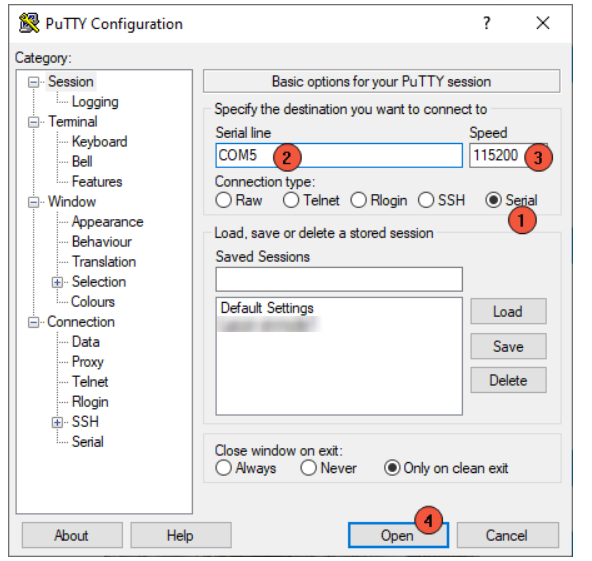
4. Eventually, save session’s settings for later use.
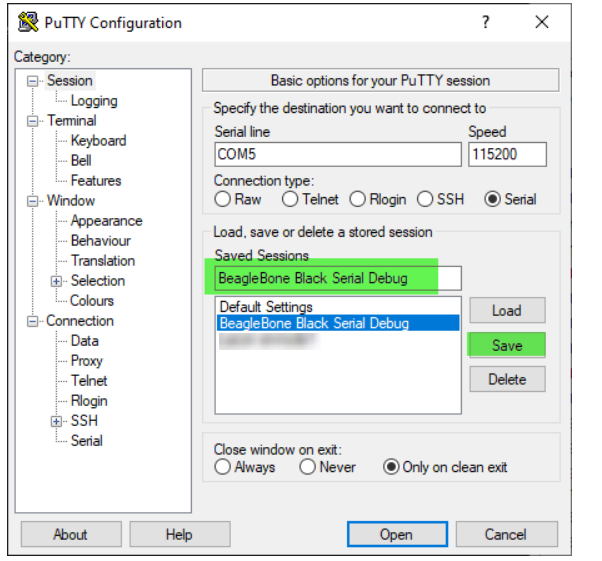
Click on “Open” to start serial connection with PuTTY.
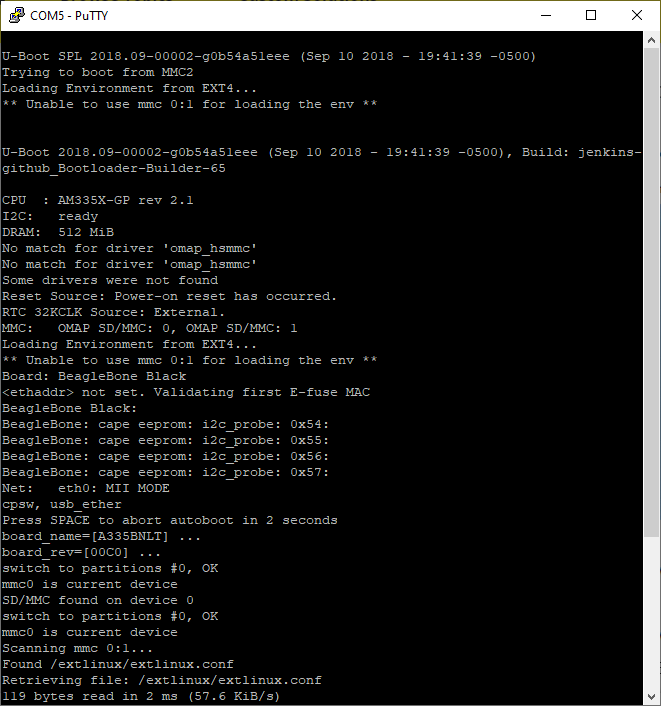
How to set up Picomon to connect with BeagleBone Black
Install picomon tool
sudo apt install picomon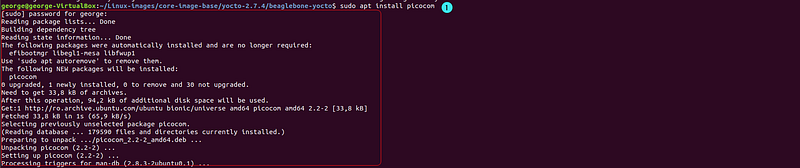
Mount Serial Device
Note: Screenshots from my machine Linux set up with an OracleVM (Virtual Machine) Virtualbox
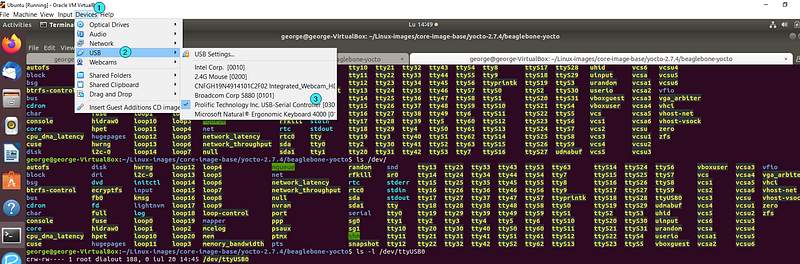
List all devices in the root file system , under /dev/

/dev/ttyUSB0represents the serial device
Only root and users belonging to the dialout group have read and write access to this file. Therefore, you need to add your user to the dialout group: sudo adduser $USER dialout

Lauch picomon command
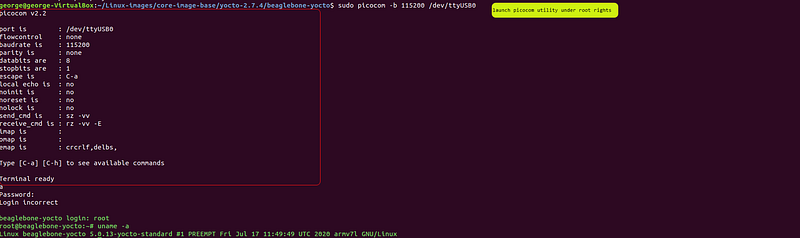
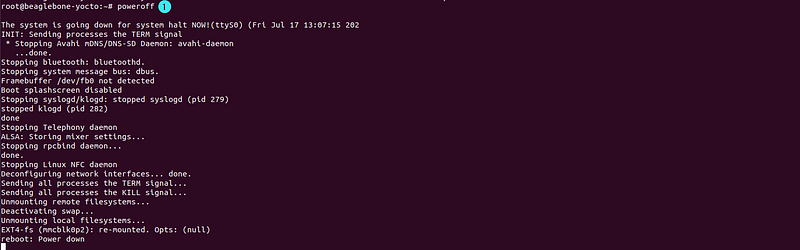
Switch off BeagleBone Black by serial command
use
poweroff