

How to Get the Latest OS Image in Oracle Cloud Infrastructure (OCI) using Terraform
When we need to deploy a virtual machine or bare metal instance in OCI, we will need to get the OCID of the image based on the OCI region and operating system version.
We can achieve this by visiting https://docs.cloud.oracle.com/iaas/images/ page and browse for our preferred operating system.
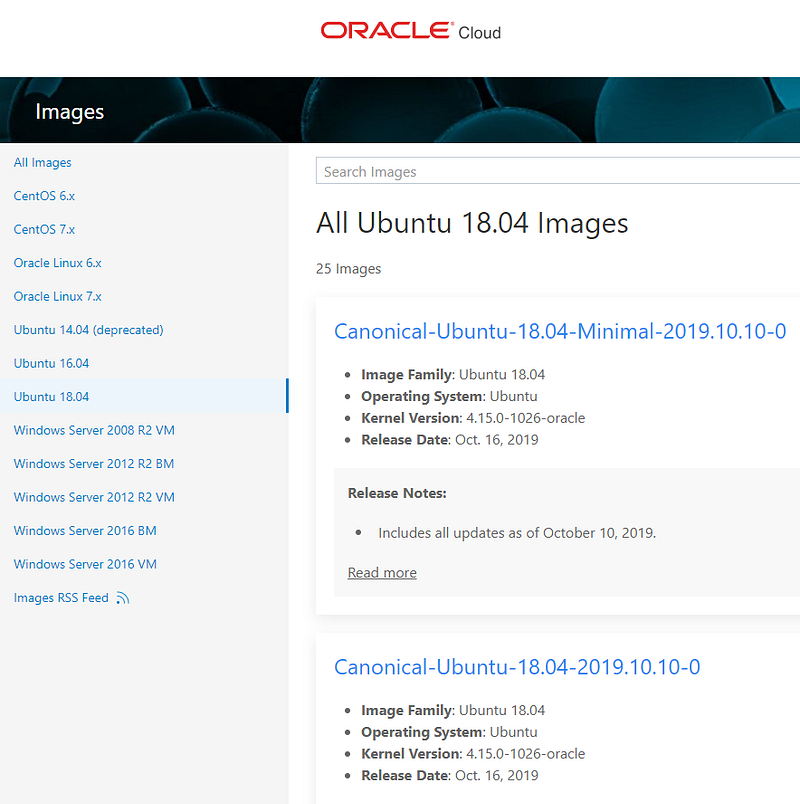
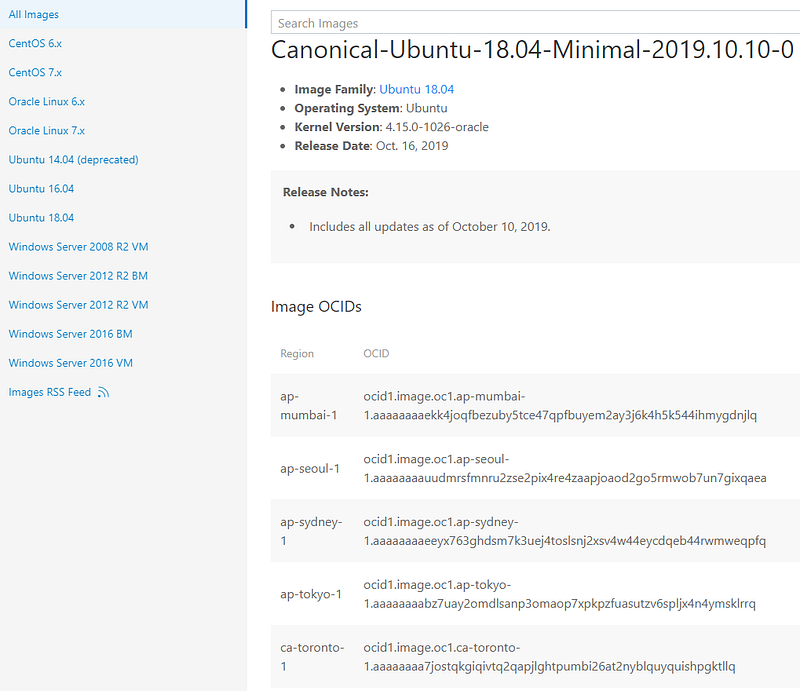
Then we click on the name of the image to select the right OCID of the image for our region:
Fortunately, there is a simple and better way to do it with Terraform and it involves the use of Data Source: oci_core_images.
This data source provides the list of images in Oracle Cloud Infrastructure Core service, both public and private. Note, that not all OCID listed in the web site listed above are available using this data source.
If you want to check the list of OCID available run the following OCI CLI command:
oci compute image list --all --output table --compartment-id=ocid1.tenancy.oc1..aaaaaaaazfqk2s2eh6ryevficafuy
widcxlal34snoocovitbwnzdjfd67w9
If you need help to install and configure OCI CLI please read this post → https://readmedium.com/how-to-configure-oracle-oci-cli-in-5-minutes-a52bbf5d6d51
1. Requirements:
We will need to generate the private key & fingerprint and copy the tenancy_ocid & user_ocid from the console to configure the OCI Provider.
The process is described in detail in the following link: https://docs.cloud.oracle.com/iaas/Content/API/Concepts/apisigningkey.htm
Also, we will need the Compartment ID. In the Oracle Cloud console, click on the main menu, then the Identity menu and finally the Compartment menu.
Select an existing or create a new Compartment, then copy the OCID of the Compartment.
2. Configure the OCI provider
The first step is setting up the Terraform provider. The OCI provider looks like this:
provider "oci" {
  tenancy_ocid = "${var.oci_tenancy}"
  user_ocid = "${var.oci_user}"
  fingerprint = "${var.oci_fingerprint}"
  private_key_path = "${var.oci_key}"
  region = "${var.oci_region}"
}
After we have the credentials ready, we will create the variables.tf file:
variable "oci_tenancy" {
  type = string
  description = "Oracle Cloud Identifier tenancy"
}
variable "oci_user" {
type = string
description = "Oracle Cloud Identifier user"
}variable "oci_fingerprint" {
type = string
description = "Oracle Cloud Fingerprint for the key pair"
}variable "oci_key" {
type = string
description = "Oracle Cloud key"
}variable "oci_region" {
type = string
description = "Oracle Cloud region"
}variable "oci_compartment" {
type = string
description = "Oracle Cloud Compartment"
}Finally, create a file terraform.tfvars with your OCI settings.
oci_tenancy = "ocid1.tenancy.oc1..aaaaaaaazfqk2x2bhy3yeuailoiuywiocx
l7l347no7covitbs3zlj7t6twa"
oci_user = "ocid1.user.oc1..aaaaaaaab2dgf5dg6tbgzbvujhh8qgera5hjdref
9skmon5ynrjlvhqtdfja"oci_fingerprint = "cf:65:39:30:ef:7b:c3:30:07:b2:d5:77:b4:j3:f8:1d"oci_key = "../oci/oci_api_key.pem"oci_region = "uk-london-1"oci_compartment = "ocid1.tenancy.oc1..aaaaaaaazfqk2s2eh6ryevficafuy
widcxlal34snoocovitbwnzdjfd67w9"3. Get the Latest OCID for Oracle Linux 7.7
Create a file called oracle-linux-7–7-oci-images.tf and add the following code to get the latest Oracle Linux 7.7:
# get latest Oracle Linux 7.7 image
data "oci_core_images" "oraclelinux-7-7" {
  compartment_id = var.oci_compartment
  operating_system = "Oracle Linux"
  operating_system_version = "7.7"
  filter {
    name = "display_name"
    values = ["^([a-zA-z]+)-([a-zA-z]+)-([\\.0-9]+)-([\\.0-9-]+)$"]
    regex = true
  }
}
output "oracle-linux-7-7-latest-name" {
value = data.oci_core_images.oraclelinux-7-7.images.0.display_name
}output "oracle-linux-7-7-latest-id" {
value = data.oci_core_images.oraclelinux-7-7.images.0.id
}Then, we will add the following code to get the latest instance with GPU to the same file:
# get latest Oracle Linux 7.7 with GPU image
data "oci_core_images" "oraclelinux-7-7-gpu" {
  compartment_id = var.oci_compartment
  operating_system = "Oracle Linux"
  operating_system_version = "7.7"
  filter {
    name = "display_name"
    values = ["^.*-GPU-.*$"]
    regex  = true
  }
}
output "oracle-linux-7-7-gpu-latest-name" {
value = data.oci_core_images.oraclelinux-7-7-gpu.images.0.
display_name
}output "oracle-linux-7-7-gpu-latest-id" {
value = data.oci_core_images.oraclelinux-7-7-gpu.images.0.id
}4. Get the Latest OCID for CentOS 7
Create a file called centos–7-oci-images.tf and add the following code:
# get latest CentOS 7 image
data "oci_core_images" "centos-7" {
  compartment_id = var.oci_compartment
  operating_system = "CentOS"
  operating_system_version = "7"
  sort_by = "TIMECREATED"
  sort_order = "DESC"
}
output "centos-7-latest-name" {
value = data.oci_core_images.centos-7.images.0.display_name
}output "centos-7-latest-id" {
value = data.oci_core_images.centos-7.images.0.id
}5. Get the Latest OCID for Ubuntu 16.04
Create a file called ubuntu–1604-oci-images.tf and add the following code to get the latest Ubuntu 16.04 instance:
# get latest Ubuntu Linux 16.04 image
data "oci_core_images" "ubuntu-16-04" {
  compartment_id = var.oci_compartment
  operating_system = "Canonical Ubuntu"
  filter {
    name = "display_name"
    values = ["^Canonical-Ubuntu-16.04-([\\.0-9-]+)$"]
    regex = true
  }
}
output "ubuntu-16-04-latest-name" {
value = data.oci_core_images.ubuntu-16-04.images.0.display_name
}output "ubuntu-16-04-latest-id" {
value = data.oci_core_images.ubuntu-16-04.images.0.id
}Then, we will add the code to get the latest Ubuntu Minimal 16.04 instance:
# get latest Ubuntu Linux 16.04 Minimal image
data "oci_core_images" "ubuntu-16-04-minimal" {
  compartment_id = var.oci_compartment
  operating_system = "Canonical Ubuntu"
  filter {
    name = "display_name"
    values = ["^Canonical-Ubuntu-16.04-Minimal-([\\.0-9-]+)$"]
    regex  = true
  }
}
output "ubuntu-16-04-minimal-latest-name" {
value = data.oci_core_images.ubuntu-16-04-minimal.images.0.
display_name
}output "ubuntu-16-04-minimal-latest-id" {
value = data.oci_core_images.ubuntu-16-04-minimal.images.0.id
}Finally, we will add the code to get the GPU instance of Ubuntu 16.04:
# get latest Ubuntu Linux 16.04 GPU image
data "oci_core_images" "ubuntu-16-04-gpu" {
  compartment_id = var.oci_compartment
  operating_system = "Canonical Ubuntu"
  operating_system_version = "16.04"
  filter {
    name = "display_name"
    values = ["^.*-GPU-.*$"]
    regex  = true
  }
}
output "ubuntu-16_04-gpu-latest-name" {
value = data.oci_core_images.ubuntu-16-04-gpu.images.0.
display_name
}output "ubuntu-16_04-gpu-latest-id" {
value = data.oci_core_images.ubuntu-16-04-gpu.images.0.id
}6. Get the Latest OCID for Ubuntu 18.04
Create a file called ubuntu–1804-oci-images.tf and add the following code to get the latest Ubuntu 18.04 instance:
# get latest Ubuntu Linux 18.04 image
data "oci_core_images" "ubuntu-18-04" {
  compartment_id = var.oci_compartment
  operating_system = "Canonical Ubuntu"
  filter {
    name = "display_name"
    values = ["^Canonical-Ubuntu-18.04-([\\.0-9-]+)$"]
    regex = true
  }
}
output "ubuntu-18-04-latest-name" {
value = data.oci_core_images.ubuntu-18-04.images.0.display_name
}output "ubuntu-18-04-latest-id" {
value = data.oci_core_images.ubuntu-18-04.images.0.id
}After that, we will add the code to get the latest Ubuntu Minimal 18.04 instance:
# get latest Ubuntu Linux 18.04 Minimal image
data "oci_core_images" "ubuntu-18-04-minimal" {
  compartment_id = var.oci_compartment
  operating_system = "Canonical Ubuntu"
  filter {
    name = "display_name"
    values = ["^Canonical-Ubuntu-18.04-Minimal-([\\.0-9-]+)$"]
    regex  = true
  }
}
output "ubuntu-18-04-minimal-latest-name" {
value = data.oci_core_images.ubuntu-18-04-minimal.images.0.
display_name
}output "ubuntu-16-04-minimal-latest-id" {
value = data.oci_core_images.ubuntu-18-04-minimal.images.0.id
}7. Get the Latest OCID for Windows Server 2012 R2
Create a file called windows-2012-oci-images.tf and add the following code to get the latest Windows Server 2012 R2 virtual machine instance:
# get latest Windows Server 2012 R2 Virtual Machine image
data "oci_core_images" "windows-2012-vm" {
  compartment_id = var.oci_compartment
  operating_system = "Windows"
  filter {
    name = "display_name"
    values = ["^Windows-Server-2012-R2-Standard-Edition-VM-Gen2-
      ([\\.0-9-]+)$"]
    regex  = true
  }
}
output "windows-2012-latest-vm-name" {
value = data.oci_core_images.windows-2012-vm.images.0.display_name
}output "windows-2012-latest-vm-id" {
value = data.oci_core_images.windows-2012-vm.images.0.id
}Then, we will add the code to get the latest Windows Server 2012 R2 bare metal instance:
# get latest Windows 2012 Bare Metal image
data "oci_core_images" "windows-2012-bm" {
  compartment_id = var.oci_compartment
  operating_system = "Windows"
  filter {
    name = "display_name"
    values = ["^Windows-Server-2012-R2-Datacenter-Edition-BM-Gen2-
      ([\\.0-9-]+)$"]
    regex  = true
  }
}
output "windows-2012-latest-bm-name" {
value = data.oci_core_images.windows-2012-bm.images.0.display_name
}output "windows-2012-latest-bm-id" {
value = data.oci_core_images.windows-2012-bm.images.0.id
}Finally, we will add the code to get the Windows Server 2012 R2 bare metal Dense I/O:
# get latest Windows 2012 Bare Metal Dense I/O image
data "oci_core_images" "windows-2012-bm-denseio" {
  compartment_id = var.oci_compartment
  operating_system = "Windows"
  filter {
    name = "display_name"
    values = ["^Windows-Server-2012-R2-Datacenter-Edition-BM-Gen2-
      DenseIO-([\\.0-9-]+)$"]
    regex  = true
  }
}
output "windows-2012-latest-bm-denseio-name" {
value = data.oci_core_images.windows-2012-bm-denseio.images.0.
display_name
}output "windows-2012-latest-bm-denseio-id" {
value = data.oci_core_images.windows-2012-bm-denseio.images.0.id
}8. Get the Latest OCID for Windows Server 2016 R2
Create a file called windows-2016-oci-images.tf and add the following code to get the latest Windows Server 2016 R2 virtual machine instance:
# get latest Windows Server 2016 Virtual Machine image
data "oci_core_images" "windows-2016-vm" {
  compartment_id = var.oci_compartment
  operating_system = "Windows"
  filter {
    name = "display_name"
    values = ["^Windows-Server-2016-Standard-Edition-VM-Gen2-
      ([\\.0-9-]+)$"]
    regex  = true
  }
}
output "windows-2016-latest-vm-name" {
value = data.oci_core_images.windows-2016-vm.images.0.display_name
}output "windows-2016-latest-vm-id" {
value = data.oci_core_images.windows-2016-vm.images.0.id
}Then, we will add the code to get the latest Windows Server 2016 bare metal instance:
# get latest Windows 2016 Bare Metal image
data "oci_core_images" "windows-2016-bm" {
  compartment_id = var.oci_compartment
  operating_system = "Windows"
  filter {
    name = "display_name"
    values = ["^Windows-Server-2016-Datacenter-Edition-BM-Gen2-
      ([\\.0-9-]+)$"]
    regex  = true
  }
}
output "windows-2016-latest-bm-name" {
value = data.oci_core_images.windows-2016-bm.images.0.display_name
}output "windows-2012-latest-bm-id" {
value = data.oci_core_images.windows-2016-bm.images.0.id
}Finally, we will add the code to get the Windows Server 2016 bare metal Dense I/O:
# get latest Windows 2016 Bare Metal Dense I/O image
data "oci_core_images" "windows-2016-bm-denseio" {
  compartment_id = var.oci_compartment
  operating_system = "Windows"
  filter {
    name = "display_name"
    values = ["^Windows-Server-2016-Datacenter-Edition-BM-Gen2-
      DenseIO-([\\.0-9-]+)$"]
    regex  = true
  }
}
output "windows-2016-latest-bm-denseio-name" {
value = data.oci_core_images.windows-2016-bm-denseio.images.0.
display_name
}output "windows-2016-latest-bm-denseio-id" {
value = data.oci_core_images.windows-2016-bm-denseio.images.0.id
}9. Run the Terraform script
Clone my GitHub repository:
git clone https://github.com/guillermo-musumeci/terraform-oci-os-images.gitInitialize the Terraform provider:
terraform initExecute the Terraform script:
terraform apply -auto-approve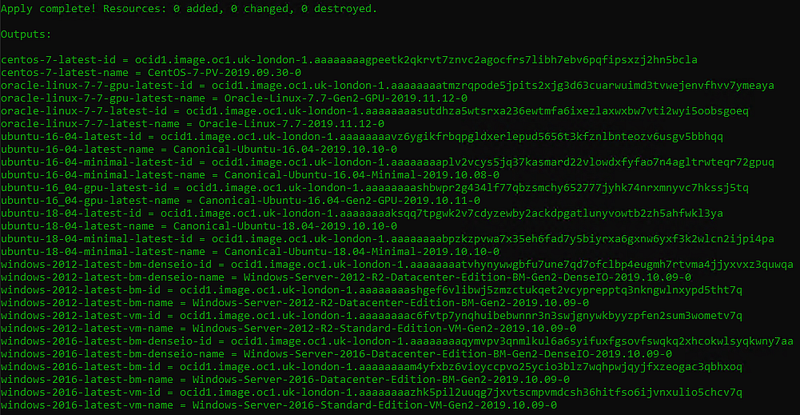
Final Note: Oracle recommends to hardcore the OCID of images for production deployments to use the same image every time you execute the Terraform Apply command.
To ensure this, specify the image OCID directly, rather than locating it using the oci_core_image data source.
This is because the oci_core_image data source calls into the ListImages API, whose return values can change over time as new images are periodically added and older ones deleted.
For example, Oracle Linux 7.6 and previous versions images are listed on the images web site but they are not available using oci_core_images data source.
Thank you for reading!


