avatarProto Bioengineering

Free AI web copilot to create summaries, insights and extended knowledge, download it at here

4118

Abstract

e, then in every Python file want to use Bleak in, we write <code>import bleak</code> (more details on this later).</p><p id="8ec6">To install Bleak, we have to use <a href="https://realpython.com/what-is-pip/">Pip, the package manager for Python</a>. We can use Pip to install Bleak with one line in <a href="https://support.apple.com/guide/terminal/open-or-quit-terminal-apd5265185d-f365-44cb-8b09-71a064a42125/mac">Terminal</a>:</p><div id="95ac"><pre>pip install bleak</pre></div><p id="14bc">Pip comes built-in with Python 3, so you shouldn’t have to install anything to use it.</p><p id="e0db">To check if you have Pip, <a href="https://support.apple.com/guide/terminal/open-or-quit-terminal-apd5265185d-f365-44cb-8b09-71a064a42125/mac">open Terminal on your Mac</a> and type <code>pip</code>. Press <i>Enter</i>. If it’s installed, you’ll see a help menu print out.</p><figure id="35d6"><img src="https://cdn-images-1.readmedium.com/v2/resize:fit:800/1*gEUSQu3ra5xE0I7SdbCx6g.png"><figcaption>We type pip on the first line after the %. Pip will print out a help menu if it’s installed.</figcaption></figure><p id="930e">If have Python 3 but not Pip for some reason, go to <a href="https://pip.pypa.io/en/stable/installation/">Pip’s official installation page</a>.</p><p id="feb8">If you don’t have Python 3, <a href="https://www.python.org/downloads/">install it here</a>. It will come with Pip.</p><h1 id="5691">Importing Bleak</h1><p id="a2cd">How do we use Bleak after it is installed? Does Python just know where it is?</p><p id="c3d8">Python has to be told what Bleak is in <b>every Python file that we want to use Bleak in</b>. We’ll only have one Python file for this scanner project, so we’ll import Bleak once at the top of the file.</p><div id="90ec"><pre><span class="hljs-meta"># scanner.py</span>

<span class="hljs-keyword">import</span> bleak</pre></div><p id="4c2d">Now, we can use Bleak in the rest of our code. For example, we can call <code>bleak.BleakScanner()</code> to create the first part of our scanner, which we’ll cover in a minute.</p><p id="194f"><b>An alternative way to </b><code>import</code><b> Bleak</b> is to import specific classes from Bleak, like so:</p><div id="881e"><pre><span class="hljs-keyword">from</span> bleak <span class="hljs-keyword">import</span> BleakClient <span class="hljs-comment"># OR</span> <span class="hljs-keyword">from</span> bleak <span class="hljs-keyword">import</span> BleakScanner</pre></div><p id="14a1">This is more specific (and makes for cleaner, faster code). We’ll end up using both <code>BleakClient</code> and <code>BleakScanner</code> to make our scanner.</p><h1 id="e4c0">The Most Basic Bluetooth Scanner</h1><p id="09d8">The main pieces of a simple Bluetooth scanner are:</p><ul><li>scanning for nearby devices</li><li><code>print</code>ing them to the screen</li></ul><p id="3caa">That’s most of what we have to worry about, thanks to Bleak taking care of the rest. <b>All we have to write is:</b></p><div id="00ac"><pre><span class="hljs-comment"># scanner.py</span>

<span class="hljs-keyword">import</span> asyncio <span class="hljs-keyword">from</span> bleak <span class="hljs-keyword">import</span> BleakScanner

<span class="hljs-keyword">async</span> <span class="hljs-keyword">def</span> <span class="hljs-title function_">main</span>(): devices = <span class="hljs-keyword">await</span> BleakScanner.discover() <span class="hljs-keyword">for</span> device <span class="hljs-keyword">in</span> devices: <span class="hljs-built_in">print</span>(device)

asyncio.run(main())</pre></div><p id="d47a">There are some <b>extra statements in there</b> (<code>async</code> and <code>await</code>) <b>that are necessary for Bleak</b> due to the nature of wireless communication. We’ll cover this more below.</p><p id="d49f">For now, the code above starts <code>BleakScanner</code>, spends 5–10 seconds finding devices, then prints them all to your screen.</p><figure id="9bcd"><img src="https://cdn-images-1.readmedium.com/v2/resize:fit:800/1*1BDT3i8WFKTRbSlDsEIFaw.png"><figcaption>The output of scanner.py, wh

Options

ich shows UUIDs and names for all nearby Bluetooth LE devices.</figcaption></figure><h1 id="7590">Why We Need to Use Asyncio</h1><p id="e63e">Usually, code runs from top to bottom, one line after the other. But what about code where we need to send a wireless message to a Bluetooth device and then we don’t know when we’ll hear back from that device? <b>We can’t make our code pause and wait indefinitely, so what do we do?</b></p><p id="ec69">We can use <b>asynchronous code</b> to allow our computer to interact with Bluetooth devices without jamming up and stalling our program. In Python, this is done using <a href="https://docs.python.org/3/library/asyncio.html">Asyncio</a>, which is included with Python 3 (unlike Bleak). <a href="https://realpython.com/async-io-python/">A complete guide on Asyncio is available here.</a></p><p id="d24f">Without asyncio, <b>our scanner would look like this (and wouldn’t work)</b>:</p><div id="eb2f"><pre><span class="hljs-comment"># scanner.py without asynchronous code</span>

<span class="hljs-keyword">from</span> bleak <span class="hljs-keyword">import</span> BleakScanner

<span class="hljs-keyword">def</span> <span class="hljs-title function_">main</span>(): devices = BleakScanner.discover() <span class="hljs-keyword">for</span> device <span class="hljs-keyword">in</span> devices: <span class="hljs-built_in">print</span>(device)

main()</pre></div><p id="e376">Instead, we make <code>main()</code> asynchronous and specify that <code>BleakScanner.discover()</code> is going to take a while with <code>await</code>:</p><div id="3814"><pre><span class="hljs-comment"># scanner.py</span>

<span class="hljs-keyword">import</span> asyncio <span class="hljs-keyword">from</span> bleak <span class="hljs-keyword">import</span> BleakScanner

<span class="hljs-keyword">async</span> <span class="hljs-keyword">def</span> <span class="hljs-title function_">main</span>(): devices = <span class="hljs-keyword">await</span> BleakScanner.discover() <span class="hljs-keyword">for</span> device <span class="hljs-keyword">in</span> devices: <span class="hljs-built_in">print</span>(device)

asyncio.run(main())</pre></div><p id="b3ab">Then the code can start <code>BleakScanner.discover()</code> without freaking out if it doesn’t hear anything back immediately.</p><h1 id="09fc">A Better Bluetooth Scanner</h1><p id="d82c">Getting the addresses and names of device is cool and all, but is that all we can do with a scanner?</p><p id="f959"><a href="https://readmedium.com/how-to-make-a-detailed-bluetooth-le-scanner-with-a-macbook-and-python-8e2c7dccfd39"><b>We can do way more</b></a><b>, like asking a device what it is capable of</b> (e.g. measuring heart rate, measuring movement, etc.) and <b>determining how strong the Bluetooth signal is</b> (how close the device is to us), among other things.</p><p id="ddf1"><b>To make a more detailed scanner,</b> check out our other article, <a href="https://readmedium.com/how-to-make-a-detailed-bluetooth-le-scanner-with-a-macbook-and-python-8e2c7dccfd39?postPublishedType=repub">How to Make a Detailed Bluetooth LE Scanner with a MacBook and Python</a>.</p><h1 id="21d9">Questions and Feedback</h1><p id="585e">If you have questions or comments, email us at [email protected] or message us on <a href="http://instagram.com/protobioengineering">Instagram (@protobioengineering)</a>.</p><p id="f2c5">If you liked this article, consider supporting us by <a href="https://ko-fi.com/protobio">donating a coffee</a>.</p><h1 id="a8a2">Our Other Articles</h1><ul><li><a href="https://readmedium.com/how-to-connect-to-a-bluetooth-device-with-a-macbook-and-python-7a14ece6a780">How to Connect to a Bluetooth Device with a MacBook and Python</a></li><li><a href="https://readmedium.com/github-for-biologists-407fab350083?source=your_stories_page-------------------------------------">GitHub for Biologists</a></li><li><a href="https://readmedium.com/how-to-make-colored-country-maps-in-python-tldr-edition-d58147105a8d">How to Make Colored Country Maps in Python</a></li></ul></article></body>

How to Find All Bluetooth LE Devices Near You with a MacBook and Python

Use code to see into the “Internet of Things” matrix.

Photo by Rafal Jedrzejek on Unsplash

TLDR version of this article available here.

If you’re sitting in your living room, chances are you’re surrounded by tech: smart watches, home assistants, smart lightbulbs, smart ovens, and the like. If you don’t, your neighbors have their own dozen or so devices. Did you know that you can use code to find all of them on your computer?

In this tutorial, we’ll write some Python code to look for (AKA “scan” for) all of the Bluetooth LE devices near you. Our end product will be a 20-line piece of code called a “Bluetooth scanner.”

Bluetooth LE (Low Energy) is a lightweight protocol used for most modern “Internet of Things” devices and wearables. If you’ve ever connected your phone to a heart rate monitor, you were probably using Bluetooth LE.

Note: This tutorial excludes finding devices like headphones. These devices actually use “Bluetooth Classic,” which is like Bluetooth LE, but can handle heavier data, like music. Bluetooth LE code does not work with and can’t find Bluetooth Classic devices.

A Windows version of this tutorial is available here as well as a condensed version with code only.

Requirements

  • Mac OS 12.x+
  • Python 3
  • Bleak (a Python Bluetooth LE library)
  • Bluetooth LE devices within 20–100 meters of you

Overall Steps to Making a Scanner

The pieces to this project are going to be:

  1. Installing Bleak, a popular Bluetooth LE library for Python.
  2. Using Bleak’s discover() function to find all nearby Bluetooth LE devices.
  3. Using Bleak to then ask each Bluetooth device more specific info about itself (i.e., what it can do, like capturing heart rates, etc.)

If you’re looking to connect to a single Bluetooth LE device or are looking for more background on how Bluetooth LE works, check out our other article here.

Why We Need “Bleak”

Bleak is a Bluetooth LE library for Python. It handles all of the messy code and logic that is required for Macs to talk to Bluetooth.

Without it, we’d have to write about 1000 lines of code to talk to our Mac’s Bluetooth module. Contrast that with writing 1–2 lines to install and import Bleak into our code, then 10 or so more lines to get it to find Bluetooth devices. You can see Bleak’s underlying code here.

Installing Bleak

To use Bleak, we have to install it then import it into our code. We install it once, then in every Python file want to use Bleak in, we write import bleak (more details on this later).

To install Bleak, we have to use Pip, the package manager for Python. We can use Pip to install Bleak with one line in Terminal:

pip install bleak

Pip comes built-in with Python 3, so you shouldn’t have to install anything to use it.

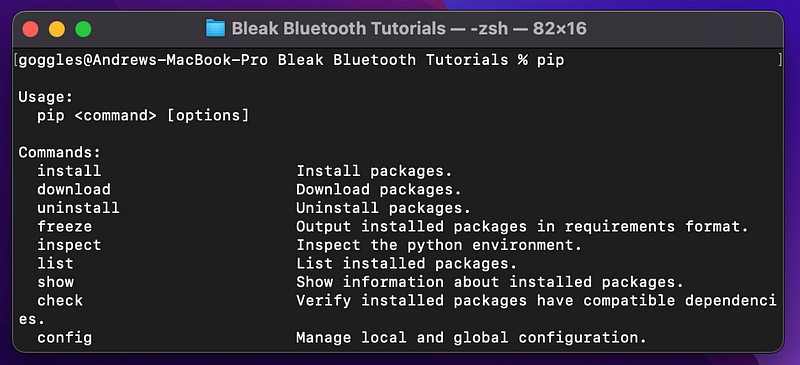
To check if you have Pip, open Terminal on your Mac and type pip. Press Enter. If it’s installed, you’ll see a help menu print out.

We type `pip` on the first line after the `%`. Pip will print out a help menu if it’s installed.

If have Python 3 but not Pip for some reason, go to Pip’s official installation page.

If you don’t have Python 3, install it here. It will come with Pip.

Importing Bleak

How do we use Bleak after it is installed? Does Python just know where it is?

Python has to be told what Bleak is in every Python file that we want to use Bleak in. We’ll only have one Python file for this scanner project, so we’ll import Bleak once at the top of the file.

# scanner.py

import bleak

Now, we can use Bleak in the rest of our code. For example, we can call bleak.BleakScanner() to create the first part of our scanner, which we’ll cover in a minute.

An alternative way to import Bleak is to import specific classes from Bleak, like so:

from bleak import BleakClient
# OR
from bleak import BleakScanner

This is more specific (and makes for cleaner, faster code). We’ll end up using both BleakClient and BleakScanner to make our scanner.

The Most Basic Bluetooth Scanner

The main pieces of a simple Bluetooth scanner are:

  • scanning for nearby devices
  • printing them to the screen

That’s most of what we have to worry about, thanks to Bleak taking care of the rest. All we have to write is:

# scanner.py

import asyncio
from bleak import BleakScanner

async def main():
    devices = await BleakScanner.discover()
    for device in devices:
        print(device)

asyncio.run(main())

There are some extra statements in there (async and await) that are necessary for Bleak due to the nature of wireless communication. We’ll cover this more below.

For now, the code above starts BleakScanner, spends 5–10 seconds finding devices, then prints them all to your screen.

The output of `scanner.py`, which shows UUIDs and names for all nearby Bluetooth LE devices.

Why We Need to Use Asyncio

Usually, code runs from top to bottom, one line after the other. But what about code where we need to send a wireless message to a Bluetooth device and then we don’t know when we’ll hear back from that device? We can’t make our code pause and wait indefinitely, so what do we do?

We can use asynchronous code to allow our computer to interact with Bluetooth devices without jamming up and stalling our program. In Python, this is done using Asyncio, which is included with Python 3 (unlike Bleak). A complete guide on Asyncio is available here.

Without asyncio, our scanner would look like this (and wouldn’t work):

# scanner.py without asynchronous code

from bleak import BleakScanner

def main():
    devices = BleakScanner.discover()
    for device in devices:
        print(device)

main()

Instead, we make main() asynchronous and specify that BleakScanner.discover() is going to take a while with await:

# scanner.py

import asyncio
from bleak import BleakScanner

async def main():
    devices = await BleakScanner.discover()
    for device in devices:
        print(device)

asyncio.run(main())

Then the code can start BleakScanner.discover() without freaking out if it doesn’t hear anything back immediately.

A Better Bluetooth Scanner

Getting the addresses and names of device is cool and all, but is that all we can do with a scanner?

We can do way more, like asking a device what it is capable of (e.g. measuring heart rate, measuring movement, etc.) and determining how strong the Bluetooth signal is (how close the device is to us), among other things.

To make a more detailed scanner, check out our other article, How to Make a Detailed Bluetooth LE Scanner with a MacBook and Python.

Questions and Feedback

If you have questions or comments, email us at [email protected] or message us on Instagram (@protobioengineering).

If you liked this article, consider supporting us by donating a coffee.

Our Other Articles

Python
Bluetooth
IoT
Mac
Wearables
Recommended from ReadMedium