
How To Create Custom Docker Base Images For Azure Machine Learning Environments

With Azure Machine Learning, you can easily submit your training script to various compute targets using an R estimator or a Python one, that wraps run configuration information to specify the details for the execution of a script. During the training, the entire folder containing the training script is copied to the target training cluster. A Docker Base image, which meets the requirements stated in the estimator, is built and becomes the environment on which the training script is executed.
Even if the upon mentioned executor allows you to declare additional CRAN and Github packages, or Conda and PIP packages, to load into the training environment, there may be some features you need for your script that can’t simply be declared using the usual estimator options. Fortunately the estimator also has the option to declare a custom Docker image to use for your environment.
Building a custom Docker image for this purpose isn’t often a task every Data Scientist could perform. So this article would be a simple guide to do that once you have access to an Azure Machine Learning Workspace and you’re working on a Windows based laptop.
Azure Machine Learning Services have a Linux based architecture, so the Docker images have to be Linux based too. If you are a Windows user, you’ll hardly have a Linux installation (maybe an Ubuntu distribution) with data science tools and environments already installed. You can also install for example a Windows Subsystem for Linux and then install all the tools you need on it to do your job. Obviously this solution is time consuming and could present issues during the installation of all the components.
Here the Azure ML Compute Instances come to rescue: they are Linux based virtual machines and already have all the tools installed, including Docker! You only need to take care to enable the SSH access for it.
Create an SSH Enabled Compute Instance
Once you created your Azure ML Workspace and once you’re into the new Azure ML Studio, you can create your Compute Instance as following:
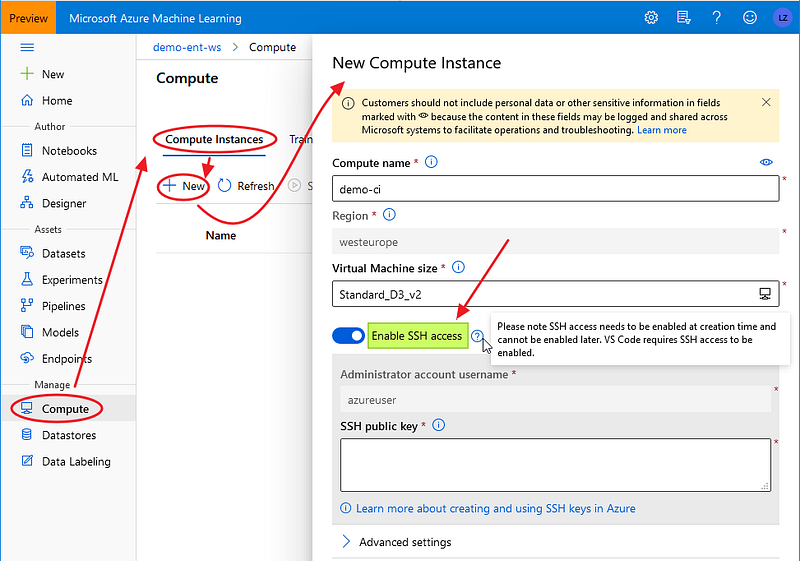
An easy way to generate an SSH public key in Windows is using PuTTYgen. Follow this guide to create an SSH key pair.
You just need to past the public key into the textbox in figure 1 and then click “Create”. After few minutes, your Compute Instance is ready to use:
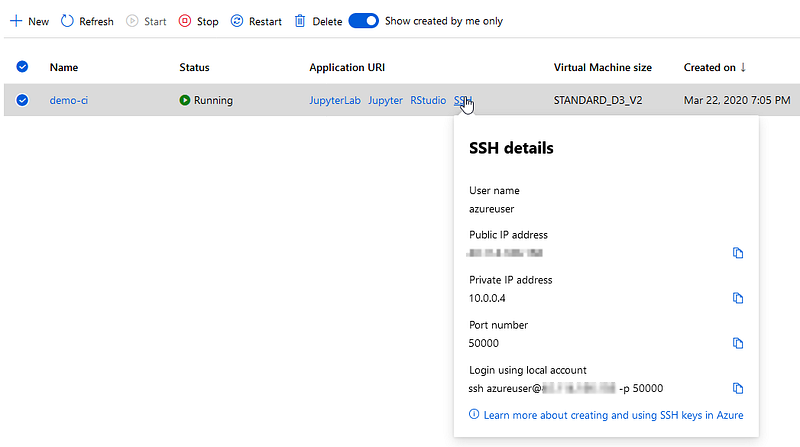
You can start using it clicking on the JupyterLab, Jupyter or RStudio links to start to develop your solution (in Python or R). In our case, we need to access to its command line in order to start building our Docker image. So we need to use PuTTY as mentioned here. After filled the required fields in PuTTY and after loaded the private key in the Auth section as shown here:
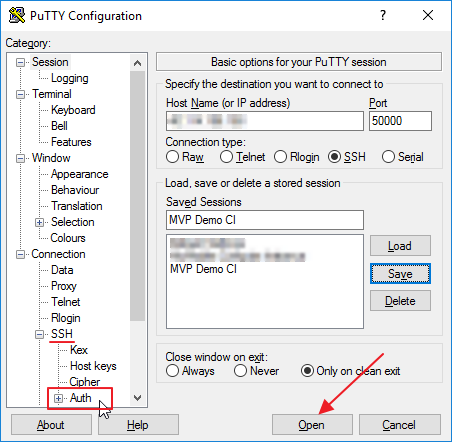
just click Open to start the remote session pointing to your Compute Instance. After clicked on Yes on the PuTTY alert dialog, you’ll prompted to enter the user name. After using the default azureuser user, you’ll also be prompted for the passphrase used in PuTTYgen to create the key pair. After enter it you’ll be in:
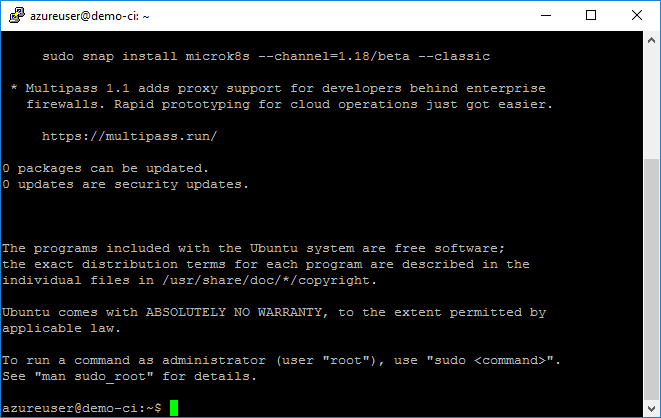
You can also add the default user name azureuser into the data tab, simplifying the login phase for the next time you’ll connect:
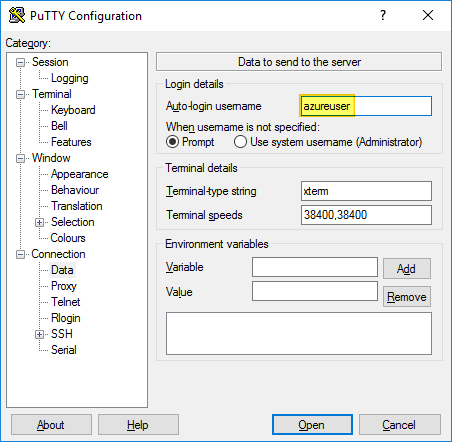
In order to easily reconnect to your Compute Instance, it’s better to save your session using the Save button.
Easily Manage Files Into Your Compute Instance
In order to build a custom Docker image, you need to create a file called Dockerfile. For a Windows user is simpler to create a text file using a GUI and not using VI, for example. So we need a SFTP client to connect to the Compute Instance and to manage files. One of the most used is WinSCP. As always, fill the required fields for a new site and load the private key file in the Advanced options:
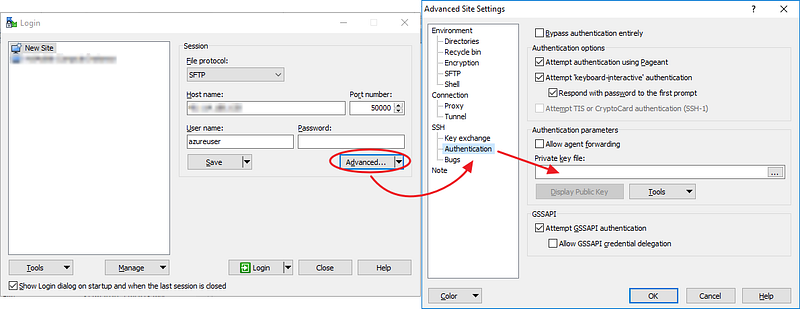
Even in this case, after clicking on Yes in the warning dialog, you’ll be prompted for the key pair passphrase. On the left panel there is your local file system, on the right panel you can see the Home of your Compute Instance:
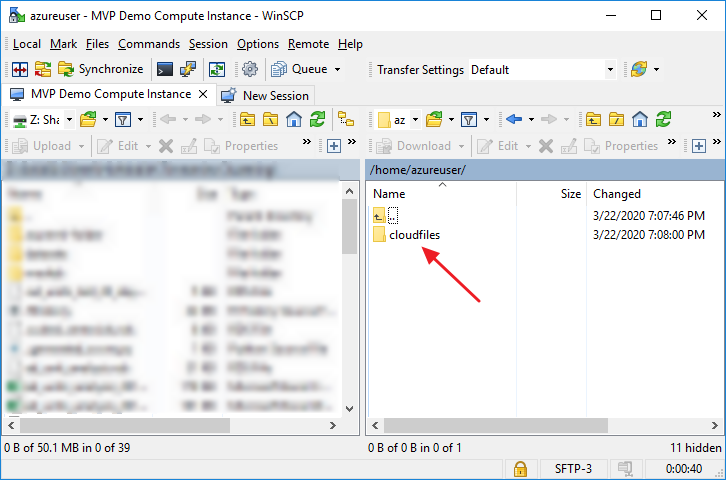
Inside the default “cloudfiles” folder, there is the “code” link that will redirect into a specific “code” folder. After you’ve been set into the code folder, just right-click into the panel and create a new folder, naming it “r-sdk-docker-image”:
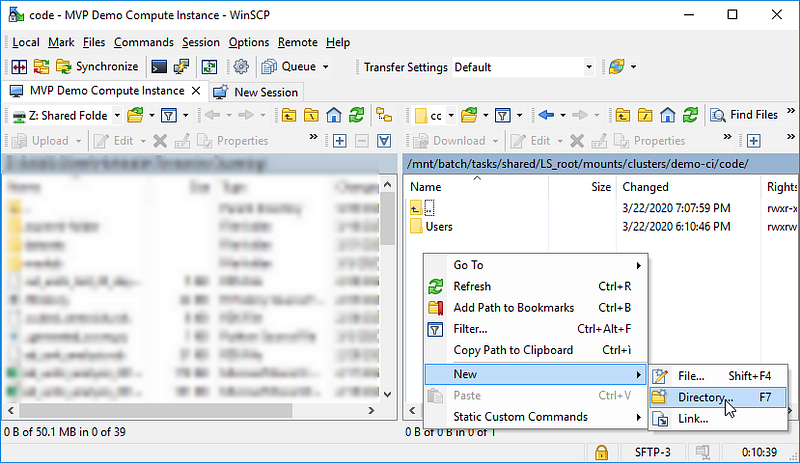
You can now create your Dockerfile file directly into the r-sdk-docker-image folder using the New → File… feature. A simple editor window pops up and there you can past your commands to build your image. In my case, I used the following code (check always the latest version of the Python SDK here; in my example I’m using the version 1.10.0 that could be outdated):
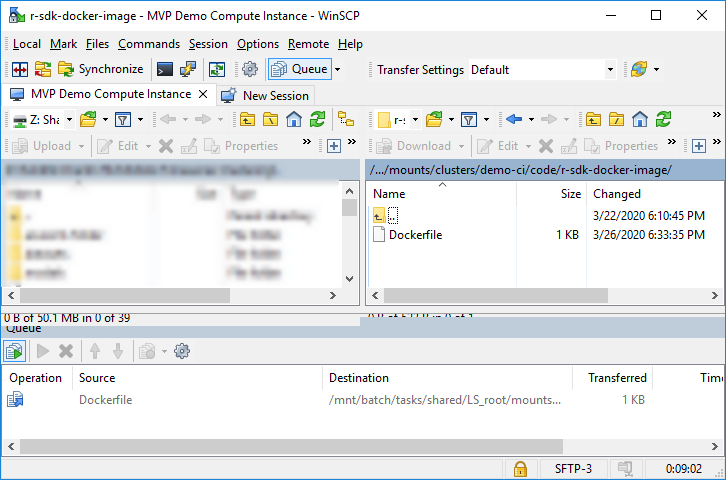
After saving the script, you can see your Dockerfile ready into WinSCP:
Build Your Docker Image With PuTTY
Let’s go back to PuTTY. After opening the previously saved session, you need to change your working directory to the just created r-sdk-docker-image one, using the ls and cd commands:

It’d be a good idea to start reading a beginner’s guide to build Docker images. You can then finally build your docker image named r-sdk-docker-img using the following command:
$ docker build -t azureuser/r-sdk-docker-img .Don’t miss the dot (= current folder, the one containing the Dockerfile file) at the end! After waiting for about 20 minutes, your docker image is ready:

The fastest way to make this image available to a new machine is to push it to Docker Hub. If you try to use your image on a new machine that doesn’t have it yet, Docker will automatically try and download it from Docker Hub. So sign into it and after that you can log into your Docker Hub from PuTTY executing the following command:
$ docker loginSo now you can retag your image using a version number:
$ docker tag azureuser/r-sdk-docker-img <your-docker-hub-username>/r-sdk-docker-img:v1and then push it into your account on Docker Hub:
$ docker push <your-docker-hub-username>/r-sdk-docker-img:v1After that, you can see your image in your Docker Hub account:

Publish Your Image On Azure Container Registry
As you probably already know, when you create a new Azure ML Workspace and then you train or deploy a model using it, an Azure Container Registry for your workspace is created. It registers Docker containers that you use during training and when you deploy a model. When using images stored in the container registry for the workspace, you do not need to authenticate to the registry. Authentication is handled by the workspace.
If you want to use a standalone Azure Container Registry, you will need to configure a service principal that has at least read access. You’ll find more details about interacting with service principals and Azure Machine Learning in my previous post:
To minimize costs, the Workspace’s ACR is lazy-loaded until deployment images are created.
You can easily get the name of your Workspace’s ACR looking at the resources listed under the resource group containing your Workspace into the Azure Portal. In my case:

You can also get its name programmatically using the Azure CLI as shown here.
Once you have the ACR name and a Dockerfile file, you can build your image into the ACR following these steps.
Use Your Custom Docker Image in Azure Machine Learning
Once you have the ACR name (e.g. myacr) and an image named myimage:v1 stored in it, you can reference the image as myacr.azurecr.io/myimage:v1 when using it for model deployment.

In case you’re using an image stored in the Workspace’s Azure Container Registry, or a container registry that is publicly accessible, you can use the following R code to use it into an Environment:
library(azuremlsdk)# Create the environment
myenv <- r_environment( name = "myenv" )# Enable Docker and reference an image
myenv$docker$enabled = TRUEmyenv$docker$base_image = "myacr.azurecr.io/myimage:v1"If you want to use an image from a private container registry that is not in your workspace, you must use docker$base_image_registry to specify the address of the repository and a user name and password:
# Create the environment
myenv <- r_environment( name = "myenv" )
# Enable Docker and reference an image
myenv$docker$enabled <- TRUE
myenv$docker$base_image <- "myimage:v1"# Set the container registry information
myenv$docker$base_image_registry$address <- "myregistry.azurecr.io"
myenv$docker$base_image_registry$username <- "username"
myenv$docker$base_image_registry$password <- "password"You can also specify your custom Dockerfile directly into the Environment. Remember to set the base image to NULL:
# Specify docker steps as a string.
dockerfile <- paste0(
  "FROM mcr.microsoft.com/azureml/base:intelmpi2018.3-ubuntu16.04", "\n",
  "RUN echo \"Hello from custom container!\"" )
# Set base image to None, because the image is defined by dockerfile.
myenv$docker$base_image <- NULL
myenv$docker$base_dockerfile <- dockerfile# Alternatively, load the string from a file.
myenv$docker$base_image <- NULL
myenv$docker$base_dockerfile <- "./Dockerfile"Conclusions
When you transform your data, train a model or deploy a trained model on a remote host, you need to ensure to provide an environment having all the dependencies your code needs. Azure Machine Learning provides a default Docker base image as the starting point when spinning up a compute cluster to do the job.
A Data Scientist usually decides to create a custom base image when he wants to use Docker to manage the code dependencies, to maintain tighter control over component versions, to save time during deployment or share a standardized environment for the team.
This post guided you step by step in creating a Docker base image on a Linux machine even if you are a Windows user. Then common ways to use such an image with the Azure ML R SDK are suggested.


