
How to Convert Your Images To Cartoon Format (Part 2)
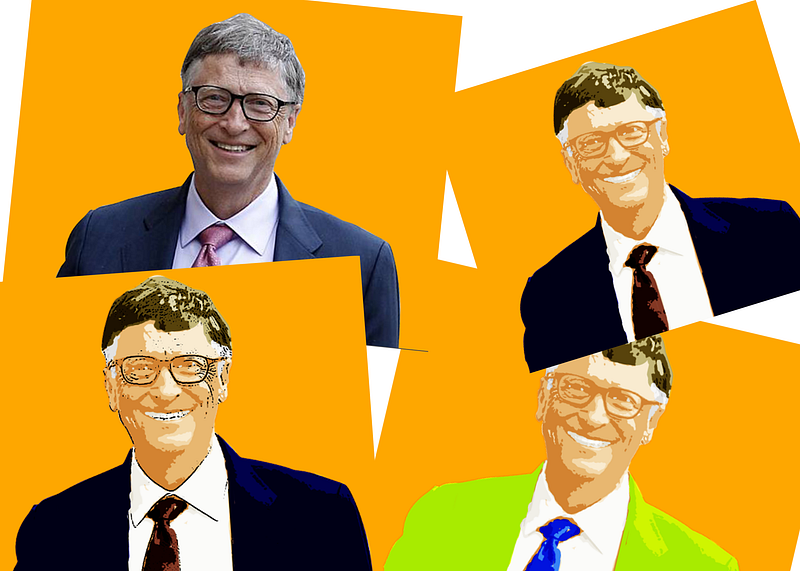
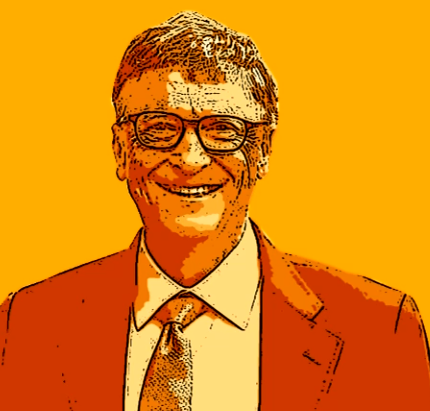
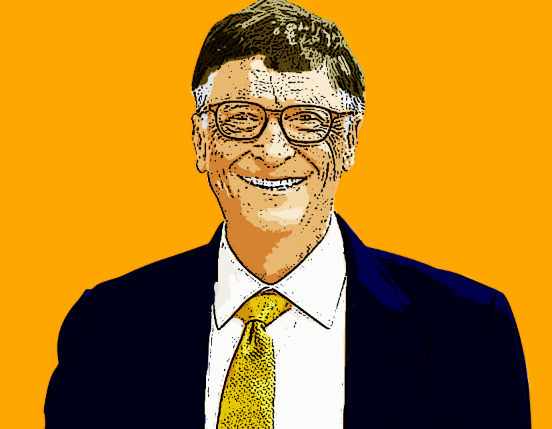
In my last article, we converted this image,

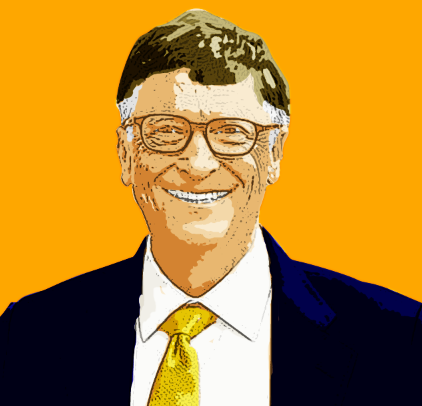
into something like this:
To follow up with this tutorial, check out my previous tutorial session on the conversion of images to cartoon format
Step one
Creating depth and shades
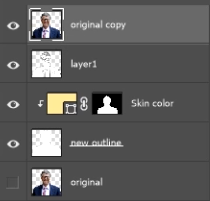
- Make a copy of the ‘original’ image and move it to the top of the layer palette. This can be done by using the command Ctrl + J on the original copy, and then dragging this layer to the top of the palette. After this step, your layers palette should look something like this below.
2. Blur this image: Blur the image using the Gaussian blur, This command is located can be found in the menu under Filter -> Blur -> Gaussian Blur
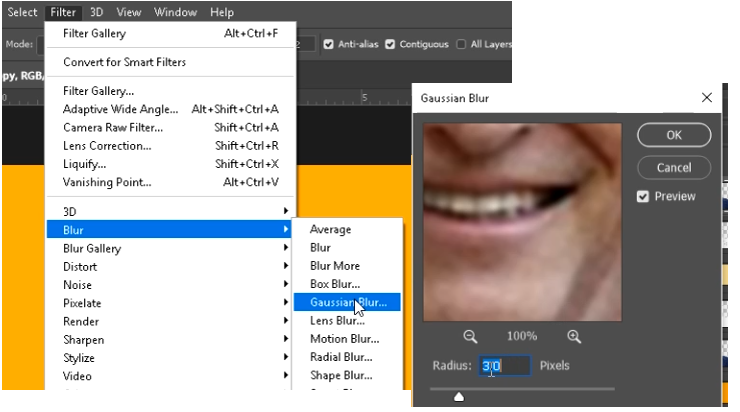
Set the value to around 3.0 this should smoothen the image, blurring some of the details.
Values ranging from 2 to 4 are generally good for this purpose.
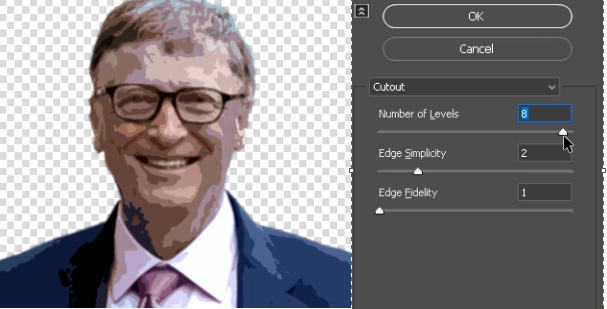
3. Next, Select menu: Filter -> Filter Gallery -> Artistic -> Cutout
Now you would be required to set three values for the edge of simplicity, fidelity and number of levels,
Set the ‘Edge of simplicity’ to 2 , and
Set the ‘Edge of fidelity’ to 1
The Number of levels is usually okay within the range of 5 and 8. You should choose a value that gets you the best shading results on the face.
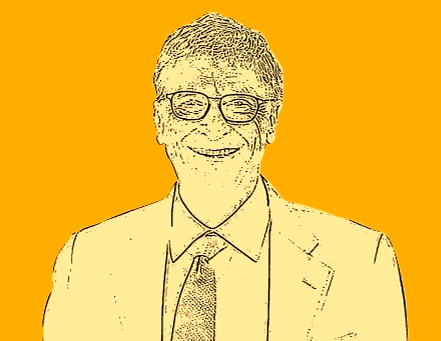
Using this image, we would make two depths, for light and shade.
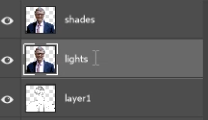
4. Make a copy of this image. Rename one to ‘lights’ and the other ‘shades’
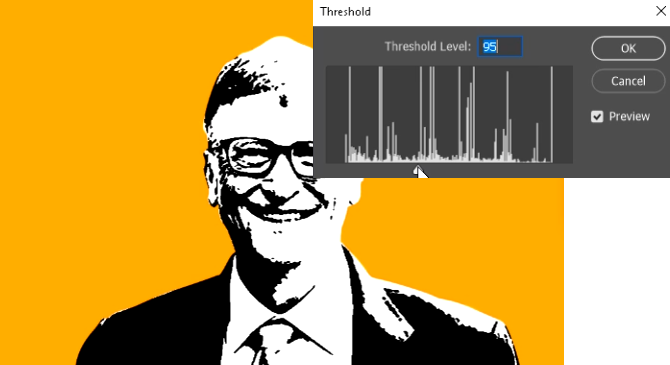
5. Select the shades layer, and turn off the visibility of the lights layer. On the menu, select image -> Adjustment -> Threshold.
Move the slider while looking at the image preview. For this step, we are aiming for an area of dark on which shades of light would fall. Click ok when you are satisfied with the preview.

6. Using the Magic Wand tool

on the ‘tools palette’, click on the white layers on the image and delete them using the delete key on the keyboard. After that, use Ctrl + D to deselect the area.
When you’re done, change the blending mode of this image from Normal to Smooth light
The result is an image with shades and depth.
7. If the shades are too obvious and you want to dampen the effect, you can reduce the opacity of the layer
8. Select the lights layer and make it visible. Go to the menu Image -> Adjustments -> Threshold.
This time, the focus would be on the white part of the image.

Again, using the magic wand tool, remove all black parts of the image
9. Change the image blending mode to soft lights.
10. You can repeat these two steps and include more layers of shades if your image still doesn’t meet your expectations. During the making of this image, I noticed the jaw wasn’t visible enough, so I added another layer of shading that brought out the line of the jaw
After deleting all the white part of the image with the magic wand tool, and changing the blending mode of this layer to soft light, the result of the image was as this,
11. In this next step, we would be adding some colors to the design.
Step two
Coloring the image
Some artists might prefer this single color shades for their designs but others may prefer many colors. This step adds colors to parts of the image like the suit, shirt, tie, teeth, hair, etc.
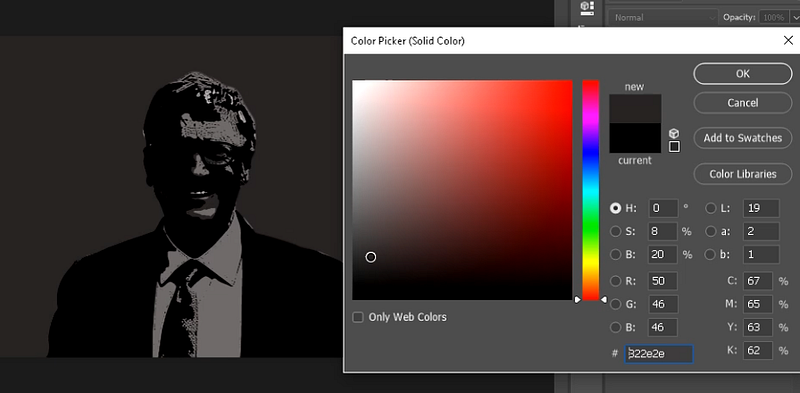
1. Select the skin layer and below the ‘layers palette’, click on the ‘fill or adjustment layer’

2. Set the color to grey, this would be used for the suit
3. Rename the layer to ‘suit’
Create a clipping mask of this layer by right-clicking on the layer and selecting ‘Create Clipping mask’
4. Set the color palette to default (D) and then create a create a layer mask of the suit layer by clicking on the layer mask icon

at the bottom of the layers palette.
5. Select the paint bucket tool and then click on the canvas (image) to fill it with the black color. This would remove all the black tint and return the image to its previous look.
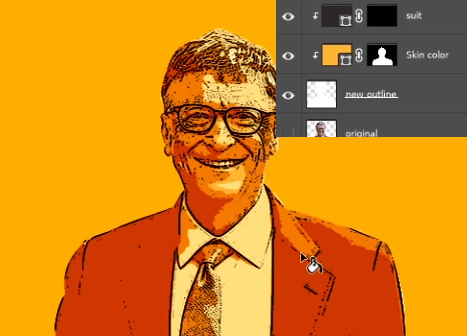
The layers palette should look something like this (above).
6. Repeat the above four steps for the color of the teeth, tie, shirt, and hair

This would make the layers palette look just as in the image above now that you have finished making the layers, you can start coloring the image.
We would be starting from the ‘white hair’ layer
7. Select the ‘white hair’ layer and click on the black ‘mask’ next to the colored layer.
9. Using a hard brush with an opacity of 100% paint a pure white color over the white hair. This painting brings out the color of the layer.
You need to be careful in painting this part, I suggest you use a smaller paint brush size, this is to ensure you paint all parts of the canvas.
If you make a mistake and run the paint over any unwanted part, you can remove that part by changing the color of the brush to black and re painting the part of the image.
Note:
Black — Cleans the paint
White — Opens the image
The clipping mask prevents the colors from spilling out of the image, hence all your colors remain within your image. Below is the image before and after the painting of white hairs.
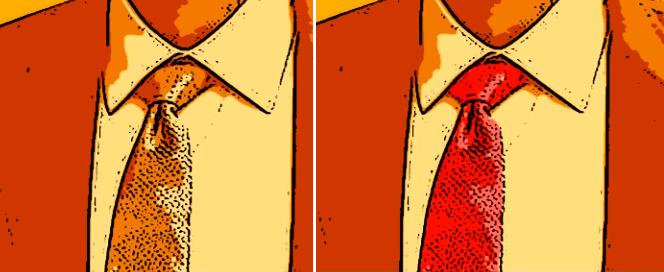
7. Repeat the process for the tie
8. Do the same thing for the for the shirt, teeth and eye. Since they are all have a white color, they can use the same color fill for all the parts.
Doing the same for the hair and the suit gives the output
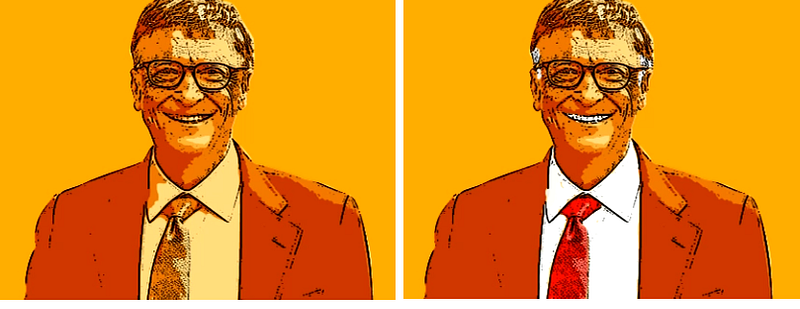
Another advantage with this method is the ability to change the colors of any part of image at will,
You can change the colors of any part of the image by double clicking on any fill layer
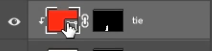
This brings out a color picker window from which you can change the colors

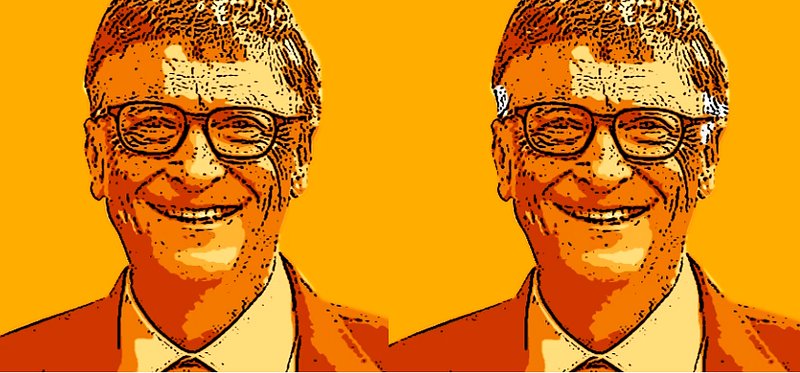
Below is the result of changing the red tie color
If you also feel like the outline is hard, you can decrease the opacity of the outline as in the image below,
Or you can remove it completely by disabling the layer visibility
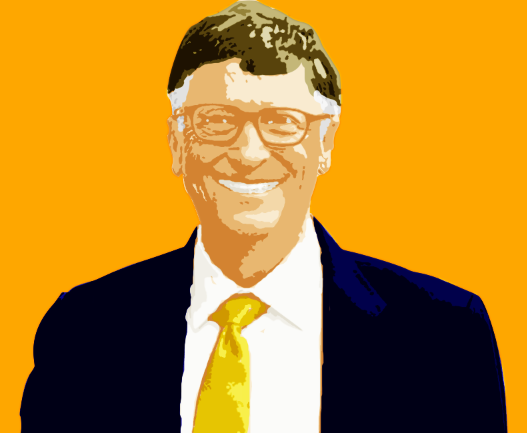
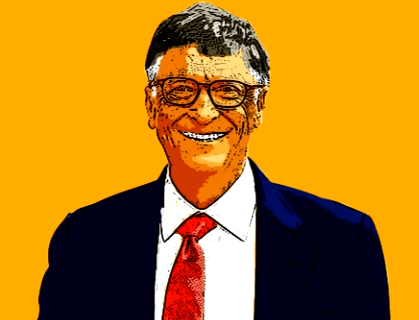
Finally, it all depends on what type of image you prefer
Congratulations, you can now go-ahead creating cartoon-like images using photo shop
Follow me Anthony Aniobi for more amazing tutorials and tech updates


