
How to Configure your own GitLab Runner with a Docker Executor on AWS EC2
If you are trying to use the GitLab CI shared runners, you may run out of minutes. So, in this tutorial, I will show you how you can run your own GitLab Runner on AWS.
Last update: May 2022
Here is an overview of what we will do in this tutorial:
- we will create a new virtual machine (VM) on AWS using EC2
- install the GitLab Runner on the VM
- install any required dependencies on the VM
- configure the GitLab Runner to work with gitlab.com
This is a fully manual process that is ideal for beginners wanting to get started with GitLab CI. This is NOT a production-ready setup and should NOT be used as such.
We will do everything from the browser and you don’t need to install any software on your computer.
Step 1. Create an AWS account
If you don’t have an account with AWS, please go ahead and create one. During the setup process, you will need to provide your billing details and credit card.
However, if this is your first account with AWS, you enjoy access to the AWS Free Tier, which offers free but limited access to almost all AWS services for 12 months.
The rest of the tutorial will assume that you are somewhat familiar with using AWS.
Important! Please keep track of any AWS services you create. Once something is running in the cloud, even if you don’t actively use it, there is a chance you will get a bill at the end of the month. So keep an eye on your expenses.
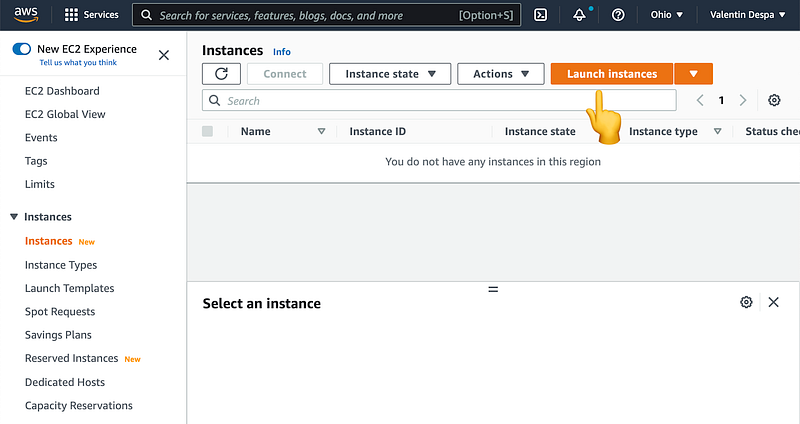
Step 2. Create a new virtual machine
We will use EC2 to create a new virtual machine on the AWS cloud.
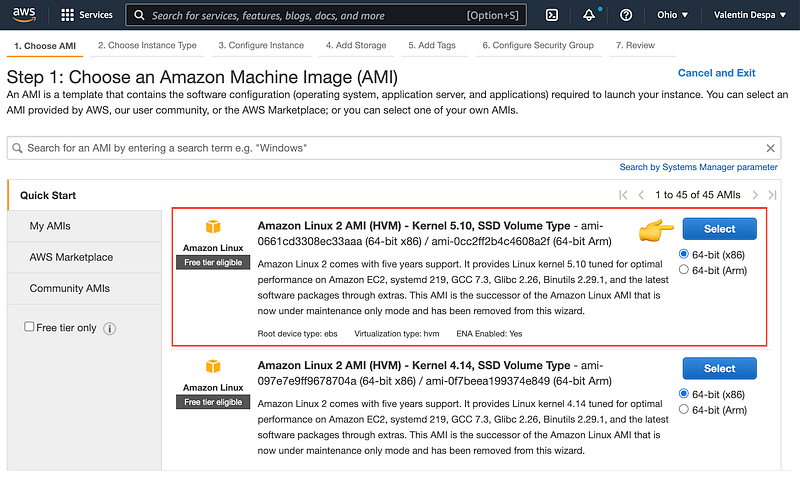
We will use the Amazon Linux 2 image, with a 64-bit (x86) processor.
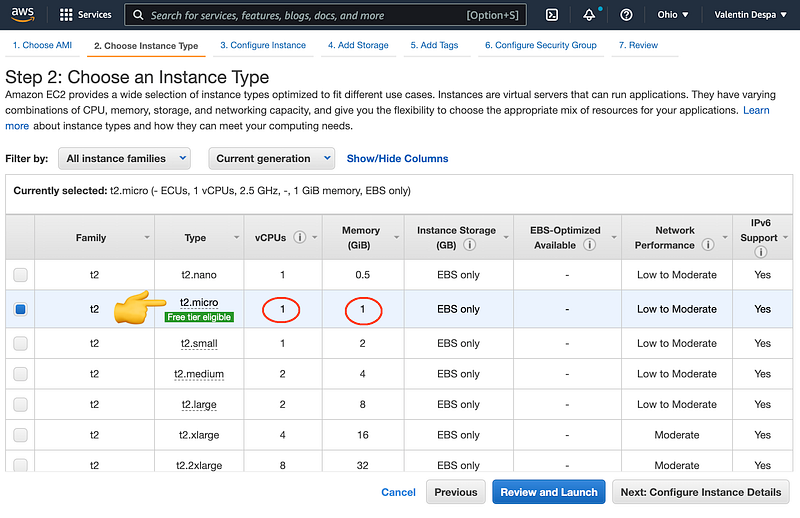
In the next step, we need to select the configuration of the VM. The only option that is eligible for the free tier is t2.micro, with a single virtual CPU and 1 GB of RAM.
If your budget allows, try to go a bit higher and select t2.large or higher.
This final step allows us to preview the VM we are about to create.
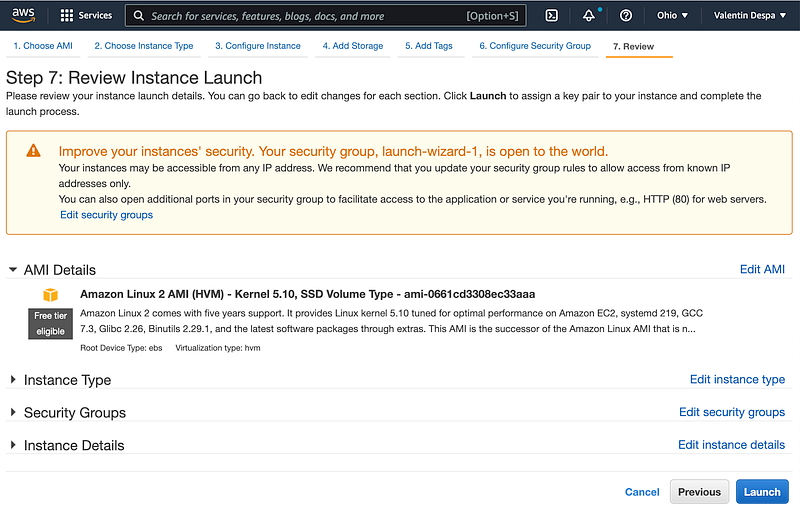
Once you click on Launch, the following window will appear.
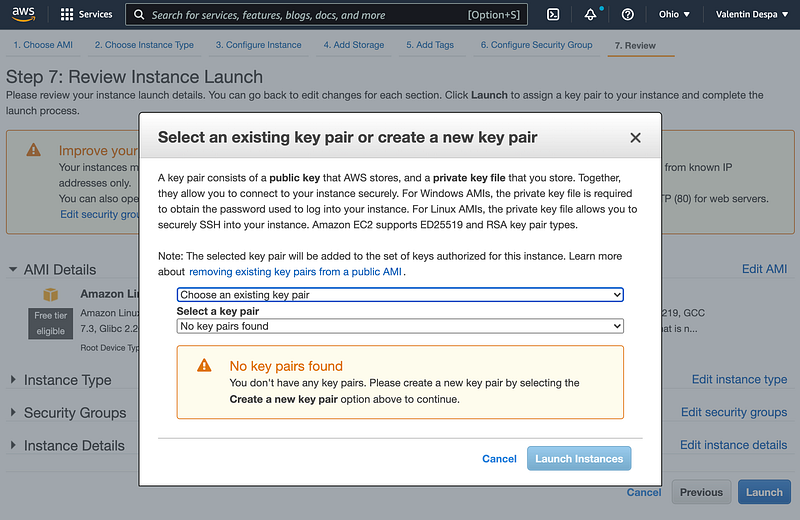
From the list, select Create a new key pair and download it.
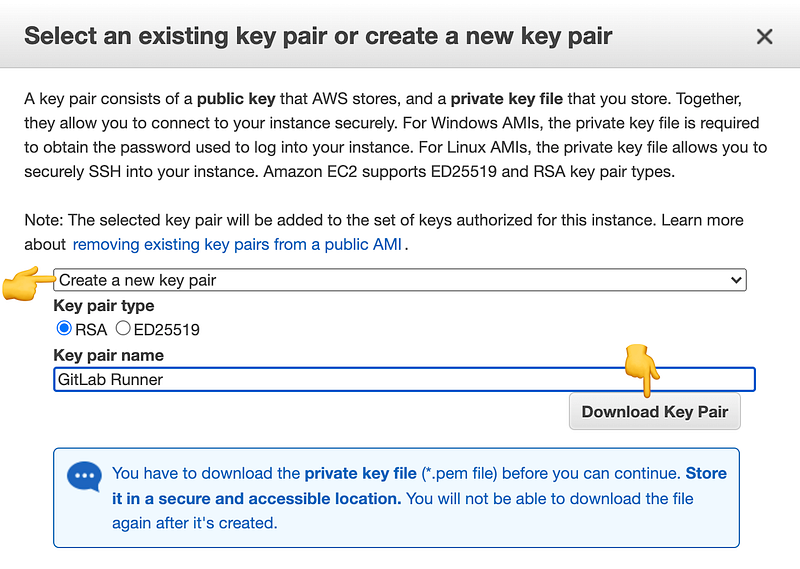
After this, click on Launch Instances. This will take a minute or two to complete, so grab a cup of coffee and take a short break.
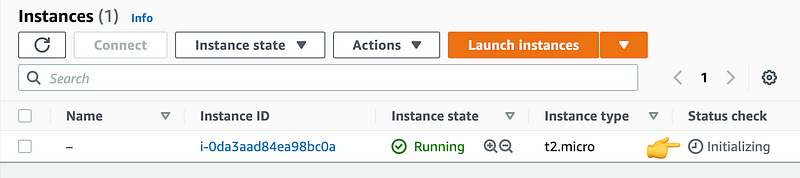
Step 2. Connecting to the VM with SSH
In the past, establishing an SSH connection to your EC2 instance required an SSH client and some additional steps. But now you can directly open a terminal from your browser.
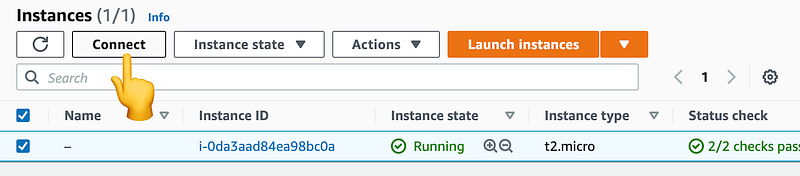
Select the instance and click on the Connect button.
Leave the defaults as they are and click on Connect.
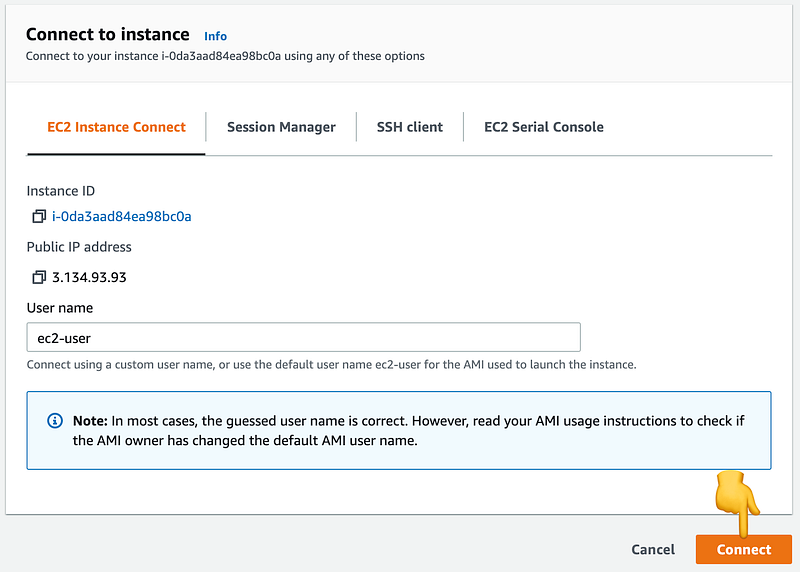
This will open a new browser window where you have a web-based terminal directly connected to your VM.
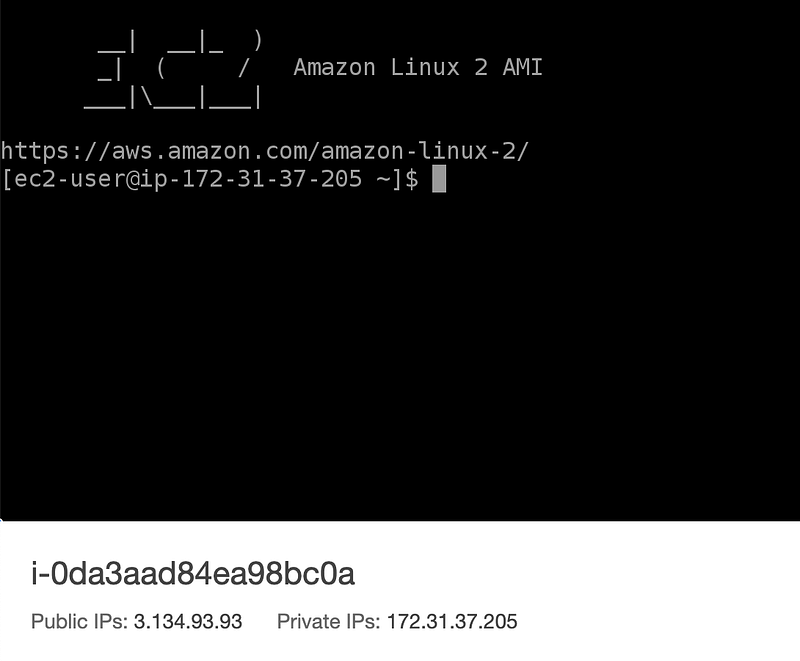
Here you can start typing the upcoming commands. If the terminal windows ever gets stuck, try refreshing it. You will be automatically reconnected.
Step 3 — Updating dependencies
First, let’s make sure that all dependencies are up to date.
sudo yum -y updateStep 4 — Installing Git
The GitLab Runner requires Git to run. The next command will try to install Git:
sudo yum install -y gitVerify that Git has been installed by running:
git --version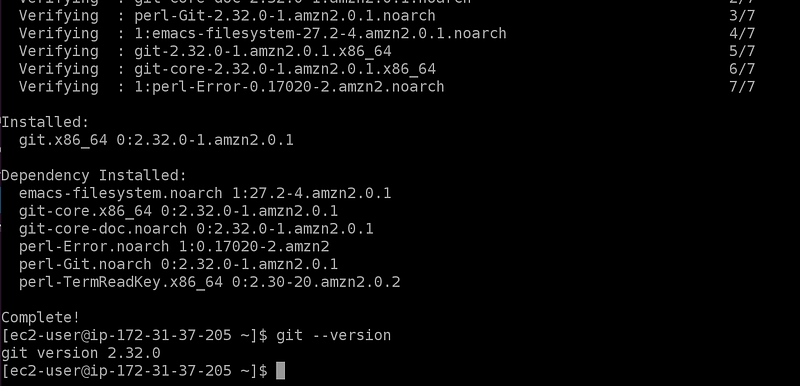
Step 5- Installing Docker
Let’s install Docker since we want to use the GitLab Runner with a Docker executor. If you need an overview of the executors available, I recommend reading A Brief Guide to GitLab CI Runners and Executors.
sudo amazon-linux-extras install -y dockerThe next step is to add the ec2-user user to the docker group:
sudo usermod -aG docker ec2-userYou can check if this has been done by using the groups command and by verifying that docker is in the list:
groups ec2-userWe also want to ensure that the Docker daemon is started automatically:
sudo systemctl enable dockerNow restart your EC2 instance to make sure Docker will start.
sudo rebootReestablish connection to the instance by refreshing the browser window after a few minutes.
After the restart, try the following command (without sudo!):
docker run hello-world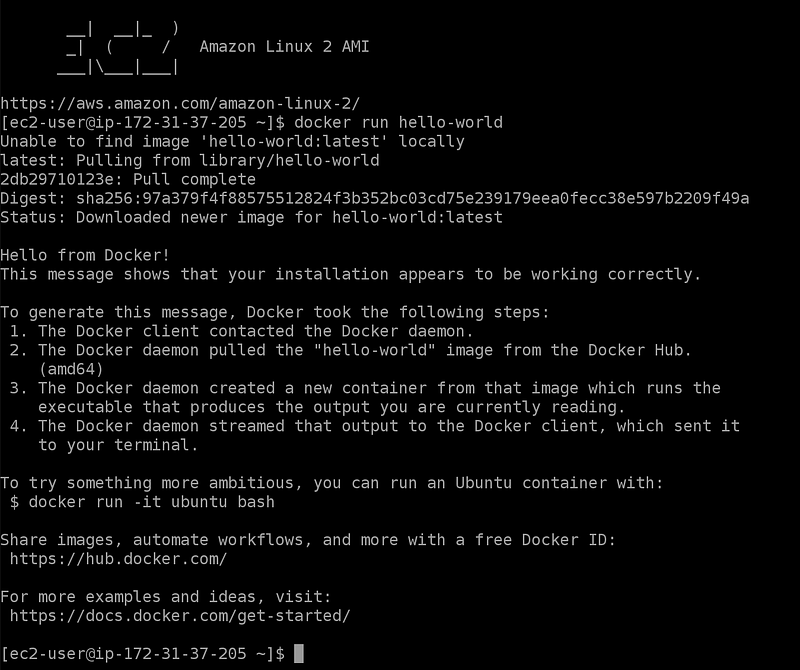
Step 6- Installing the GitLab Runner
The first step is to download the official installation package:
curl -LJO "https://gitlab-runner-downloads.s3.amazonaws.com/latest/rpm/gitlab-runner_amd64.rpm"Now let’s install the package
sudo rpm -i gitlab-runner_amd64.rpm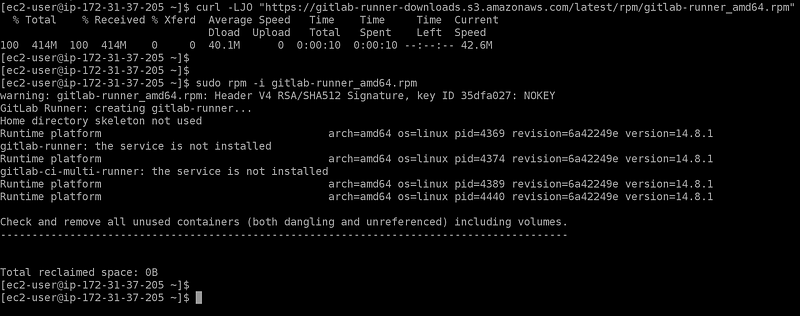
Step 7 — Letting GitLab know that we want to use a dedicated runner
While you can assign a runner to a single project, it would it useful to assign it to all projects in a group.
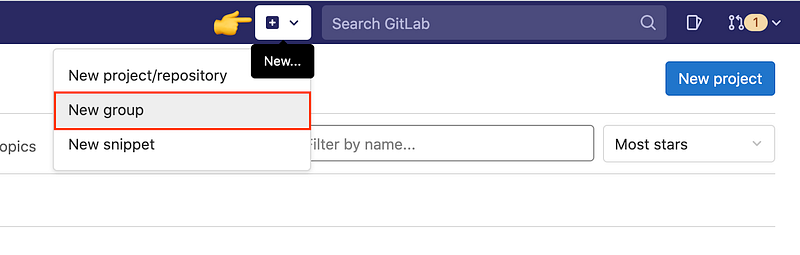
So go ahead and create a private group just for this runner. I want only projects that are in this group to use the runner on AWS.
From the group, go to Settings > CI/CD and expand the Runners configuration.
As a first step, make sure you disable any shared runners for this group.
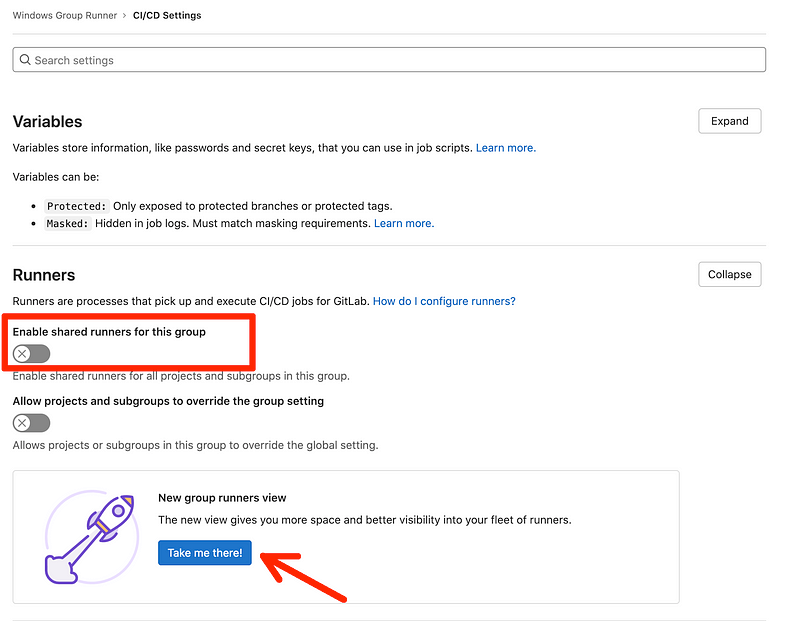
After this, we continue by viewing the Runners view. The same view is available from CI/CD > Runners.
Step 8— Configuring the GitLab CI Runner
Let’s go back to the AWS machine and start the configuration by running this command:
sudo gitlab-runner registerAlternatively, copy the installation command as shown below as it already contains the correct values for the URL and the registration token.
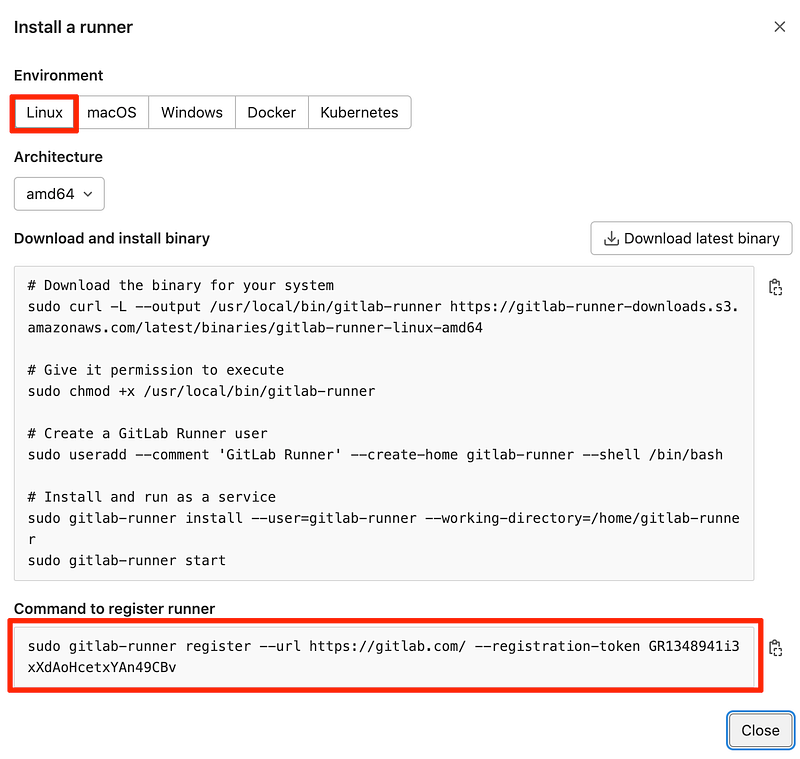
This will start a short configuration wizard with the following steps:
- Enter the GitLab instance URL (for example, https://gitlab.com/) — Simply copy/paste the URL exactly as shown in GitLab.
- Enter the registration token — Copy/paste the registration token exactly as shown in GitLab.
- Enter a description for the runner — Simply hit the Enter/Return key to use the default name.
- Enter tags for the runner (comma-separated) — You can leave this empty for now. You can change this later from GitLab. Hit the Enter/Return key to continue.
- Enter optional maintenance note for the runner — You can leave this empty.
- Enter an executor: custom, docker, ssh, virtualbox, docker-ssh+machine, kubernetes, docker-ssh, parallels, shell, docker+machine —
If you have installed Docker, you can specify the
dockerexecutor. - Enter the default Docker image (for example, ruby:2.7) — You can use the default and hit the Enter/Return key to continue.
Now let’s verify that the service is running by using the command:
sudo gitlab-runner status
From back to the group, open Settings > CI/CD and expand the Runners configuration.
You should now see the runner as being registered.

Creating well-researched and to-the-point content requires a lot of time and energy. If this was helpful and you wish to support me, please leave a comment, share, and press that 👏 a few times (up to 50 times). And consider subscribing to Medium.
Step 9— Enabling the privileged mode
While our runner might seems to work, once we try to build Docker images we will run into troubles.
So we need to enable the privileged mode to be able to use Docker in Docker.
We will need to edit the config.toml and flip the privileged from false to true. The config.toml file location is in /etc/gitlab-runner/.
I hope you are at least somewhat familiar with vim, the text editor.
To open the config.toml file, run the command:
sudo vim /etc/gitlab-runner/config.toml
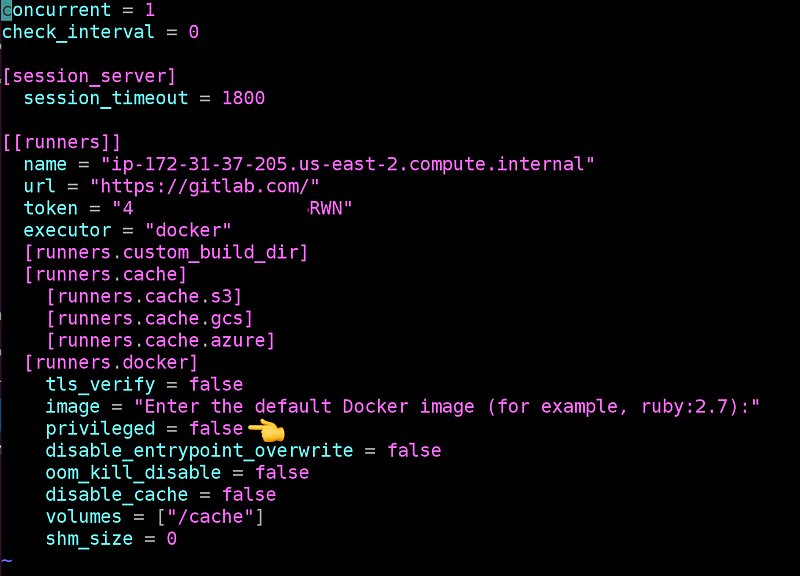
The next part will be a bit tricky. Press i to go in insert mode. You will see at the bottom of the screen:

Use your keyboard arrows (up/down, left/right) and go to the privileged value of false. Remove the value of false and type true.
Now press the Esc key to exit the insert mode.
To save the file, press Shift + ; (this will type :) and now type x and hit the Enter key to exit.

Now let’s restart the GitLab Runner:
sudo gitlab-runner restartStep 10— Testing the installation
We want to test that our newly configured runner is working properly. To test that, we will define a small pipeline that:
- uses artifacts and checks that they are passed from one stage to the other
- builds a Docker image
- pushes the image to the GitLab Container Registry
Create a new GitLab project in the new group and add the following pipeline definition file .gitlab-ci.yml:
stages:
    - build
    - package

build:
    image: alpine
    stage: build
    script:
        - echo "Hello Docker" > index.html
    artifacts:
        paths:
            - index.html


build docker image:
    image: docker
    stage: package
    services:
        - docker:dind
    variables:
        DOCKER_TLS_CERTDIR: ""
    script:
        - echo $CI_REGISTRY_PASSWORD | docker login -u $CI_REGISTRY_USER $CI_REGISTRY --password-stdin
        - docker build -t $CI_REGISTRY_IMAGE .
        - docker image ls
        - docker push --all-tags $CI_REGISTRY_IMAGE
If you want to learn how to build pipelines in Gitlab CI, I have created an online course that starts with the basics of Gitlab CI and YAML and helps you understand the fundamentals of CI/CD. Learn more about the course.
And also this Dockerfile:
FROM nginx
COPY index.html /usr/share/nginx/html
The pipeline should run without any issues.
If you enjoy content like this and it helped you solve a problem, help me create more. Please leave a comment, share, and press that 👏 a few times (up to 50 times). And consider subscribing to Medium for more amazing content.
Troubleshooting
This job is stuck because the project doesn’t have any runners online assigned to it.
You may encounter this error if you have defined one or more tags when registering the runner.
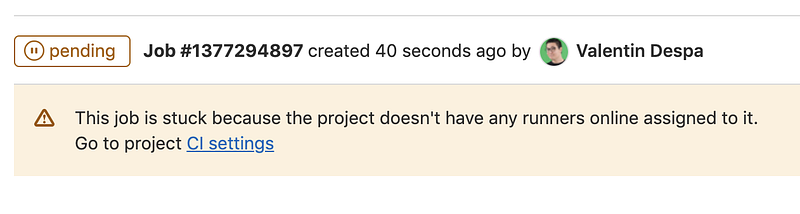
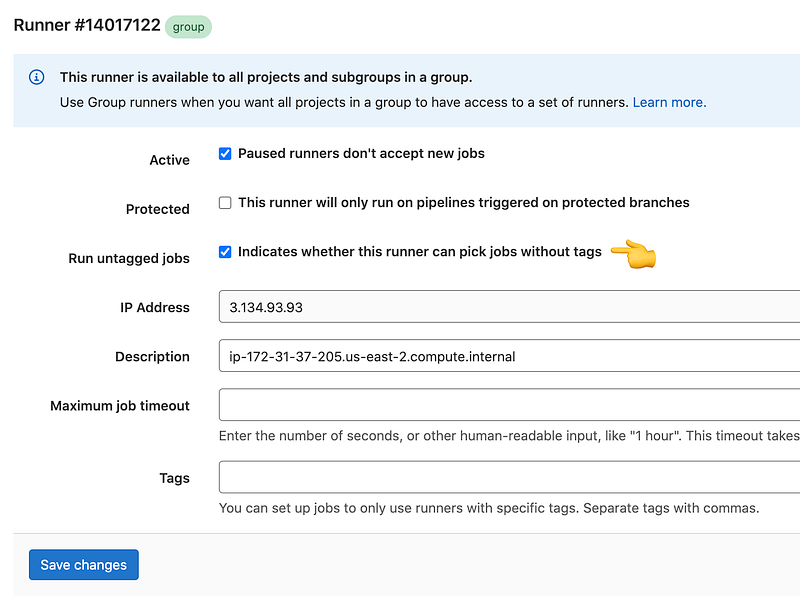
The job is most likely stuck because of the way the runner is configured. You can add a tag for your job indicating you wish them to be executed with a specific runner (based on the tag) or you can amend the runner configuration and enable Run untagged jobs.
Go to the runner and click the edit button.
Error: Error during connect: Post “http://docker:2375/v1.24/auth": dial tcp: lookup docker on 10.0.0.2:53: no such host
The above error could be is just an error from the Docker in Docker container failing to start. You should see in the long also this error:
mount: permission denied (are you root?)This error indicates that the runner is not configured to use the privileged mode. Please revisit the instructions at Step 9.
Cannot connect to the Docker daemon at tcp://docker:2375. Is the docker daemon running?
A common cause for this error is not setting the DOCKER_TLS_CERTDIR variable.
variables:
   DOCKER_TLS_CERTDIR: ""
Conclusion
I hope this tutorial helped you set up your GitLab Runner to run using the AWS infrastructure. Leave a comment in the section below if you have any questions. I would love to hear from you!
Thank you for sticking with this article until the end. If you enjoyed it, please leave a comment, share, and press that 👏 a few times (up to 50 times). It will help others discover this information and maybe it will help someone else as well.
Follow me on Medium and YouTube if you’re interested in more tutorials like this one.


