
How to Build a Backend with NestJS and Prisma — Part 1
Learn how to create a backend with NestJS, Prisma, and a PostgreSQL database in a Docker container.

Most of my articles are about Angular (or frontend stuff in general), but not this one!
In this article, I will show you how to create a backend with NestJS and Prisma. We will also set up a PostgreSQL database in a Docker container.
Nest is a framework for building efficient, scalable Node.js server-side applications.
Of course, you can always mock backend responses. But see this as an opportunity to evolve from a Frontend to a Full Stack developer.
This will be a 10-step easy-to-follow guide — I promise.
Let’s get started!
Step 1: Download & install Node.js
I guess that you already have it installed. If you don’t, download and install it from here.
Step 2: Install NestJS
Open a terminal and run:
npm i -g @nestjs/cliThis will install the NestJS CLI globally.
Step 3: Create a NestJS backend
To create an app named nestjs-backend-demo, run:
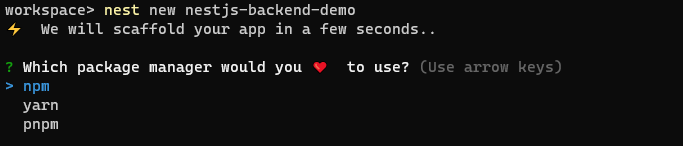
nest new nestjs-backend-demo
You will be asked which package manager you want to use. Pick the one you’re familiar with — I’ll use npm.
After the installation is complete, open the project in your IDE.
For VS Code users, you can open the project by running:
cd nestjs-backend-demo
code .
This is what the project contains:
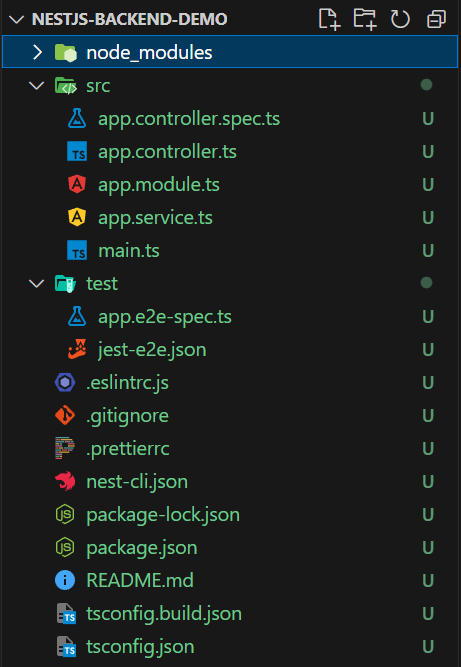
As you can see, the project is initialized with Prettier, ESLint, and Jest configured.
If you’ve ever used Angular, you should already be familiar with modules and services.
Lastly, controllers are responsible for handling incoming HTTP requests and providing responses.
Step 4: Setup a PostgreSQL database in Docker
Firstly, you need to have Docker installed and running.
Next, create a file named docker-compose.yml and copy-paste the following:
version: '2.23'
services:
  dev-db:
    image: postgres:16
    ports:
      - 5434:5432
    environment:
      POSTGRES_USER: postgres
      POSTGRES_PASSWORD: <type-your-password-here>
      POSTGRES_DB: nestdemodb
    networks:
      - demoapp
networks:
  demoapp:
You can adjust the version to match your installed version. Also, don’t forget to provide a password!
Disclaimer: Don’t hardcode your authentication credentials into your code. This is simply a demo, but for production applications, you should never commit secrets, tokens, or passwords to your repositories. Find more information about this topic here and here.
To create a docker container with a PostgreSQL database, run:
docker compose up dev-db -d
The -d at the end stands for “run in the background”.
You can confirm the creation of the container by running:
docker ps

You can also check the status of the database by using the CONTAINER ID like this:
docker logs d7d4ccde1d73
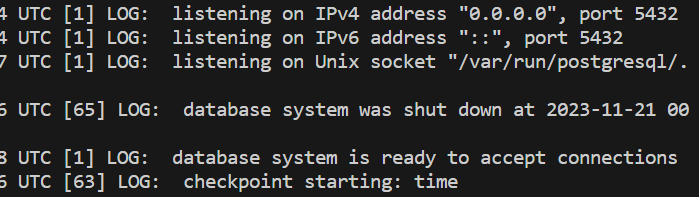
If it says that the “database system is ready to accept connections”, you’re good to go!
Step 5: Setup Prisma (ORM)
You got your database up and running.
Now, you need a way to connect to it. For that, we will use Prisma. So, let’s set it up!
Prisma is an open-source ORM that makes it easy to manage and interact with a database.
To install and initialize Prisma, run:
npm install -D prisma
npm install @prisma/client
npx prisma init
This will create two new files: schema.prisma and .env.
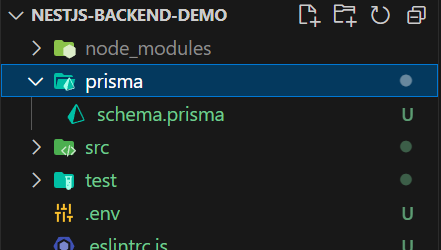
The schema.prisma file is where we will declare our models — this is what it looks like at first:
generator client {
  provider = "prisma-client-js"
}

datasource db {
  provider = "postgresql"
  url      = env("DATABASE_URL")
}
The .env file is where we will declare environment variables to make them automatically available to Prisma.
Initially, there is only one such variable, the DATABASE_URL for connecting to the database.
Let’s modify this URL based on the information in the docker-compose.yml file we saw earlier.
The format is:
postgresql://<POSTGRES_USER>:<POSTGRES_PASSWORD>@localhost:<PORT>/<POSTGRES_DB>?schema=publicFor our example, the URL becomes:
DATABASE_URL="postgresql://postgres:<type-your-password>@localhost:5434/nestdemodb?schema=public"Double-check and make sure the port is correct!
Step 6: Create a model
Let’s create our first model. This model will represent the entity for the Users in the app. In the schema.prisma, file append the following lines:
model User {
  id        String   @id @default(uuid())
  createdAt DateTime @default(now())
  updatedAt DateTime @updatedAt

  email String @unique
  hash  String

  firstName String
  lastName String

  @@map("users")
}
The Prisma model naming convention is to use the singular of the name.
On the other hand, for database table names the convention is to use the plural. To respect both conventions, use the @@map attribute as shown in the previous snippet.
Step 7: Generate and apply a migration
Each time you modify something in the schema.prisma file, you need to generate and apply a migration for the changes to take place in your database.
To do this, run:
npx prisma migrate dev
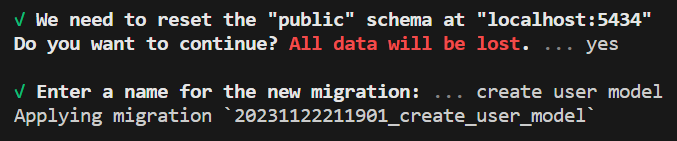
Disclaimer: When using the
devoption, if it’s not the first time you run this command, you will be asked to reset all data in your database to proceed.
DON’T use this command in production — for production and testing environments there is another command:
npx prisma migrate deploy.
You will also be asked to give a name for the new migration. You should provide a meaningful and descriptive name.
This will create a migrations directory the first time you run it.

Subsequent executions will add new directories and scripts under the migrations directory.
This is like backing up your steps, so you can reach your current schema even if you started from an empty one.
The dev command also runs the generate command behind the scenes:
npx prisma generate
which generates TypeScript types for the schema. We can then import and use those types into our services and controllers.
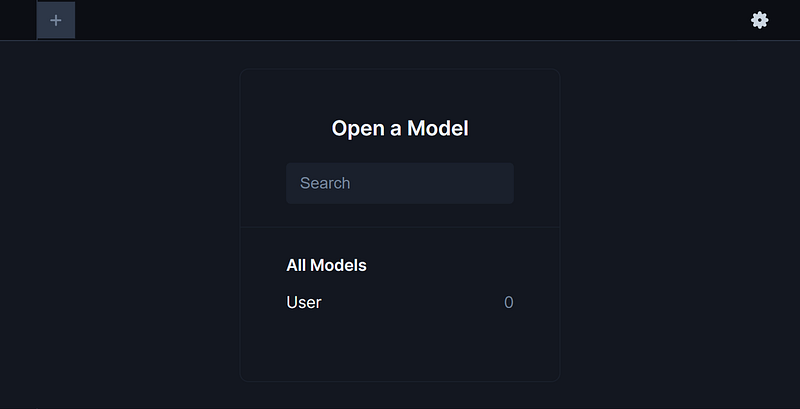
You can inspect your database by using Prisma Studio.
To open it, run:
npx prisma studio
If a browser tab doesn’t pop automatically, visit localhost:5555.
On the landing page, you can select which model you want to inspect.
For example, for the User model, the table should look like this:
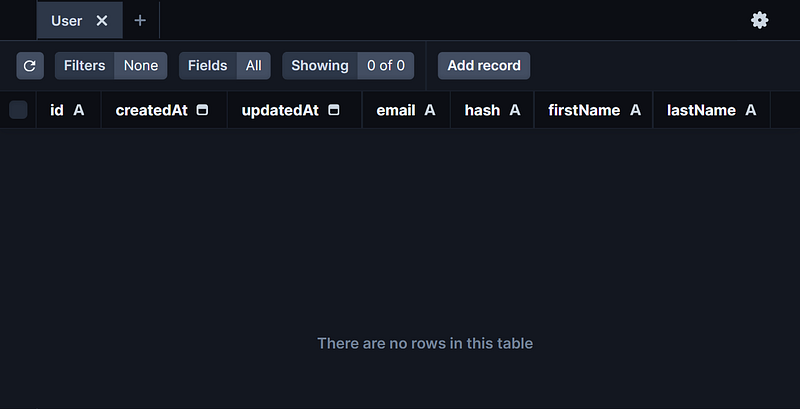
It should have all the declared fields but no data as we haven’t registered any users yet.
Step 8: Connect to the database
The last step regarding the database part is to connect to it.
Create a new module:
nest g module prisma
and a new service:
nest g service prisma --no-spec
The second command will automatically add the new service to the providers array of the PrismaModule. Since other modules will use it, add it to the exports array as well.
@Global()
@Module({
  providers: [PrismaService],
  exports: [PrismaService]
})
export class PrismaModule {}
Additionally, we need to add the @Global() decorator to make the module global-scoped.
The PrismaService will contain the logic for connecting to the database.
To that end, it should extend the PrismaClient and call the constructor of the superclass with the following configuration:
@Injectable()
export class PrismaService extends PrismaClient {
  constructor(config: ConfigService) {
    super({
      datasources: {
        db: {
          url: config.get('DATABASE_URL'),
        }
      }
    });
  }
}
For this to work, you also need to install @nestjs/config:
npm install @nestjs/config
and import the ConfigModule in the AppModule:
import { ConfigModule } from '@nestjs/config';

@Module({
  imports: [
    // Other imports...
    ConfigModule.forRoot({ isGlobal: true }),
  ],
  controllers: [AppController],
  providers: [AppService],
})
export class AppModule {}
Step 9: Create a Controller
Since the model we use in this demo is for users, let’s create a controller that will handle the user registration (i.e. creating a user).
First, create the auth module, service, and controller:
nest g module auth
nest g service auth --no-spec
nest g controller auth --no-spec
Then, create a register.dto.ts file that contains the data transfer object (DTO) class for the registration:
export class RegisterDTO {
  email: string;
  password: string;
  firstName: string;
  lastName: string;
}
In the AuthService, inject the PrismaService and create the register method:
@Injectable()
export class AuthService {
  constructor(private prisma: PrismaService) {}

  async register(dto: RegisterDTO) {
    try {
      const user = await this.prisma.user.create({
        data: {
          email: dto.email,
          hash: dto.password,
          firstName: dto.firstName,
          lastName: dto.lastName,
        },
        select: {
          id: true,
          email: true,
          createdAt: true,
        },
      });
      console.log(user);
    } catch (error) {
      if (error instanceof PrismaClientKnownRequestError) {
        if (error.code === 'P2002') {
          throw new ForbiddenException('Email already in use!');
        }
      }
      throw error;
    }
  }
}
The method this.prisma.user.create() creates and returns the new user. The select block contains the fields that will be returned — for example, we don’t want to return the password (hash field).
For now, let’s just print the created user in the console.
The above snippet contains a security issue (more on that later). Can you spot it?
Finally, let’s use the register method in the AuthController:
@Controller('auth')
export class AuthController {
  constructor(private authService: AuthService) {}

  @HttpCode(HttpStatus.CREATED)
  @Post('register')
  register(@Body() dto: RegisterDTO) {
    return this.authService.register(dto);
  }
}
This controller will handle requests that start with /auth. Its register method will handle requests to /auth/register.
If you want to append a prefix, like /api, edit your main.ts file:
async function bootstrap() {
  const app = await NestFactory.create(AppModule);
  app.setGlobalPrefix('api'); // <== Adds prefix to all endpoints
  await app.listen(3000);
}
Step 10: Create a User
I saved the best for last — finally some action!
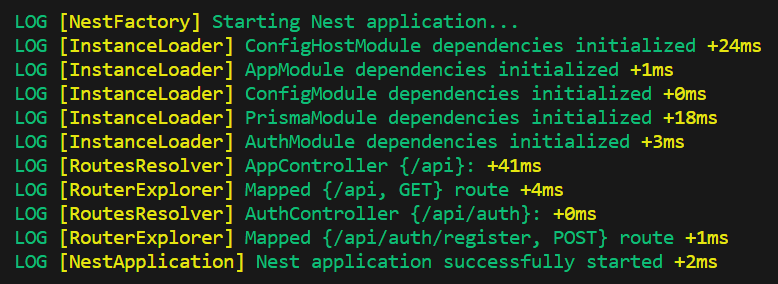
Make sure you have Docker and the PostgreSQL container up and running. Then run:
npm run start
This will start your NestJS backend server and you should see something like this:
Open Postman (or any other alternative you may prefer) to test the endpoint:
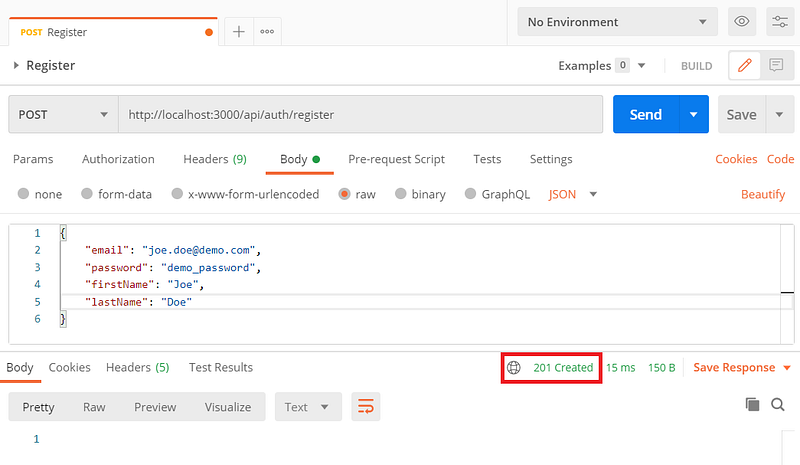
You should see the user printed from the console.log into your terminal.
Also, if you check the database with Prisma Studio, it should no longer be empty.
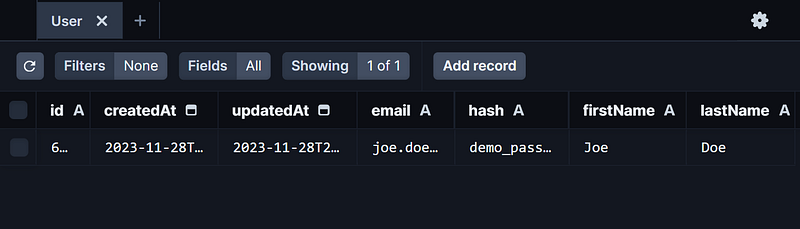
So, I mentioned a security issue earlier, which is visible in the above screenshot.
The password is not hashed and is stored as plain text in the database! 😱
Additionally, what happens if we don’t provide a property, like say the firstName?
We’ve already covered a lot in this one, so there has to be a Part 2!
Subscribe to my newsletter and stay tuned for Part 2, in which we will:
- add field validations
- hash the password before storing it in the database
- use an Angular application to perform the registration
You can find the source code of the demo in this GitHub repository.
Conclusion
In this article, we created a backend with NestJS.
We configured Prisma as the ORM and set up a PostgreSQL database in a Docker container.
We also created and tried our first endpoint for registering users.
That’s all for now.
Thank you for reading!


