
How To Add Picture Links to Paragraphs/Headings Within a Medium Article
An easy and simple step-by-step guide for the non-coders out there!
Adding a Contents List at the beginning of a long article is a must, as it not only gives the reader a glimpse of what topics you will talk about, but also a shortcut to those sections they are the most intrigued by.
Today’s how-to article is a variation to the other how-to article I wrote, where this linking is done via text. You can check it out here.
The reason why you choose to use pictures rather than just text is a personal one, I believe. But at the same time, it can make your article look more aesthetic and more put together.
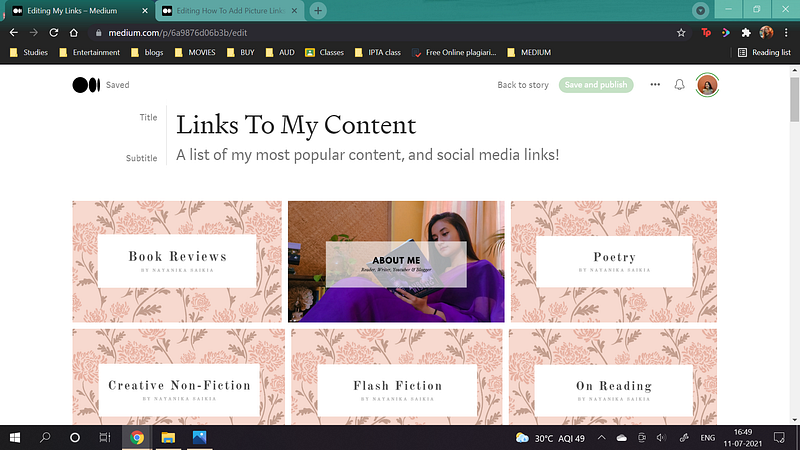
It might seem a bit difficult but once you get the hang of the three simple steps, this is going to be life-changing! Today I will show you how I created my aesthetic “My Links” on Medium. Before I go over the steps, you can see the finished result here.
Step 1: Adding Pictures and Headings
Step 2: Finding the specific identifier (with Inspect)
Step 3: Ctrl+C, Ctrl+K and Ctrl+V
Step 1: Adding Pictures and Headings
The first step is simply to add the pictures at the beginning of the story. These are the pictures you are going to link to the different sections that will appear later on in the story.
At the same time, create the headings for those paragraphs too. Basically, the pictures at the beginning will act as shortcuts and link to the specific headings of the different paragraphs. As for formatting, simply write a heading of your choice, and then select it. From the Medium toolbar that appears, click on the big ‘T’ to convert the heading into Title case.
Write it all down, before you can start with the editing.
Step 2: Finding the specific identifier (with Inspect)
I am going to simplify this as much as I can.
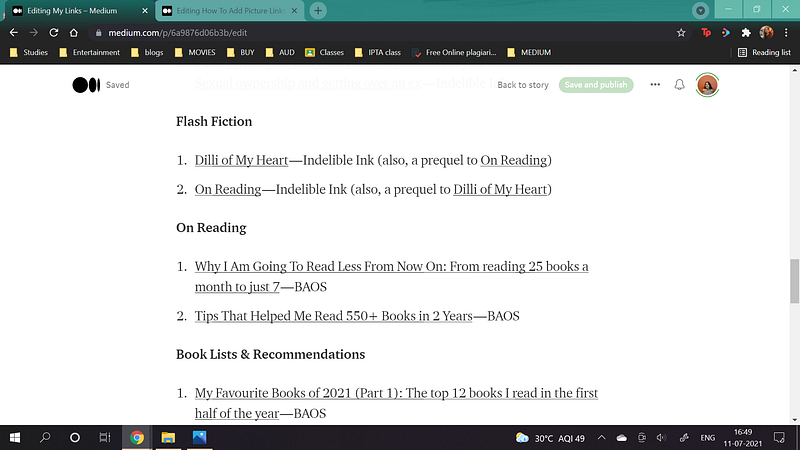
- Select the heading to the paragraph, that you want to add the link of in the pictures at the beginning.
- In our case here, the “Flash Fiction”/“On Reading”/“Book Lists & Recommendations” in the sections headings are the ones we want to add the shortcuts of.
- So what we are going to do now, is select the heading “Flash Fiction” and then right-click on it.
- In the drop-down menu that appears, we will select ‘Inspect’, at its very end.
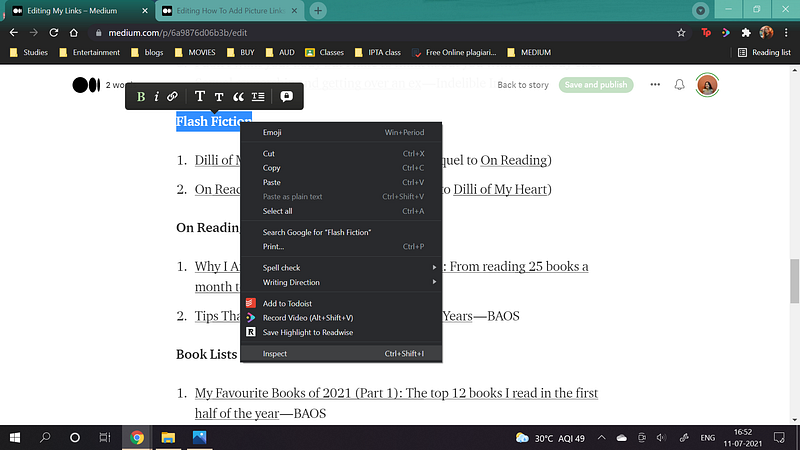
This will lead to the opening up of the code window on the right side. Now, don’t be intimidated, and just keep following the steps below.

- The next step is to figure out THE code (or identifier as my non-coder self likes to call it)which makes this whole linking process all the easier for you!
- And in our case, the code is “5793”.

Step 3: Ctrl+C, Ctrl+K and Ctrl+V
And we’re almost done!
- Now you have to keep in mind, the 4-digit identifier/code we just saw in the code window. Keeping that in mind (or you just simply Ctrl+C it), close the code window by clicking on the “x” on the right corner.
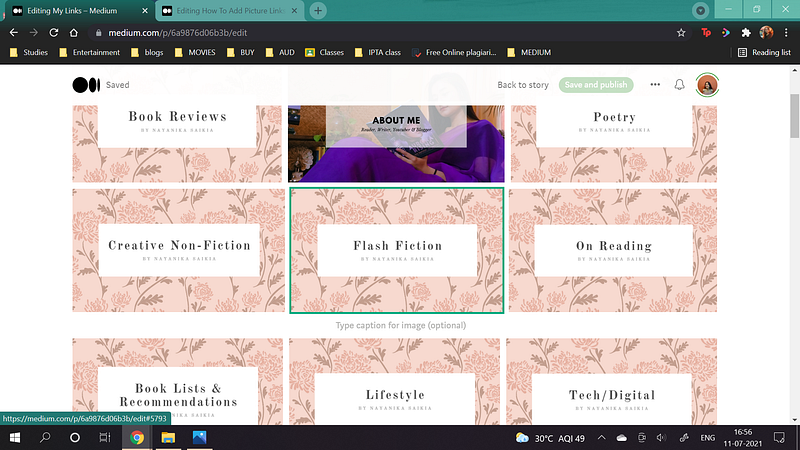
- Next up, we are going to scroll right back up to the top, where we had made THE list of pictures.
- There, we are going to click on the respective picture (in our case, the picture for “Flash Fiction”). Once it is selected, a green border appears around it.
- Since clicking on pictures in Medium articles does not make the toolbar appear, we are now going to press Ctrl+K. As a result, the option to add the link will appear.
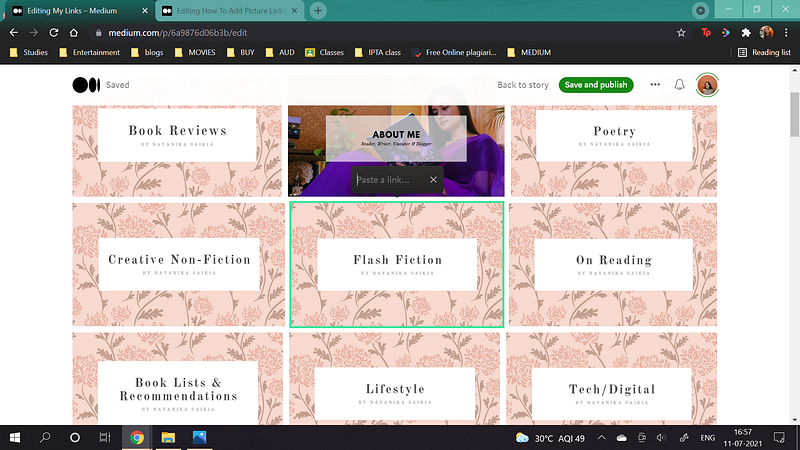
- Here, we are going to type in “#5793” and then press enter.
- DO NOT FORGET THE “#”.
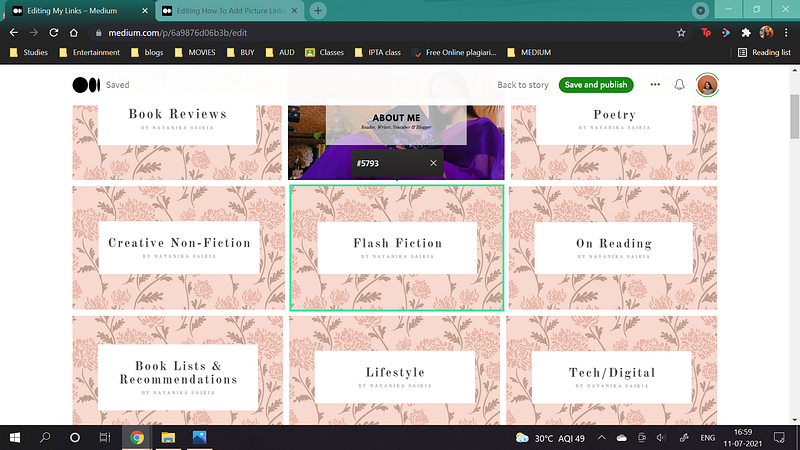
And you’re done! Repeat this process for the rest of the pictures as well. And then Save and Publish!
In case you want to make this sort of a Contents List with not just pictures but texts, you can do the exact same process. The only difference is, you will not need to use Ctrl+K for text because when you select the text in a Medium article, the toolbar appears automatically to help you format it. And within that toolbar, the option to link is also always available.
I hope you understood that. However, if you would like to see illustrations, you can check out this specific article too.
So that’s it, guys! I hope you found this useful and easy. Don’t forget to let me know what you thought in the comments below!
Nayanika Saikia graduated summa cum laude with a Bachelor’s degree in English Literature and was also a Dean’s List student. She is currently pursuing her Master’s degree. At the moment, she is working as a Booktuber, blogger, and reviewer with various national and international publishers. She can often be found on her Instagram account Pretty Little Bibliophile.