
How to Add a Progress Bar to Your ‘for’ Loops in Python
A guide on how to add a simple progress bar to your Python code using the Rich library.
Hello World!

Today we are going to take a look at how to add a simple progress bar to your Python code using a library named Rich.
I’ve already talked about this library in my post about creating tables inside your terminal:
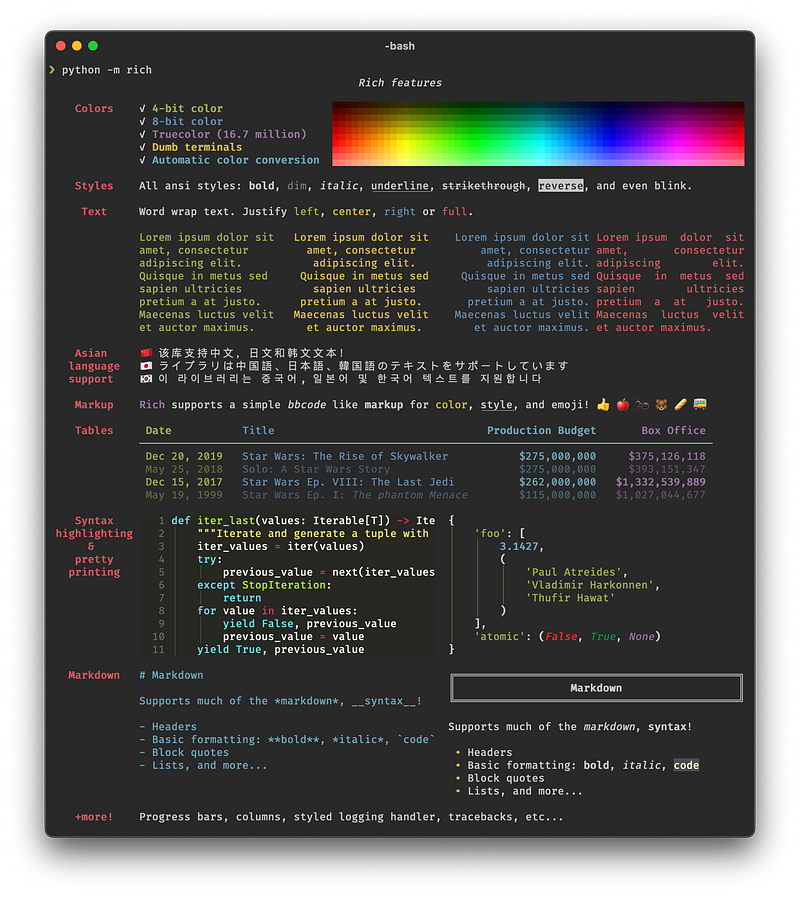
For those who have never seen this library, Rich is a Python package for rich text and beautiful formatting in the terminal. It is pretty easy to use and fast to integrate into your projects. With this package you can do a lot of cool things in your terminal, here’s a brief example from the GitHub webpage:
Today we are going to keep it simple and just have a look at how to show a progress bar for your code.
As usual, I’ll divide the post into paragraphs so feel free to skip ahead.
0. Requirements and Target
For this tutorial you’ll need:
- Python 3.x
- The following package: rich
We are going to install the requirements (except for Python) in the next step.
The tutorial is targeted at:
- Python beginner programmers
- People who want to learn more about TUIs (Terminal User Interfaces) in Python
1. Installing the requirements
rich
The first thing we need to do is install the requirements. In this tutorial, we are going to use rich to create our progress bar.
To install the package we just need to write in the terminal:
pip install richIf you want to take a look at the documentation you’ll find it here:
2. Creating our for loop
Now that we’ve installed the package, we need to create a code snippet to work with:
In this first part of the code, we define our function do_something which waits for 0.1 seconds and then returns a string. To test this out without implementing the progress bar we can just write a simple for loop calling our function and printing once the process is completed:

3. Implementing the progress bar
To implement the progress bar using Rich we have two different ways:
Using Track
Track is the quick way to add a progress bar to your code. You don’t need to make major changes to the code, you can just insert the function where you declared the size of the for loop and you are good to go.
You also need to remove the print from inside your loop, because it will conflict with the rendering of the progress bar:

Using Progress
If you want to have more control over your progress bar, you can use the Progress class. To use this you’ll need to create a progress object and then create a task for each progress bar you’ll need. Once you’ve got everything you need, you can advance the progress bars by using the update method.
As you can see from the example above, you can also change the description of the progress bar after you’ve created the object:

Using Progress (Multiple Bars)
You can also create more than one single progress bar by creating multiple tasks. After that you can update each task as you need:

And that’s all for today. As usual, you can find the full example on my GitHub.
If you’d like to support me consider subscribing to Medium using my referral:
Other URLs:
Personal Website:
Social Links:
Linkedin:
More content at PlainEnglish.io. Sign up for our free weekly newsletter. Follow us on Twitter and LinkedIn. Join our community Discord.


