
How I Reduced Docker Image Size from 1.43 GB to 22.4 MB
In 5 Simple Steps
If you are working in web development, then you probably already know about the idea of containerization and how it’s so great and everything.
But when working with Docker image size is a great concern. It’s often over 1.43 GB for just the boilerplate project that we get from create-react-app
Today we will containerize a ReactJS application and learn some tricks about how we can reduce the image size and, at the same time, improve performance.
The tricks will be shown for ReactJS, but it applies to any NodeJS application.
Step 1. Create Your Project
- Simply go to your terminal and type
npx create-react-app docker-image-test- Then create-react-app will provide you with your basic React application
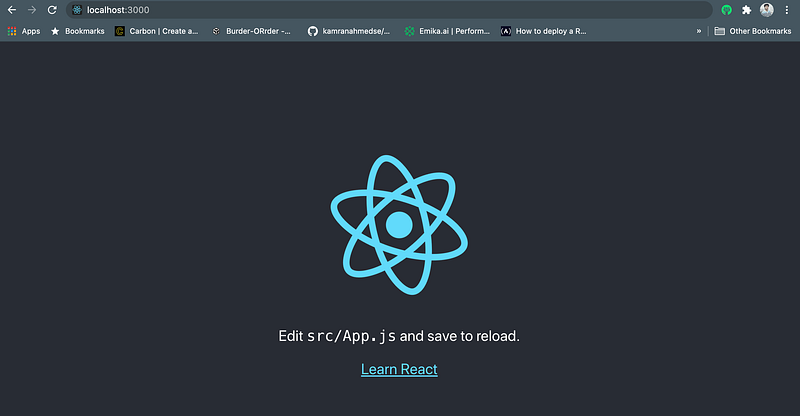
- Afterward, go into the root directory and run the project.
cd docker-image-test
yarn install
yarn start- Then go to http://localhost:3000 to see that your application is up and running.
Step 2. Build Your First Image
- Inside the root directory of your project, create a file named Dockerfile and paste the following code there.
- Notice that we are getting our base image node:12 from the docker hub, installing our dependencies, and running the basic commands. (We won’t go into the details of docker commands here)
- Now from your terminal, build the image for your container.
docker build -t docker-image-test .
- Docker will build your image. After finishing, you can see your image using this command.
docker imagesOn top of the list is our newly created image, and on the far right side, we can see the size of the image. It’s 1.43GB for now.

- We can run the image by using the following command
docker run --rm -it -p 3000:3000/tcp docker-image-test:latestYou can go to your browser and refresh the page to verify that it’s still working.
Step 3. Change the Base Image
- We used node:12 as our base image in the previous configuration. But traditionally, node images are based on Ubuntu which is unnecessarily heavy for our simple React application.
- From the DockerHub (Official docker image registry), we can see that alpine-based images are much smaller than ubuntu-based images, and they are packaged with just the minimum dependency.
- A comparison between the size of these base images is shown below.

- Now we will use node:12-alpine as our base image and see what happens.
- Then we build our image and see the size as we did before.

Wow! Our image size is reduced to 580MB only. That’s a great improvement. But can we do better?
Step 4. Multistage Build
- In our previous configurations, we were copying all of our source codes into the working directory.
- But it’s unnecessary as we only need the build folder to serve our website. So now, we will use the concept of multi-stage build to cut down the unnecessary code and dependencies from our final image.
- The configuration will look something like this.
- In the first stage, we install the dependencies and build our project
- In the second stage, we copy the contents of the build folder from the previous stage and use that to serve our application.
- This way, we don’t have unnecessary dependencies and codes inside our final image.
Next, we build our image and see the image from the list as before

Now our image size is 97.5MB only. How great is that?
Step 5. Using NGINX
- We are using a node server to serve the static assets of our ReactJS application, which is not the best option for serving static content.
- We can use a more efficient and lightweight server like Nginx to serve our application and see if it improves our performance and reduce the size.
- Our final Docker configuration file will look something like this.
- We are changing the second stage of our docker configuration to serve our application using Nginx.
- Then we build our image using this current configuration.

- The image size is reduced to 22.4MB only!
- And at the same time, we are using a more performant server to serve our awesome application.
- We can verify if our application is still working using the following command.
docker run --rm -it -p 3000:80/tcp docker-image-test:latest- Notice we are exposing the container's 80 port to the outside as Nginx, by default, will be available on port 80 inside the container.
So these are some easy tricks you can apply to any of your NodeJS projects to reduce the image size by a huge margin. Now your container is truly more portable and efficient.
That’s it for today. Happy Coding!
Have something to say?
Get in touch with me via LinkedIn or my Personal Website.Resources
- Inspiration Of this Post: https://readmedium.com/docker-image-optimization-from-1-16gb-to-22-4mb-53fdb4c53311
- Docker: https://docs.docker.com/
- Alpine Images: https://hub.docker.com/_/alpine
- Multi-Stage Build: https://docs.docker.com/develop/develop-images/multistage-build/
- NGINX: https://www.nginx.com/


