Here is Exactly How Aperture Affects your Images
As a beginner photographer, you look at other people’s photos and see how beautifully blurred they are.
The subject is well separated from the background and it is leaving you thinking:
“How on earth can I take pictures like that?”
You want those portraits filled with ‘Bokeh’ balls in the background and you have no clue where to start.
You want a nicely blurred background that draws the eye to your subject, whether that is an object or a human being.
Well, don't worry! If you are feeling like this, you’ve come to the right place.
This quick guide will tell you all you need to know about aperture and how to use it to your advantage.
In a few minutes time, you will be taking ‘Bokehlicious’ pictures that will leave your friends and family amazed!
By the end of this article, you will understand:
- What Aperture is and how to use it in your camera’s manual mode
- What effect it has on your photos, and
- How to use the aperture setting practically to get the best images possible
Just note that this article will tell you the basics of aperture and everything you need to know so that you can go out and shoot great photos.
However, if you want to learn more about the technicalities, I have linked an amazing article for you down below that will tell you exactly how aperture affects everything in the camera body and so forth for further reading:
Are you ready to take amazing photos that are packed with ‘Bokeh’ balls and amazing, blurred backgrounds? Let’s get started!
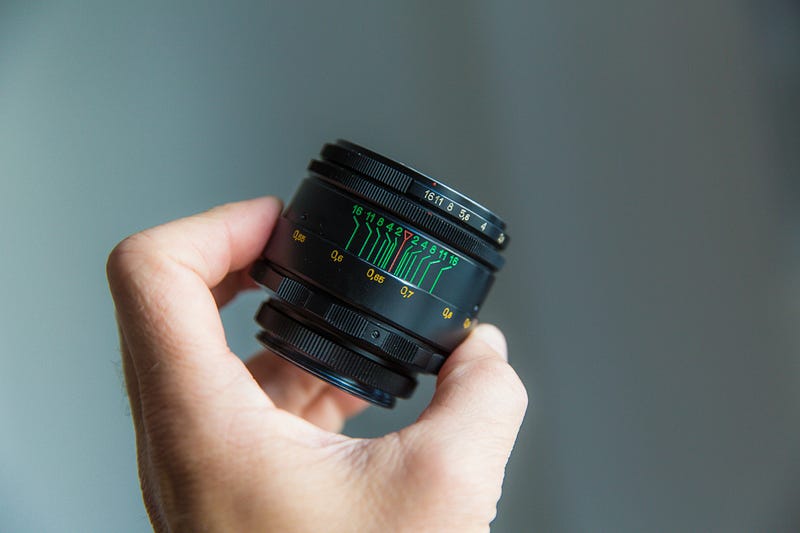
So, what is Aperture then?
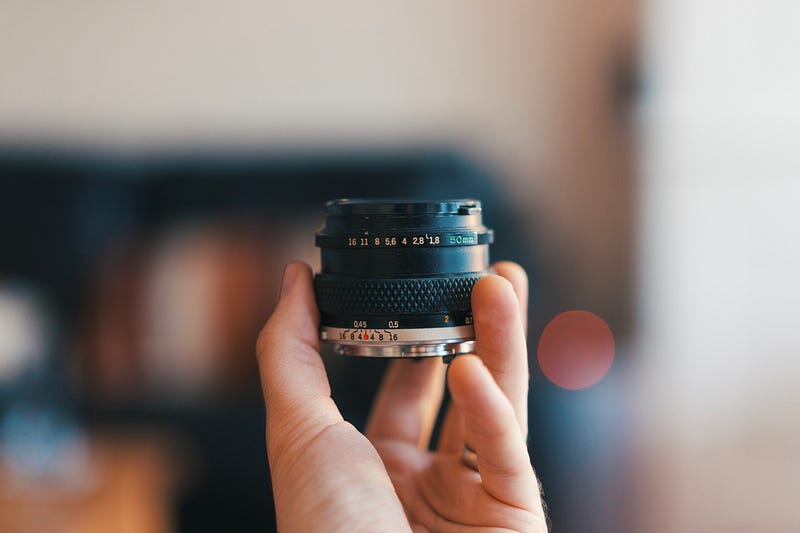
Aperture determines how wide the opening is on your camera lens. The wider the Aperture, the more light will be let in.
The narrower the Aperture, the less light will be let in!
The aperture on your camera lens is known as an F-Stop or a ‘Stop’.
The F-Stop of your lens is determined by a numerical system.
The smaller the number, the wider the aperture and thus, more light will be let into your camera sensor,
For example, F/1.8 is a much wider aperture than say, F/11.
F/22 is even narrower again and is commonly used in landscape shots where you want the entire scene in focus.
How does aperture affect your photos?
Different lenses will have different maximum apertures, which determines how much light that lens will be able to let in.
For example, a cheap kit lens typically has a maximum aperture of around F/3.5, which lets in around half the light of a 50mm lens shooting at its maximum aperture of F/1.8.
This means that the kit lens will perform much worse in low-light conditions than the faster 50mm lens.
A wider aperture will also allow you to shoot handheld in a wider variety of conditions, such as nighttime or when you want to freeze the motion in the scene of your shot.
Remember that you do not have to shoot at the maximum aperture of your lens and this would not be appropriate for certain scenes, anyway.
For example, you might have a 50mm lens that can shoot at F/1.8 but you are trying to shoot a landscape scene instead of, say a portrait.
For this scenario, you will need to bump your aperture down to around F/11 — F/22.
Shooting at a lower aperture will make your background less blurry but more of your scene will be in full focus.
But if you are shooting in low-light conditions and you want less blur in your background or you wish to freeze the motion in your shot, you will need to let more light into the sensor by other means, which may require you to compromise.
You may have to increase the shutter speed, which means it will take longer to get the shot and you will no longer be able to freeze the motion in your scene.
Or if you are not willing to opt for a lengthier shutter speed you will need to bump up your ISO, which can be potentially problematic, particularly at night as more noise and grain will be introduced into your shot. This can be a deal-breaker for some.
Ultimately, it will be down to you what compromises you will be willing to make when you take the shot but it is important to remember that adjusting your aperture can have unexpected consequences.
So, now you know the basics and the technical parts of how the aperture works, let's take a look at some sample scenarios and see what you should do if you are in these situations.
How to best use your aperture setting in different situations
So, you are hellbent on getting those amazing shots with gorgeous bokeh in the background. Or you want a landscape shot that leaves the scene in full focus? Or something in between?
Before you start, please make sure you understand how to properly adjust your aperture, along with the other key settings on your camera.
Here is an article giving you a tutorial on how to properly do this. Once you have read this, come back to this article and read on!
Whatever you want, I will show you some quick examples and explain how best to set your aperture:
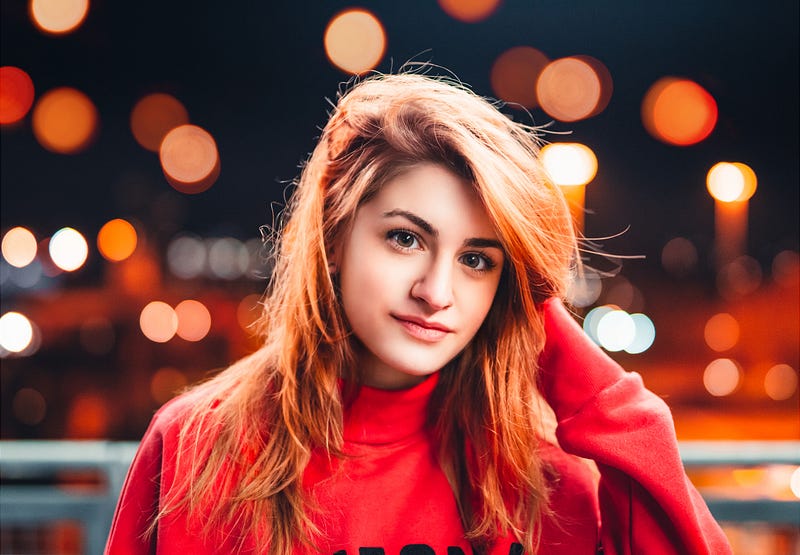
You want a portrait shot full of bokeh (daytime)
This is an easier scene to shoot than many others and as long as you have an adequate source of light in your scene, your camera should cope well:
- Firstly, set your aperture as wide as possible, while ensuring it is not too wide that part of your subject is not in focus (usually F/3.5 max for a kit lens, F/1.8 or F/2.8 for a 50mm lens or a zoom lens)
- Next, ensure that your ISO is set as low as possible. For the vast majority of cameras, this will be ISO 100. This means that there will be no noise or grain in your shot, which is not what you want
- Finally, adjust your shutter speed according to how well exposed your image is and what your preferences are. If the shot is bright and during broad daylight, I suggest you underexpose your shot by dragging the shutter speed down and if the shot is a bit dark bring it up a little. If you want to edit your photos in Lightroom of Photoshop, always expose for the highlights (do this by underexposing your shot/reducing your shutter speed)
Once you have followed these guidelines, you should end up with a shot that is well-exposed, well-focused and your subject is in focus and noise-free and grain-free.
For extra bokeh in your background, try placing your subject in front of a set of lights or some background lights from a streetlight or a busy shopping centre.
You want a landscape shot that is in full focus
This is also an easier shot to achieve, though make sure you have enough light in the scene otherwise you will not be able to capture the landscape in its full glory:
- First of all, set your ISO to 100 to ensure that no noise or grain will creep up in your image.
- Next, set your aperture as wide as possible to ensure that all of the scenes is in focus (for example, F/11 or F/22). Though take care to ensure you keep the aperture as wide as you can while keeping the scene in full focus. This will help in scenes where there is less light.
- Finally, adjust your shutter speed according to how well exposed your photo is. For example, if your scene is overexposed, you should bring your shutter speed up to 1/750, for example. If your scene is underexposed, bring your shutter speed down but ensure that there is no motion in your shot otherwise this will become blurred.
These rough guidelines will help you to ensure that your landscape shot is well-focused while ensuring you are getting enough light into the camera.
You want a portrait shot full of bokeh (nighttime)
This type of shooting scenario will be much, much more difficult to shoot than the other 2 but if you can master it, the results will be so rewarding:
- Firstly and most importantly, keep that ISO level as low as possible. Set it to ISO 100 to start with and if that does not let enough light in after playing around with the other settings, then adjust it but do your best to keep it as low as possible. Gain creeps in much more quickly at night than it does in daytime conditions.
- Next, set your aperture as wide as possible while ensuring your entire subject is kept in focus. This will usually be set at around F/1.8 — F/4, though you can only go up to F/3.5 max on a kit lens.
- Finally, adjust your shutter speed according to how well exposed your image is. I suggest you underexpose your image a little by bumping up the shutter speed. This will stop the highlights in the bokeh balls from being blown out and then the bokeh background can be properly shot in all its glory.
Finally, remember that practice makes perfect and over time you will naturally get better at taking photos in a wide variety of situations :)
Thank you so much for taking the time to read this article. I hope you enjoyed it and I hope you were able to take something away from it. Feel free to give me a shout in the comments below and I’ll happily get back to you.
If you want to see more content like this, please take a minute to follow me. I write on a regular basis about photography, tech, science and entrepreneurship.
And finally, if you are new to photography and you want to start taking action today, sign up to my FREE 7-Day beginner photography Bootcamp course here!