
Git tutorial — A Beginner’s Guide to the most Frequently used Git Commands
A shortlist of 20 Git commands for all your code versioning needs
Git is hard, and there’s an overwhelming amount of command and tricks that you could learn and use but, when it comes to day to day development, there is a small subset of Git commands that you are most likely going to use over and over. Here is a list of git commands that I use daily
- The
git status - The
git clone - The
git branch - The
git checkout - The
git pull - The
git push - The
git diff - The
git log - The
git reflogaka the life-saver - The
git rebase - The
git merge - The
git remote - The
git stash - The
git reset - The
git fetch - The
git cherry-pick - The
git commit - The
git add - The
git grep - The
git init
Remember you can learn more about these commands by running git command --help i.e., git checkout --help

The “git init” command
Use this command to create an empty Git repository. Given a directory, when the git init is run, a .git directory with subdirectories is generated.

I use the git init less often, only when I am starting a new project.
The “git remote” command
Use this command to point your local git repository to track a remote git repository. I created a repository in GitHub, and as shown below, you can set the remote tracking URL.

You can use git remote -rm upstream to delete the above or git remote set-url upstream-url to change the remote upstream's URL.
When you fork a repository, you can add another remote, i.e., origin to track your forked remote repository. Below is a screenshot of my fork of the spring-security repository, and after the fork, I run the git remote add origin [email protected]:rhamedy/spring-security.git command.

The “git clone” command
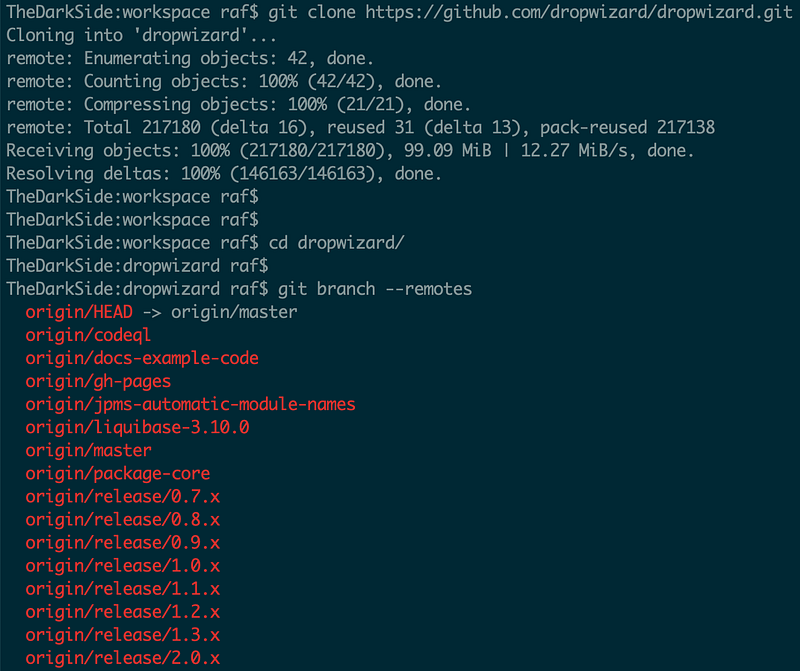
Clones a repository into a newly-created directory, creates remote-tracking branches for each branch in the cloned repository.
In the attached screenshot, gitclone the Dropwizard repository and then listed its remote branches.
The “git pull” command
Now let’s pull the changes from the remote repository. The remote repository has README.md and a LICENSE file.
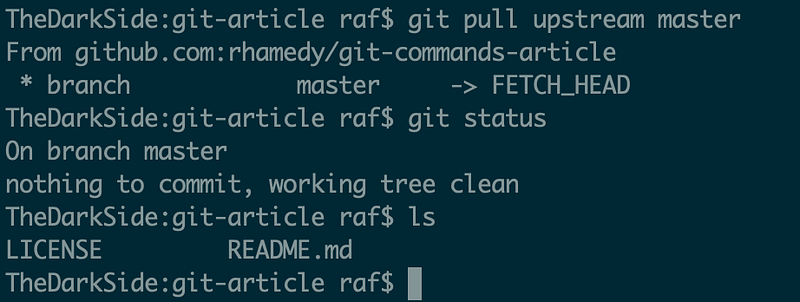
Using the git pull upstream master we indicate to git, to pull down changes from upstream tracked remote repository and it’s master branch.
Instead of upstream you can use a different tracked remote repository. Let’s say; I would like to pull down my forked version of the spring-security master branch using git pull origin master
The “git checkout” command
This command helps you switch between different git branches. It also allows you to check out out a git commit SHA or a specific version of a file.

Initially, there is themaster branch and we used git checkout with -b to create a new branch and call it develop.
Now you can use git checkout {branch_name} to switch between the two branches.
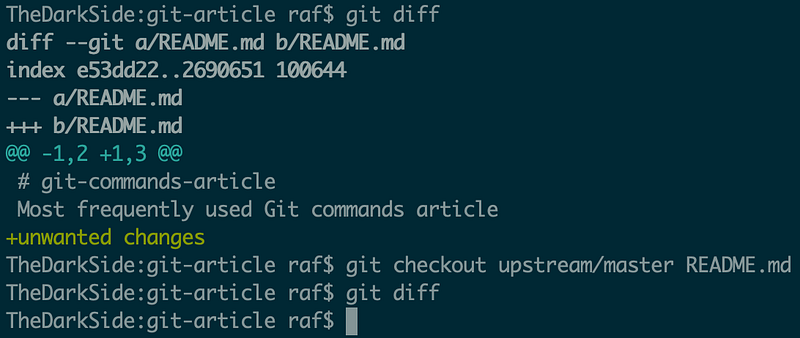
Let’s say you changed a file in your branch and would like to revert to the original version, use git checkout {file-path} or you can also do git checkout upstream/master {file-path} and that would revert your changes.
You can also use git checkout {commit-sha} to checkout a specific SHA.
The “git branch” command
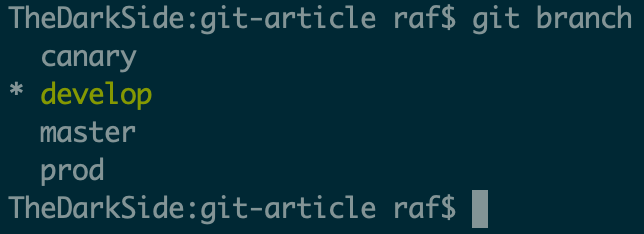
This command lists all your git branches. I use this almost always before switching to a branch, push, pull, and rebase changes. For more options run git branch --help command.
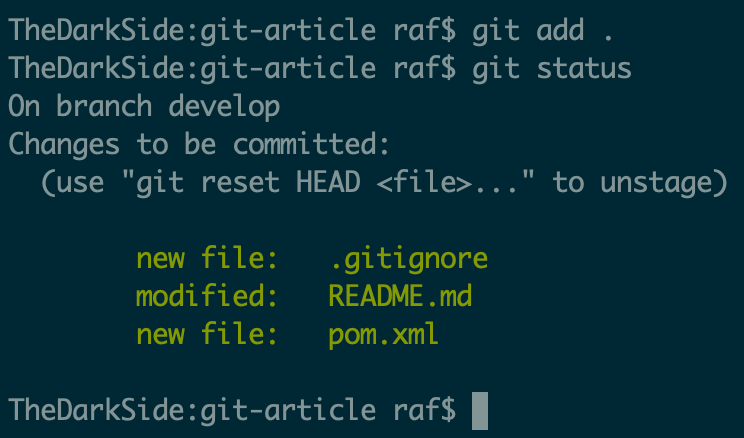
The “git status” command
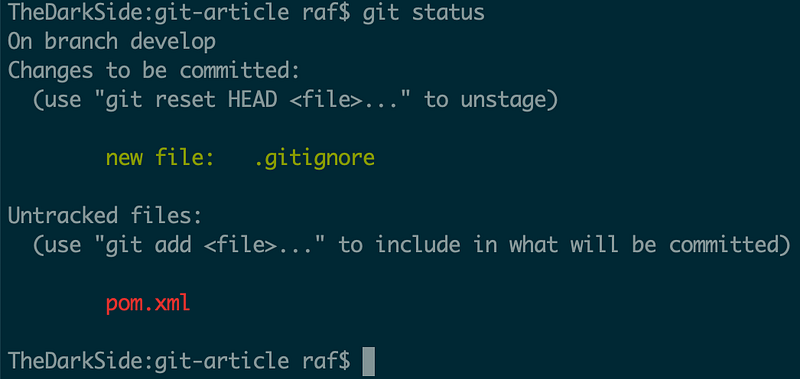
The git status command shows changes in your current git branch. The screenshot shows that a new file pom.xml is added but, not yet staged, and the .gitignore is staged. A change has to be staged first and then commit.
The “git diff” command
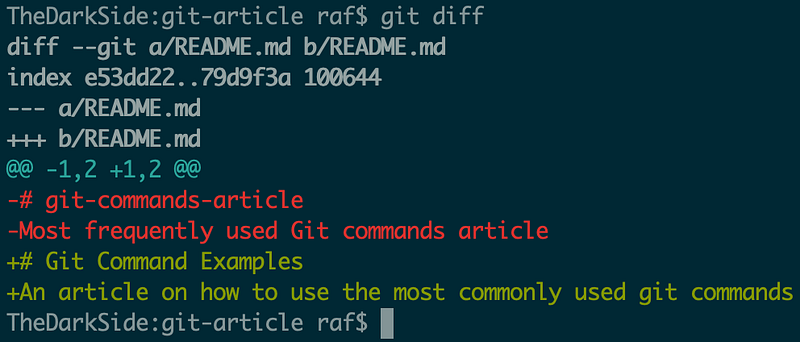
This command is used to show your changes to versioned files. The git diff for README.md shows the lines that are added in green and lines removed in red, including the # of lines added and removed.
The “git add” command
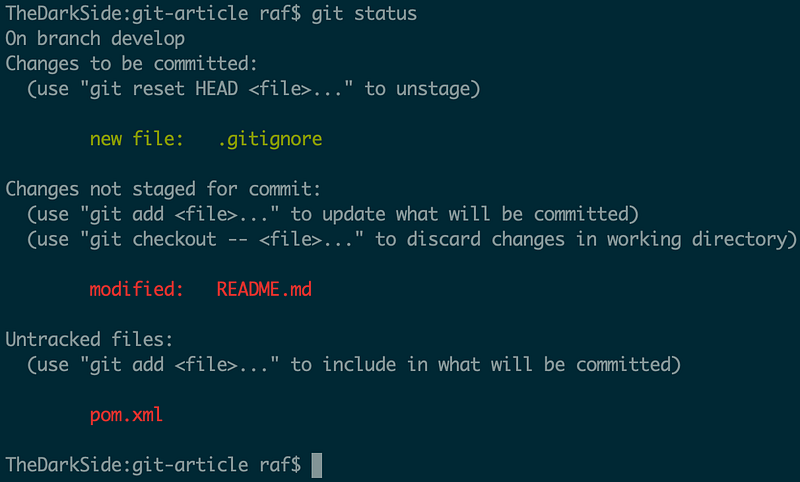
The git status shows that we have already staged the .gitignore file, however, the README.md and pom.xml file’s changes are not yet staged.
Let’s stage the README.md and pom.xml files and to do that we run git add README.md pom.xml or git add . to stage changes in the current directory.
The “git commit” command
This command commits your changes to the git branch. Let’s commit the changes shown in the above screenshot.
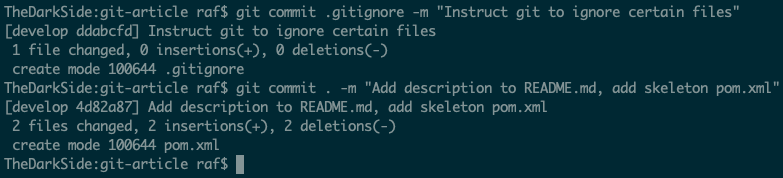
The first commit adds the .gitignore with a clear message and the second commit adds the rest of the changes and git status will show no more changes.
The “git log” command
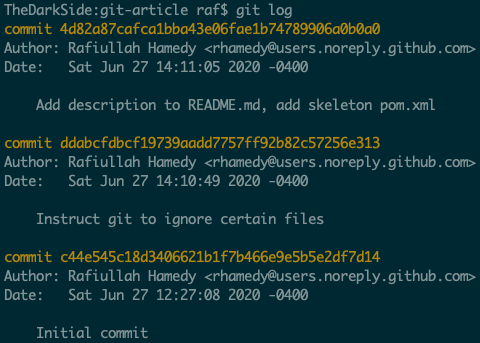
Use this command to see the commit history of the current git branch.
You can pass the --oneline flag to the git log to only show short commit SHA and the commit message.
You can also pass the --graph and --pretty flags to the git log command.
The “git push” command
Now that we have committed some changes to the local repository, as shown above, let’s push the changes to the upstream remote repository.
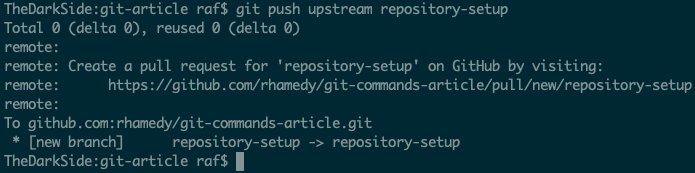
Now the local branchrepository-setup is pushed to the upstream repository, and you should see it in the UI, i.e., Github.
The “git stash” command
Let’s say you have made some changes and would like to save them and revert the working branch to the state before your changes, HEAD commit.
I pushed the repository-setup branch upstream and then created a pull request against the developbranch in Github and merged it. Now my local develop branch does not have the changes in the upstream develop branch, and I also made some changes in the develop locally.
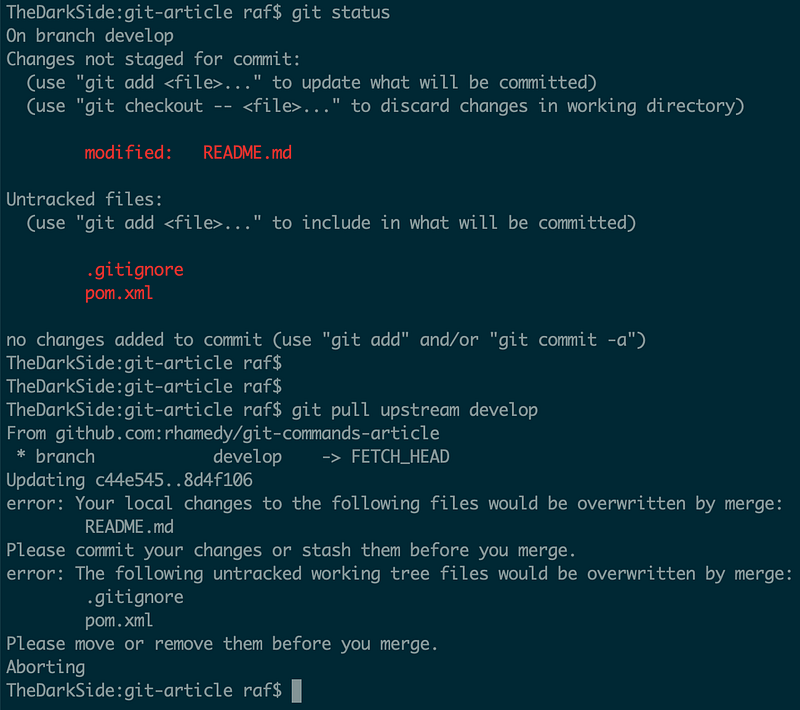
The above screenshot shows the local changes as well as the output of the git pull upstream develop that says
Please commit your changes or stash them before you merge.
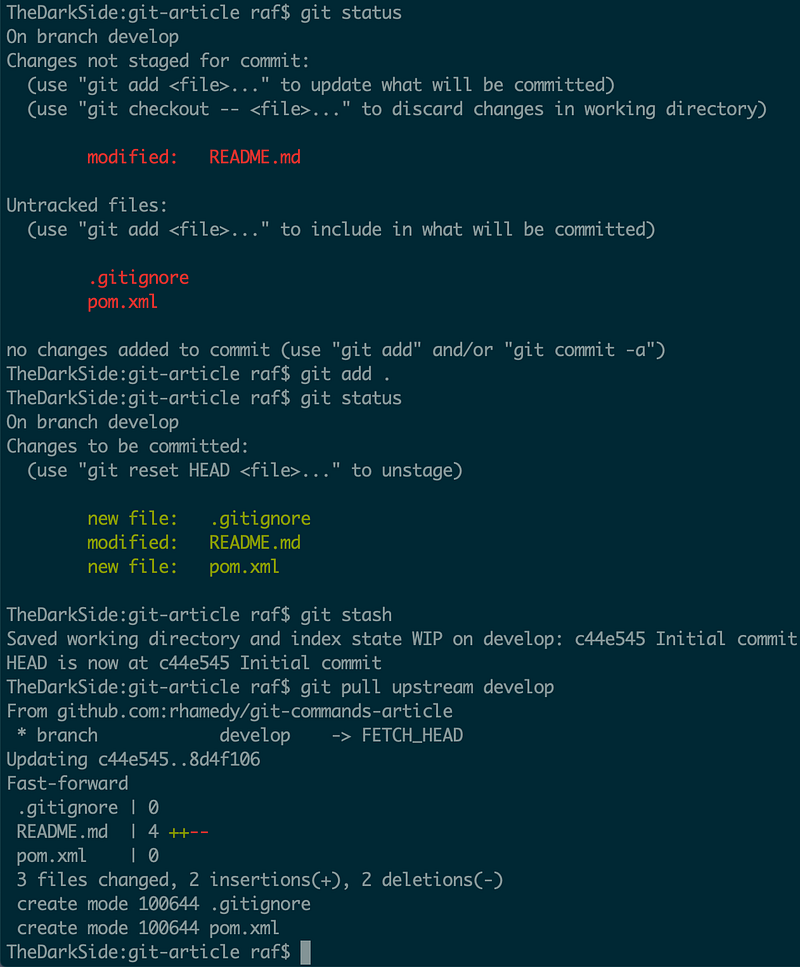
So let’s stage all the local changes using git add . and then stash (save) them away so we can pull upstream changes.
As shown in the screenshot, we have successfully pulled the upstream changes.
You might be wondering, what happened to my stashed changes? Use the git stash list command to see a list of all stashes as shown below
stash@{0}: WIP on develop: c44e545 Initial commitTo apply your most recent stashed changes into your current working branch, you can use the command git stash pop (removes the stashed item from the top of the stash list) or git stash apply (keeps the stash entry in the stash list).
For more on git stash run git stash --help or read the documentation https://git-scm.com/docs/git-stash
The “git rebase” command
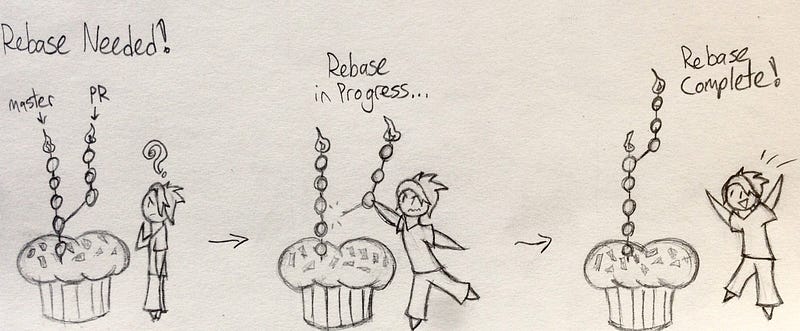
As shown in the drawing below, a rebase is taking all your changes (commits) and putting it on top of the branch’s HEAD commit. Let’s say; you checked out develop a week ago to work on a feature-todo and after one week, you have ten commits, and you are ready to push your changes upstream. During this one week, your colleagues have been merging changes to the develop branch, and that means your changes are on top of an old commit.
A rebase takes your changes from the old commit and put it on top of the HEAD commit of the branch.
So I created two branches of develop
- The branch (1)
update-readme-file - The branch (2)
feature-todo
Added some commits to the theupdate-readme-file, pushed the changes up and merged the pull request to the develop branch.
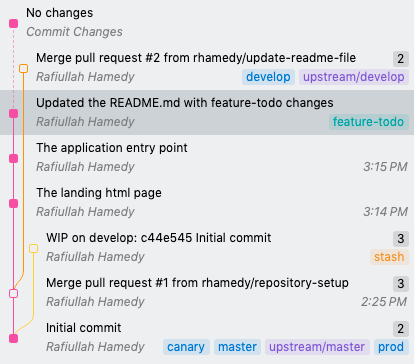
The feature-todo branch, as shown in the screenshot, does not have the recent develop changes (from update-readme-file). Let’s rebase feature-todo on top of the develop branch.
Here is the series of commands
git checkout develop
git pull upstream develop
git checkout feature-todo
git rebase develop
Since the README.md file is changed in thedevelop and also in our branch feature-todo, rebase will flag that. We can do the following to resolve the conflicts
- Edit the
README.mdfile and make the necessary changes to resolve the conflict - Stage the
README.mdfile
Now you can continue the rebase with git rebase --continue command and if you wish to abort the rebase then git rebase --abort. A successful rebase would put our commits (top 3) on top of the develop HEAD commit as shown below

You can also use git rebase to squash one or more commits together. Let’s say you have four and wish to squash them to one
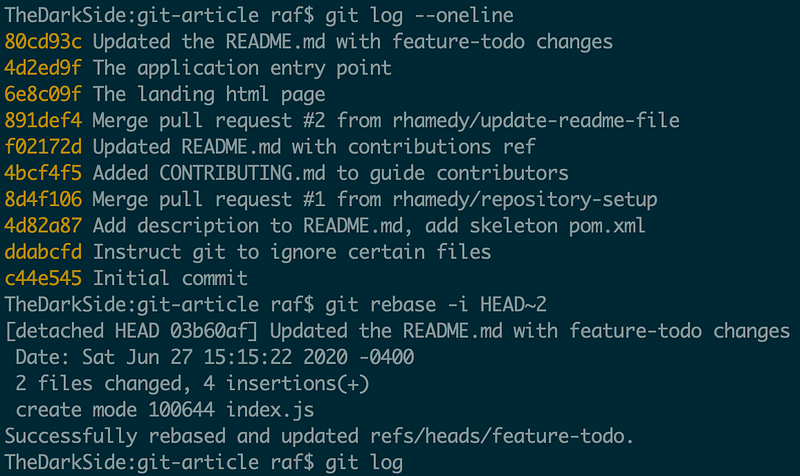
The above will allow you to mark each of the commits whether you want to keep them or squash (s) them. I often squash my commits before pushing my changes upstream.
The “git merge” command
One difference between git merge from git rebase is that git merge creates a merge commit, and majority developers don’t like the extra merge commit.
Let’s say you want to merge changes from develop to the canary branch and you can do that by
git checkout canary
git merge --ff-only develop
For more on how merge works see git merge --help or the documentation https://git-scm.com/docs/git-merge.
The “git fetch” command
I use the git fetch --all to pull down the remote branches and tags.
The “git cherry-pick” command
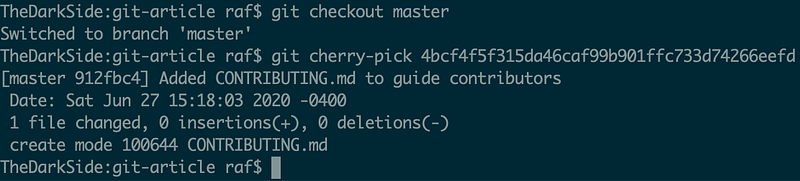
As the name implies, this command allows you to cherry-pick a commits from elsewhere and apply it to your current working git branch.
Let’s say you have a pull request, and a colleague will make a pull request against your pull request. Your options are to merge your colleague’s pull request to yours or avoid the merge commit and pull down your colleague’s changes and cherry-pick the necessary commits form your colleague’s pull request and apply it to yours.
The “git reflog” command
Learn how to use git reflog and you shall always be able to get out of a local git mess. Reference logs are where everything you do with your local branch is recorded. Here is how I have used git reflog in the past.
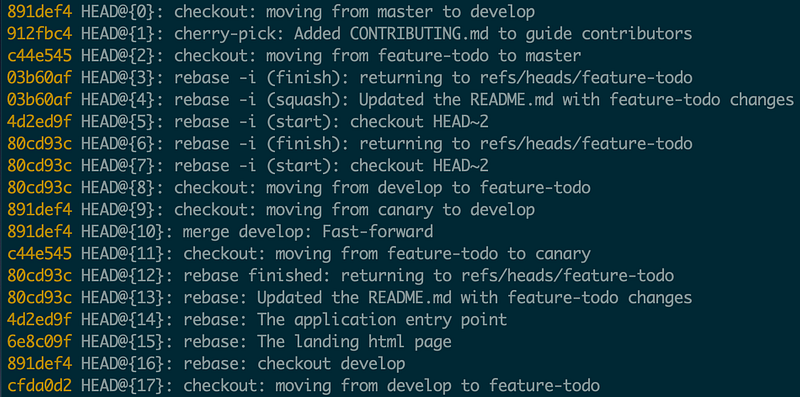
Let’s say our branch’s state is in a total mess, and you desperately want to get back to an earlier state where everything was working. Checkout out the git reflog and find out the entry where you think you want to go back to and then use the git checkout HEAD@{12} or git reset HEAD@{3} to get back to that state in time.
I highly recommend learning more about git reflog , and it would massively boost your confidence when playing around with git. It’s worth mentioning that git reflog is for the local repository, so careful what you push upstream.
The “git reset” command
Use the git reset command to reset the current HEAD of local branch to a specific state.
Let’s say I would like to reset the last commit
git reset --soft HEAD~1When using --soft the changes in the last commit are staged and when using --hard the changes are deleted. See git reset --help for more detail.
The “git grep” command
Use this command to search the tracked files for a pattern.

Conclusion
Thank you for reading. If your most commonly used git commands are not listed here, then please feel free to share them with the rest of us in the comments section.
If you liked reading this article, feel free to check out my other articles, including the following three that you might find helpful.
For more articles, add me on Linkedin and follow on Medium.