
Getting started with the Twitter API in 2023
And how to connect your Twitter account via Python

Have you ever wanted to bring your Twitter data to life in your own custom app? Or have you ever thought about automating tweet posts?
With the Twitter API, you can do just that!
But, where do you start? No worries, I’ve got you covered!
Let’s discover how together 👇🏻
Table of contents #Step 1: Join the Twitter community #Step 2: Get your hands on a Twitter Developer Account. #Step 3: Time to make your first Twitter Developer App. #Step 4: Unlock the power of the Twitter API with your API Keys. #Step 5: Start sending API requests and bring your data to life! — #Checking our public tweets — #Writing a tweet directly
#Step 1: Join the Twitter community
If you don’t already have a Twitter account, create one. Head over to Twitter and sign up in a few simple clicks. If you don’t want to… then maybe this is not your article…

#Step 2: Get your hands on a Twitter Developer Account.
To access the Twitter API, you need to apply for a developer account. This can be done on developer.twitter.com. Just click on Apply and fill out some information about your app and how you plan to use the Twitter API. It usually takes 2 days to get verified — so you should start now!

#Step 3: Time to make your first Twitter Developer App.
Once you’re approved, it’s time to start using your twitter developer account.

If you click into the Developer Portal, you will be led into your main view:

As you can observe, I have already two apps created. However, I am going to create a brand new one with you :)
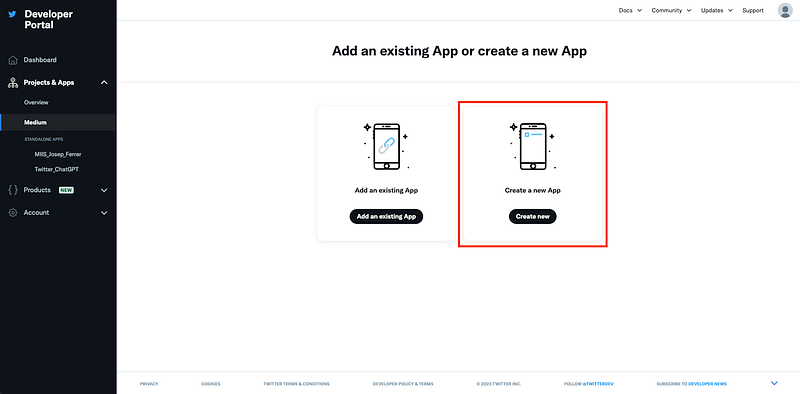
First of all, we need to create a project. Mine is called Medium. We add an app and choose to create a new one.
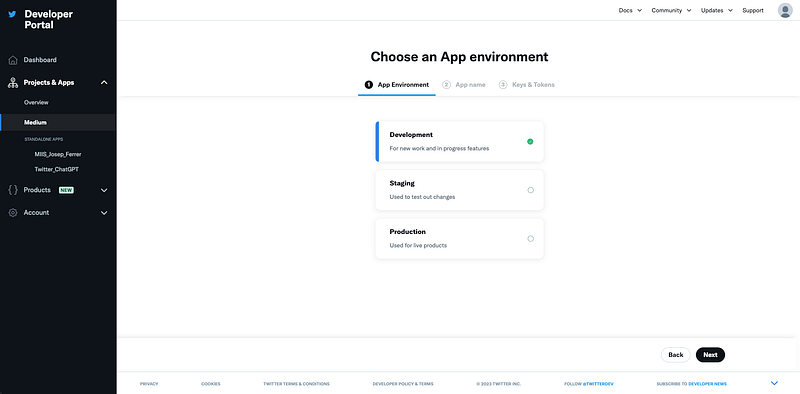
Then you need to choose the app environment. In my case, I usually choose the Production one. You can choose whatever you feel comfier with.
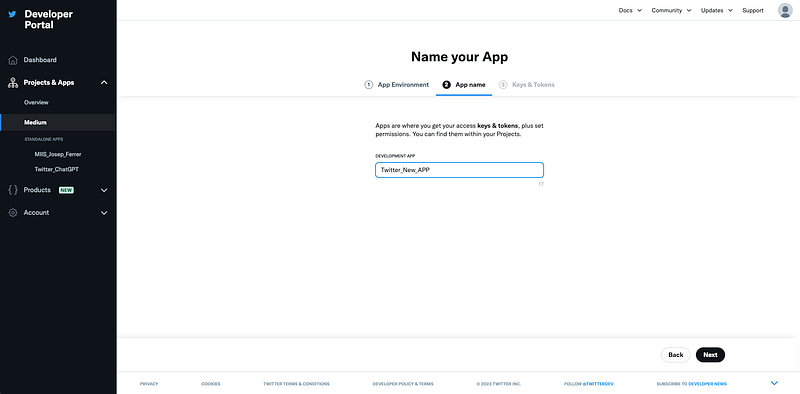
You need to pick the new name
And finally, you got the API Key, API Key secret, and Bearer Token. You need to store them three, if not, then we will need them again :(
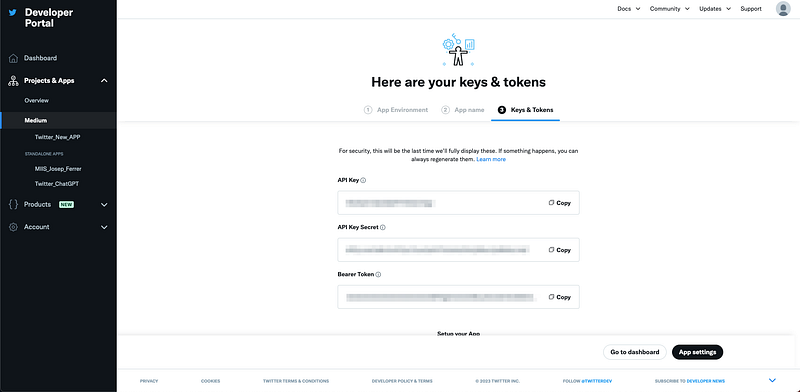
All three elements are:
- API Key: It is a unique identifier that is usually generated by an API provider and provided to a developer to access their API.
- API Key Secret: It is used in combination with the API Key to securely sign API requests. The API Key Secret should be kept private and never shared.
- Bearer Token: A bearer token is a security token that is issued by an authorization server and is used to access a protected resource. The token is usually a JSON Web Token (JWT) that contains information about the authenticated user and authorization claims.
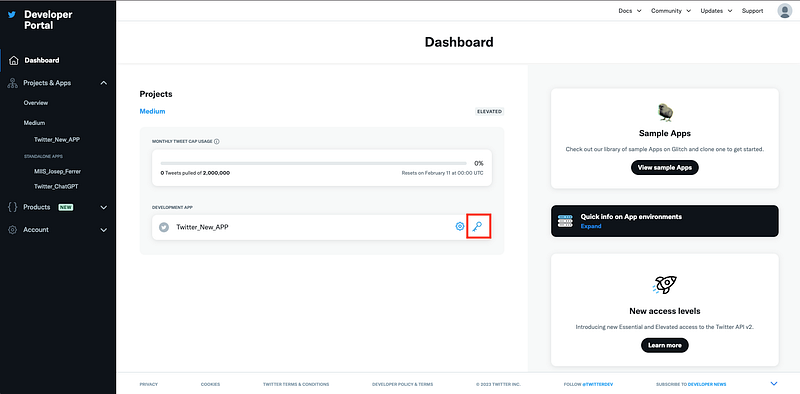
#Step 4: Unlock the power of the Twitter API with your API Keys.
To make API requests, you’ll need to generate API keys for your Twitter Developer App. Simply go to the Keys and Tokenssection and click on the key icon.
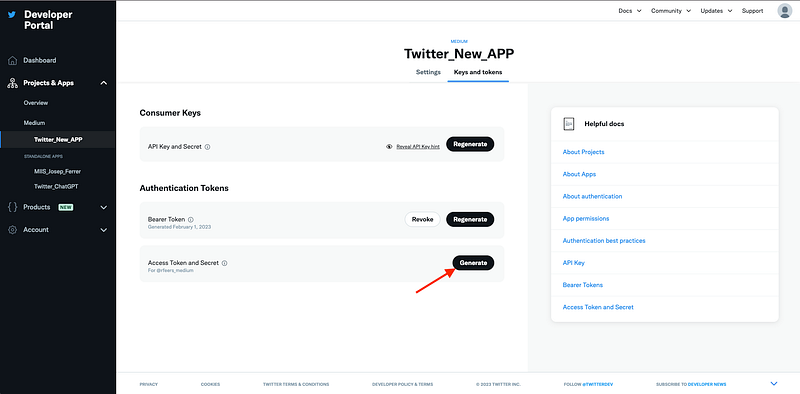
In the following view, you need to click into generate.
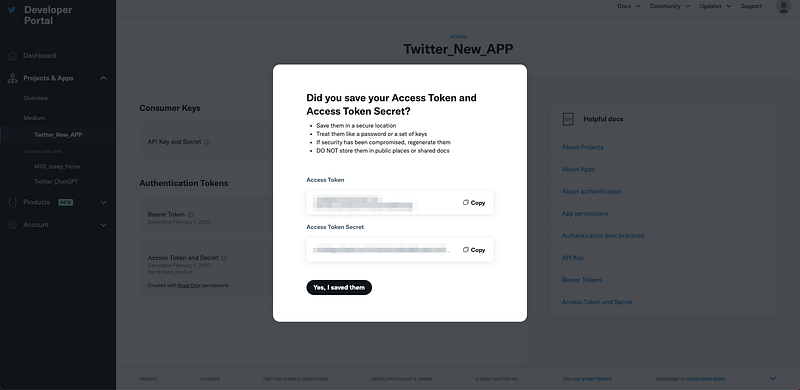
Now we need to copy them again and store them somewhere safe — especially when sharing our code with others! :)
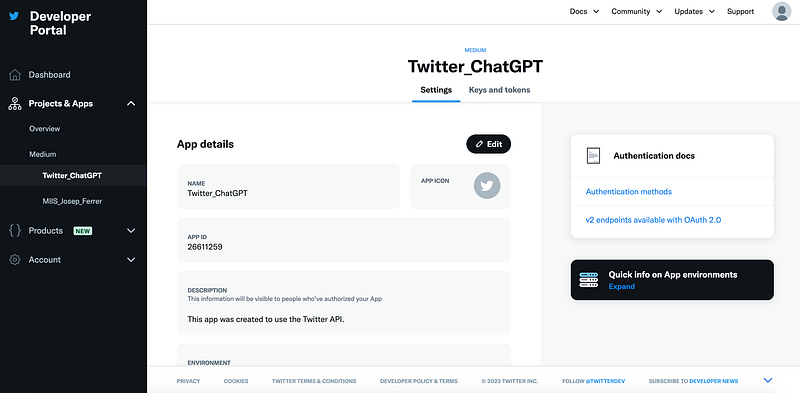
What’s the main problem? The app we just created is read_only. This is why we need to change this. How? We first go back to our main view with all our apps.

Then we click into the setting button of our just-created app.
Now we need to scroll down until User authentication settings
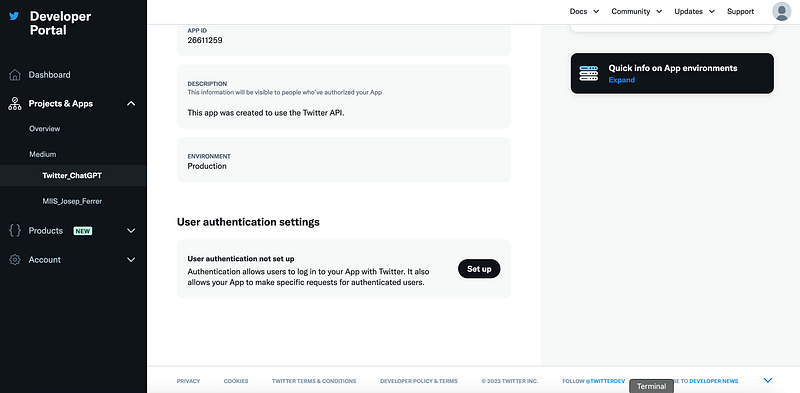
Finally, to change the permission, we need to set the following options:
- Choose the app to be Read and write
- Choose the app to be Web App, Automated App or Bot
- Define https://twitter.com/@username as Call Back URL
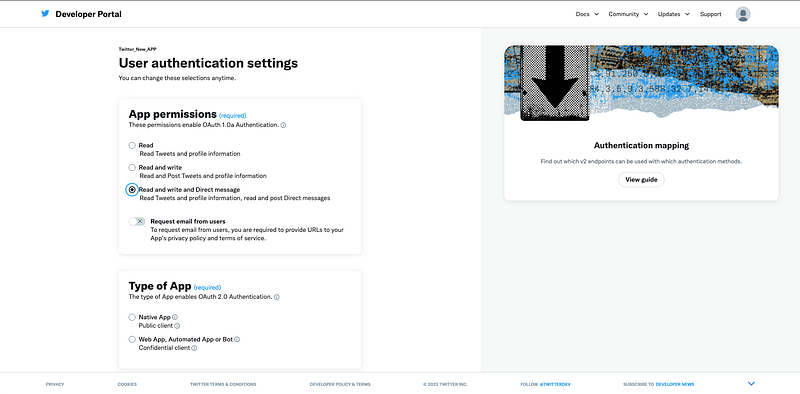
And now we are all set up! :D
#Step 5: Start sending API requests and bring your data to life!
With your API keys, you’re ready to start making API requests using RESTful API calls. These are simple HTTP requests to retrieve data from the Twitter API.
You can use tools like Postman or curl to make these requests. However, I will be using Python. For Python, we need to import the Tweepy library. If you need to install it, it is pip install tweepy.
Then we just need to define our API and access keys and define the connection with twitter.
Now you might be wondering, what can I do with this? Here we go with two examples!
#Checking our public tweets
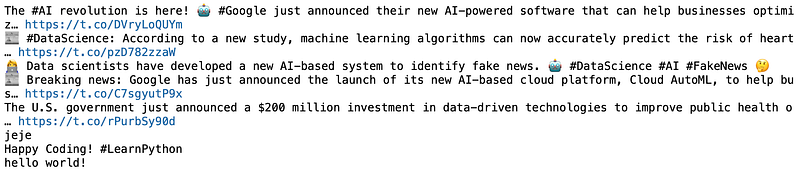
You can check all your posted tweets with the simple following code.
And you can observe in your python terminal all your historical tweets. Ad you can guess, I am using a dummy account for this article — so there are not many nor interesting tweets.
#Writing a tweet directly
You can post new tweets using directly python.
And if we go check our Twitter account, we will see the tweet is already posted!

Hope you find this article useful! These are the basics to get started with the Twitter API. I will be posting more articles explaining the functionalities of the API — and how to get the advantage of it. So stay tuned! ;)
Data always has a better idea — trust it.
You can suscribe to my Medium Newsletter to stay tuned and receive my content. I promise it will be unique!
If you are not a full Medium member yet, just check it out here to support me and many other writers. It really helps :D
Some other nice medium related articles you should go check out! :D