
Flutter
Getting Started With Flutter– Build an Expense App
Learn stateful widget, regular expression, floating button, text fields, etc. in Flutter

In the first part of this series, you learned how to create a basic app in Flutter. There you learned only basic structure, some interactivity and you used only Stateless widgets. In this tutorial, you will develop an Expense App to learn state, stateful widget, regular expression, TextField widget, and some concepts in Flutter.
I tried my best to add minimal features so you could easily understand the building blocks for this app.
You will develop the following app with me:
Features:
- User can add a row with 2 text fields: category and cost
- While typing the cost, the total cost will be shown on the title
- User can delete the last row
- User can update the cost at any row
Prerequisite:
You have to know Dart programming language and basic Flutter. If you don’t know Dart, you can learn quickly from this tutorial>
If you are first time developing a Flutter app you may try this one first:
Source Code:
1. Creating the App
Open your Android Studio, and create a new Flutter app. Give the project name “expense_today”. And click Next and follow the same to use the default settings.

You will see the following screen. Now delete all the code from the main.dart file.
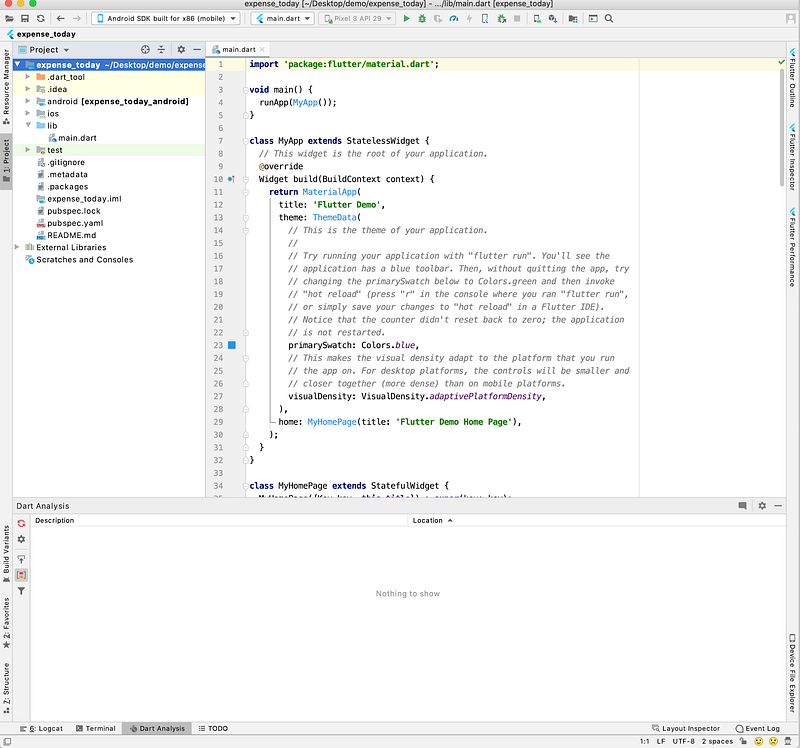
2. Create the Main App Widget
Now in the main.dart file write the following code:
Line 9aStatelessWidgetwhich is the main widget.Line 6an instance ofExpenseAppwidget to run as the appLine 3define the title of the appLine 13-21return aMaterialAppwidget with title and theme dataLine 16the primary swatch color set as green. So the app bar will look green, not blueLine 19temporary use aTextwidget, but we will change it soon.
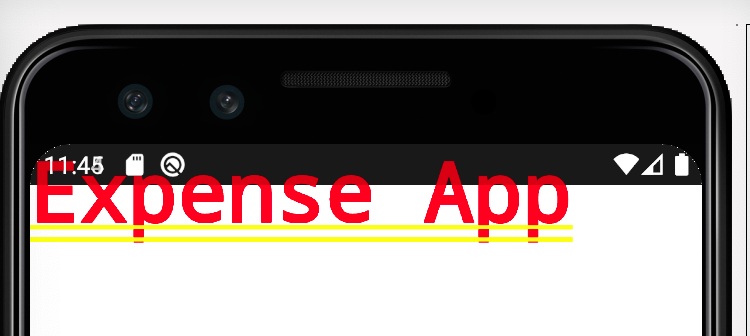
If you run this app, you will see a screen like this:
3. Create a Structure of the App
3.1 Create a HomeScreen Stateful widget
Now on the same main.dart file at the bottom after ExpenseApp class, write the following code.
Here you see, you use a StatefulWidget for the HomeScreen widget.
3.2 What is StatefulWidget?
When you want to modify data and you want to see the data reflected on that particular widget, you have to define that widget as StatefulWidget. Normally for static data, you use StatelessWidget like the ExpenseApp widget, you created at step 2.
So simply to say, a stateful widget is dynamic.
3.3 Rule to Create a Stateful Widget
You have to implement 2 classes:
- A subclass of
StatefulWidgetthat defines your widget.Line 1 - A subclass of
Statethat contains the state for that widget and defines the widget’sbuild()method.Line 8 - Override the method
createStateto create a state and assign it to the stateful widgetLine 5
3.4 User Interface
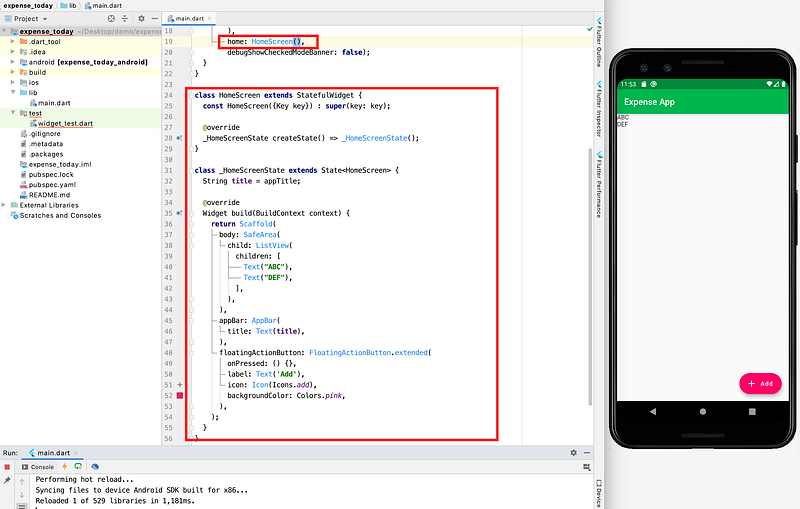
Line 12-31 is used the create the user interface. Basically, you used a Scaffold widget to create a pre-structural UI. You add a ListView with 2 simple Text widgets, an app bar, and a floating button. Currently, if you click the floating button nothing will happen, as the function is empty.
On the top Line 9 you define a title as String data and it will change in the future which will be reflected in the UI.
Line 25-30 adds a floating button widget, which will automatically show at the right bottom side of the screen.
3.5 Update ExpenseApp Widget
Now update the ExpenseApp widget. Change the home widget from Text() to HomeScreen(). If you hot reload or run the app again, you will see this beautiful screen.
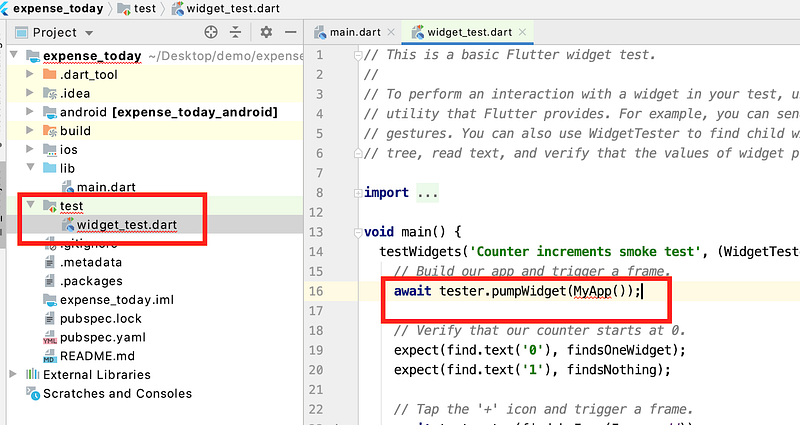
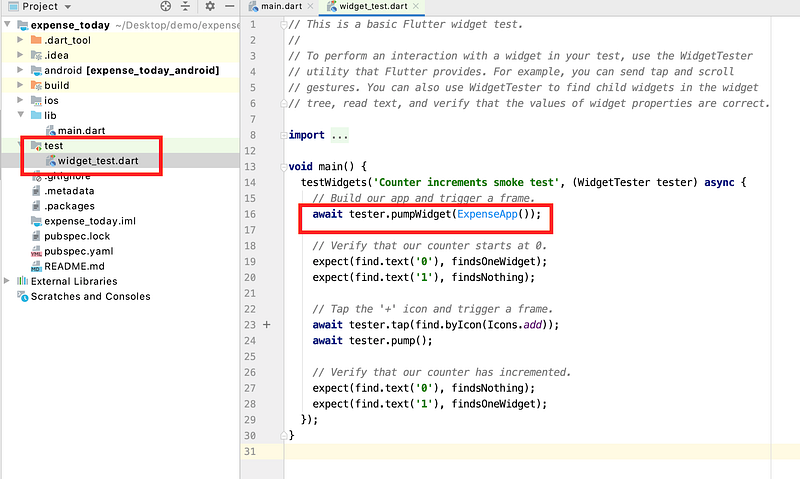
3.6 Fix Test Code
You see a red line is showing under the widget_test.dart. To remove it just change MyApp() to ExpenseApp()
4. Create a Row Widget
4.1 Creating the Source File
You need to create a row widget that will be shown within the List view, right? Like this:
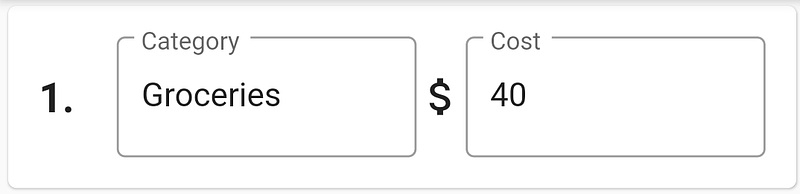
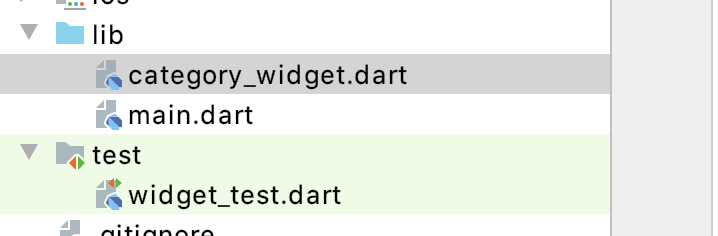
To do that, let’s create a new file named category_widget.dart within the lib directory.
4.2 Creating the Widget UI
Now write the following code in the category_widget.dart file. You again created a Stateful widget CategoryWidget. When the instance will be created you have to pass the rowNumber and a callback function.
The concept of
callbackfunction is very important. You can pass function reference to any class, and on that class the passed function can be called, that’s why it’s called callback. You can give any name though.
Discussion:
Line 16aCardwidget to create a card widget in Flutter.Line 17-18aPaddingwidget and with a value of15.0So within the card, on all sides, there will be15.0padding. It will make the UI looks good.Line 19aRowwidget to add all contents within a row.Line 20amainAxisAlignmentis set tospaceBetweenso that when more than one widgets add in a row, there should be space between widgets.Line 21aRowwidget has achildrenproperty. Here you add 4 widgets.Line 22-31aPaddingwidget with aTextchild. The value of this Text widget will be“${widget.rowNumber + 1}.”.From theStateif you want to access the widget’s data, you have to usewidget.object_name.So if therowNumberis0here it will be shown1.The reason is, you will use an array soon an array index starts with index0.Line 32-42anExpandedwidget is used with aTextFieldchild widget. Expanded widget is used to take the maximum available space the child widget can take. It automatically determines by the Flutter. Here anonChagnedfunction is used to detect the changes of the TextField value. Also, adecorationis used to make theTextFieldbeautiful.Line 43adds an icon of $ sign.Line 44-52anotherTextFieldis used to show the cost of the category.
4.3 Update main.dart file
Now update the main.dart file by importing the new widget in here.
Now update the ListView within the _HomeScreenstate class.
Within the ListView you remove the old Text widgets and adds 2 CategoryWidget. You also pass rowNumber:0 for the first one and rowNumber: 1 for the second one. Currently the callback function is empty.
Now if you save the file you see the following screen:
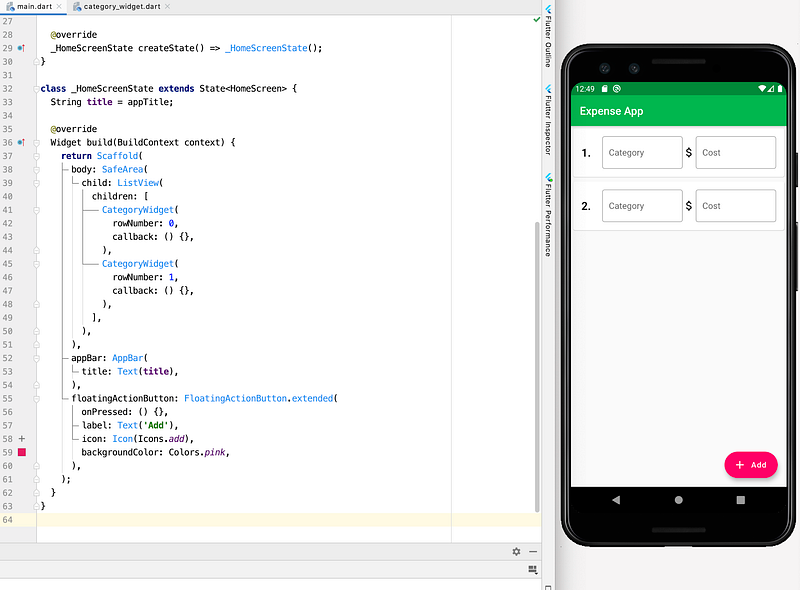
Currently, there are no functionalities, just the beautiful UI.
5. Create the “+ Add” Functionality
Now you want to make the app dynamic. So when a user will click the pink +Add button new row will be added. To do that, let’s add int totalRow = 0; within the _HomeScreenState
If totalRow is 0 there will be no row within the list view. If a user click the + Add button, totalRow will be incremented by 1 and a new CategoryWidget will be added within the list view.
Let’s add a addRow function within the _HomeScreenState
When you use a stateful widget and you want to update any data within the state, you must have to use the setState method. Inside the setState method, you have to update the state value. This is because calling setState, notifies the widget to call the build method again, thus you see the updated data on the UI.
Let’s update the ListView within the _HomeScreenWidget again:
Here you replace the old children and add a For loop. The For loop runs totalRow times. Within it, a CategoryWidget instance will be created. Also, when you use a for loop inside a widget, don’t use the curly braces {}.
Now update the onPressed function of the floatingActionButton widget and add a reference of the _addRow function.
Now save the file to hot reload the app. You see, the app screen is blank, and if you click +Add continuously a new CategoryWidget will be added within the ListView.
6. Track Each Category Cost
If a user types anything in the cost field need to track. For the category text field, this part is optional, just for demonstration purposes.
6.1 Update Category Widget
If you run the app, tap + Add to add an input row, you will see, if you type anything either on the Category or Cost it will show on the console.

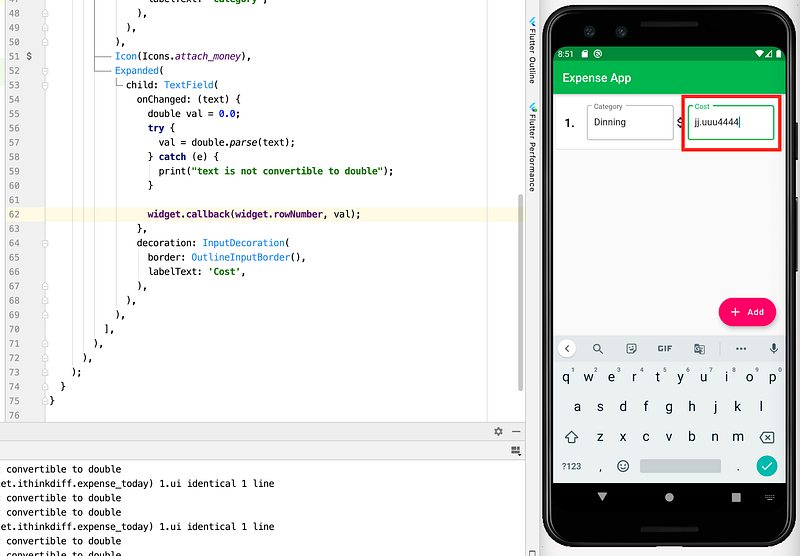
Now update the 2nd TextField's onChanged method by removing the print statement and adding the following code.
Here a try...catch block is used to convert the text from String to double value. If it couldn’t be converted, then an exception throws.
So if the user inputs the cost 3.444 it will work. And the value will be assigned with the val variable.
But if a user input “life” or any string or dirty data mixed with digit and string, an exception will throw. So in this case the default value val = 0.0 will be used.
And finally, widget.callback(widget.rowNumber, val); is used, to refer back to the widget’s callback function and pass the rowNumber and the value user input.
6.2 Add Input Restriction
Currently, a user can type anything in the cost field.
To protect users from entering string other than floating-point numbers, you will add another restriction to the cost field.
Update the category_widget.dart file by adding another import at the top.
And, modify the 2nd TextField again by adding a inputFormatter
inputFormattetrs tells the widget the rules about formatting when something entered in the TextField.
Here
FilteringTextInputFormatter.allowis used, to pass a regular expression which must be satisfied before accepting any text in the field.
6.3 Regular Expression:
Let's break the regular expressionRegExp(r’[0–9]+(\.){0,1}[0–9]*’)
In Dart, you have to use RegExp class instance to pass regular expression.
r’’means the raw string[0-9]+is the first part which means only 1 or more consecutive digits are valid e.g.1245(\.){0,1}is the second part. If the first part satisfied, it means on the 2nd part only one or no.can be used for floating-point number. e.g.12.[0-9]*is the third part means, if the first two parts are satisfied, zero or more digits can be added. eg.12.00484
So this is how to restrict the input field. Now you can not type, any string other than the required format, also you can not add more than one .
Now save the code and run the app.
7. Track Each Row Cost and Total Cost
The CategoryWidget part is done. Now let’s update the main.dart file for more interactivity.
7.1 Track Each Row
Update _HomeScreenState by adding a costForEachRow array. Here the cost provided by each row will be tracked.
7.2 Update the _addRow method
Add a costForEachRow.add(0); statement within the _addRow's setState method. When a new row will be added, an array item with a default value 0 will be added to the costForEachRow array. This is to track each row’s data individually in an array.
7.3 Add a Total Cost Calculation Method
After the _addRow method adds a new method _updateTotalCost
Within the setState, totalCost will be calculated based on the array costForEachRow.
Line 3if there is no item within the array, a0is assigned with thetotalCost.Otherwise, areducefunction is used to calculate the total values of the array. You can use aforloop orforEachfunction also to calculate the total cost from the array if you want.Line 7-11is used to update the app bar's title. If it has cost0only the plain app title will be used. Otherwise, additionally, the total expense will be shown.
7.4 Update Row’s Callback Function
Now add another method, _updateCostForEachRow. after the _updateTotalCost method.
This method will be passed as a callback method when the CategoryWidget instance will create in the ListView widget.
Line 2is for debugging purposes. To know what is the row number and the valueLine 4-7is used to first check if the array has the item or not by aniflogic. For example, ifrowNumis 0, the value ofcostForEachRow.lengthshould be1otherwise, the array doesn’t contain the item forrowNum = 0.This is a precaution before updating the array element’s value.Line 5updates the array element’s value. The array element is defined by therowNumwhich is an integer value starts from0.
7.5 Update ListView
Now update the ListView's for loop’s CategoryWidget's callback function.
Here you pass the _updateCostForEachRow method reference as the callback function.
Now save all code, and run the app again (hot reload will not work).
You see, if you add any value, the total cost will be calculated and shown with the app title.
8. Add a Delete Row Method
We are near to finish the app. Now add a delete row method after the _addRow method in the main.dart file.
This method will remove the last row of the array costForEachRow if it is not empty. Also, it updates the totalRow variable.
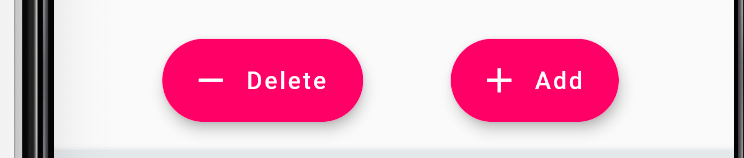
9. Add Two Floating Buttons
So if the user click + Add to add one row, there should be a -Delete button to delete the last row.
9.1 Add a New Widget
Now within the same main.dart file at the bottom, write the following code.
Here you create a new FloatingButtonsWidget widget that holds 2 floating buttons.
Line 2-4when the instance ofFloatingButtonsWidgetwill create, these values must be providedLine 10-31is used to create two floating buttons widget.Line 15is a conditional statement, that means if thetotalRowis more than0the Delete floating button will be shown.Line 17is aonPressedmethod, that defines when user tap -Delete what will happen. You pass thedeleteLastRowcallback function for this one.Line 23is the same as above but in this case, you pass theaddRowcallback function.
9.2 Update _HomeScreenState
Now update the _HomeScreenState's floatingActionButton part again. Write the following code by replacing the old code.
10. App is Ready
Now save all the code, and run the app again. You will see the add, delete and all interactivities are working.
Conclusion
I hope you understand the concepts of state, stateful widget, regular expression, and how to create some interactivity within an app in Flutter. The purpose of this tutorial is not to make a production-quality app, but to guide you to understand some building blocks to create mobile apps.
If you want to see more features or you have any question, let me know in the comments.
Source Code: 🚀
References:
- https://api.flutter.dev/flutter/material/FloatingActionButton-class.html
- https://api.flutter.dev/flutter/widgets/ListView-class.html
- https://api.flutter.dev/flutter/material/Card-class.html
- https://api.flutter.dev/flutter/material/Icons-class.html
- https://api.flutter.dev/flutter/widgets/Expanded-class.html
- And some more just google the widget name.


