
Dependency injection with Dagger 2: @Inject and @Provides

Dependency Injection, or DI in short, is a design pattern that allows to delegate the creation of objects and their dependencies to another object or framework. It is gaining a lot of interest in Android application development. This post shows how to inject objects using Dagger 2 through a console app.
Introduction
Dagger 2 is a dependency injection framework developed by Google. It is not to be confused with the Dagger 1 Framework which is the previous version developed by Square. Please note that the in the following paragraphs, I will also qualify Dagger 2 by Dagger (without numbers)
Dagger 2 allows to define and configure dependencies using annotations. It also allows to inject into Android components such as Activities and Fragments thanks to Android-Dagger. In fact, Dagger 2 can be divided into two parts:
- Dagger: which provides the base dependency injection capabilities
- Dagger-Android: which allows to inject objects into Android components such as Activities and Fragments
This article studies Dagger DI annotations through a console application. We can also apply the following principles in an Android app, but for the sake of understanding and simplicity, I chose the simple console app.
The sample projects of this guide are created using IntteliJ and coded with the Kotlin language. To get Dagger to work in IntelliJ, add the following dependencies in the build.gradle of the console project;:
def dagger_version = '2.17'
compile "com.google.dagger:dagger:$dagger_version"
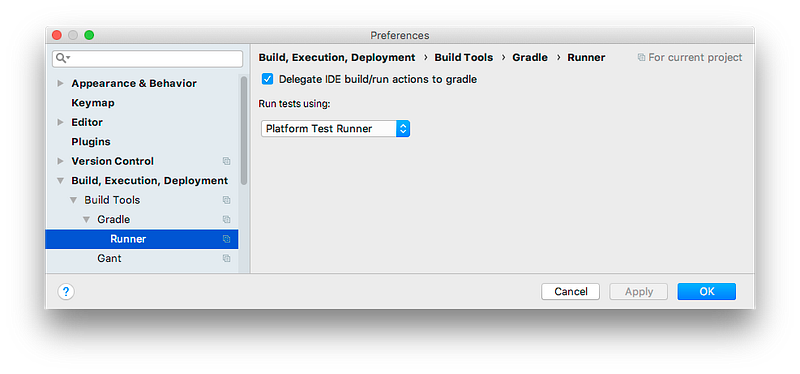
kapt "com.google.dagger:dagger-compiler:$dagger_version"After that, configure IntelliJ to delegate build actions to Gradle in settings -> Build, execution, deployment -> Build Tools -> Gradle -> Runner
Now we are, ready to inject some dependencies.
Dagger DI through a simple app
In this part, we will develop a console app that illustrates how to apply DI with dagger.
First, I will describe the problem that we are going to solve which is the same problem addressed in the official website. Suppose that we want to model a coffee maker that requires a thermosiphon pump and an electric heater to operate.
The solution of this problem is pretty straightforward. We need three classes: ElectricHeader, Thermosiphon and CoffeeMaker. The latter requires a instance of an ElectricHeader and Thermosiphon so that it can turn them on or off when the CoffeeMaker is turned on or off. In addition to that, the Thermosiphon needs the same ElectricHeader instance passed to the coffee maker.
Without dependency injection, we create the instances manually and the code should be similar to the one below:
val heater = ElectricHeater()
val pump = Thermosiphon(heater)
val coffeMaker = CoffeeMaker(heater, pump)
coffeeMaker.brew()
With dependency injection, the object instantiation is delegated to another class or framework. Thus, the previous code would look like this:
val coffeMaker = DIClassOrFramework.getCoffeeMaker()
coffeeMaker.brew()
It may seem like magic but (unfortunately) it is not. This kind of code is achieved by Dagger 2 thanks to some annotations and some lines of additional code. The good news is that the code and annotations we makes the business code smaller, and easier to test. Next, we will see how to actually make a coffee maker with Dagger 2.
Dagger 2 works by building a dependency graph. We call it a dependency graph because when we imagine objects and their dependencies, it is similar to a graph. In our case, the graph looks like this:
            +---->ElectricHeater
CoffeeMaker |          ^
            |          |
            |          |
            |          +
            +---> Thermosiphon
The graph has a root item which is the CoffeeMaker that has two dependencies illustrated by the arrows. Dagger 2 manages the dependency graph of the classes that have the @Inject and @Provides annotation. Dagger cannot instantiate or inject classes that do not have neither @Inject nor @Provides annotations.
In order to get an instance of the root object (CoffeeMaker), we need to create an interface that has a function that returns any class of the graph that we want. This interface must have the @Component annotation.
Here is a summary of our first Dagger annotations:
@Injectand@Provides: class that have this annotations are integrated in the dependency graph of Dagger.@Component: used to annotate the interface that returns the root object of the graph.
The next section proposes a solution using some of these annotations.
The @Inject annotation
We have many annotation to choose from to solve the problem. The @Provides annotation offers more possibilities than @Inject but requires more code. Thus, in the following section, we specify the dependency graph only with @Inject annotation.
@Singleton class ElectricHeater @Inject constructor() {
    var heating: Boolean = false
    val isHot get() = heating
    fun on() {
        this.heating = true
    }
    fun off() {
        this.heating = false
    }
}
class Thermosiphon @Inject constructor( private val heater: ElectricHeater ) {
    fun pump() {
        if (heater.isHot) {
            println("Heater is hot !!!")
        }
    }
}
class CoffeeMaker @Inject constructor() {
    @Inject lateinit var heater: ElectricHeater
    @Inject lateinit var pump: Thermosiphon
    fun brew() {
        println("Brewing coffee")
        heater.on()
        pump.pump()
        println("Coffee ready :)")
        heater.off()
    }
}
Here is the explanation of the most important parts of the code:
@Singleton class ElectricHeater @Inject constructor()
class Thermosiphon @Inject constructor( private val heater: ElectricHeater )
class CoffeeMaker @Inject constructor()
Each class has an empty constructor with the @Inject annotation. This allows instances of these classes to be constructed by Dagger.
The @Singleton annotation means that Dagger will create and maintain a single instance of the annotated class. This means that any time an ElectricHeater instance is needed, the same instance will be passed.
The heater parameter of the Thermosiphon constructor will also be automatically injected by Dagger. In addition to injecting constructor parameters, Dagger also injects non-private instance variables that have the @Inject annotation as illustrated below.
class CoffeeMaker @Inject constructor() {
    @Inject lateinit var heater: ElectricHeater
    @Inject lateinit var pump: Thermosiphon
}
Thanks to the different @Inject annotations, the Dagger dependency tree is well defined for our problem. One question remains, how to get a CoffeeMaker instance from Dagger. This is done thanks to the component that provides a method that return a CoffeeMaker as follows:
@Singleton @Component() interface CoffeeShop {
    fun maker(): CoffeeMaker
}
Dagger requires an interface that is annotated with the @Componenet annotation and defines a function that returns the Type of the class that we want to get an instance of. Dagger takes care of implementing the interface and its methods. The name of the generated class has the name as the interface with the Dagger prefix. So, in our case, we get a DaggerCoffeeShop class generated for us.
Here is the code of the main function that requests an instance of a CoffeeMaker from Dagger.
fun main(args: Array<String>) {
    val coffee = DaggerCoffeeShop.builder().build()
    coffee.maker().brew()
}
The full code is available here
This section illustrated three annotations: @Inject, @Singleton and @Component. The next section proposes another solution for the problem that uses @Provides annotation.
The @Provides annotation
The @Inject annotation is concise and easy to use. However, there are cases where this annotation cannot be used:
- Injecting an interface
- We cannot add
@Injectto classes from libraries (because we need to modify the source code) - Objects that require configuration outside of the constructor (like objects generated with a factory)
In this case, we instantiate Dagger allows to add these object to its graph using modules. A module is a class that has the @Module annotation and defines methods annotated with the @Provides annotation. Annotated methods return instances of classes that cannot support the @Inject annotation.
To illustrate these annotations, suppose that we want to pass a Heater interface instead of the ElectricHeater implementation.
interface Heater {
    fun isHot() : Boolean
    fun on()
    fun off()
}

class ElectricHeater : Heater {
    ...
}

class Thermosiphon @Inject constructor( private val heater: Heater ) {
    ...
}

class CoffeeMaker @Inject constructor() {
    @Inject lateinit var heater: Heater
    ...
}
In this cas, the ElectricHeater is provided using a module as follows:
@Module class CoffeeMachineModule {
    @Provides @Singleton fun heaterProvider() : Heater = ElectricHeater()
}
Inside the heaterProvider() function, we can write the code that we want as long as we return a Heater. We can particularly perform additional configurations if necessary.
Note that neither Heater nor ElectricHeater require any Dagger annotation, which means that we can inject classes from third party libraries and at the same time configure them.
The last modification consists of adding the module to the component as follows:
@Singleton @Component(modules = [CoffeeMachineModule::class]) interface CoffeeShop {
    fun maker(): CoffeeMaker
}
We can now run the code again and it should work as before.
Before concluding, I want to show an interesting possibility with modules. In fact, we can easily add a FireCoffeeMaker that uses a FireHeater by defining a new class, a module that provides the new heater and a component as follows:
class FireHeater : Heater {
    var heating: Boolean = false
    init {
        println("++++Fire heater instantiated")
    }
    override fun isHot() = heating
    override fun on() {
        println("Fire heater on")
        this.heating = true
    }
    override fun off() {
        println("Fire heater off")
        this.heating = false
    }
}

@Module class FireCoffeeMachineModule {
    @Provides @Singleton fun heaterProvider() : Heater = FireHeater()
}

@Singleton @Component(modules = [FireCoffeeMachineModule::class]) interface FireCoffeeShop {
    fun maker(): CoffeeMaker
}
We can use both coffee makers in the main method.
fun main(args: Array<String>) {
    val coffee = DaggerCoffeeShop.builder().build()
    coffee.maker().brew()

    val fireCoffee = DaggerFireCoffeeShop.builder().build()
    fireCoffee.maker().brew()
}
The full code is available here.
With this, we reach the conclusion of this article.
Conclusion
This article illustrated the base Dagger annotations that allow to configure and instantiate a dependency tree. The annotations are @Inject, @Component, @Singleton, @Provides and @Module. We have seen that @Inject is more concise than @Provides+@Module but has less possibilities.
The different annotations were experimented using a Kotlin console app. I choose a console app over an Android because it is simpler to setup and test this way.
We can use these Dagger 2 in Android projects. However, in order to inject into objects instantiated by Android (Activities, fragments, Application) some more setup and annotations are required. Hopefully, the dagger website explains how to do it (and maybe a future article :smile:).


