
THE DAILY WRITE
Create Unique Images For Your Stories With a Canva FREE Account
Step-by-step directions with noted screenshots
The Daily Write Challenge’s writing prompt for June 17th, 2022: What skill could you teach someone in 10 minutes or less?
I can teach you how to create unique, eye-catching images for your Medium stories — without paying a dime for graphic design software.
Yes, in less than 10 minutes! 😃
I’ll be using a Canva FREE account.
Important Note: The photo editing feature is only accessible when *logged in* to a user account.
If you need an account, head over to canva.com first!
Logged in?
Okay, let’s get right to it!
Step #1: Create a custom-sized new design.
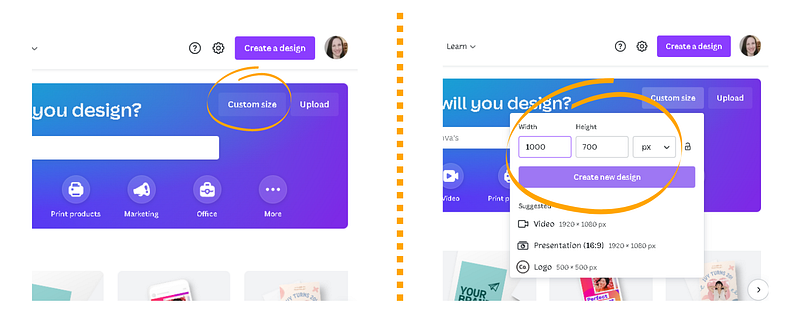
Click the ‘Custom Size’ button and enter desired Width and Height (in pixels). Then click the ‘Create New Design’ button.
I used a width of 1000 pixels by a height 700 pixels.
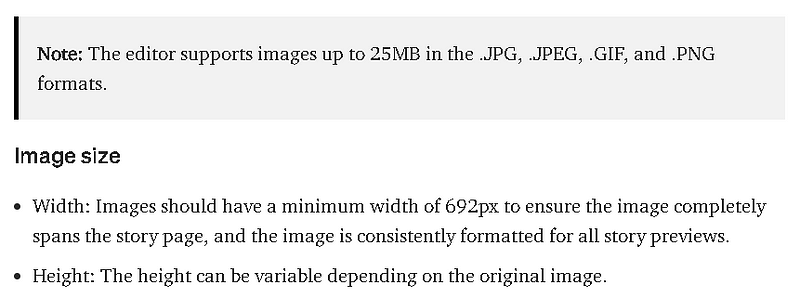
Below are Medium’s guidelines for image specs:
Step #2: Browse the elements tab to find an image or photo (or upload your own!).

Click on the ‘Elements’ tab in the menu bar to the far left of screen.
In the search bar (above the element thumbnails), enter a keyword to find relevant images. To narrow search results, click an option from menu just below search bar (in this case, ‘Photos’).
Step #3: Select an image and place it on a blank design Page.
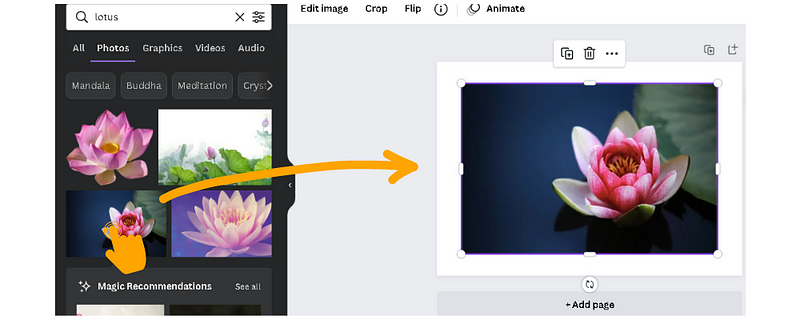
There are two ways to do this; click once on the desired image (it will then appear on the design Page) or click and drag it over (and onto) the design Page.
NOTE: If you drag the image slowly across the edge of the design Page, it may automatically “fill” it. It’s okay to go on to Step #4 (and scale and arrange after editing).
Step #4: Access the ‘Edit Image’ menu bar.
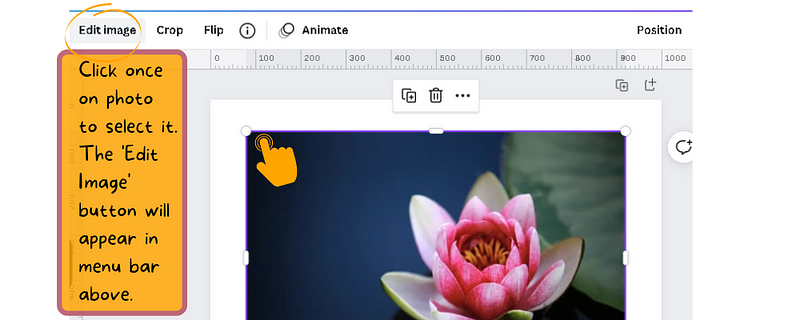
Single click on the image to select it.
Above the design Page, the menu bar now includes the ‘Edit Image’ button — click it.
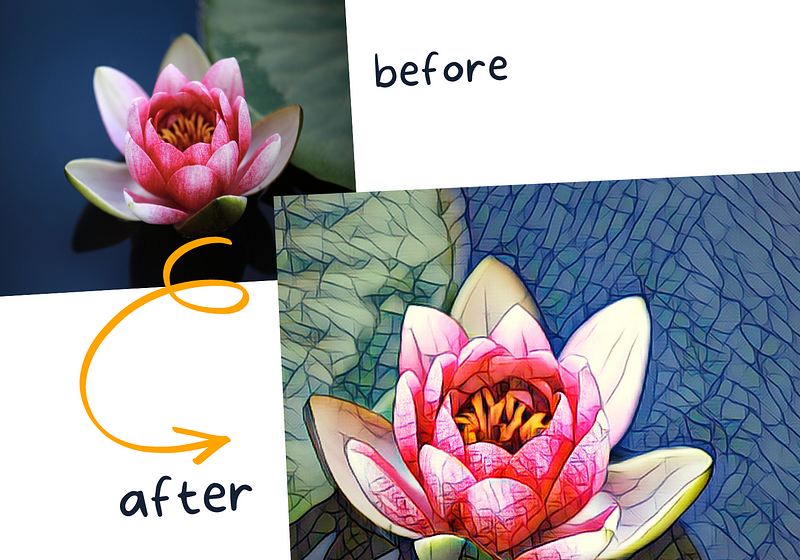
Step #5: Browse and apply Effects. *I used ‘Paint Effects’ and ‘Filter Effects’
The process is the same for both (search for either “paint” or “filter”). *Screen captures walk through how to apply ‘Paint Effect.’
Type “paint” in the search bar in the far left panel. ‘Paint Effects’ appear below (click See all to view all paint effect options).
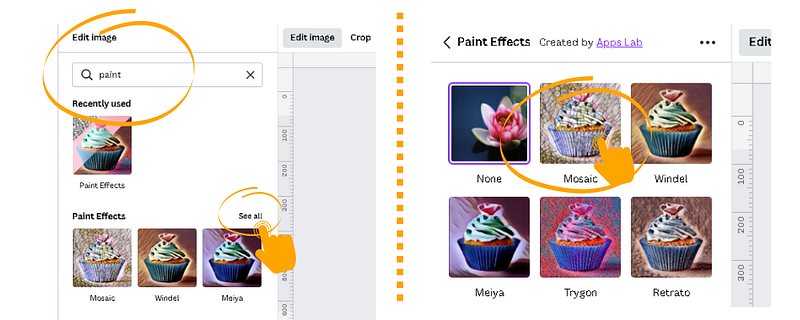
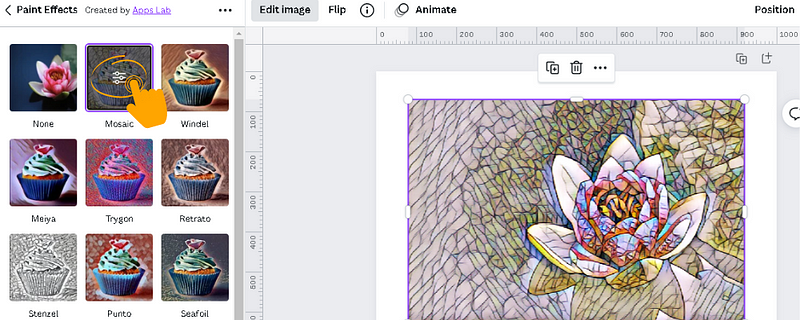
Select ‘Paint Effect’ you wish to apply (I used Mosaic).
If you like how it looks, press ‘Apply.’ *Located at the bottom of the left panel, below Paint Effects thumbnails.
If not, click on the See controls icon in middle of the Effect thumbnail.
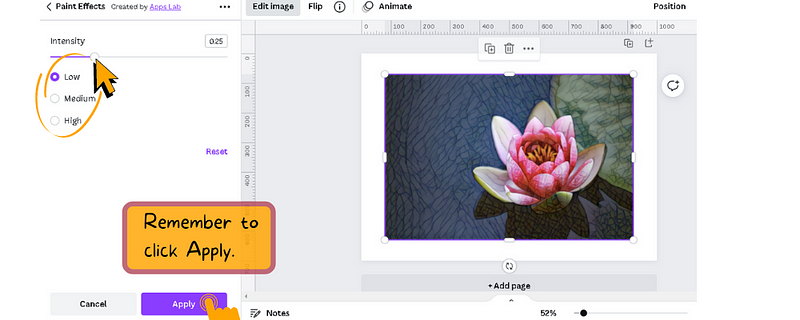
To adjust Intensity, select Low, Medium, or High, or click and slide the bar to adjust. *I used low and 0.25 Intensity.
When satisfied, click ‘Apply.’
Step #5: Scale and arrange image.
Double click on the image. Click and drag corners to scale. Click on the image and drag it to move.
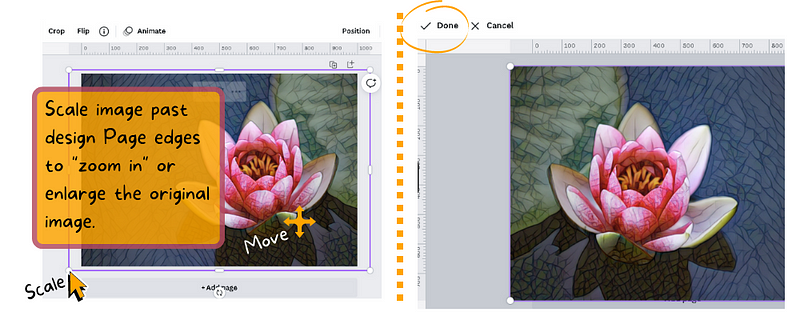
Once happy with image placement, click ‘Done.’
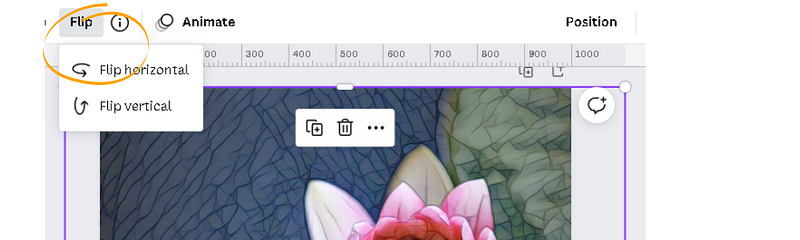
I flipped my image horizontally.
Step #6: Download and Save the finished design file.
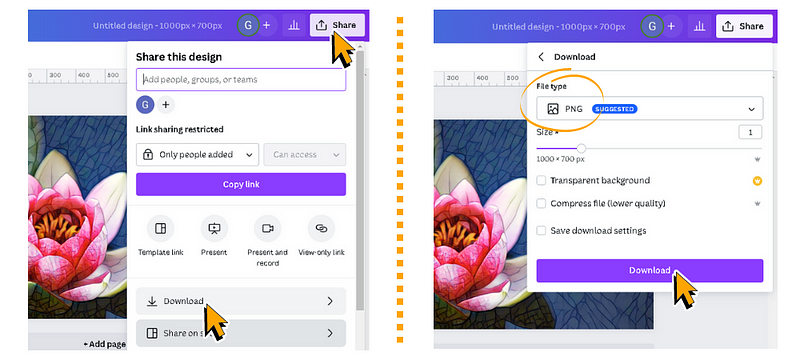
Click ‘Share.’ Then, in the pop-up window, click ‘Download.’
Another window will pop-up; choose desired File type and Size, then click ‘Download’ once more.
Save the file to your computer.
Nicely done! 👏
KEY MESSAGE: With a FREE Canva account, you can create unique images for your Medium stories (or endless other purposes)! It’s a simple affordable way to add an impressive touch — and have fun!
As always, thank you for reading!
❤ By Amanda Jean
✴️Have you indulged in a Medium membership!? When you sign up via my referral link, you gain access to every article on Medium for either $5/monthly (or a discounted price of $50/year). You will also support my writing - and others you read. Thank you, sincerely! Enjoy!💚


