
Create The Most Photorealistic Images on MidJourney — Success Prompting Formula & 100+ Cheat Codes (Part 3)
Let’s explore the Prompting Cheat Codes for Various Camera/ Film Types, Description of Realism & Complete Guide to Aspect Ratios to create the most Jaw-Dropping Photorealistic Images on MidJourney! (Part 3)
If later you find this article valuable, throw me some Medium love! 🥰 What you can do to support me: Clap up to 50, leave a message, highlight some text if you see fit & be sure to follow. 💌
Yay, here comes Part 3 that lots of you are waiting for! The feedback of Part 1 and Part 2 are both really amazing (thank you all!), I’m pretty sure you’re ready to explore the last few batches of cheat codes to create the Most Jaw-Dropping Photorealistic Images on MidJourney with me in this one!
In Part 1 and Part 2 of this article, I have shared:
- My MidJourney Photorealistic Images Success Prompting Formula
- Cheat codes for:
Photography Theme/ Style+Image Angle+Image Focus+Lighting+Weather / Time of Day
In case you have missed Part 1 and 2, you may want to go through them first. Here you go:
Parts 4 and 5, where I shared my secret bonus tips, have also been published. You can check them out afterward!
Let’s take a look at my “MidJourney Photorealistic Images Success Prompting Formula” again!
Photography Theme/ Style + Description of Image Content + Image Angle + Image Focus + Lighting + Weather / Time of Day + Camera/ Film Type + Description of Realism + Complete Guide to Aspect Ratios + My Secret Bonus Tips
Based on this success formula, I’ve categorized the cheat codes into the following:
📌 Photography Themes/ Styles (Covered in Part 1 of the article)
📌 Image Angles (Covered in Part 1 of the article)
📌 Image Focus (Covered in Part 1 of the article)
📌 Lighting (Covered in Part 2 of the article)
📌 Weather / Time of Day (Covered in Part 2 of the article)
📌 Camera/ Film Types (Covering in THIS Article)
📌 Description of Realism (Covering in THIS Article)
📌 Complete Guide to Aspect Ratios (Covering in THIS Article)
✨ My Secret Bonus Tips (Part 4 and Part 5 of the Article!)
In this article, let’s explore the cheat codes for:
Camera/ Film Types+Description of Realism+Complete Guide to Aspect Ratios
And, of course, you’ll see many amazingly photorealistic images with their prompts in this article. Let’s go!
📸 Camera/ Film Types
📌 Camera Models
DSLR cameras (Digital single-lens reflex camera)
Each real-world DSLR camera has its own unique characteristics and properties.
There are a lot of debates out there: Does adding a specific DSLR camera model name to your prompt actually make a difference in your photorealistic images outcome?
Here is my opinion: After a lot of trials of adding different DSLR camera model names in the MidJourney prompts, I concluded that for DSLR Camera, different model names does not really matter — simply put, the image outcome doesn’t give any significant effect that I could notice.
So here is my suggestion: You can add ANY of the DSLR camera model name or, simply add “DSLR” to your prompt, MidJourney reads them both the same way as: you want to generate a photorealistic image.
Here are some popular camera model names you can use, if you don’t like to use “DSLR”:
- Nikon D850
- Canon EOS R5
- Sony A7R IV
- FujiFilm X-T4
- Panasonic GH5
- Leica SL2
- Pentax Spotmatic F
- Minolta Maxxum 7
But wait… there’s a catch!
Other than DSLR cameras, there are many other cameras that have special characteristics and can produce very unique image outcomes. And most importantly, if you put them in your prompt, MidJourney does understand them and can give Midjourney a flame of reference to what specific type of picture you’re looking for!
Let’s check what they are:
- GoPro Camera (GoPro cameras are built for versatility. They’re ready for action and as such, can record fast, making them great for recording sports.)
Mountain bike race, full of action, GoPro camera photography --ar 16:9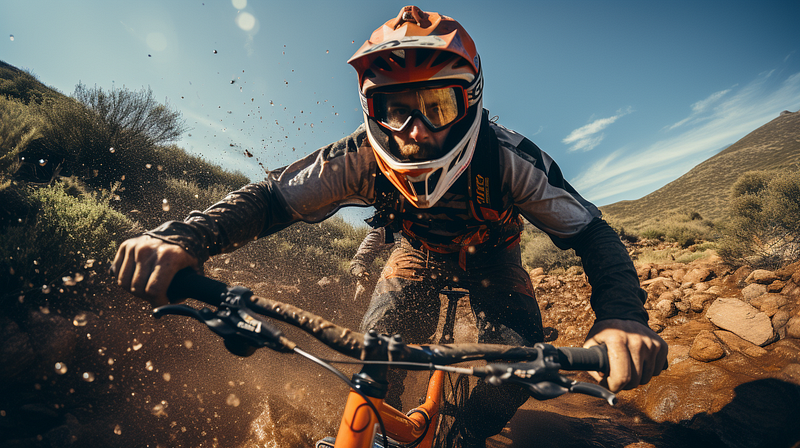
- Night Vision Camera (Night vision cameras use infrared light to illuminate images in the dark. The images have a greenish tone.)
Night vision camera photo of a wooden house in a full moon night --ar 16:9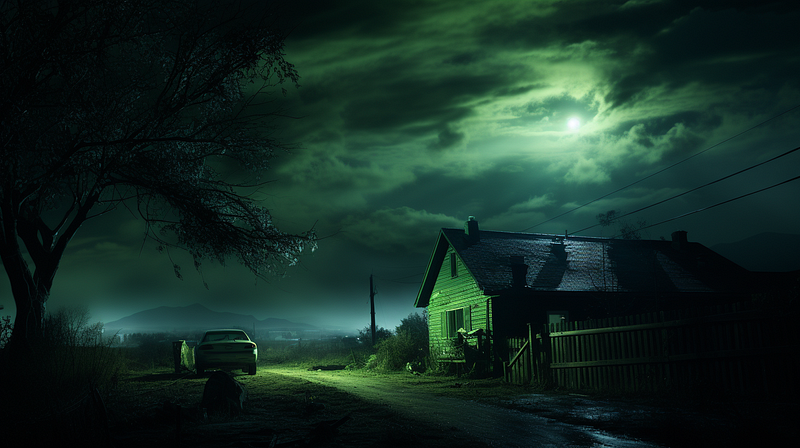
- Schlieren Imaging Camera (Schlieren Imaging is a way to make invisible flow elements, such as gases, air, and other transparent media visible)
Schlieren imaging style photography of two moving hands --ar 16:9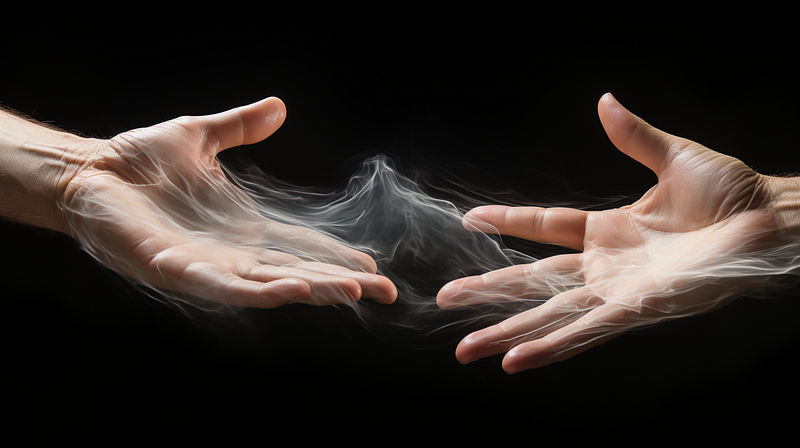
- Fisheye Camera (Fisheye cameras use wide-angle lens which can capture an extremely wide field of view. While a rectilinear wide-angle lens can capture a field of view of 100 degrees, the fisheye lens can capture a field of view ranging from 100 to 180 degrees but with a circular image)
Fisheye camera photo of a crowded beach --ar 1:1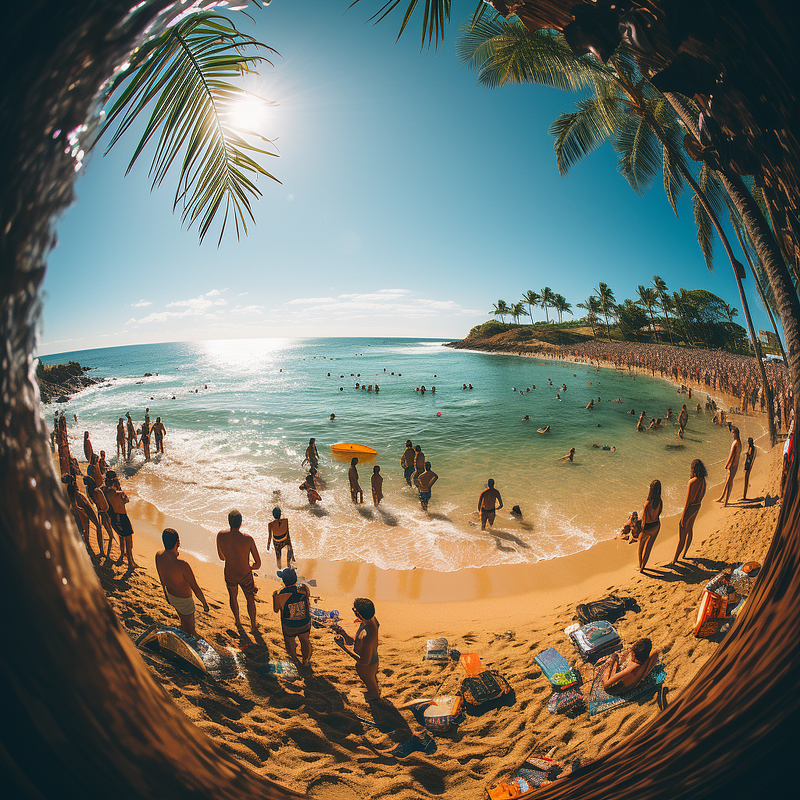
- Disposable Camera (Disposable cameras are a type of film camera designed to be single use. The pictures has a unique color tone and grains)
Disposable camera photo of a teenage girl taking selfie --ar 16:9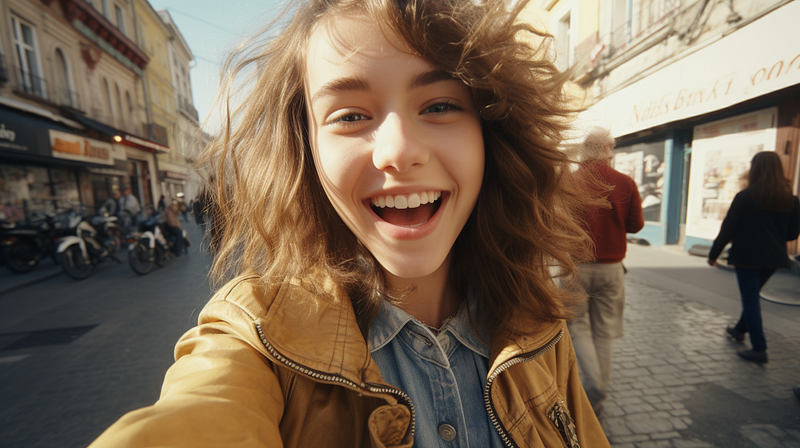
- Vintage Polaroid Camera (Also known as instant cameras. Introduced in 1948 and became popular in the 1970s. It is a small and compact device that takes pictures and develops hard copies instantly. The pictures give a vintage aesthetic with warmer color tone and unique grains)
Vintage polaroid photo of a mysterious young girl in a foggy forest, spooky --ar 16:9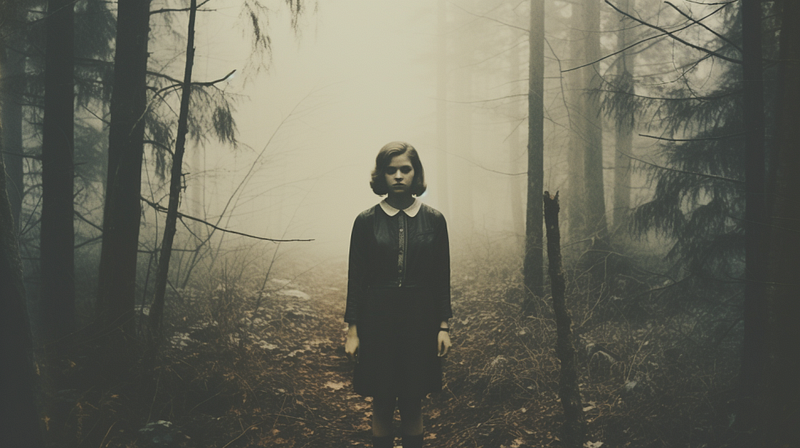
- Instax Camera (FujiFilm Instax is a modern instant camera that produces sharper images that has overall better dynamic range. Comparing to Polaroid, Instax brings a more photojournalistic aesthetic while Polaroid brings a vintage aesthetic)
Instax camera photo of a couple taking picture at the streets of tokyo --ar 3:2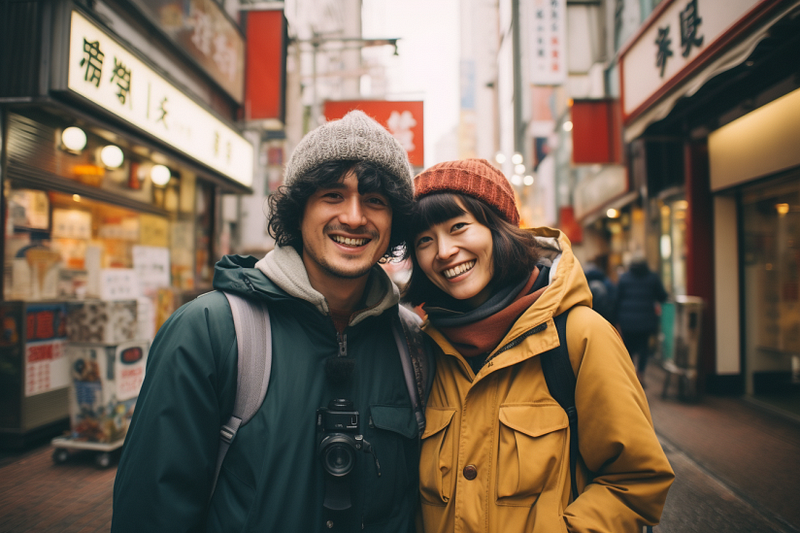
- Ambrotype (Ambrotypes are backed with a dark opaque material, e.g. black lacquer and velvet, which makes their negative image appear positive — dark areas appear so because the backing material shows through clear areas in the glass. Highlights of the image are comprised of silver particle deposits and will appear milky-white)
Ambrotype photo of a family of three and a dog --ar 16:9
- Lomo Camera Photo/ Lomography (Lomo camera is a Russian 35mm film camera. It’s an ultra-basic camera with a fixed lens, one shutter speed, and manual focusing. Lomo pictures are then full of flaws which give its unique characters: oversaturated, high in contrast, and soft. The backgrounds tend to be blurry because lomography lenses have very large apertures)
Lomo camera photo of a cat lying in the sun in a garden --ar 16:9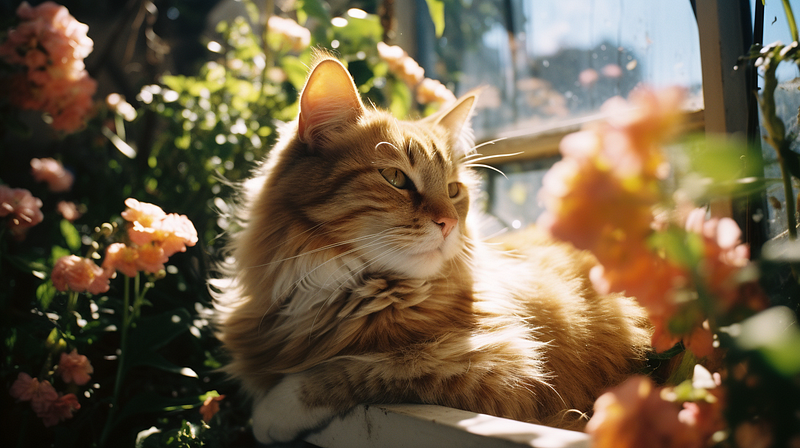
📌 Film Types
Although taking pictures with films is not so popular anymore nowadays, certain film types do play a key role in determining the contrast, grain, light sensitivity, and very distinct appearance of the image outputs.
Other than putting “Film Photography” or “Film Camera” to your prompt, there are also some iconic film types that MidJourney can understand. Let’s check what they are!
- Agfa Vista 200 (Agfa Vista 200 gives saturated colors and is famous for its yellow and red tones)
Photo of Instanbul old streets, taken by Agfa Vista 200 --ar 16:9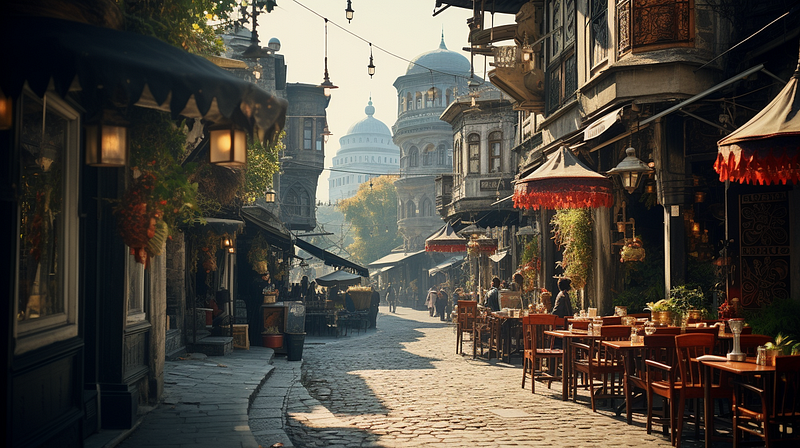
- Fujifilm Superia X-TRA 800 (Offers vivid tonal palette with accurate color reproduction, perfect for indoors or low light environment)
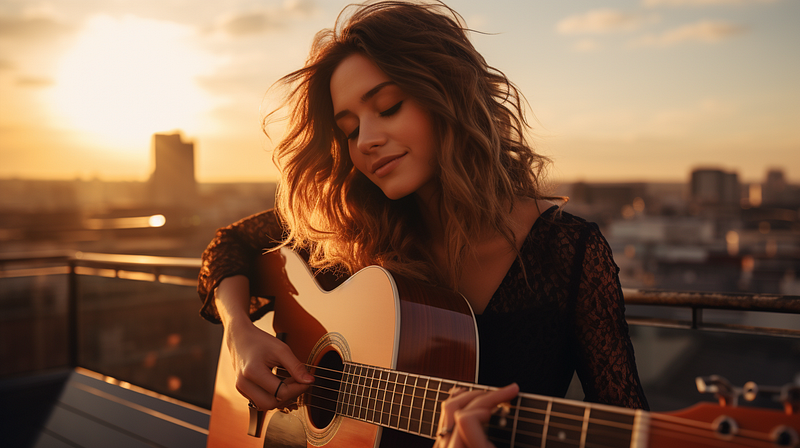
Instagram model with messy hair in a gloomy day, city, photo taken by Fujifilm Superia X-TRA 800 --ar 16:9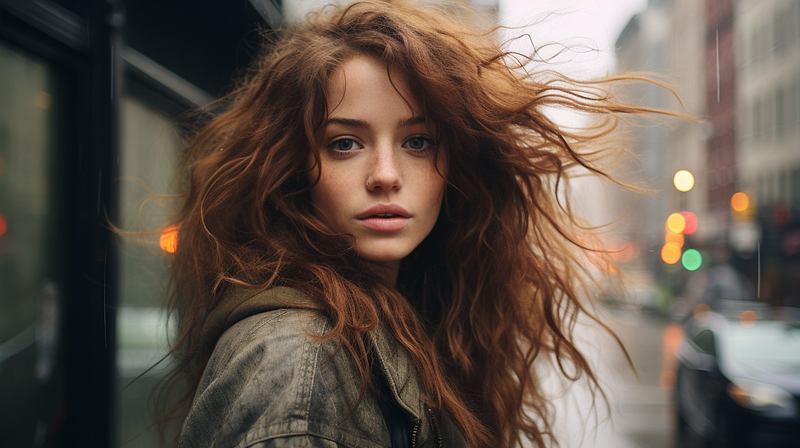
- Kodak Ektar 100 (Kodak Ektar 100 is a daylight-balanced color negative film characterized by a vivid color palette, high saturation, and an extremely fine grain structure)
Photo taken by Kodak Ektar 100, an old lady with her dog at a park, afternoon light --ar 16:9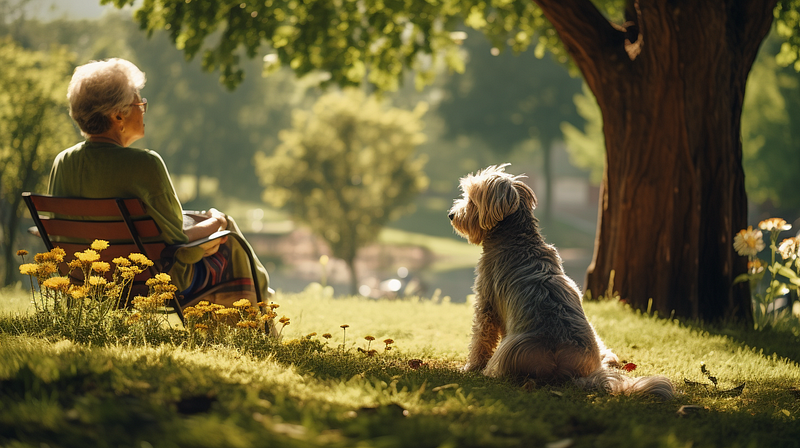
- Kodak Tri-X 400 (Tri-X is a black and white film that offers excellent tone gradation and brilliant highlights and produces a nostalgic look)
Shop owner of a vintage film camera shop. Photo taken by Kodak Tri-X 400. --ar 16:9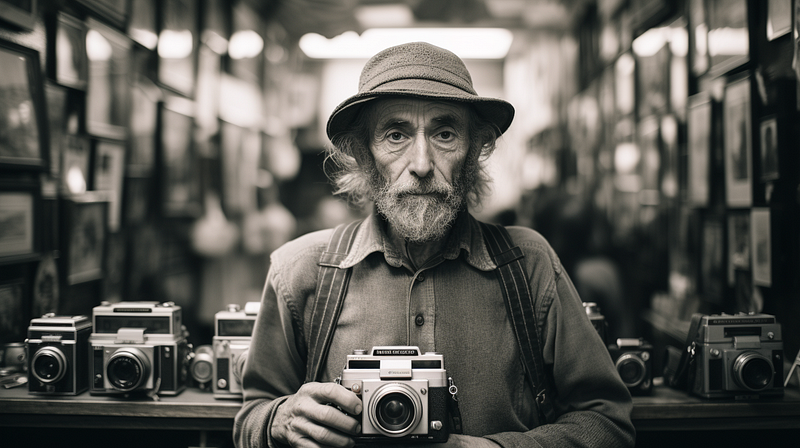
- CineStill 800T (Photos give a unique look with cool tungsten-balanced tones and halation around light sources, making it a popular choice for night photography)
CineStill 800T film photo, Hong kong streets at night, neon signs, wide angle, rainy --ar 16:9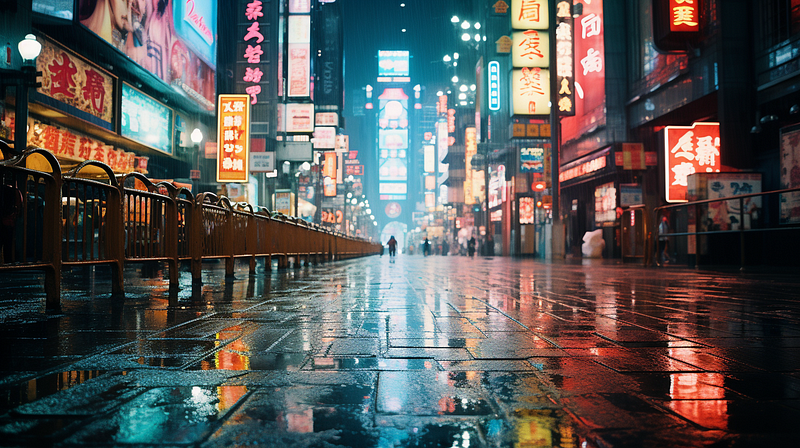
- Kodachrome 64 (It was first introduced in 1935 by Eastman Kodak Company and became one of the most popular color slide films for still photography. Kodachrome 64 is known for its detailed images with excellent color accuracy and sharpness. The film’s color palette is also distinctive with bright and vibrant colors. Steve McCurry’s famous photographic portrait “Afghan Girl,” was taken using this film)
Young siblings in 1970s, photo taken by Kodachrome 64 --ar 16:9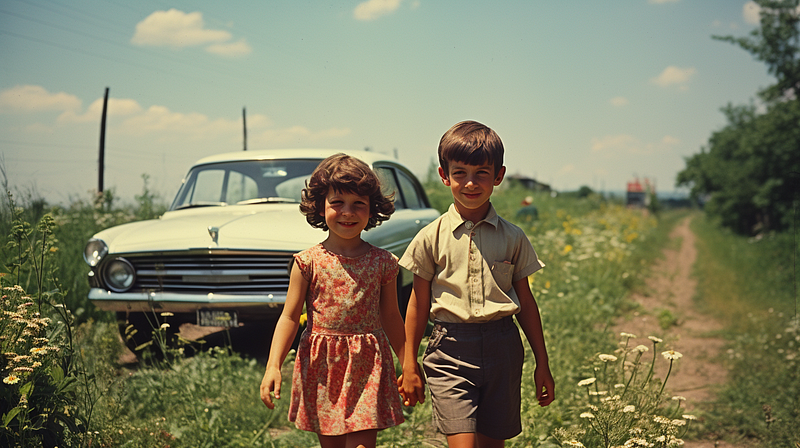
✍🏻 Description of Realism
By adding these cheat codes to your prompts, you are telling MidJourney you’re looking to generate an image that is close to realism. I like to throw in at least one of these cheat codes in the prompts when generating photorealistic images on MidJourney:
- Vivid
- Filmic
- Lifelike
- Dramatic
- Authentic
- Cinematic
- Expressive
- Everyday life
- Photorealism
- Photorealistic
- Ultra Realistic
- Ultra Detailed
- Photo of the Year
- Real-life Photography
- Award-winning Photography
- HD (means “high definition”)
- UHD (means “ultra-high definition”)
- 4K/ 8K/ 16K/ 32K (refers to image resolution)
- Film Photography (if you’re looking for the film photo effect)
- DSLR photography (DSLR refers to digital single-lens reflex camera)
🖼️ Complete Guide to Aspect Ratios
📌 What is the aspect ratio for?
Aspect Ratio refers to the width-to-height ratio of an image, and is typically expressed as two numbers separated by a colon, like 3:2, 4:3, etc.
The ratio is more than just numbers. It influences the composition (relationship between the subject and background) of your images, in other words, it affects the shape of the “canvas” you’re allowing MidJourney to create on.
That’s why choosing the appropriate aspect ratio is especially important for creating photorealistic images.
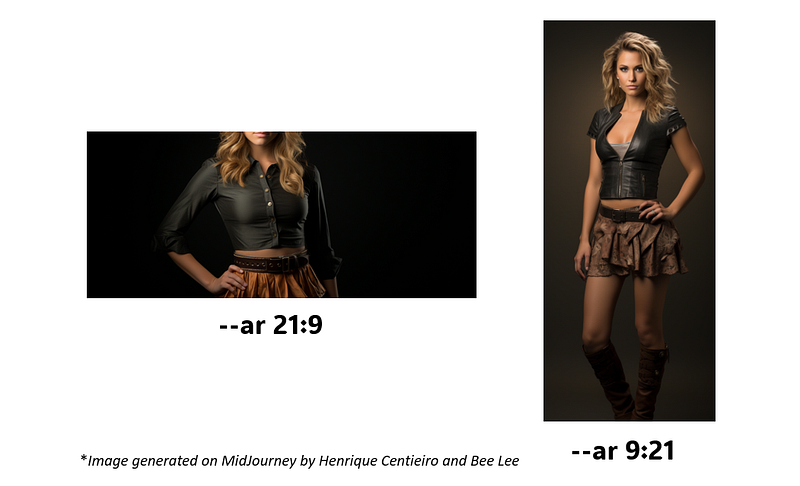
For example, if you are generating a full body photo shot of a standing woman and use an aspect ratio of 21:9, it not only limits the creative freedom of MidJourney, and may even lead to the image result not entirely following your prompt/ essential parts missing like in this example:
📌 How to add the aspect ratio parameter in your MidJourney prompt?
You can add the aspect ratio parameter --aspect or --ar with your preferred aspect ratio at the end of your prompt when generating photorealistic images like this one:
A portrait of Jennifer, half body shot --ar 9:16
📌 What is the BEST aspect ratio for photorealistic images?
4:3 is the most common aspect ratio in digital photography, followed by 16:9 and 3:2. But of course, you can use whatever aspect ratio you prefer!
There’s no “best” aspect ratio for your photorealistic images. It all depends on the composition of your desired images and/ or your specific needs.
📌 What are some other commonly used aspect ratios on MidJourney?
Square: 1:1
Horizontal: 5:4, 4:3, 3:2, 16:9, 21:9
Vertical: 4:5, 3:4, 2:3, 9:16, 9:21
📌 Let’s take a look at some image examples of these commonly used aspect ratios!
— Aspect Ratio for Square
--ar 1:1
This is MidJourney’s default aspect ratio if you don’t specify in your prompt. It produces a perfectly square image, it draws focus to the subject by eliminating background details. Most Instagram images use 1:1 aspect ratio.
The front of a palace with columns lining the walkway with golden lights shining down from above, night time. --ar 1:1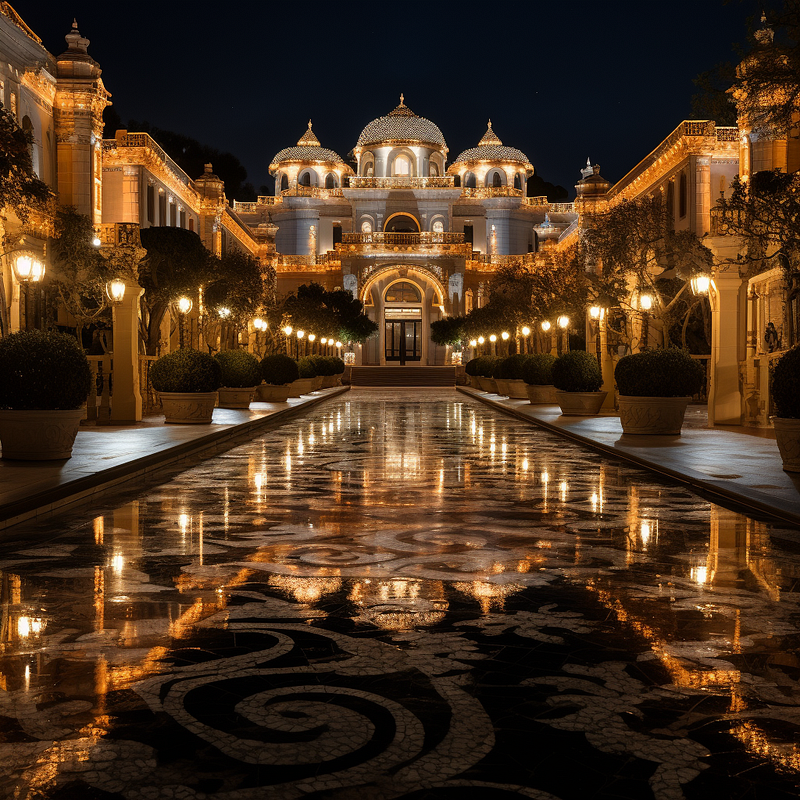
— Aspect Ratios for Horizontal Images
--ar 5:4
Aspect ratio 5:4 is mostly common in photography and art prints, and large and medium format film cameras.
National Geographic photography of a black bear hunting at the river --ar 5:4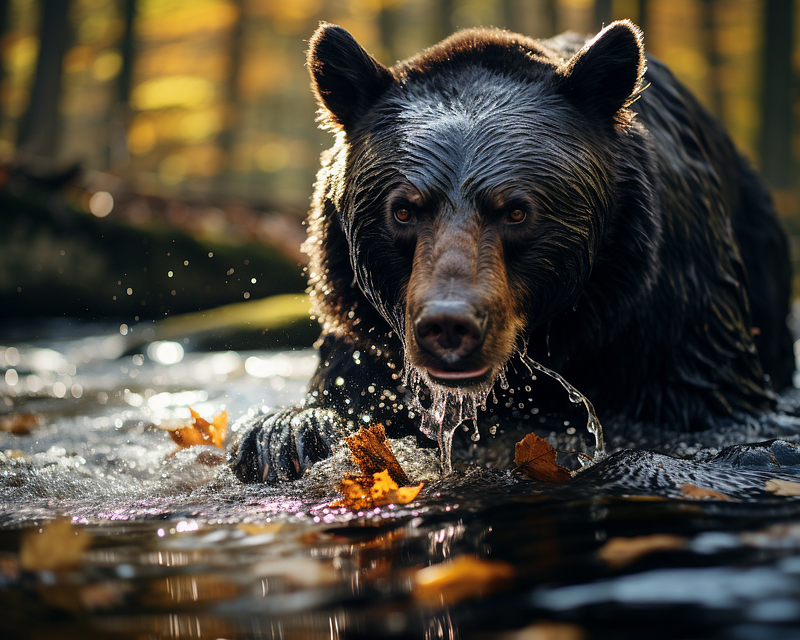
--ar 4:3
4:3 is the most common choice of aspect ratio in generating photorealistic images on MidJourney. It’s the default aspect ratio for most digital cameras and phone cameras, and it offers a pleasing aesthetic and harmonious balance as it falls between the square format (1:1) and the wide panoramic view (16:9).
1970s photography in Paris, woman drinking coffee at a road side cafe, morning light --ar 4:3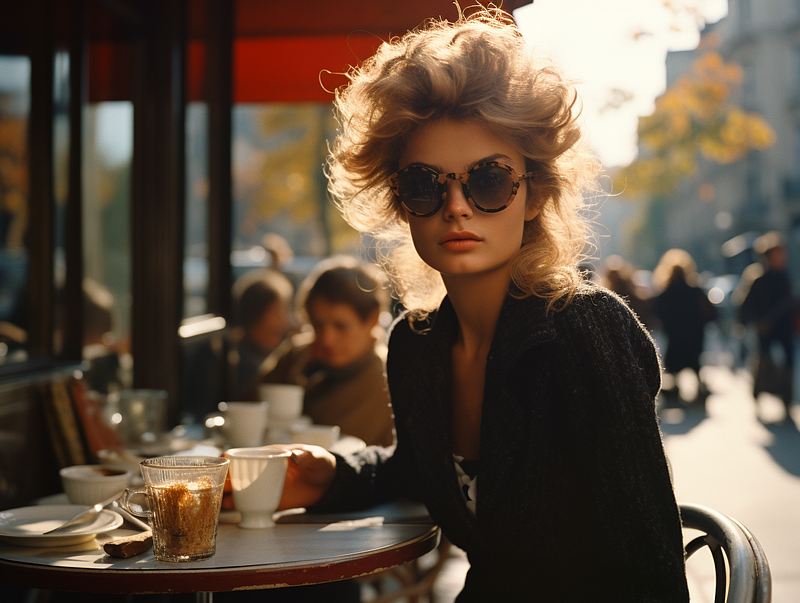
--ar 3:2
3:2 is the most typical aspect ratio for 35mm film and photography. Also common for art prints.
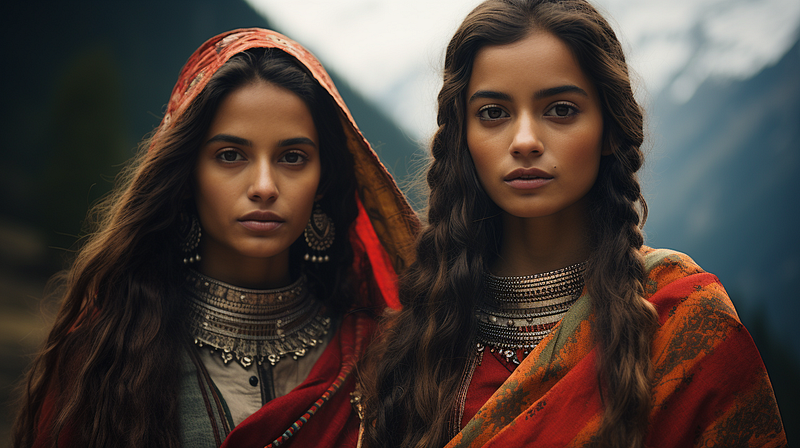
Indian village woman at a gathering in the forests of Himachal Pradesh, associated press photo --ar 3:2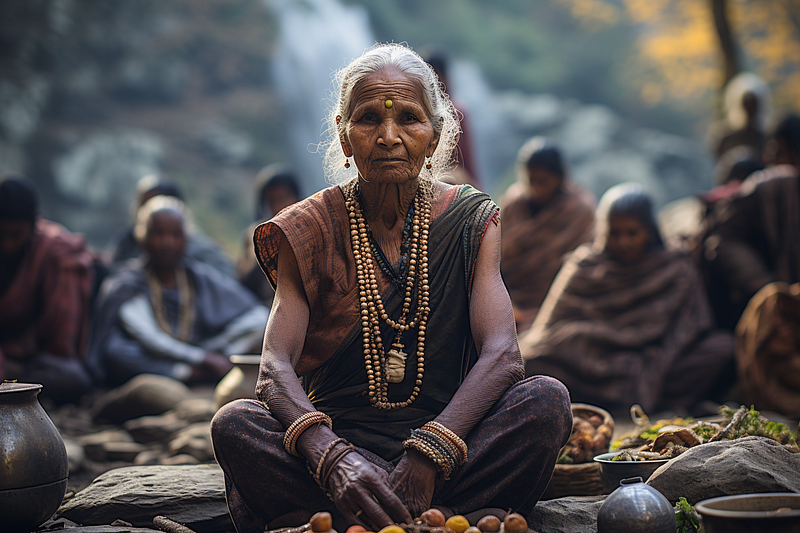
--ar 16:9
16:9 aspect ratio is great for cinematic style photo shots and most commonly used in film and television. iPhone and most smartphones take pictures and videos at this ratio. The is also YouTube’s most common aspect ratio.
Cinematic still photography of a movie, Asian man and woman, fashionably dressed on the streets of new york --ar 16:9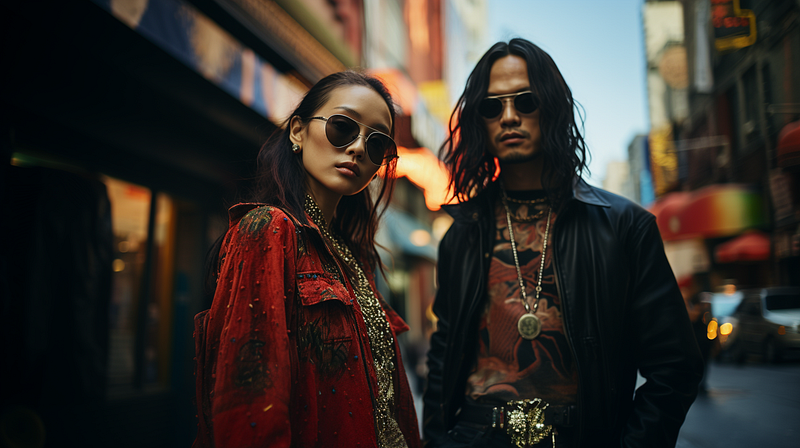
--ar 21:9
Aspect ratio 21:9 is also known as ultrawide, which offers an even broader field of view than that of 16:9, making it ideal for immersive panoramic photography.
A 2,000 square meter contemporary home designed by Mies van der Rohe, built right at a cliff, overlooking a beautiful arid valley, sunset hour --ar 21:9 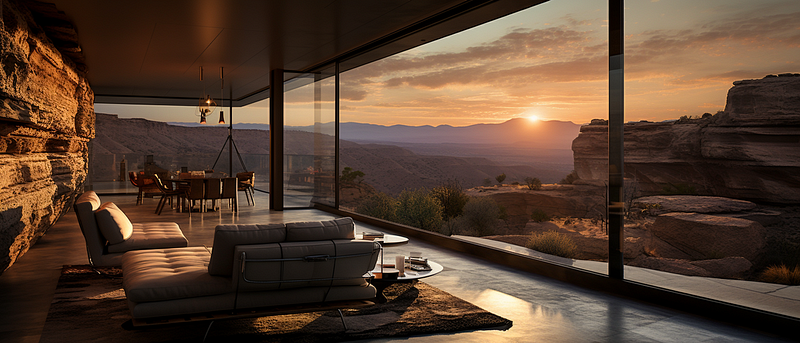
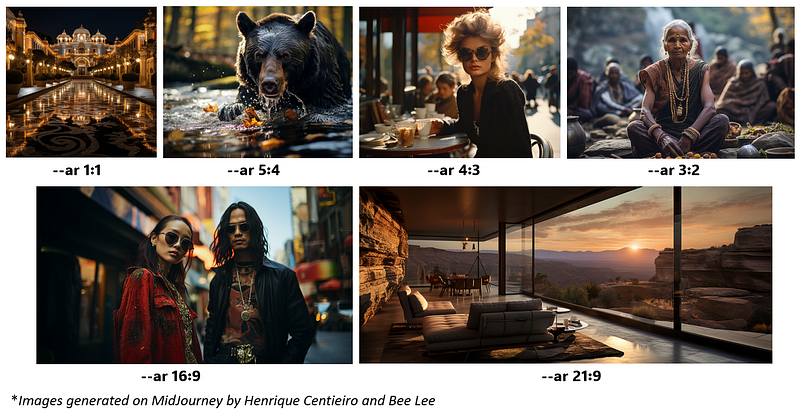
Hard to tell their differences? No worries! I have put together all the above image examples in different horizontal aspect ratios, so that it’s easier for you to visualize their differences:
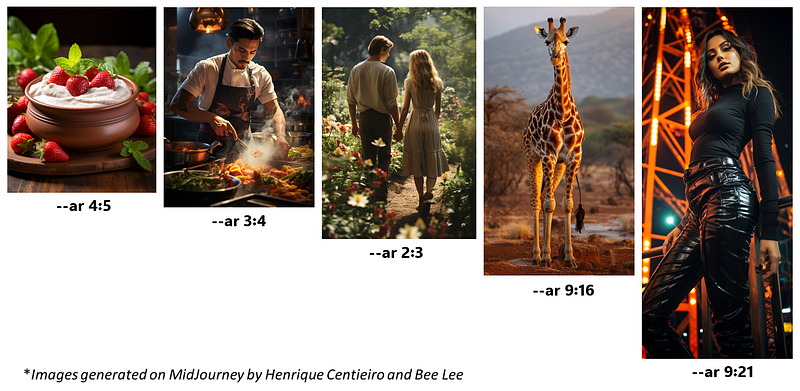
— Aspect Ratios for Vertical Images
--ar 4:5
Very close to a square, 4:5 is another popular aspect ratio and Instagram’s vertical portrait ratio.
Product photography of a fresh pot of Greek yogurt, with fresh mint and strawberries. --ar 4:5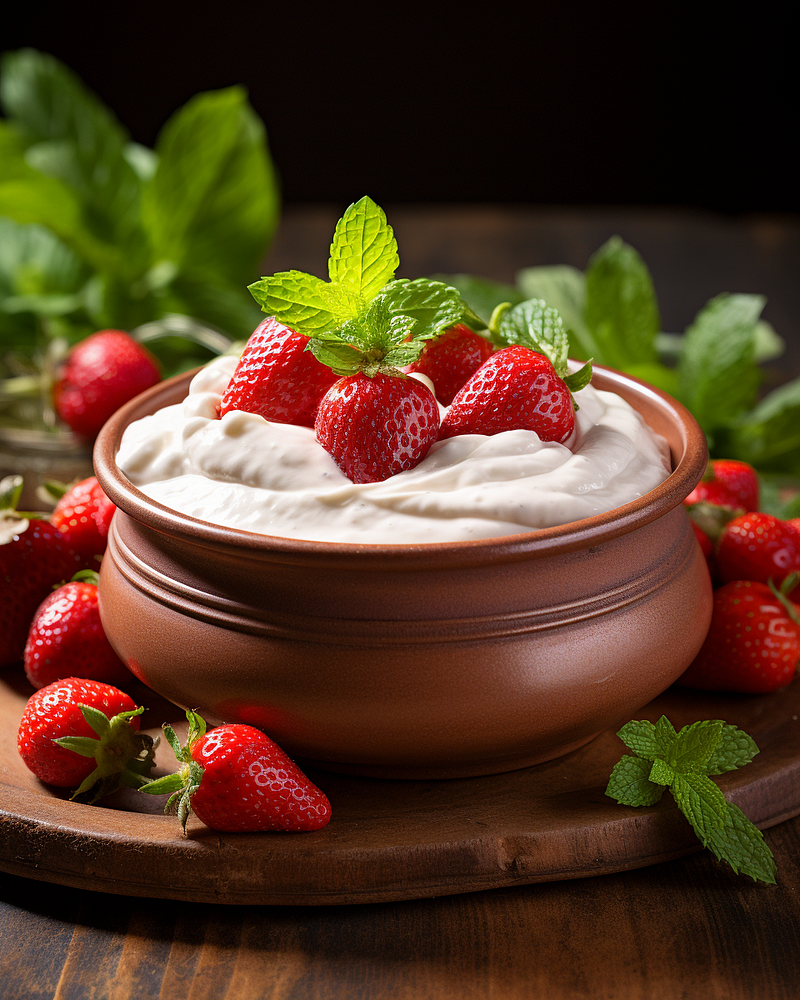
--ar 3:4
This ratio is ideal for portrait photography. It allows the entirety of the subject to be viewed without zooming out too far.
A photorealistic image of a chef preparing a big dish, with steams, pots and pans, close-up angle, action and intensity. --ar 3:4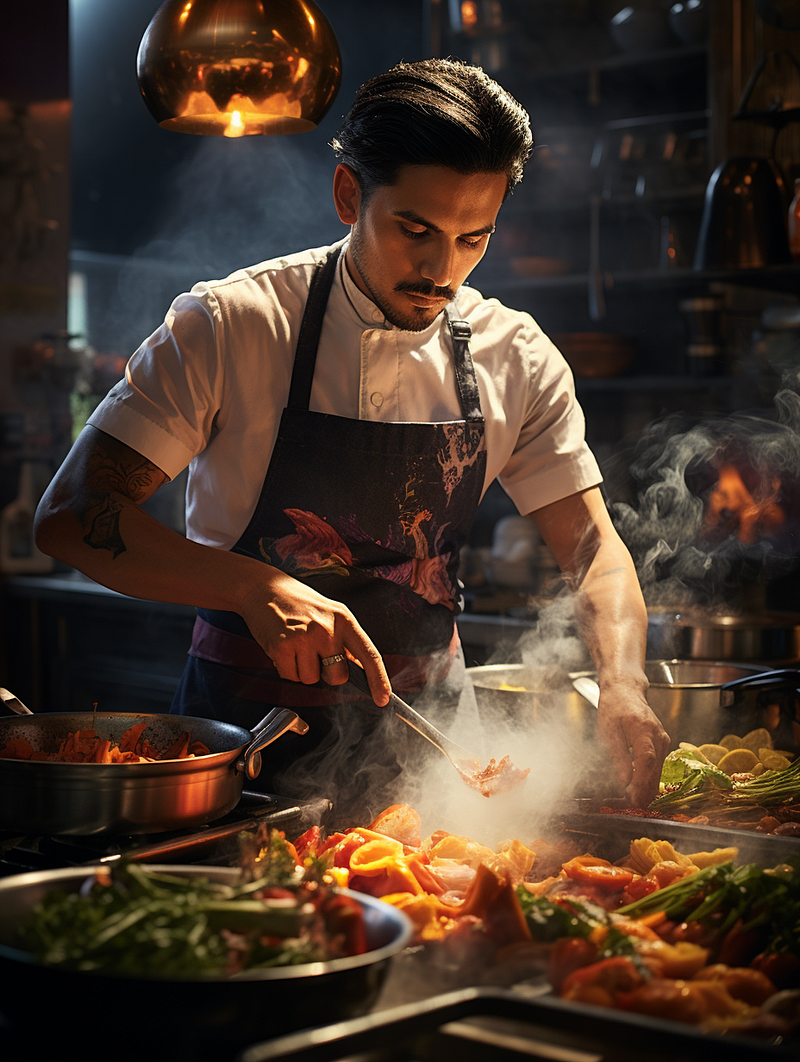
--ar 2:3
This ratio is also ideal for portrait photography. It is typically found on DSLR cameras when they are oriented vertically. It allows the photograph to contain the entirety of the subject’s body.
A film camera photo of a young couple holding hands and walking through a beautiful garden, flowers all around, very detailed, high contrast --ar 2:3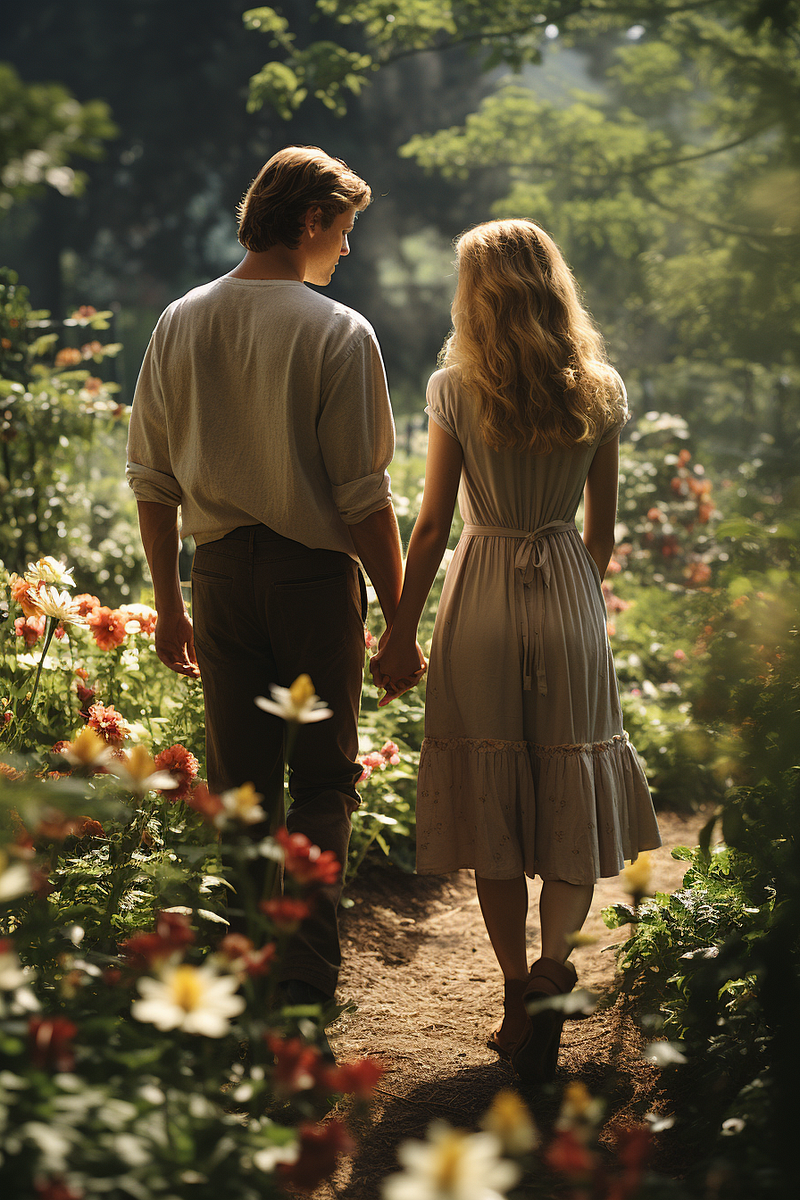
--ar 9:16
9:16 is commonly used for images with taller subjects. Same as 16:9, iPhone and most smartphones take pictures and videos at this ratio if your phone remains vertical.
National Geographic photography of a giraffe in Kenya, whole body, early morning --ar 9:16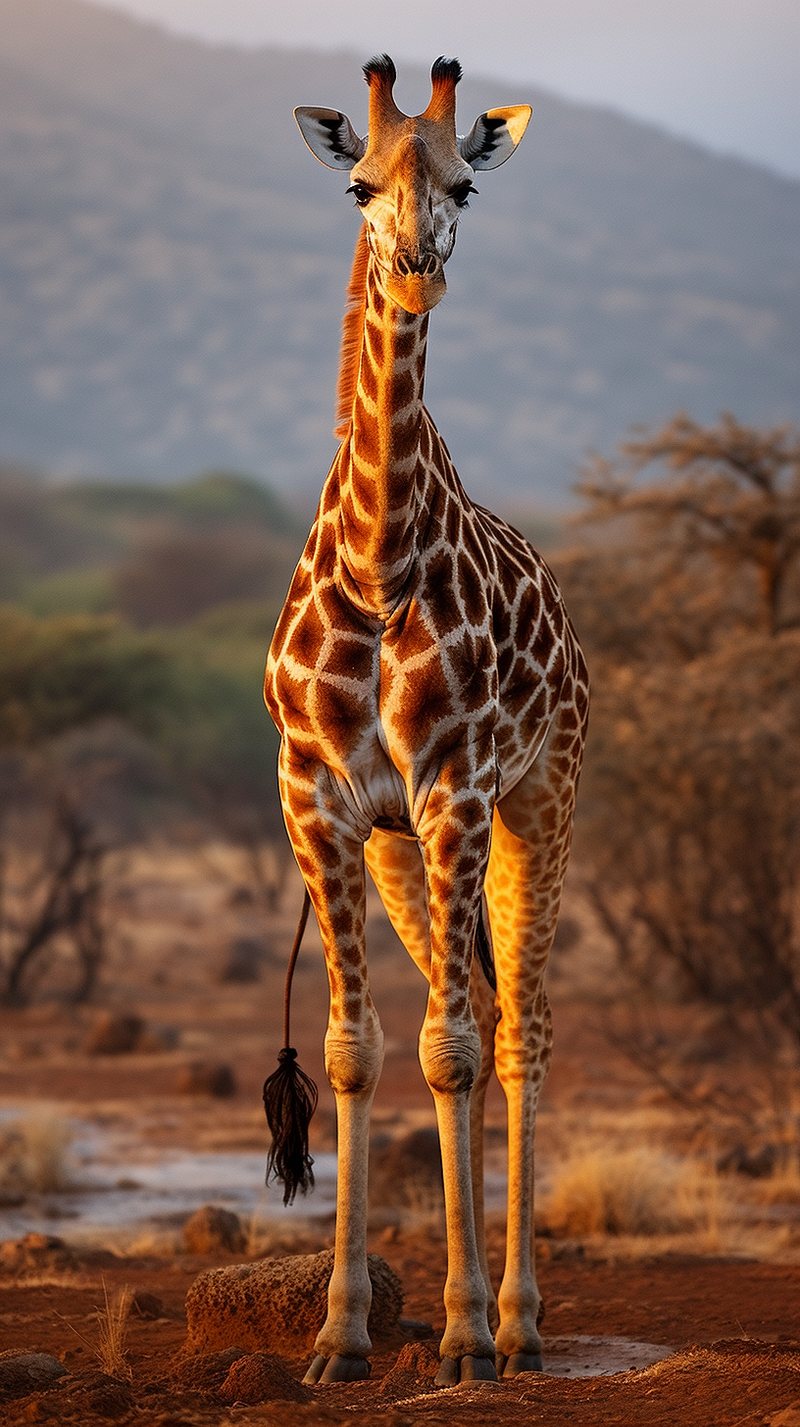
--ar 9:21
Needless to say, 9:21 is perfect for images with very tall subjects to capture the entirety of them.
Full body shot of an instagram model, posing in front of Eiffel Tower, low angle shot, full body, night time, high contrast --ar 9:21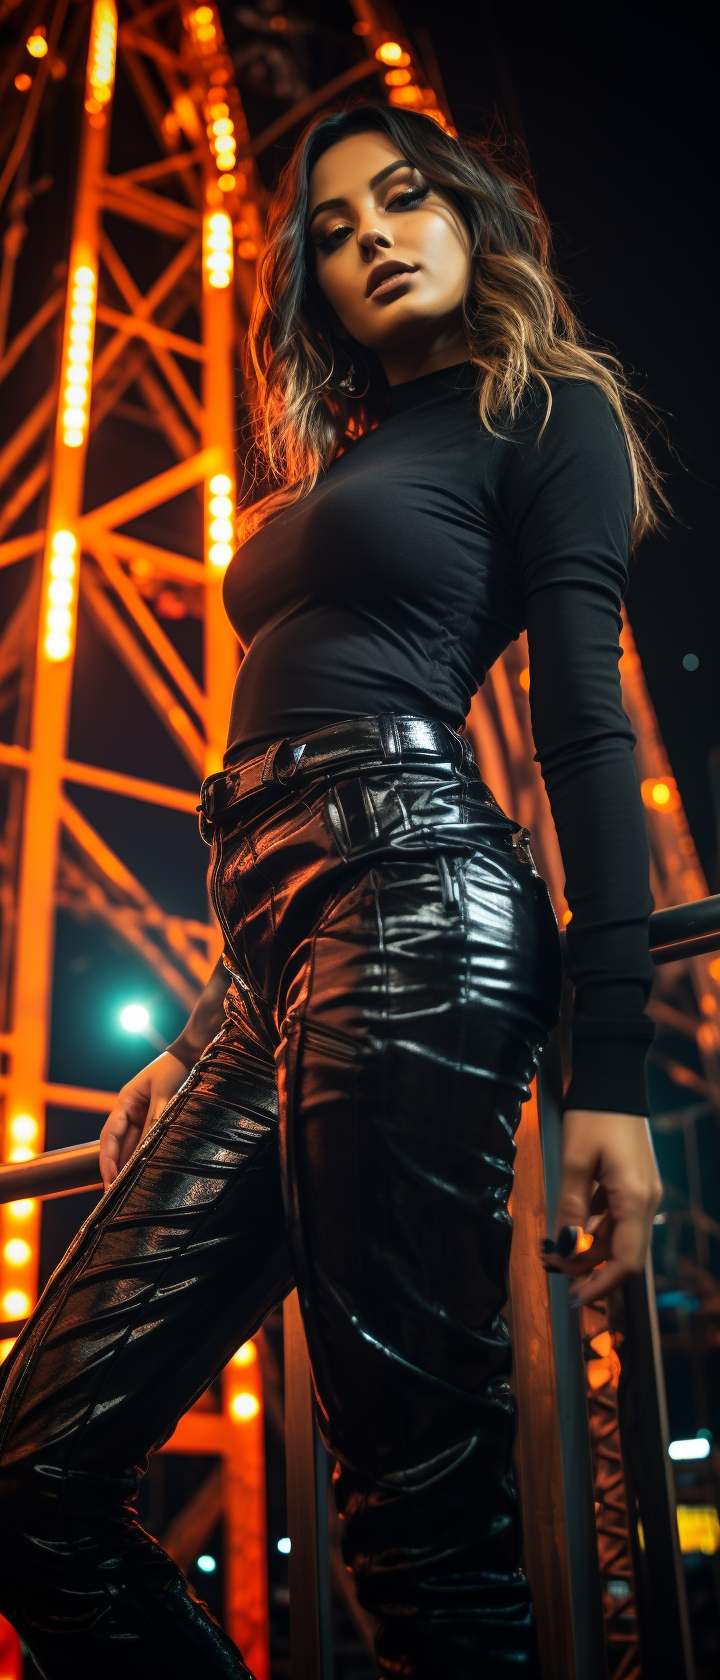
And again, here is the collection of the above photorealistic images in various vertical aspect ratios for you to visualize better:
In the upcoming Part 4 and Part 5 of this article, I will share My Secret Bonus Tips to complete my MidJourney Photorealistic Images Success Prompting Formula! That will include all my Tips & Tricks to create the Most Photorealistic Images on MidJourney, that I have discovered throughout the countless hours of trial and error.
You sure don’t want to miss it! ✨
If you found this article valuable, why not throw me some Medium love? 🥰 What you can do to support me: Clap up to 50, leave a message, highlight some text if you see fit & be sure to follow. 💌
In case you have missed Part 1 and 2 of this article, check them out:
And here are the last 2 parts about my Secret Bonus Tips after you finished reading Part 3 (this article):
Meanwhile, feel free to check out all my other articles here to learn more Tips and Tricks on using MidJourney:
Here’s a special shoutout to Ms. Bee Lee, for her crucial effort that contributed to creating this article. Follow her Twitter for her “Daily Dose of AI Art”!
🌞 Stay in touch with me:


