
ChatGPT for Jupyter: The ChatGPT Extension for Jupyter Notebooks
The extension every data scientist needs.
In a previous article, we saw a VSCode extension with ChatGPT-like functionalities, and today we’ll see how to integrate ChatGPT in Jupyter Notebooks, which will be very useful for anyone who works with data.
You heard that right! You can get ChatGPT’s functionalities such as format, explain, debug, complete, and review code right from Jupyter Notebook.
Let’s dive into it!
How to install the ChatGPT extension for Jupyter Notebooks
First of all, this is a browser extension powered by GPT-4, which means that we have to download the extension from the web store.
If you’re a Chrome user, go to this website and install the extension, while if you’re a Firefox you can install it locally following the steps here.
After the extension is installed, open the settings window. You have to select OpenAI API, choose a model you want to use, and insert your OpenAI API key, which you can find here.
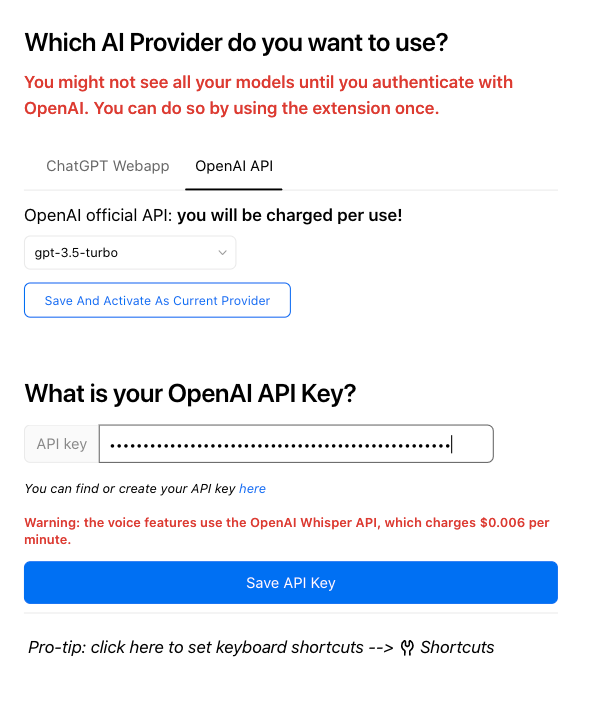
Note: In case the “Which AI Provider do you want to use?” prompt has an infinite loading circle and your API key isn’t saved, open up the regular ChatGPT page, send a message there, and then come back to the settings page and refresh it. Now you should see the image above (for other issues like this, visit the Github repo).
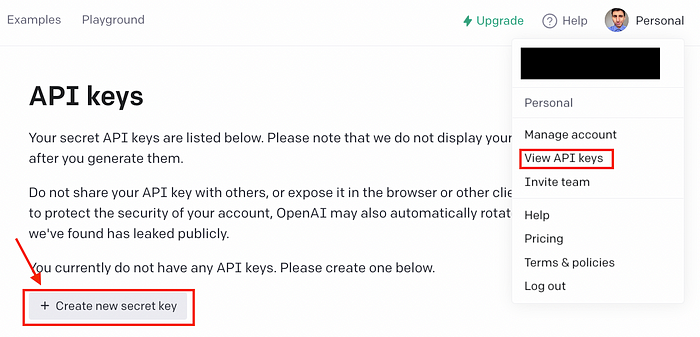
In case you don’t have API keys, you can create one by following the steps in the image below.
Once your key is saved, you can open Jupyter Notebook in Chrome. After you open or create a new notebook, you’ll see that there are new buttons on the toolbar.

Let’s explore their functionality.
Note: If you’re a Mac user and Safari is your default browser, you should change the default browser to Chrome/Firefox if you want to work with the extension installed. To change the default browser to Chrome, click on the three dots, settings, and select “default browser” from the left panel.
Format code
This extension allows you to automatically add comments, docstrings, and formatting to your cell. To do so, you have to click on the button below and you’ll automatically get an improved version of the code.
Here’s an example with a Python function.
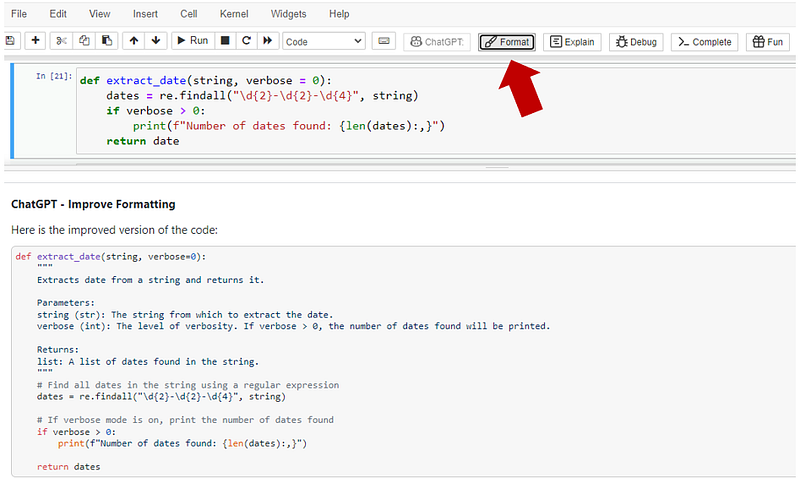
As you can see, the extension added docstrings and comments to our code.
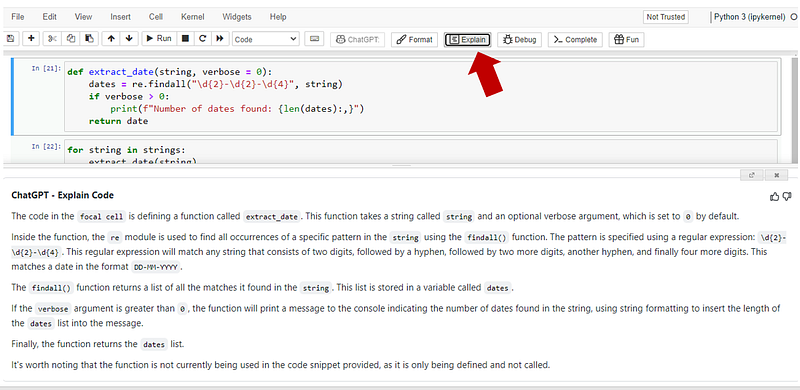
Explain code
With this extension, you can explain the content of your code cell using ELI5 style. Just click on the “Explain” button and a window will pop up with a comprehensive explanation of the code cell.
Debug code
You can easily debug an error message in your code cell and obtain an explanation of the error (as you’d get with ChatGPT) by using the “Debug” button.
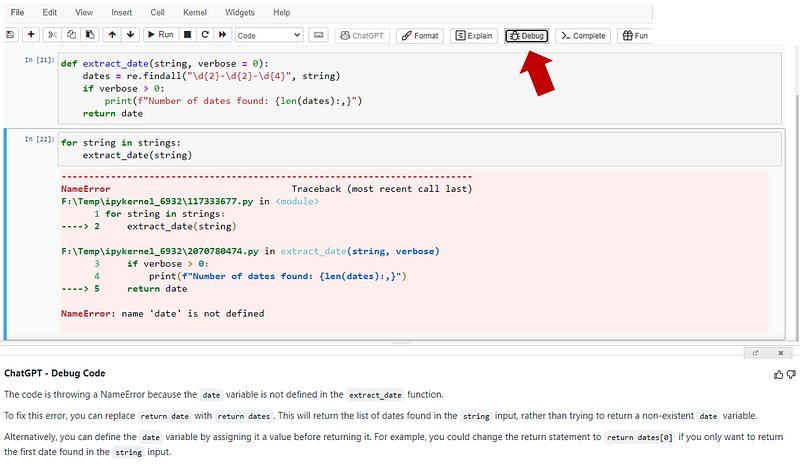
As you can see, ChatGPT found a typo in my code and suggested replace replace date with replace dates .
Complete code
One of my favorite functionalities of this extension is code completion. It allows you to complete a code snippet in your code cell. You only need to leave a comment with the instructions and add some code if necessary.
Here’s an example.
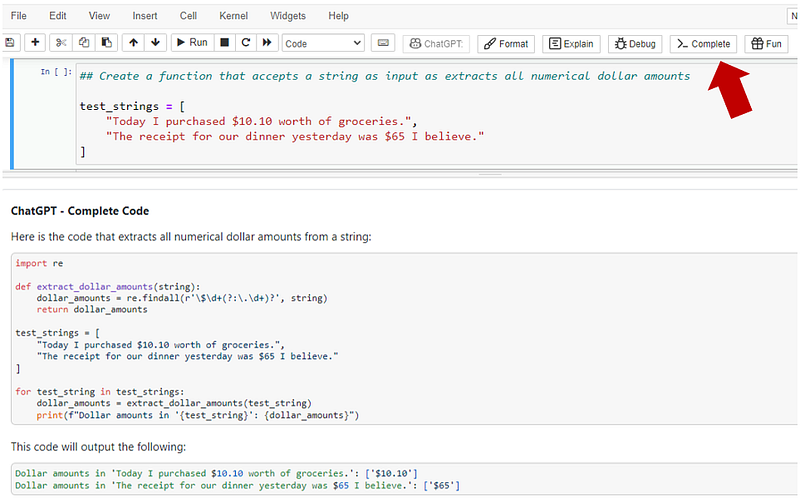
As you can see, we only needed a comment and a list of samples to generate the code we wanted.
More Functionalities
There are other things you can do with this extension such as run a code review of your code cell, ask questions to ChatGPT, and even ask ChatGPT a question through your microphone.
Just keep in mind that if you use the voice command feature, you’ll need the OpenAI Whisper API, which charges $0.006 per minute.
Artificial Corner’s Free ChatGPT Cheat Sheet
We’re offering a free cheat sheet to our readers. Join our newsletter with 20K+ people and get our free ChatGPT cheat sheet.
If you enjoy reading stories like these and want to support me as a writer, consider signing up to become a Medium member. It’s $5 a month, giving you unlimited access to thousands of Python guides and Data science articles. If you sign up using my link, I’ll earn a small commission with no extra cost to you.


