
Chat with your own data with Azure OpenAI
Deploy a ChatGPT web app in minutes
On May 23rd, a stunning announcement was released, stating that new feature would have been added to the Playground soon, so that users could directly upload and chat with their own document, without worrying about the backend embedding and documents’ pre-processing.
Well, the day has finally come. In this article, I’m going to show you how to create a powerful ChatGPT-like web application to interact with your own document — without a single line of code.
The building blocks of our web app will be:
- An Azure OpenAI Service →the Azure Service that provides REST API access to OpenAI’s powerful language models including the GPT-4, GPT-3.5 turbo, and Embeddings model series. Those models can also be easily accessed within the Playground.
- An Azure Cognitive Search instance → Azure Cognitive Search is a cloud search service that gives developers infrastructure, APIs, and tools for building a rich search experience over private, heterogeneous content in web, mobile, and enterprise applications. It has built-in AI capabilities that enrich all types of information to help you identify and explore relevant content at scale. Plus, it is now provided with a Vector Search capability to use the concept of embedding (via Azure OpenAI models) and cosine-similarity to retrieve documents based on the user prompt.
- An Azure App Service Plan →Azure App Service is a platform as a service (PaaS) that allows you to build and host web applications, mobile backends, and RESTful APIs in the programming language of your choice without managing infrastructure.
Great, let’s now dive deeper into our project.
Azure OpenAI setup
First thing first, let’s create an Azure OpenAI instance so we can access the Playground:
- An Azure subscription (you can create one for free here →https://azure.microsoft.com/it-it/free/) which is enabled to host Azure OpenAI instance. To enable your subscription, you can complete this form.
- An Azure OpenAI instance →you can do so by creating a new resource in the Azure Portal:
- Once the resource is created, you can jump to the Azure OpenAI Studio. Like many other cognitive services (like Language Service or Form Recognizer), Azure OpenAI studio appears as a friendly UI where you can see the list of capabilities of the models and the API request code (in Python) you can call to embed the model into your applications.
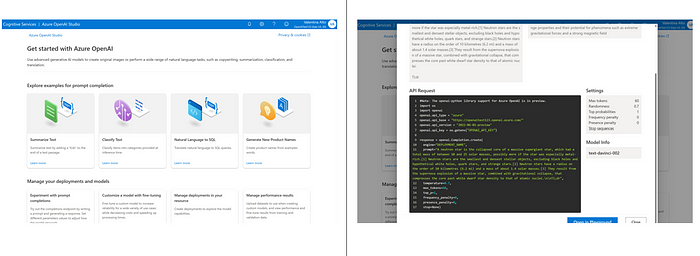
Then, directly from the examples on the home page, you can jump to the Playground where we will start experimenting with our models.
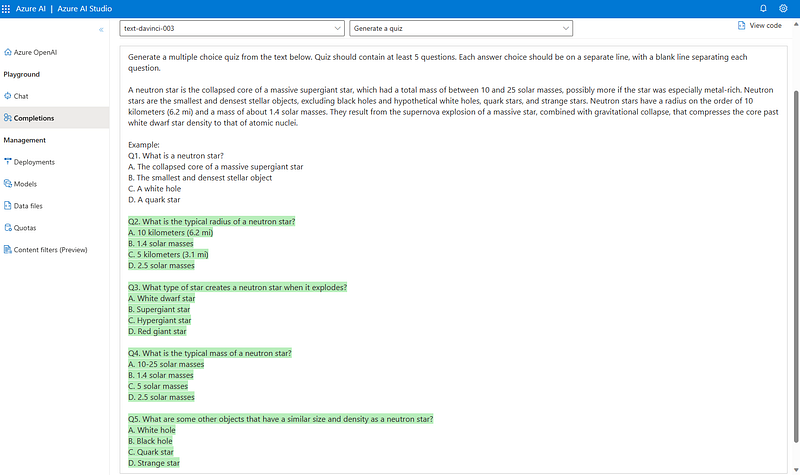
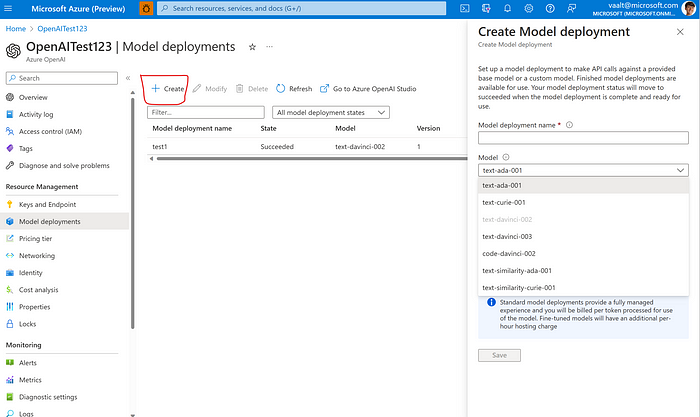
- The last step before you can start experimenting is creating a deployment that will enable you to make calls against a provided base model or fine-tuned model. Each deployment can be associated with one model. You can decide to create your model either in the Playground:
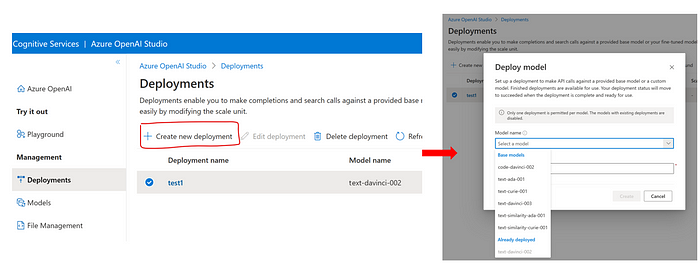
or directly in the Azure Portal, within your OpenAI resource backend:
All set up! If you are interested in a full overview of the portal, you can refer to my latest article here.
Uploading your documents
There are three ways to link your documents to the Azure OpenAI service:
- Blob storage
- Azure Search
- Local files
Regardless of your source location, you will have to create a blob storage and Azure search service anyway, since those will be necessary for the web app to run. More specifically, the blob storage will be the location of your uploaded files, while the Azure search will provide the index to reference the source of response generation.
Note: Cross-origin resource sharing (CORS) must be turned on for your Blob storage. You can enable it while creating the resource.
As you can see, in my case I’ve uploaded a local file, the research paper titled “A Bibliometric Review of Large Language Models Research from 2017 to 2023” by Fan et al.
As data formats, the service accepts .txt, .md, .html, .pdf, .docx, and .pptx.
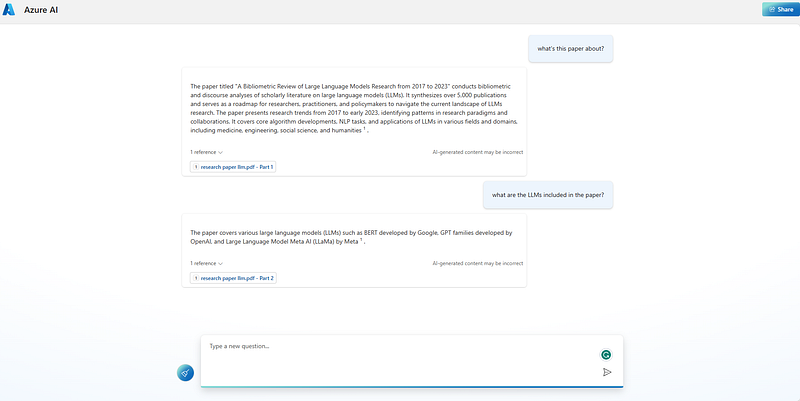
Once the document (or multiple documents) is uploaded, we can already start chatting with it in the Playground:
The model is explicitly referencing the document we uploaded, providing us with the source from which it generates its response. Plus, you can also decide whether to ground it to the provided document or let it respond to any user’s query. Let’s see the two different scenarios:
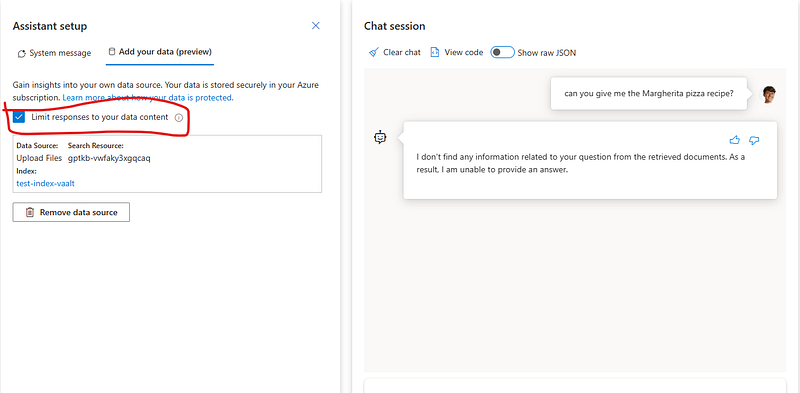
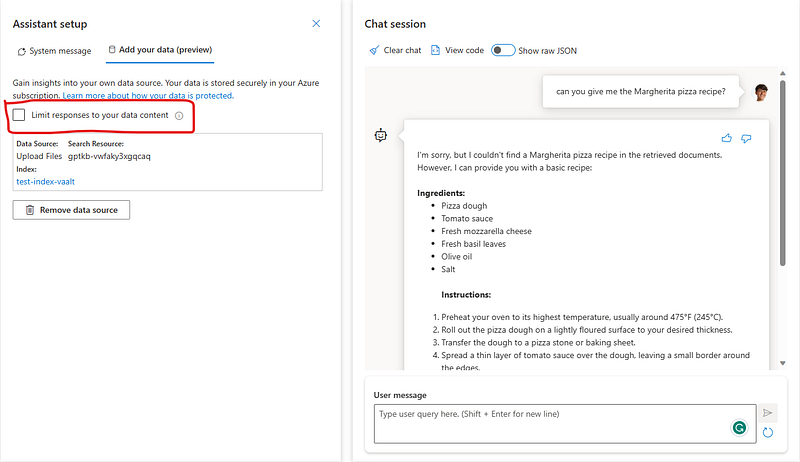
As you can see, to the question “can you give me the Margherita pizza recipe?”, the model responds with different answers depending on whether or not it is grounded.
Deploying your web app
Great, now that we are happy with our responses, the next step will be creating a UI to share with our users. The good news is that now you can do so with literally a few clicks.
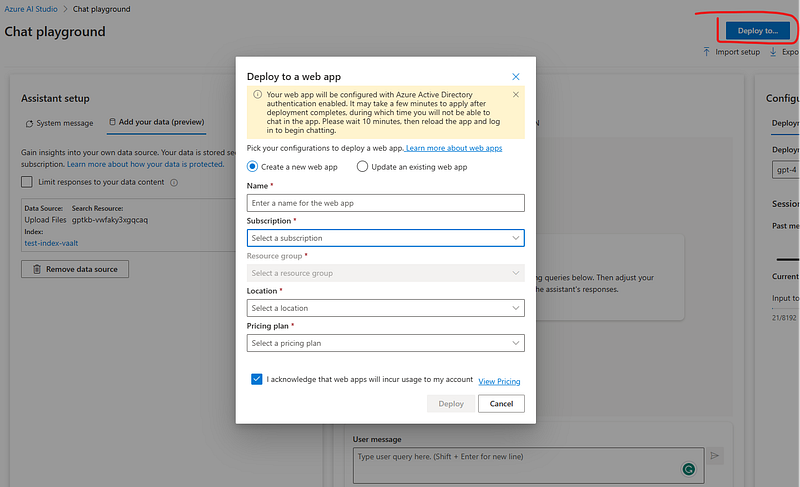
Indeed, with the “deploy to” button, you can instantiate an Azure App Service to host your web app without writing a single line of code. You will need:
- Name →the unique name of your App Service
- Subscription →your Azure subscription
- Resource group →the logical container where your App Service will be deployed
- Location →the Region of your App service
- Pricing Plan →your App Service pricing plan. You can read more about pricing plans here.
Once deployed the app, you can click on the “Launch” button ad already see the front-end deployed in minutes.
Et voilà! You now have an Enterprise ChatGPT grounded to your data and running in a web app, all in a matter of minutes.
Conclusions
This new feature of Azure OpenAI is definitely a game changer. The incredible value is mainly due to the fact that you don’t have to manage the documents’ embedding, chunking, and indexing activities, as the backend of this feature will manage it for you. Plus,
Now we are all waiting for the next brand-new feature announced, that is the availability of plugins within the Playground. If you want to learn more about the concept of plug-ins, you can reference my former articles about LangChain Agents here and the Microsoft documentation here.
Stay tuned for upcoming amazing announcements!


