
Building a Web Chat with Social Login using Spring Boot: Enabling GitHub as Identity Provider
Step-by-Step Guide to enable GitHub as Identity Provider to the Web Chat application
This article is part of a series where we explore the implementation of a Web Chat Application with Social Login using Spring Boot.
In the introductory article, we outline the sections we will cover:
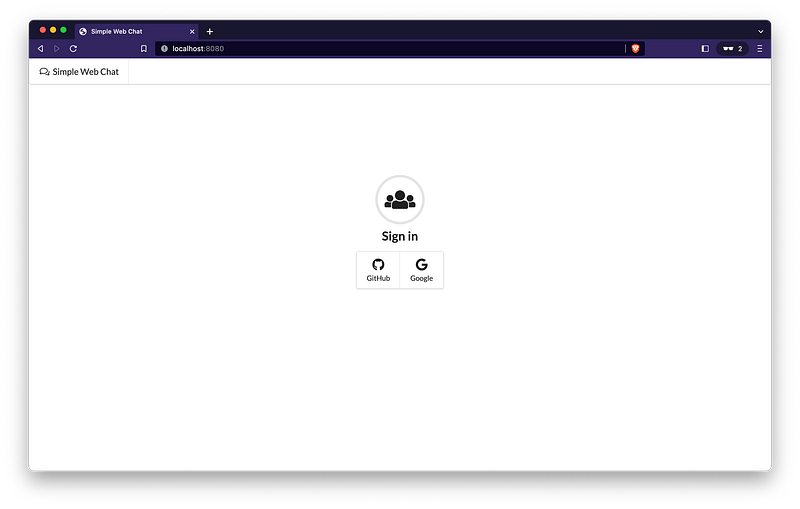
Here’s a glimpse of how our Web Chat will be at the end!
In this particular article, we will explore how to enable authentication using GitHub as a social identity provider, ensuring only authorized users can access the chat.
So, let’s get started!
Creating OAuth2 App in GitHub
Let’s create an OAuth2 app in GitHub. To do this, log in to your GitHub account and click on your profile photo in the upper-right corner of any page, then select Settings from the dropdown menu.
In the next page, click <> Developer settings. Then, in Settings / Developer settings page, click OAuth Apps.
Add a new application by clicking the Register a new application button or, if you already have apps created, click the New OAuth App button present on the right of the screen.
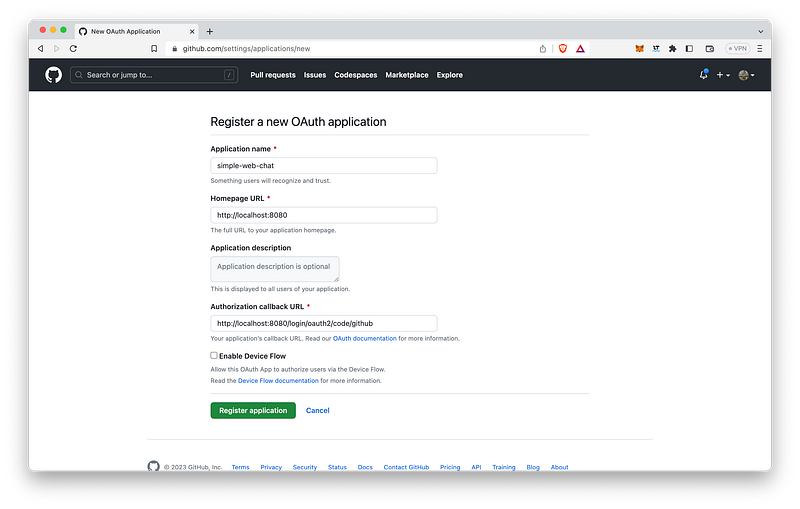
On Register a new OAuth application form:
- Type
simple-web-chatinApplication namefield; - For
Homepage URL, sethttp://localhost:8080; - In
Authorization callback URL, set the redirect to GitHub OAuth2 endpoint in Web Chat application, that is:http://localhost:8080/login/oauth2/code/github; - To finalize, click the
Register applicationbutton.
On the next page, you will see the Client ID for the simple-web-chat displayed. To obtain the Client Secret, simply click the Generate a new client secret button.
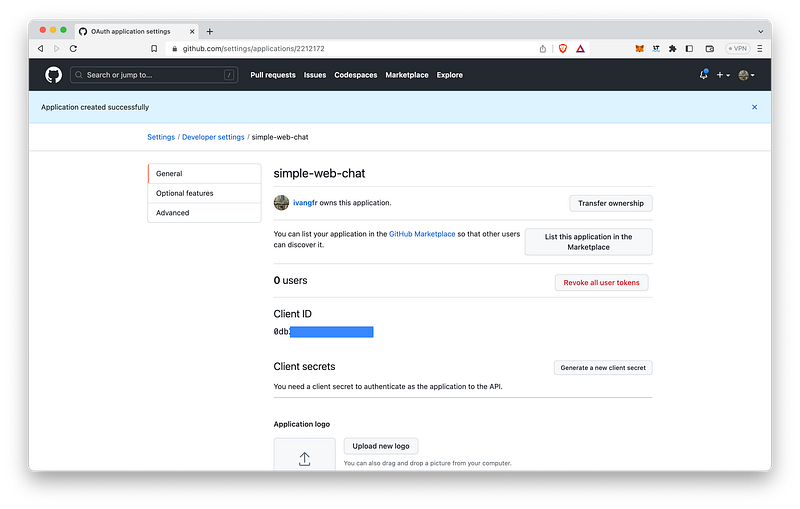
After successfully creating an OAuth2 App in GitHub, please make sure to note down the generated Client ID and Client Secret. These credentials will be utilized when testing the login functionality with a GitHub account.
Backend & Frontend modifications
Create the GitHubOAuth2UserInfoExtractor class
Let’s proceed with the creation of the GitHubOAuth2UserInfoExtractor class inside the security package. The class should include the following content:
package com.example.simplewebchat.security;

import org.springframework.security.core.authority.SimpleGrantedAuthority;
import org.springframework.security.oauth2.client.userinfo.OAuth2UserRequest;
import org.springframework.security.oauth2.core.user.OAuth2User;
import org.springframework.stereotype.Service;

import java.util.Collections;

@Service
public class GitHubOAuth2UserInfoExtractor implements OAuth2UserInfoExtractor {

    @Override
    public CustomUserDetails extractUserInfo(OAuth2User oAuth2User) {
        CustomUserDetails customUserDetails = new CustomUserDetails();
        customUserDetails.setUsername(retrieveAttr("login", oAuth2User));
        customUserDetails.setName(retrieveAttr("name", oAuth2User));
        customUserDetails.setAttributes(oAuth2User.getAttributes());
        customUserDetails.setAuthorities(Collections.singletonList(new SimpleGrantedAuthority(WebSecurityConfig.CHAT_USER)));
        return customUserDetails;
    }

    @Override
    public boolean accepts(OAuth2UserRequest userRequest) {
        return "github".equalsIgnoreCase(userRequest.getClientRegistration().getRegistrationId());
    }
}
The GitHubOAuth2UserInfoExtractor class is a service component that extracts user information from the GitHub OAuth2 provider. It implements the OAuth2UserInfoExtractor interface and provides two methods:
extractUserInfo: this method takes anOAuth2Userobject and creates aCustomUserDetailsobject with extracted user information such as username, name, attributes, and authorities. In this method, theCHAT_USERauthority is assigned to the user.accepts: this method checks if the OAuth2 provider used is GitHub by comparing the registration ID of the client.
Update the application.properties
Let’s add the following two lines in the application.properties file.
spring.security.oauth2.client.registration.github.clientId=${GITHUB_CLIENT_ID}
spring.security.oauth2.client.registration.github.clientSecret=${GITHUB_CLIENT_SECRET}
These lines configure the OAuth2 client registration for GitHub. The first line specifies the clientId, while the second line specifies the clientSecret. The placeholders ${GITHUB_CLIENT_ID} and ${GITHUB_CLIENT_SECRET} are used to indicate that the actual values will be retrieved from environment variables or an external configuration source instead of being hard-coded. This approach enhances security and flexibility by allowing the configuration to be easily adapted to different environments.
Update the login.html
Let’s apply the following changes (highlighted in bold) to the login.html file.
<!DOCTYPE html>
<html lang="en" xmlns:th="http://www.thymeleaf.org">
...
<body>

    <div class="ui middle aligned center aligned grid">
        <div class="column">
            ...
            <div class="ui compact labeled icon menu">
                <a class="item" th:href="@{/oauth2/authorization/github}">
                    <i class="github icon"></i>
                    GitHub
                </a>
                <a class="item">
                    <i class="google icon"></i>
                    Google
                </a>
            </div>
        </div>
    </div>
...
</body>
</html>
The line xmlns:th="http://www.thymeleaf.org" is an XML namespace declaration. It enables the usage of Thymeleaf attributes and expressions in the HTML code.
The th:href=”@{/oauth2/authorization/github}” is a Thymeleaf attribute used in an anchor tag (<a>) to specify the URL for the "GitHub" link. This endpoint is responsible for initiating the OAuth2 authorization flow with GitHub as the identity provider. When the user clicks on the "GitHub" link, it triggers the authentication process with GitHub and redirects the user to the appropriate authorization page.
Testing Login using GitHub account
Open a terminal and navigate to the project’s root folder. Then, let’s export the Client ID and Client Secret values generated by GitHub to the environment variables GITHUB_CLIENT_ID and GITHUB_CLIENT_SECRET, respectively.
export GITHUB_CLIENT_ID=<the-client-id-generated-by-github>
export GITHUB_CLIENT_SECRET=<the-client-secret-generated-by-githb>
To start the Web Chat application, run the following command:
./mvnw clean spring-boot:run
Next, open your browser and navigate to http://localhost:8080. Once the page loads, choose GitHub as your identity provider.
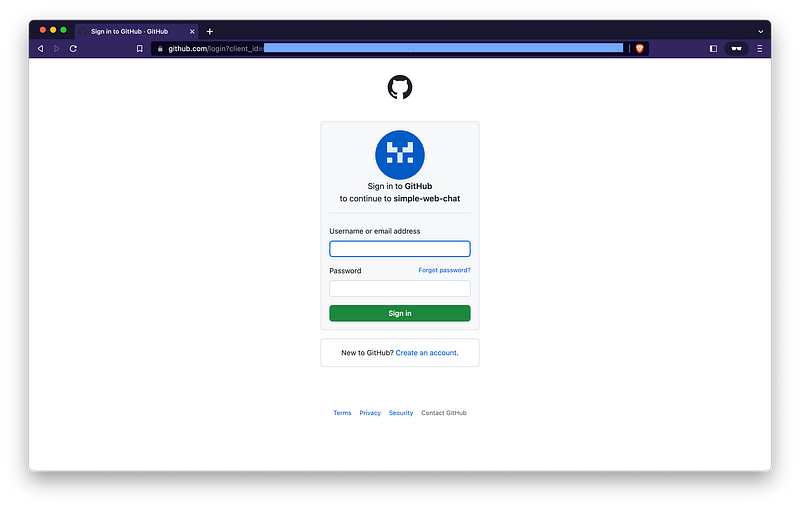
After selecting GitHub, you will be redirected to a login page where you need to provide your GitHub username or email address, along with your password.
After entering your credentials on the previous page, you will be redirected to another page where you will be asked to authorize simple-web-chat.
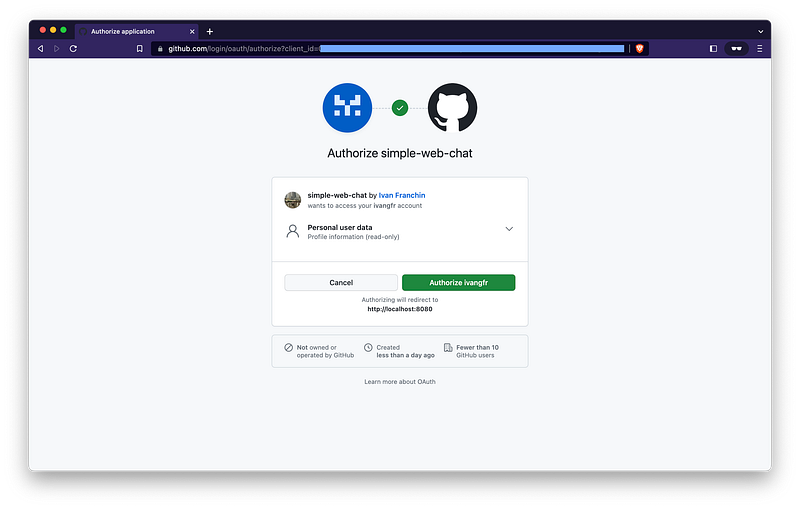
Once you have authorized simple-web-chat, you will be redirected to index.html of the Web Chat application, indicating that the integration with GitHub has been successful.

Up Next
We will explore how to enable Google as Identity Provider to the Web Chat application.
We hope you are enjoying the Web Chat Tutorial series!
Support and Engagement
If you enjoyed this article and would like to show your support, please consider taking the following actions:
- 👏 Engage by clapping, highlighting, and replying to my story. I’ll be happy to answer any of your questions;
- 🌐 Share my story on Social Media;
- 🔔 Follow me on: Medium | LinkedIn | Twitter;
- ✉️ Subscribe to my newsletter, so you don’t miss out on my latest posts.


