
Spring Boot | Star Vote
Building a Single Spring Boot App with Keycloak or Okta as IdP: Enabling Keycloak as IdP
A step-by-step guide on how to enable Keycloak as Identity Provider to the StarVote application

This article is part of a series that explores the implementation of a Single Spring Boot application called StarVote. The application will use Keycloak or Okta as Identity Provider.
In the introductory article, we outline the sections we will cover:
Here’s a sneak peek of how the StarVote application will be at the end!
In this particular article, we will explore how to enable authentication using Keycloak as an Identity Provider, ensuring only authorized users can access the application.
So, let’s get started!
Starting Keycloak
Note: Before proceeding, please ensure that you have Docker installed.
To get started, open a terminal and execute the following command to launch the Keycloak Docker container.
docker run --rm \
  --name keycloak \
  -p 9080:8080 \
  -e KEYCLOAK_ADMIN=admin \
  -e KEYCLOAK_ADMIN_PASSWORD=admin \
  quay.io/keycloak/keycloak:24.0.2 start-dev
Configuring Keycloak
Sign in
- Open a browser and access Keycloak Web Console at http://localhost:9080/admin;
- On the Sign in screen, type
adminfor both “Username” and “Password” fields; - Click the
Sign inbutton.
Create a new Realm
- On the left menu, click the dropdown button that contains
Master.Then, clickCreate Realm; - Set
my-realmto “Realm name” field; - Click
Createbutton.
Disable the Required Action Verify Profile
Note: Just for this demo. Do not do it in production!
- On the left menu, select “Authentication”;
- In the “Authentication” screen, click “Required actions” tab;
- Disable the “Verify Profile” required action.
Create a new Client
- On the left-hand menu, select “Clients”;
- In the “Clients” screen, click
Create client; - In the “General Settings” tab, set
star-voteas the “Client ID” and clickNext; - In the “Capability config” tab, enable the “Client authentication” toggle switch and click
Next; - In the “Login Settings” tab, set
http://localhost:8080in the “Root URL” field and clickSave. - The Client secret generated for the
star-voteclient can be found in the “Credentials” tab. Make a note of this value, as it will be needed later. - Finally, let’s create two new roles for the
star-voteclient users.
- Navigate to the “Roles” tab and click
Create Role; - Enter
STAR-VOTE-ADMINas the “Role Name” and clickSave; - Repeat the process to create the
STAR-VOTE-USERrole.
Create new Groups
- In the left-hand menu, select “Groups”;
- In the “Groups” screen, click
Create group; - Enter
StarVoteAdminsfor the “Name” and clickCreate; - Click on the name of the
StarVoteAdminsgroup to select it; - Select the “Role mapping” tab and click
Assign role; - Choose “Filter by clients” and type
STARin the “Search by role name” field. TheSTAR-VOTE-ADMINrole of thestar-voteclient will appear. Select it, and clickAssign. - Go back to “Groups” screen;
- Let’s create another group. So, click
Create group; - Enter
StarVoteUsersfor the “Name” and clickCreate; - Click on the name of the
StarVoteUsersgroup to select it; - Select the “Role mapping” tab and click
Assign role; - Choose “Filter by clients” and type
STARin the “Search by role name” field. TheSTAR-VOTE-USERrole of thestar-voteclient will appear. Select it, and clickAssign.
Create an Admin
- In the left-hand menu, select “Users”;
- In the “Uses” screen, click
Create new user; - In the “Create user” screen form:
- Set
app-adminfor the “Username” field; - For the “Email”, enter
[email protected]; - Enable the “Email verified” toggle switch;
- Click
Join Groupsbutton. Then, selectStarVoteAdminsand clickJoin; - Finalize the Admin creation by clicking
Create.
4. Let’s set a password for app-admin:
- Navigate to the “Credentials” tab and click
Set password; - Let’s enter a strong password for
app-admin,123😝; - Disable the “Temporary” switch toggle;
- Click
Saveand confirm the password setting by clickingSave password.
Enable the Registration of New Users
- On the left-hand menu, select “Realm Settings”;
- In the
my-realmscreen, select the “Login” tab; - Enable the “User registration” toggle switch present in the “Login screen customization” section;
- Next, select the “User registration” tab;
- In “User registration” tab, select “Default groups” sub-tab and click
Add groups; - Select the
StarVoteUsersgroup and clickAddbutton.
That is it. Keycloak is configured!
Backend & Frontend Modifications
Update the application.properties
Let’s add the following lines to application.properties file:
jwt.auth.converter.principal-attribute=email

spring.security.oauth2.resourceserver.jwt.issuer-uri=http://localhost:9080/realms/my-realm

spring.security.oauth2.client.provider.keycloak.issuer-uri=http://localhost:9080/realms/my-realm
spring.security.oauth2.client.provider.keycloak.user-name-attribute=${jwt.auth.converter.principal-attribute}

spring.security.oauth2.client.registration.keycloak.clientId=${spring.application.name}
spring.security.oauth2.client.registration.keycloak.clientSecret=${KEYCLOAK_CLIENT_SECRET}
spring.security.oauth2.client.registration.keycloak.scope=openid,profile,email- The
jwt.auth.converter.principal-attributeproperty configures the principal attribute. It determines how the user is identified in the JWT. - The
spring.security.oauth2.resourceserver.jwt.issuer-uriproperty specifies the URI of the issuer for JWT tokens. The issuer URI is used to verify the authenticity and integrity of the JWT token received by the resource server; - The
spring.security.oauth2.client.provider.keycloak.issuer-urispecifies the URI of the OpenID Connect (OIDC) provider (in this case, Keycloak) for the OAuth 2.0 client. This URI is used to configure the client to authenticate and interact with the OIDC provider during the OAuth 2.0 flow; - The
spring.security.oauth2.client.provider.keycloak.user-name-attributespecifies the attribute in the JWT token that represents the username or user identifier. The username attribute is used to identify the user in the application; - The
spring.security.oauth2.client.registration.keycloak.clientIdspecifies the client ID for the OAuth 2.0 client. - The
spring.security.oauth2.client.registration.keycloak.clientSecretspecifies the client secret for the OAuth 2.0 client; - The
spring.security.oauth2.client.registration.keycloak.scopespecifies the scope requested by the OAuth 2.0 client during the authorization process. Scopes define the permissions and access rights requested by the client. In this configuration, the client requests theopenid,profile, andemailscopes, which are commonly used to access basic user information and profile details.
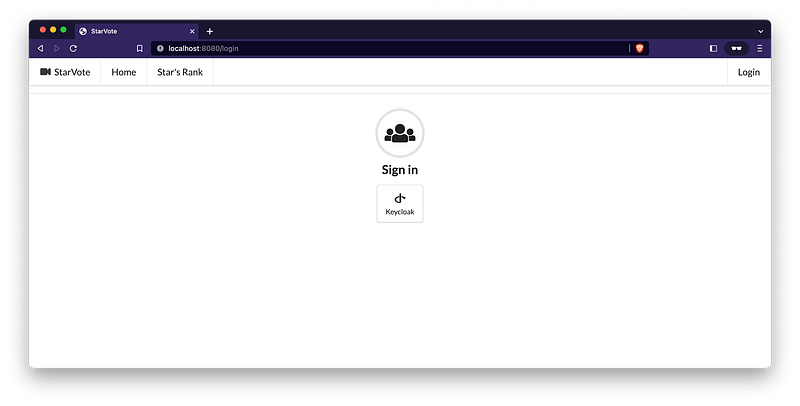
Update the login.html
Let’s apply the following change (highlighted in bold) in login.html:
<!DOCTYPE html>
<html lang="en" xmlns:th="http://www.thymeleaf.org">
...

<body>

<div class="ui center aligned basic segment">
    ...
    <div class="ui compact labeled icon menu">
        <a class="item" th:href="@{/oauth2/authorization/keycloak}">
            <i class="openid alternate icon"></i>
            Keycloak
        </a>
    </div>
</div>

...
</body>
</html>
The th:href="@{/oauth2/authorization/okta}" is a Thymeleaf attribute used in an anchor tag (<a>) to specify the URL for the Keycloak authentication. This endpoint initiates the OAuth2 authorization flow with the chosen identity provider. When the user clicks on the corresponding link, it triggers the authentication process and redirects them to the appropriate authorization page.
Update the WebSecurityConfig class
In WebSecurityConfig class, let’s provide the implementation to the extractRoles method:
public class WebSecurityConfig {
    ...

    private Collection<? extends GrantedAuthority> extractRoles(Jwt jwt) {
        Map<String, Object> resourceAccess = jwt.getClaim("resource_access");
        Map<String, Object> resource;
        Collection<String> resourceRoles;
        if (resourceAccess == null
                || (resource = (Map<String, Object>) resourceAccess.get("star-vote")) == null
                || (resourceRoles = (Collection<String>) resource.get("roles")) == null) {
            return Collections.emptySet();
        }
        return resourceRoles.stream()
                .map(role -> new SimpleGrantedAuthority("ROLE_" + role))
                .collect(Collectors.toSet());
    }
}
Testing StarVote application
Start StarVote
Make sure you are in the root folder of the StarVote application in the terminal. Export the KEYCLOAK_CLIENT_SECRET environment variable and set it to the client secret provided by Keycloak. Use the following command:
export KEYCLOAK_CLIENT_SECRET=<star-vote-client-secret-provided-by-keycloak>Then, run the following command:
./mvnw clean spring-boot:run
Testing StarVote UI
Once the application is started, let’s open a browser and access: http://localhost:8080.

Then, click the Login button present on the top-right of the screen and select Keycloak.
The Keycloak login page will appear.
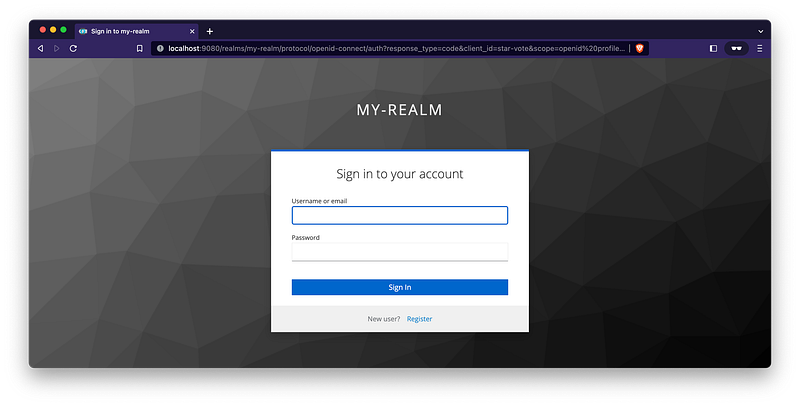
Type app-admin for the “Username or email” field and 123 for the “Password” field.
You are in! 🎉
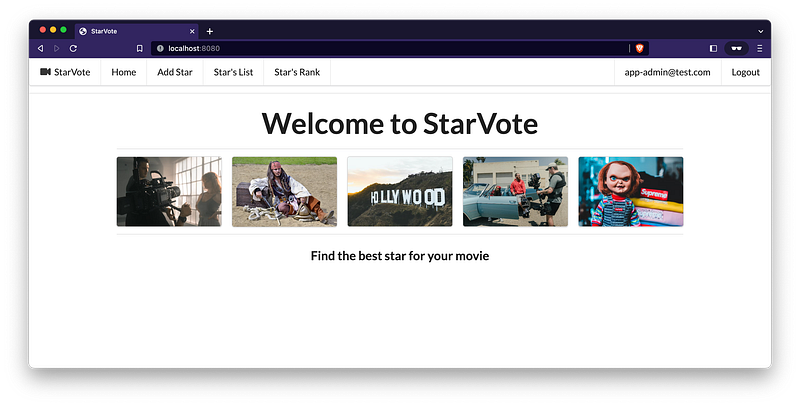
Feel free to add your favorite movie stars or even register as a new user on StarVote! 😃
Testing StarVote API
Once the application is started, we can submit requests to its endpoints. Let’s try to retrieve all the stars. So, open another terminal and run the following command:
curl -i http://localhost:8080/api/stars
This command will return an HTTP 401 response, as the endpoint is now secured. In order to access it, we need to provide an Bearer access token.
Let’s go ahead and request it to Keycloak:
- In a terminal, let’s create the
KEYCLOAK_CLIENT_SECRETenvironment variable and set thestar-voteclient secret value to it.
KEYCLOAK_CLIENT_SECRET=<star-vote-client-secret-provided-by-keycloak>
2. Then, let’s request a new access token for app-admin by running the following command:
curl -X POST \
  "http://localhost:9080/realms/my-realm/protocol/openid-connect/token" \
  -H "Content-Type: application/x-www-form-urlencoded" \
  -d "username=app-admin" \
  -d "password=123" \
  -d "grant_type=password" \
  -d "client_secret=$KEYCLOAK_CLIENT_SECRET" \
  -d "client_id=star-vote"
You should get something like
{
    "access_token": "eyJhbGciOiJSUzI1NiIsInR5cCIgOiAiSldUIiwia2lkIiA6ICJZ...",
    "expires_in": 300,
    "not-before-policy": 0,
    "refresh_expires_in": 1800,
    "refresh_token": "eyJhbGciOiJIUzI1NiIsInR5cCIgOiAiSldUIiwia2lkIiA6ICI...",
    "scope": "email profile",
    "session_state": "38ec6c8c-9bbb-4cdf-bc76-a0998daea895",
    "token_type": "Bearer"
}
3. What we need is the access_token field. So, let’s copy and set it to another environment variable called APP_ADMIN_ACCESS_TOKEN
Note: you will get a different
access_token!
APP_ADMIN_ACCESS_TOKEN=eyJhbGciOiJSUzI1NiIsInR5cCIgOiAiSldUIiwia2lkIiA6ICJZ...
We can inspect the access token using jwt.io website. After decoding it, we have the following for header and payload:
header
{
  "alg": "RS256",
  "typ": "JWT",
  "kid": "YYillYGh0QUQVUG8Yy4D15K59AeLBi9P6K0Phb3oYzA"
}
payload
{
  "exp": 1686151596,
  "iat": 1686151296,
  "jti": "658b74d7-db67-4430-b1af-0f2269a03cd4",
  "iss": "http://localhost:9080/realms/my-realm",
  "aud": "account",
  "sub": "02e377a8-3aab-4c22-aca9-4dee4cdbef28",
  "typ": "Bearer",
  "azp": "star-vote",
  "session_state": "38ec6c8c-9bbb-4cdf-bc76-a0998daea895",
  "acr": "1",
  "allowed-origins": [
    "http://localhost:8080"
  ],
  "realm_access": {
    "roles": [
      "offline_access",
      "uma_authorization",
      "default-roles-my-realm"
    ]
  },
  "resource_access": {
    "star-vote": {
      "roles": [
        "STAR-VOTE-ADMIN"
      ]
    },
    "account": {
      "roles": [
        "manage-account",
        "manage-account-links",
        "view-profile"
      ]
    }
  },
  "scope": "email profile",
  "sid": "38ec6c8c-9bbb-4cdf-bc76-a0998daea895",
  "email_verified": true,
  "preferred_username": "app-admin",
  "given_name": "",
  "family_name": ""
}
Looking closed the payload, we can see the “resource_access” field in the given JSON that represents an access control configuration for a resource called “star-vote”. This resource has a single role, defined as STAR-VOTE-ADMIN.
4. Let’s proceed and provide the APP_ADMIN_ACCESS_TOKEN in the next call to the /api/stars endpoint. Here is the updated cURL command:
curl -i http://localhost:8080/api/stars -H "Authorization: Bearer $APP_ADMIN_ACCESS_TOKEN"This command should return an HTTP 200 response with an array of stars (maybe empty in case you haven’t added any star).
The API is working great! 🎉
5. To shut it down, go to the terminal where it’s running and press Ctrl+C.
Keycloak Cleanup
Go to the terminal where Keycloak Docker container is running and press Ctrl+C.
Up Next
We’ll dive into enabling Okta as the Identity Provider for the StarVote application, as an alternative to using Keycloak.
We hope you are enjoying the StarVote Tutorial!
Support and Engagement
If you enjoyed this article and would like to show your support, please consider taking the following actions:
- 👏 Engage by clapping, highlighting, and replying to my story. I’ll be happy to answer any of your questions;
- 🌐 Share my story on Social Media;
- 🔔 Follow me on: Medium | LinkedIn | Twitter | GitHub;
- ✉️ Subscribe to my newsletter, so you don’t miss out on my latest posts.


