
Build Your First iOS Widget — Part 3
Making a user-configurable widget with SiriKit
Note: This is the third and final part of my 3-part widget tutorial. Make sure to complete part 1 and part 2 before continuing with this article.
Note: You’ll need Xcode 12 Beta 2 or higher to follow this tutorial.
So far, we have created a simple list-based app that displays different emoji along with their names, and allows you to view details about a specific emoji by tapping on it. Furthermore, we created a widget for our app–which can be small, medium, or large–and will display an emoji that is updated randomly every hour.
In this final part of the tutorial, we will use SiriKit to add a new widget that the user can configure to display an emoji of their choice.
User-Configurable Widgets
In some cases, we may want an app widget to display content chosen by the user. For example, a stock market app may let users choose a specific stock to display on a widget. Let’s go ahead and write some code to support adding a widget that displays an emoji of your choice.
Intent Definition
To get started, we first need to create a custom intent definition; this is what will allow us to define customizable properties for our widget (i.e. the emoji). To create an intent definition click on the File menu, select New File and select SiriKit Intent Definition File; name your file SelectEmojiIntent.
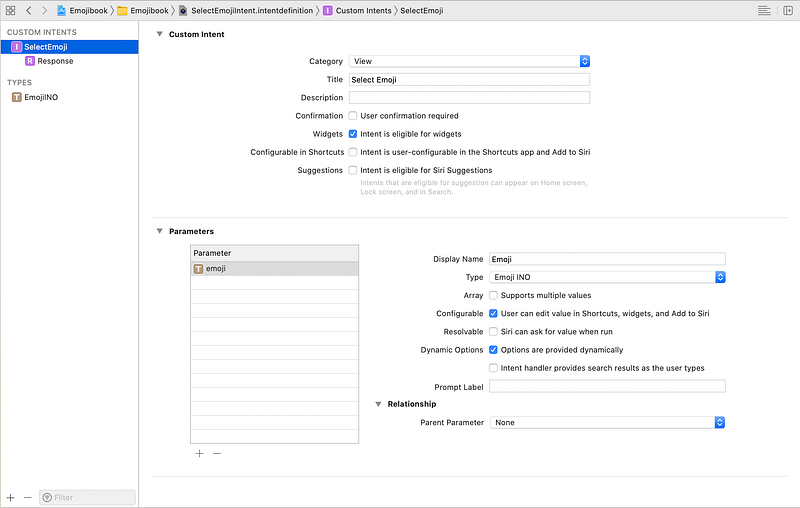
Now that the intent file is created, we need to define our intent. To do this, click on the ‘+’ icon on the bottom left of the intent file and select New Intent, give your intent the name SelectEmoji. Set the category to View; make sure that Intent is eligible for widgets is selected, and the other options are deselected.
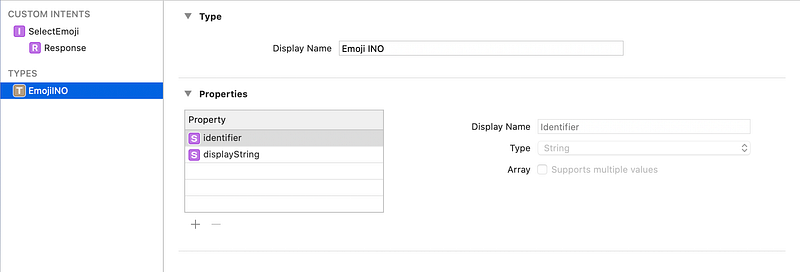
Now that we’ve created our intent, we need to define the configurable properties that our intent will handle. We will define a new INObject type (intent object) called EmojiINO (emoji intent object). Click on the ‘+’ icon again, and select ‘New Type’, give it the name EmojiINO. You should see a new type created with the identifier and displayString properties.
Now go back to your SelectEmoji intent and add a new parameter called emoji, changing the type to EmojiINO. Make sure that ‘Options are provided dynamically’ is selected.
The EmojiINO type describes the emoji that a user can choose in a SelectEmojiIntent. Now we will write some code for providing the emoji options dynamically.
Intents Extension
To dynamically provide the list of supported emoji, we need to add an Intents Extension. Here, we will create an IntentHandler that will create a list of EmojiINO from all the emoji in our EmojiProvider. To add the intents extension choose File -> New -> Target… and select Intents Extension. Press Next and give a name to your extension (e.g. Emojibook Intent), make sure that None is selected as the starting point. Click Finish, and activate the Intents scheme if prompted by Xcode.
Navigate to the General tab of the Emojibook Intent target and add SelectEmojiIntent as one of the supported intents, like so:
Now go to the intent definition file, and make sure that it is a member of the Emojibook app, the Widget, and the Intents extension. Do the same for the EmojiDetails.swift and the EmojiProvider.swift files.
We can now go to IntentHandler.swift and implement the SelectEmojiIntentHandling protocol to provide the emoji options. Our IntentHandler.swift file will look like so:
Here, we’re obtaining all the emoji options from our EmojiProvider, and creating a INObjectCollection of EmojiINO. Each EmojiINO has an identifier to distinguish it from others, and a display name shown in the options list of the widget.

Custom Emoji Widget
Before adding our custom emoji widget, let’s make some changes to better organize our code. First, let’s add a reusable placeholder view in EmojibookWidgetView.swift by adding a View struct, like so:
Now, go ahead and rename the Emojibook_Widget.swift file to RandomEmojiWidget.swift. We will also rename the structs inside this file to refer to a RandomEmojiWidget, like so:
We can finally work on our custom emoji widget. First, add a new Swift file called CustomEmojiWidget.swift making sure it is part of the Emojibook Widget Extension target. Similar to the TimelineProvider we defined in our RandomEmojiWidget, we will need to define an IntentTimelineProvider for our CustomEmojiWidget. An IntentTimelineProvider provides the widget entries for a user-configurable widget, based on a given Intent; in our case, this is the SelectEmojiIntent.
We previously used a static widget configuration, since the random emoji widget does not have any configurable properties. For the custom emoji widget, we will use an intent widget configuration, since the widget will be configured based on the SelectEmojiIntent. In the end, our CustomEmojiWidget will look like this:
Note that the timeline method now includes a configuration parameter, which refers to the intent containing user-customized values (i.e. SelectEmojiIntent). We also created a helper function, lookupEmojiDetails, that allows us to find the corresponding emoji for the configuration, based on the id.
If you run your app now and try to add a CustomEmojiWidget, you won’t be able to do so. This is because we need to tell the system that our app now supports two types of widgets, the RandomEmojiWidget and the CustomEmojiWidget. To achieve this, we will need to create a WidgetBundle.
Create a new file called EmojiWidgetBundle.swift, and add the code below:
As you might remember, the @main annotation defines the entry point to our widget. We previously used RandomEmojiWidget as our entry point, but since our new entry point will be the widget bundle we just defined, we should now remove this annotation from RandomEmojiWidget.swift. After doing so, we will be ready to test our new widget.
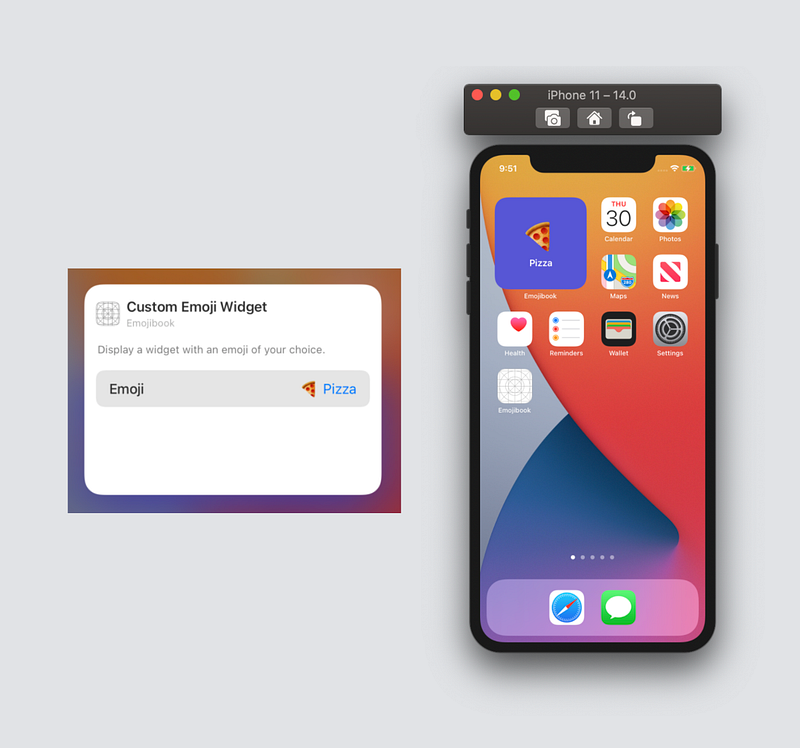
Let’s go ahead and run our app. When you try to add an Emojibook widget, you will now have the option add a custom emoji widget. Once you add it, you can edit the widget to show the emoji that you want!
Thanks for reading! I hope you enjoyed this article and found it useful. You can find the completed app on GitHub.
To learn more about WidgetKit, make sure to check out Apple’s awesome resources:


