
Build Your First iOS Widget — Part 2
Different widget sizes and deep links
Note: This is part 2 of a 3-part tutorial. Make sure to complete part 1 before continuing with this article. You can find part 3 here.
Widgets on iOS can support 3 different sizes: small, medium, and large. In part 1 of this tutorial, we only added support for small widgets. Now we will add a medium widget and a large widget as well.
Note: You’ll need Xcode 12 Beta 2 or higher to follow this tutorial.
Supporting Different Widget Sizes
Open up the Emojibook project on Xcode and navigate to the Emojibook_Widget.swift file. To support different widget sizes, all we have to do is modify the arguments in the supportedFamilies modifier of the Emojibook_Widget struct. So go ahead and add .systemMedium and .systemLarge to the list of supported families.
Now, run your app making sure the Emojibook WidgetExtension is the active scheme, and go into jiggle mode. Press the “+” button on the top left corner and select the Emojibook app. The Emojibook widget gallery will appear, you will now see the 3 different widget sizes you can add to your homescreen.

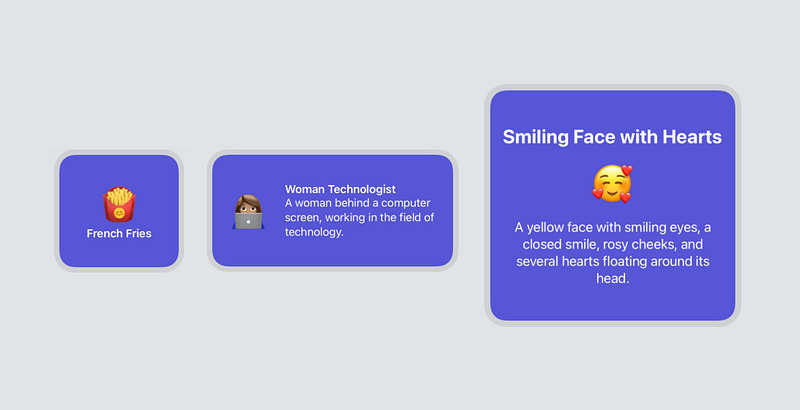
While these new widgets work, a lot of space is going unused, so we’re going to modify the views displayed for medium and large widgets. These widgets will show an emoji along with its name, and we’re also adding the emoji’s description. Navigate to EmojiWidgetView.swift and add a new View struct called MediumEmojiWidgetView. Its content will be similar to the small widget, but we’re adding a Text element with the emoji’s description, like so:
Now add another View struct called LargeEmojiWidgetView. Its content will be the same as that of the MediumEmojiWidgetView, but it will be arranged a little differently:
Let’s also move the code under the EmojiWidgetView struct into a new SmallEmojiWidgetView View struct.
We will now modify EmojiWidgetView to include a WidgetFamily property. We can access our widget’s widgetFamily by using the Environment property wrapper. This allows us to read the widget’s widgetFamily value directly from our EmojiWidgetView’s environment.
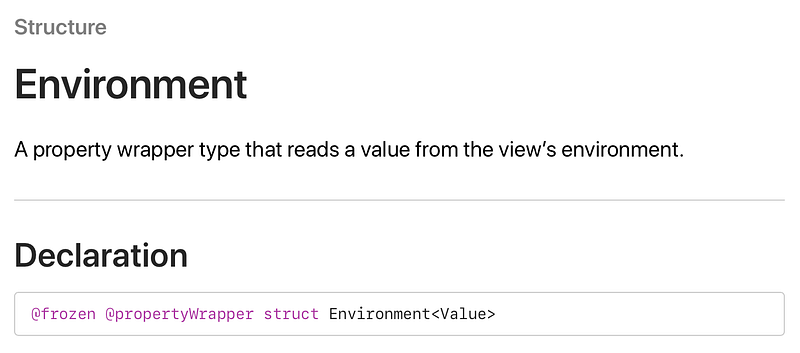
Environment property wrapper.Based on the value of the family property we will determine the size of our widget and return one the views we just added. To do this, we will also need to add the ViewBuilder property wrapper to the body of our View.
Let’s run our widget and open the widget gallery to see how our widget will look in different sizes.
Cool! Our medium and large widgets look better and make good use of screen real estate. Now let’s work on adding deep links to our app.
Widget Deep Links
Let’s add deep links so that our app will open the EmojiDetailsView we built in part 1 when launching it through the small widget. The details view will show data for the emoji that was in the widget when it was tapped. To do this, we will use the widgetURL modifier to supply a url to our SmallEmojiWidget, this is the url that will be opened when the widget is tapped. We will then use the onOpenURL view modifier to handle the widget’s url, and open the corresponding details sheet.
First things first, we need to update our EmojiDetails struct to include a unique URL property. We will use an emoji’s name to construct the url, making sure to remove any whitespaces in the string; for example, the “🤯” emoji’s url will be emoji://ExplodingHead.
Now, in EmojiWidgetView.swift, we will add the widgetURL modifier to our SmallEmojiWidgetView:
To actually open the details sheet, we need to handle this url in EmojibookListView.swift. We will first add a new variable with the State property wrapper to keep track of the current EmojiDetails instance visible in the sheet, if any.
@State private var visibleEmojiDetails: EmojiDetails?
The visibleEmojiDetails variable can be updated from two places: either when handling the widget url, or when pressing on an item in the emoji list. Using the sheet view modifier, the sheet will automatically be updated and displayed any time visibleEmojiDetails changes its value.
We will add the onOpenURL modifier, and here we will try to find the EmojiDetails for the emoji that was tapped on the widget. Once we have it, we will update visibleEmojiDetails with it. We will also need to make some updates to each Button in our list, so that each button’s action will update visibleEmojiDetails as well. In the end, our EmojibookListView will look like so:
Let’s go ahead and test our deep links. Make sure the Emojibook app is the active scheme, then click play to build and run. When you press the small widget, the app should now go directly to the EmojiDetailsView with data corresponding to the emoji in the widget.
Thanks for reading! I hope you enjoyed this article and found it useful. You can find the completed part 2 app on GitHub.
Next up: In part 3 of this tutorial, I will show you how to use SiriKit intents to make user-configurable widgets. A user will be able to select an EmojiDetails of their choice to display in the widget.
To learn more about WidgetKit, make sure to check out Apple’s awesome resources:


