
Build Your Chest at Home
How to build an impressive upper body without any equipment.
Calisthenics has been rising in popularity for some time now, and it’s become clear that you don’t need heavy weights or expensive machinery to develop an impressive physique or get seriously strong. Non-functional excess weight (fat), makes calisthenics a lot harder, so calisthenics practitioners are lean by necessity. Lean and muscular is an impressive look.
Calisthenics requires strength and skill. But you don’t have to be capable of a muscle up, or handstand push up to benefit from bodyweight exercises. You can build an impressive physique with the most basic bodyweight exercises if you know how to use them.
Since the onset of the Covid 19 pandemic and the closure of gyms, I’ve coached an individual in his 50s to build the strongest upper body he’s ever had. None of the workouts he’s done have required him to use any equipment, or even leave his house. He used to train with weights in his twenties. He’s made consistent progress working out at home, steadily getting bigger and stronger. When his progress stalls, as it inevitably will, there are more advanced workouts he will be able to use.
In this article I’ll give you four different workouts you can use to build your chest a home; starting with two workouts for beginners, followed by an intermediate workout and an advanced workout. The only equipment required to perform any of the workouts is a watch.
How to get bigger and stronger

Before learning the workouts it’s important to understand the factors which drive muscle and strength gains so you can create and adjust your own workouts to suit your level of development. This is very simple; to trigger muscle and strength increases you must train with a high level of intensity. To continue getting stronger and more muscular, you must make your workouts progressively more difficult; this approach is called ‘progressive resistance training.’
Intensity can be understood as difficulty. The more difficult a workout is the greater the chance that it will trigger growth. The closer you can get to the point where it is absolutely impossible to complete another repetition despite your greatest effort, the more growth you will trigger. After triggering growth, and allowing enough time for it to occur, you must perform a workout that is even harder than the previous workout. As you will not be using weights and cannot increase the weights used, this will be done by performing more repetitions, reducing the rest between exercises, and accessing the three levels of muscular strength known as positive (lifting the weight), concentric (halting the movement of the weight), and negative (lowering the weight). The workouts listed below employ all of these techniques to become progressively more difficult.
The exercises
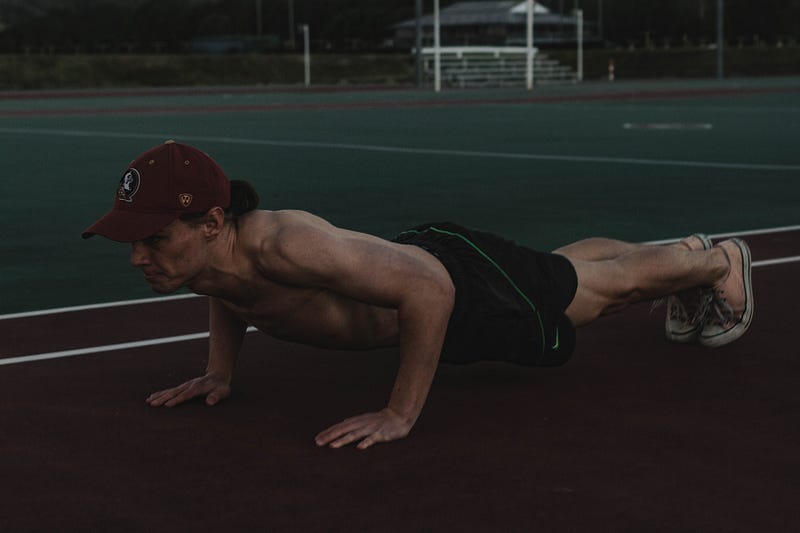
In my article Goodbye Bench Press, I explained why dips are such an excellent exercise. They do more to stimulate growth in the chest, triceps and shoulders than any other single exercise. Dips are one of the exercises you can use at home to build an impressive chest. All you need is a right angled work top. The other exercises are all variations of the push up.
The idea that a home workout can’t be challenging enough for an experienced lifter is false. I’ve been lifting weights for years and a properly constructed home workout will leave my chest sore, as well as my triceps and shoulders. More importantly, the workouts make me grow.
The four exercises you will be doing during your home workouts are dips, push ups, incline push ups with feet elevated, and close grip push ups. Instructions on how to perform the exercises are below.
Workout A1 (Beginners)

Exercises 1 Push ups
Push ups are a fundamental upper body exercises. They should be included in any beginners bodyweight training routine. Properly performed they will strengthen and build your chest, anterior deltoids and triceps.
Perform one set of push-ups. Make sure your chest touches the floor at the bottom of each movement. Move smoothly and slowly through each repetition; taking four seconds to lower your chest to the ground and two seconds to get back to the top of the movement. Stop just shy of locking your elbows out so the load is borne by your muscles and not your skeletal skeleton. Keep pushing until its impossible to keep moving.
As you get closer to the end of the set the repetitions will become harder, and therefore slower. Avoid the temptation to speed up the movement as doing so will bring momentum into play. You want your muscles alone to lift your body, with no help from momentum. The last repetition should be a real struggle, taking at least four seconds to get to the top of the movement. If you can do it faster than that, try another repetition.
If you are initially too weak to perform push ups, start with your knees on the floor and work up to 30 repetitions in a set. At that point you will be ready to try normal push ups.
Exercise 2 Negative Dips
Aim to keep your rest between the end of your push-ups and the start of your negative dips below two minutes. Dips are an advanced exercise and it is unlikely that beginners will have adequate positive strength (lifting the weight) to complete a repetition. However, just about everybody will be able to do a negative dip, as negative strength is greater than positive strength. That means you can lower more weight than you can lift.
‘Negatives’ are repetitions that focus only on the lowering portion of the exercise, and are an extremely productive way to exercise. To perform negative dips, place your hands pal s down, at equal distances from the apex of a right angle (I use the corner of a kitchen work top). Support your weight with your hands on the work top, and a slight bend in you arms. Lift your feet off of the floor and bend your knees, bringing your feet back and your head slightly forward so your body is leaning forward. Then start to lower your body by bending your arms, as slowly as you can, fighting gravity. A negative dip should take 15 seconds from the top of the movement to the bottom, where your shoulders are just above the work top. At the bottom of the movement, put your feet back on the ground, stand up, then repeat the movement. Eventually you will no longer be able to support your weight with your arms, that is the end of the set.
At first you may not be able to slow the movement down to more than a few seconds, but you will gain strength rapidly. Within a couple of weeks you should be able to perform 4 consecutive, fifteen second negatives. After that, you will be able to perform normal dips where you both lower and lift your weight using only your arms. As with push-ups, the lowering phase of the movement should take four seconds and the lifting part should take two seconds. Keep a stopwatch, wristwatch, phone or any other time measuring device on the worktop where you can see it.
You should rest for one or two days before repeating the workout. If you rest for one day, then repeat the workout and are able to perform more repetitions on both exercises, one day of rest is adequate for you. If you are not stronger on your second workout, start resting for two days between workouts. Some people will require three days rest between workouts. When you are getting adequate rest, so long as you are working hard, you will be stronger on every single workout.
When you can do at least 20 push-ups and at least 10 dips you are ready to move on to workout A2, for beginners who have built a foundation.
Workout A2
Now that you are strong enough to performs dips properly, you will begin the workout with this exercise. Perform one set until you reach failure, the point at which any further movement is impossible. This will usually be at the bottom of the movement, so there is no need to stop at the top of the movement just because that counts as a complete rep. Stop when you can’t move anymore and do not record any reps that aren’t complete. So if you get 10 good dips, then lower your self to the bottom of the 11th repetition but can’t straighten your arms to lift your self back up, record 10 repetitions.
As ever, keep the repetitions smooth and slow. No momentum!
The second exercise is push -ups.
Workout A2 adds a third exercise, close grip push-ups. Whereas normal push-ups use a wider than shoulder width spacing for the hands, this exercise keeps the hands directly below the shoulders. The elbows, rather than flaring out, are kept close to the side of the body. Lower your body until your chest touches the ground, then return smoothly to the top position. Performing push ups in this manner will put more stress on the upper chest, the triceps and the anterior deltoids. Stronger triceps will allow you to do more push ups.
Continue with this routine until you can perform at least 20 repetitions of each exercise. Once again, you should rest no more than 2 minutes between each exercise. Only perform one all out, totally committed set of each exercise.
This workout places more stress on the body than A1, so if you have a workout where you are not stronger than the previous one, you may need to insert an extra rest day between workouts.
Workout B

Congratulations, you’ve made it past the beginner stage and you should be seeing significant changes. Your chest, triceps and shoulders should all be more muscular by now.
The intermediate workout introduces two changes. The first is that you will reduce the rest between exercises to 60 seconds. Many trainees are surprised at how much more intense the workout is when rest times are halved. The second change is that you will perform a new exercise; incline push ups. Incline push-ups are identical to normal push ups but you will have your feet elevated a couple of feet above the ground by placing them on a low wall, stair, chair or other sturdy object. Incline push ups will place more of the exercise load on your deltoids.
For workout B, the exercise order is changed. Start with dips, then do normal push ups, followed by incline push ups, and finish with close grip push ups. The reduced rest time will initially mean you may perform less repetitions on some exercises, but you will adapt. Keep the rest time between all sets to 60 seconds.
Stick with this workout until you can perform at least 20 repetitions on all four exercises. As you will be beginning with dips, your reps may well go above 20, do as many as you can. It’s not unusual for trainees to be able to perform 25 or more dips by the time they finish with with workout B.
Workout C.

This is the killer, the advanced workout that leaves my chest and triceps sore for days. When I’m training at home, I don’t do this more than once a week. It takes me a while to recover.
For workout C, there is no rest between exercises. Start with dips and do as many repetitions as possible. Then, without rest, go straight into a set of push ups. Once you can do no more, move immediately to incline push ups, forcing your shoulders to take more of the load. When you can’t get another rep, move straight into a set of close grip push ups.
Once you finish the four exercises in this manner, immediately repeat them, but do only one negative repetition of each. That means you start at the top of the movement and lower your self to the bottom as slowly as possible. Aim initially for a 15 second negative on each exercise. As you get stronger, you will eventually be able to perform a 30 second negative on each exercise. Your chest, triceps and shoulders will all be on fire.
In summary, Workout C goes like this: Dips, push ups, incline push ups, close grip push ups, negative dip, negative push up, negative incline push up, negative close grip push up. The advanced workout will push your cardiorespiratory system as well as your muscles; you will have to focus on controlling your breathing.
The journey begins

Follow the guidelines and workouts above and you’ll make good progress. Muscles growth is always preceded by strength increases, so as long as you are able to complete more repetitions on each workout, you will know you’re moving in the right direction. Stick at it and you can add a significant amount of muscle to your upper body using only the four exercises covered in this article without the need for any equipment.
If you’ve enjoyed reading this story and you’re not a member, you can join medium by clicking here. Membership is only $5 / month and helps to support writers, so please consider joining. You get unlimited access to read all of the stories you want. Thank you.


