
AutoGPT Unleashed — The Autonomous AI Agent Revolution
Discover the Next-Generation AI System Designed to Perform Tasks Without Human Intervention
The dizzying pace of AI development that we have been living with lately has been certainly overwhelming. Just when we got our heads around ChatGPT, another one came along…
AutoGPT
Crazy… right!?
AutoGPT is an experimental open-source pushing the capabilities of the GPT language model. It is commonly known as artificial general intelligence — or AGI for friends ;) — with the release of an open-source Python application called Auto-GPT.
Some of you have probably already heard of it, and you might have thought it was just another GPT plugin or Chrome-Extension.
But indeed… AutoGPT is more than that.
So, let’s discover it all together! 👇🏻
So first things first…
What’s Auto-GPT
Auto-GPT Is A Task-driven Autonomous AI Agent, which basically means it is am AI system designed to perform a wide range of tasks across various domains without human intervention.
And I emphasize… without human intervention.

These agents use advanced AI models, like OpenAI’s GPT-3 or 4 language model, to complete tasks, generate new tasks based on the results, and prioritize tasks in real time. Think of it as an assistant that makes decisions on its own to achieve a goal instead of you specifying what to do next.
Auto-GPT is equipped with these features according to its GitHub owners:
- 🌐 Internet access for searches and information gathering
- 💾 Long-Term and Short-Term memory management
- 🧠 GPT-4 instances for text generation
- 🔗 Access to popular websites and platforms
- 🗃️ File storage and summarization with GPT-3.5
By leveraging the power of natural language processing and other AI technologies, these agents can autonomously perform tasks within different constraints and contexts, making them useful for a variety of applications.
⚠️ It’s important to consider potential risks, such as data privacy, ethical concerns, and system overload while using these systems to ensure responsible and successful implementation.
Next, you might be thinking is…
What does AutoGPT require?
AutoGPT combines GPT-3.5 and GPT-4 via API, allowing projects to be created that have been iterating on their prompts and reviewing each iteration to improve and build upon it.
Its main Requirements are:
- Git installed
- Python 3.7 or later. It is recommended to be over 3.10.
- OpenAI API key — you NEED to have billing set up (paid account).
So let’s set up our own Auto-GPT!
#1. How to get the OpenAI API key
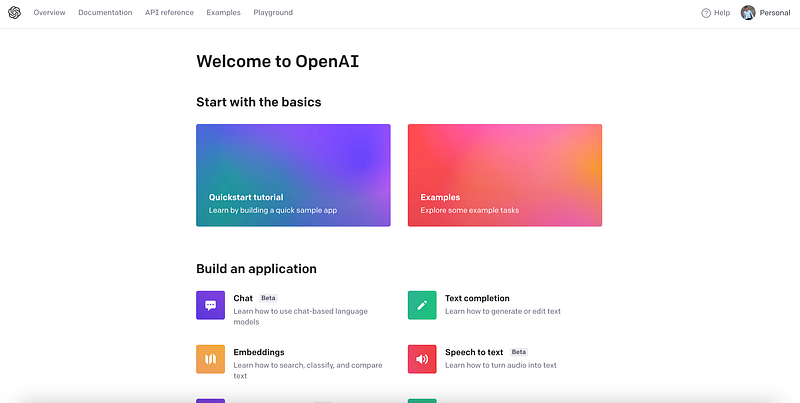
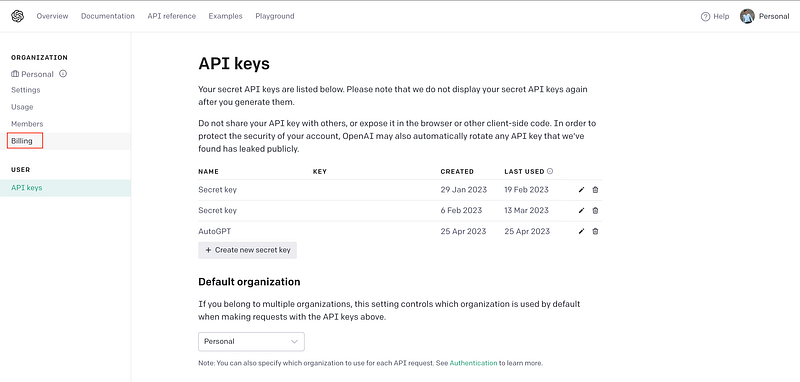
In case you do not have an OpenAI account yet, go to its website and create one. Once your account is created, go to your account overview page.
You should see something like follows:
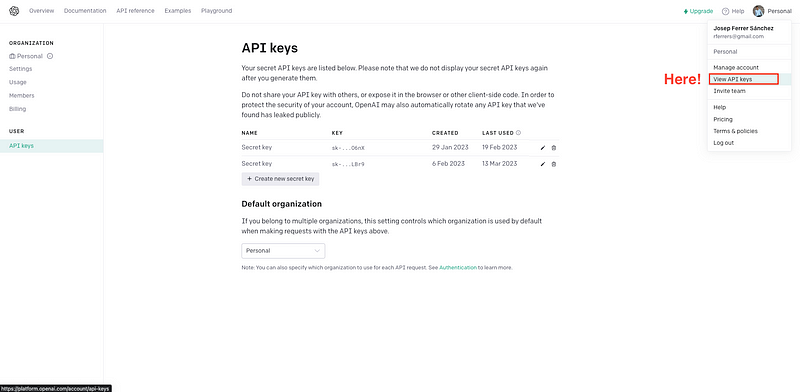
Now click on your personal account profile.

And go to the View API Keys.
Click into the Create new secret key
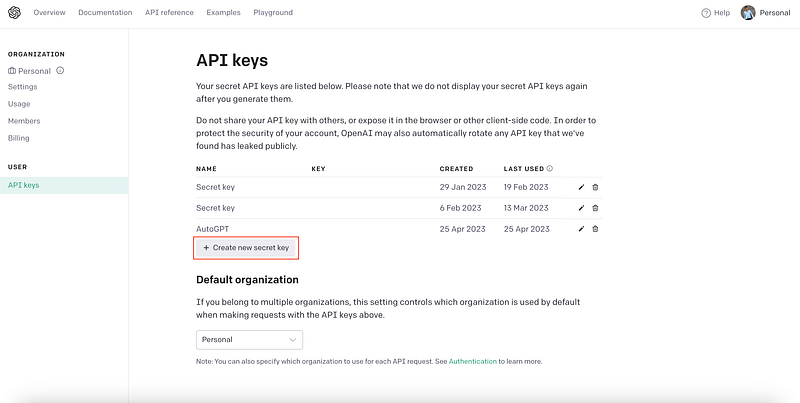
And name it.
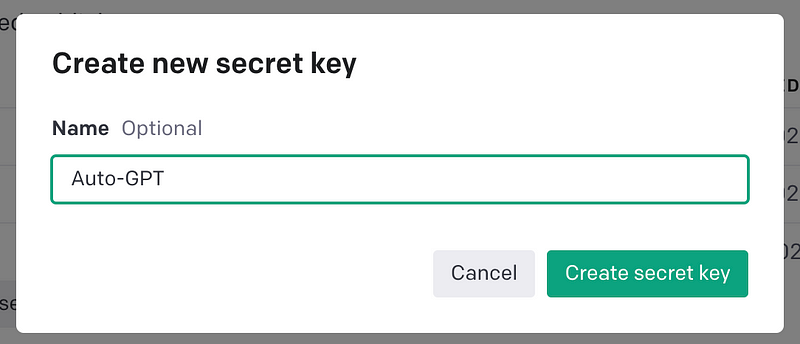
⚠️ Note: Keep a copy of this key because you can’t retrieve it from the web interface and we are needing it later on!
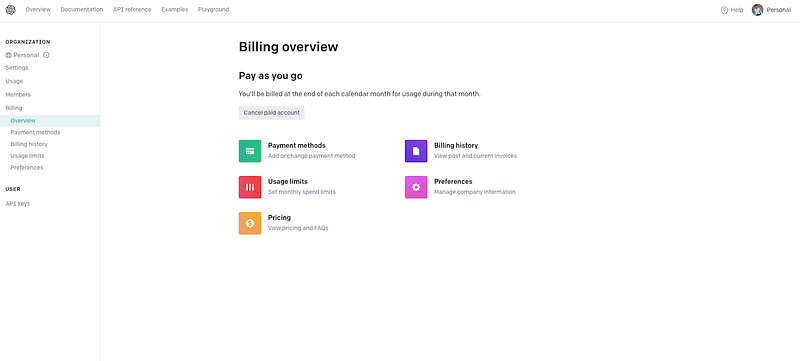
As I stated before, you must have a paying account to make calls in the OpenAI API. To activate our paying account, now you need to go to the billing section.
And then, you should see the option to Activate paid account. In my case, as it is already activated, I just see the Cancel paid account option.
⚠️ If you are worried about the potential of paying a lot of money accidentally, you can set a usage limit here. You can also track your usage here. If you are new in OpenAI, you can use up to 18$ which is included in the free version.
To set such limits, you should go to the Usage Limits section.
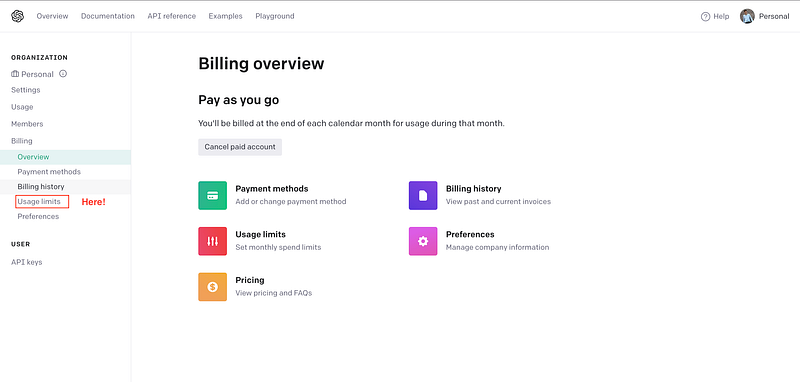
And then just choose whatever limits you prefer. AutoGPT does not spend much money — in my case, I have just spent so far 19 cents. That’s why you can set low limits.
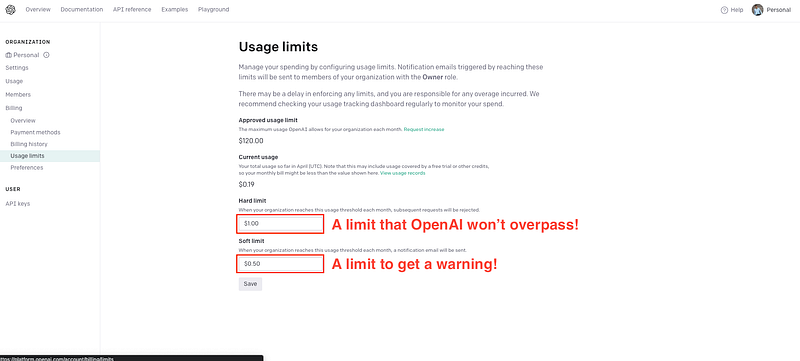
⚠️ Of course, depending on the usage you require of AutoGPT, costs might increase.
Now we are ready to proceed!
#2. Clone the GitHub repository
Open your terminal and execute the following command.
git clone -b stable https://github.com/Significant-Gravitas/Auto-GPT.git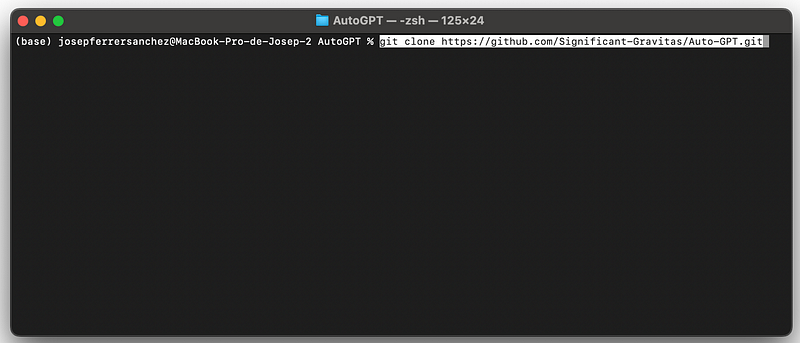
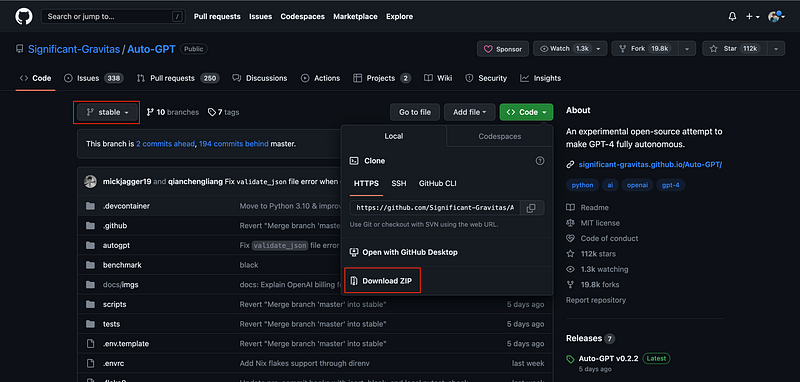
⚠️ Right now the GitHub owners just informed that it is better to use the stable branch instead of the master one. As in my case the master one gave some problems, I added the -b stable to clone the stable branch. You can directly download using the .zip from the GitHub as well.
Once we have the repo replicated in our local machine, we need to get intot the Auto-GPT folder.
cd Auto-GPTAnd then we can install the dependencies.
pip install -r requirements.txt
Then we need to find the .env.template, make a copy of it and erase the .template extension.
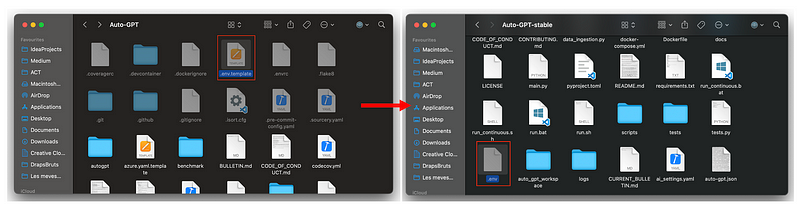
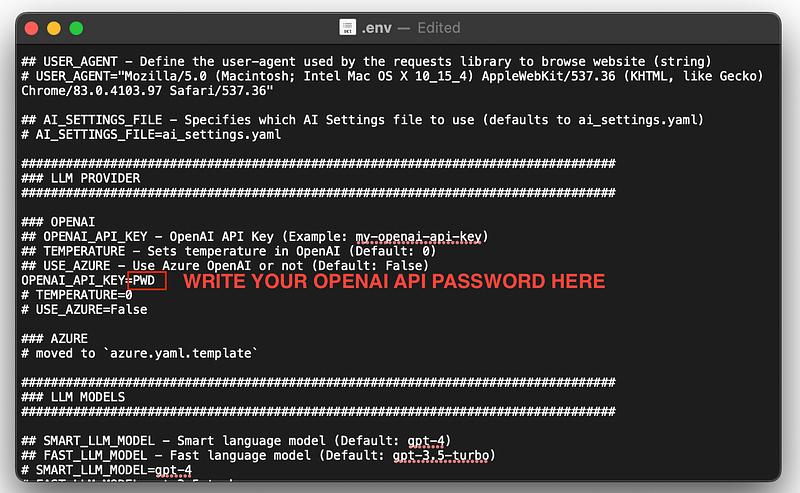
Next you need to fill your OPENAI_API_KEY on this .env file.
#3. Executing Auto-GPT
Open the terminal and run the following command.
./run.sh
You can execute ./run.sh --help to know all addition flags that can be introduced in the command. For instance, we can specify--gpt3only to use only GPT3 and --gpt4only to only use GPT4.
Now that we have our ChatGPT under execution, let’s see how it works!
So what’s so good about AutoGPT?
Well first thing first, it is important to note that GPT can write its own code using OpenAI’s latest GPT-4 model.
It also executes Python scripts which allow it to recursively debug, develop, build and continuously self-improve.
Once again… mind-blowing, right? 🤯
AutoGPT’s feedback loop looks like this:
- Plan
- Criticize
- Act
- Read Humans Feedback
- AutoGPT will ask for human feedback and permission.
[Repeat over and over]
⚠️ You can avoid AutoGPT will ask you for permission after every prompt, to ensure that the project is going in the right direction. You can avoid this using the continuous mode flag.
HOWEVER, this might end up having you AutoGPT in an infinite loop… with its corresponding cost. So, you better check from time to time what is it doing!
AutoGPT will read and write different files, and browse the web, along with looking back and reviewing its own prompts — just to ensure the project is what the user wants.
So how do we define AutoGPT Task…
#4. Defining tasks and goals
Basically you just need to give a task to AutoGPT… and it will do all the rest. It will scrape the web for the best information out there, and then it autonomously does the task for you and continues to constantly improve itself.
AutoGPT will start asking us 3 main things…
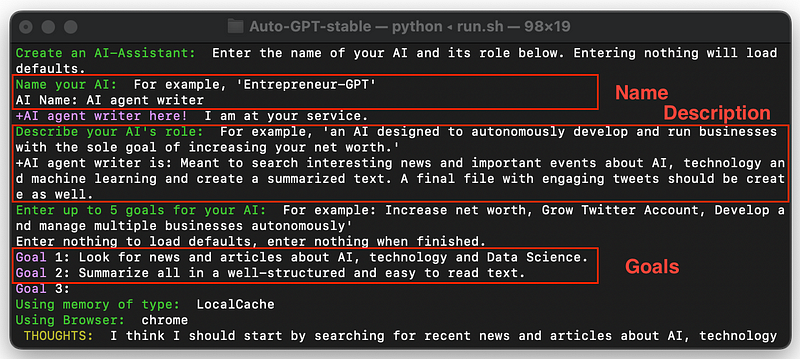
- A name for the AI. In my case, I called it
AI agent writer
2. A description that fits it. I added:
Meant to search interesting news and important events about AI, technology and machine learning and create a summarized text. A final file with engaging tweets should be create as well.
3. As many goals as you want. In my case, I added two main goals.
- GOAL 1: Look for news and articles about AI, technology and Data Science.
- GOAL 2: Summarize all in a well-structured and easy to read text.
⚠️ To start the task, just leave one goal blank and press enter. AutoGPT will start right away!
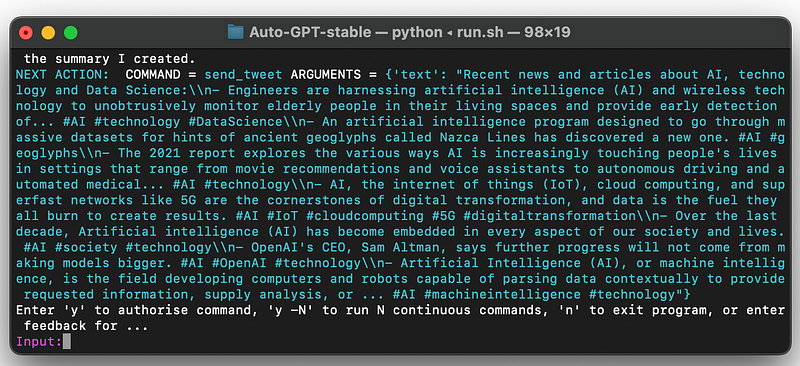
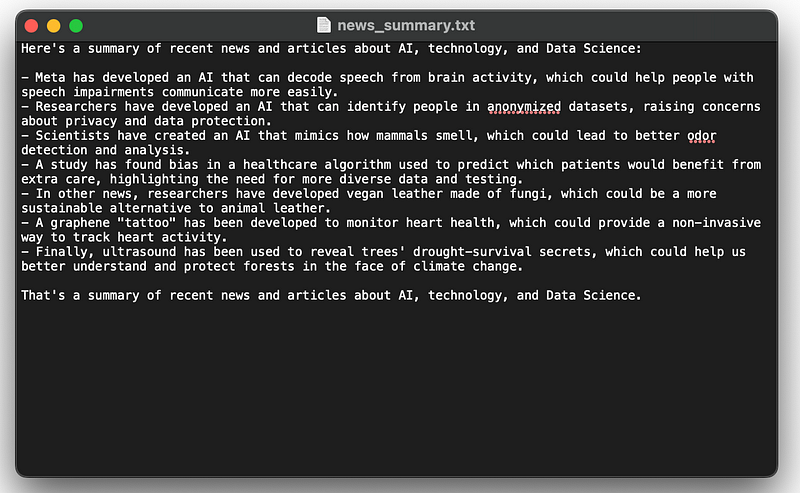
And that’s pretty much of it! After some iterations, you should have your result. In my case, AutoGPT decided to write the output directly on a .txt file:
I know I know… this is such a simple task, right?? However, there are multiple examples of AutoGPT tasks out there!
For instance, it created an App for a Twitter user. You can read the corresponding thread as follows.
Wrapping Up
I’ve been reading lots of comments and posts about AutoGPT throughout almost all social networks. It seems everyone has a completely different experience with it — but all of them do say wonders of it!
I promise I’ll be playing a little bit with this new tool and I’ll let you know what magics does it perform.
For now, let me know what you think and if you can use AutoGPT on your own.
I’ll be reading you in the comments! 👀
Data always has a better idea — trust it.
You can subscribe to my Medium Newsletter to stay tuned and receive my content. I promise it will be unique!
If you are not a full Medium member yet, just check it out here to support me and many other writers. It really helps :D
You can find me on Twitter and LinkedIn as well!
Some other nice medium related articles you should go check out! :D


