
Stable Video Diffusion
AI Video: Stable Video Diffusion (SDV) Outperforms RunwayML and Pika Labs
Stability.ai just released their first video model and it’s 🔥
This one’s a banger.
Just minutes after the release of stability.ai’s first-ever AI video model, its image-to-video approach showed amazing results as people began animating classic memes with the new “Stable Video Diffusion” (SVD) model.
And not only is SVD 100% open source: it seems to outperform any other video model currently available.
Time to have a look at how Stable Video Diffusion works and how you can use it for free!
First, a Showcase
All of these videos were generated from a single base image. Pretty cool, right
Right now we don’t have the ability to control video generation through prompts or masking, but I expect this will be possible very soon as there is a huge Stable Diffusion community that, in the past year, has developed amazing AI workflows that have later found their way into major applications such as Adobe Photoshop, etc.
Just imagine what will be possible if we integrate something like ControlNet or Composer into an SVD workflow! 🤯
However, there are settings that you can use to manipulate the results. Here is the same base image with different parameter settings (14fps and 25fps model, amount of noise, seed value):
SDV Is Outperforming RunwayML and Pika Labs
RunwayML and Pika Labs have been considered the best when it comes to the very young discipline of AI video generation.
But. Well, we’re moving fast.
Take a look at this:
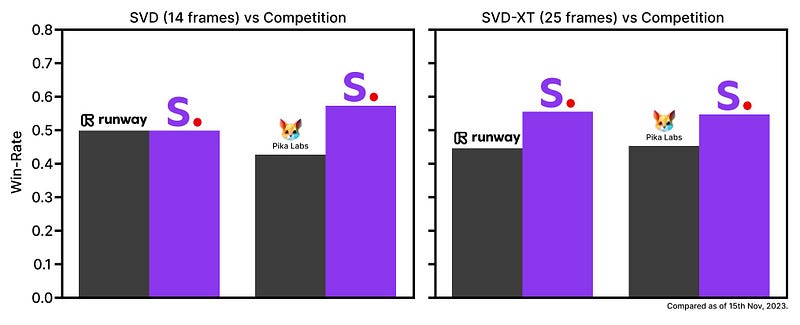
SVD actually seems to outperfom both, RunwayML and Pika Labs, based on an evaluation of viewer opinions.
SDV Is Open-Source, but…
SDV actually consists of two models:
- SVD to generate 14 frames/second and
- SVD-XT for 25 frames/second.
Both are open source, i.e. anyone can use them, but at the moment only private, experimental use is permitted, not commercial use.
How To Use Stable Video Diffusion
To use the new Stable Video Diffusion, you can either download the model and run it on your local GPU — or, if you’re missing one like me, you can interact with the model via platforms like Replicate or Huggingface (for all three access options, see the links at the end of this article).
Both platforms have similar user interfaces. However, Replicate has more options and parameters (Huggingface is also very popular, which means the queue is longer).
Generally, with the current interfaces for Stable Video Diffusion you can:
- upload an image or take a photo with your webcam
- choose the model: 14 frames or 25 frames
- choose resizing strategy (since the model has been trained on 576x1024 pixel images only)
- increase/decrease motion bucket ID (the higher the number, the more overall motion will be generated in the video)
- add seed values
- and more (like amount of noise, decoding and custom fps)
Here’s how that looks with Replicate:
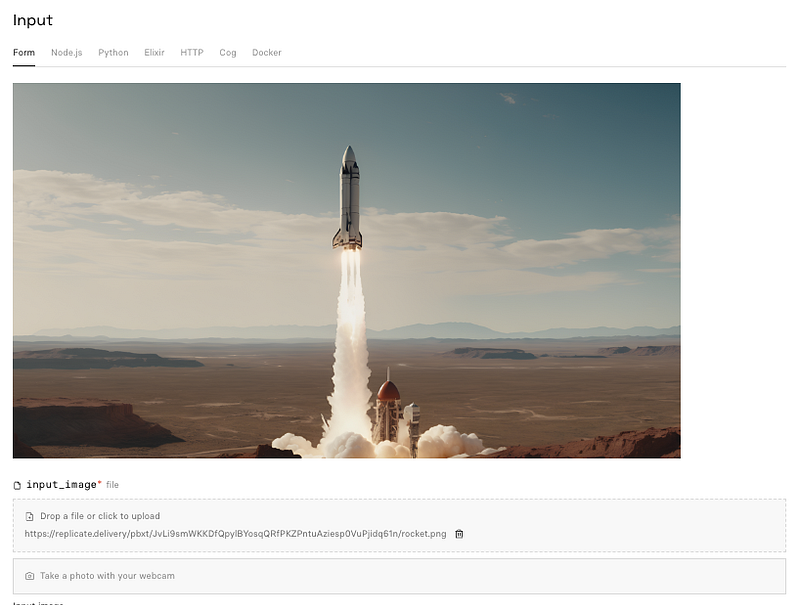
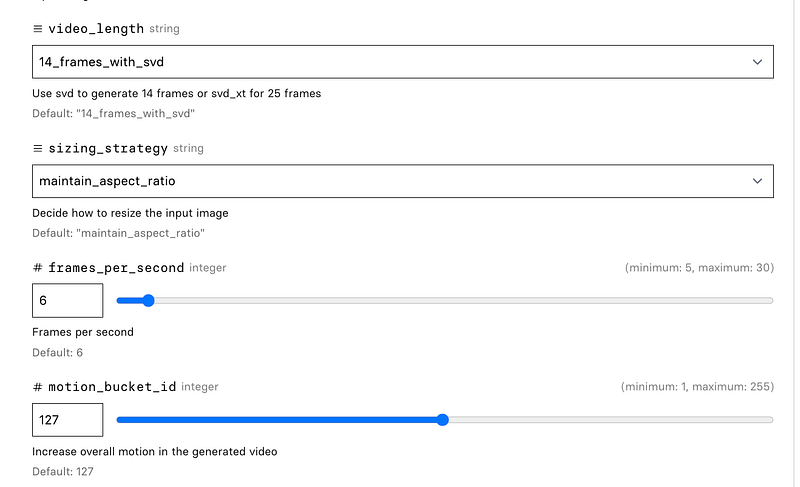
As soon as you click on “Run”, the model starts calculating the video file. Play around with the options to find the “sweet spot” where your image really comes to life.
Links to Interfaces for Stable Video Diffusion
- Use Stable Video Diffusion @ Replicate
- Use Stable Video Diffusion @ Huggingface
- Use Stable Video Diffusion @ Github
Additional Info
- Stable Video Diffusion Blog Post
- Stable Video Diffusion Research Paper
➡️ Follow me to stay up to date on “AI &Creativity”. If you want to support my work, become a Medium member using my referral link and get full access to all my articles (180+ and growing) and those of thousands of other writers. 🙏
➡️ If you like my content, why not leave a “clap” at the end of this article, so more people can see it?


