
A super simple way to spruce up your Featured Image with Midjourney
No prompting skill is required
This is one of the stories in the “Midjourney Mini Tutorials” series. The mini-tutorials are designed to help new Midjourney users perform specific tasks by providing simple, easy-to-follow instructions.

You can Have Your Cake and Eat It Too
“Don’t judge a book by its cover,” someone once said. But we all know that isn’t the case. In today’s attention-deficit society, where content creators compete to entice readers to click on an article and read it, an eye-catching featured image is critical for your writing success.
The featured image is the front-end visual representation of your article/story; it must be perfect.
If you like to use free stock images from sites like Pexels, Pixabay, Unsplash, and others, I’m sure you’ve wondered if you can find a photo that hasn’t been overused to the point where it’s too “generic,” losing appeal to your audience.
You may look for a photo that is related to your content, whether it directly reflects the core idea of the writing or acts as a symbol of the concept of the content. The image should be one-of-a-kind, clear, and sharp. The image license should also permit you to use it for commercial purposes.
That’s a lot to ask for a free image, right? As a result, you’re likely to settle for a less appealing photo as long as it “does the job.”
But what if I tell you there is a super-simple and easy way to spruce up your chosen image to make it unique and appealing, and you have the license to use it commercially? Furthermore, no prompting skill is required. What do you think?
Let’s assume we are creating a featured image now.
Here are the specifications:
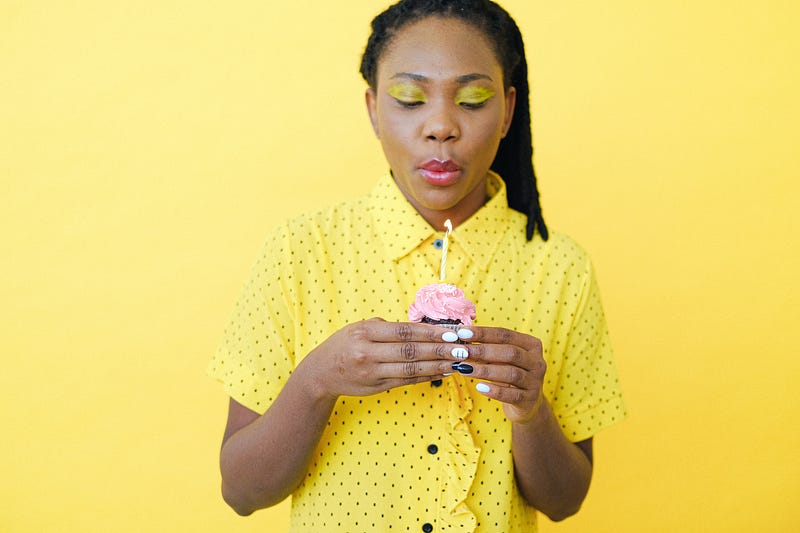
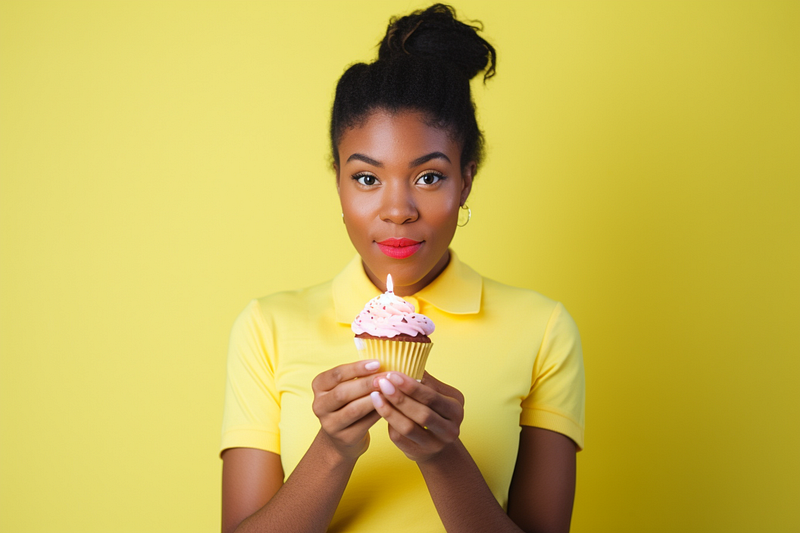
- A photo of a young black woman celebrating a year of success on Medium by writing stories about baking cupcakes.
- The subject and a cupcake must be included in the photograph.
- The subject should wear a yellow shirt because it has a special symbolic meaning with the content.
- The overall mood of the photo should be upbeat.
You searched on Pexels and found this is the best photo you can get:
Two Scenarios
Scenario A: You’re a writer.
- You wondered if you could make the photo sharper and happier.
- You want to credit the photographer who provided this wonderful free stock image for your story.
- You don’t have time to learn the Midjourney prompting technique. You want to create a photo quickly and easily.
Scenario B: You’re an experienced Midjourney user.
- You come to a stop after typing
/imagine. - Your mind has gone blank.
- You know how to make a photo that meets the above criteria, but today is a bad day, and you can’t find the right keywords to create the prompt.
Solution
- Type
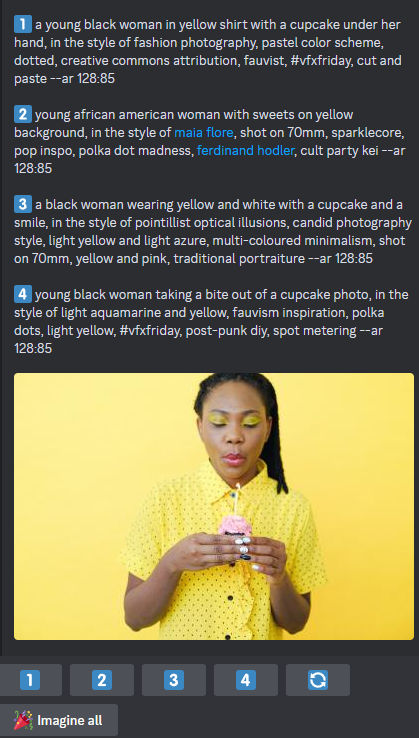
/describeand upload the image from Pexels to Midjourney. - Click any numbers (1–4) to make a corresponding photo. You can also click the “Imagine all” button to create all four images simultaneously, consuming your “fast hours.”
- Choose one image to upscale. You have a choice of 16 generated images.
- Credit the photographer using one of these formulae:
If you did not edit the prompt: Attribution: Reference image by [stock-photo-author-and-platform], rendering by Midjourney.
If you edited the prompt: Attribution: Reference image by [stock-photo-author-and-platform], prompt by [your-name], rendering by Midjourney.
Replace “stock-photo-author-and-platform” with the platform name from which you downloaded the image. Change “your-name” to your name or another person who edited the prompt for you.
In this case, the credit is as follows:
Attribution: Reference image by Anna Shvets from Pexels, rendering by Midjourney.
Results
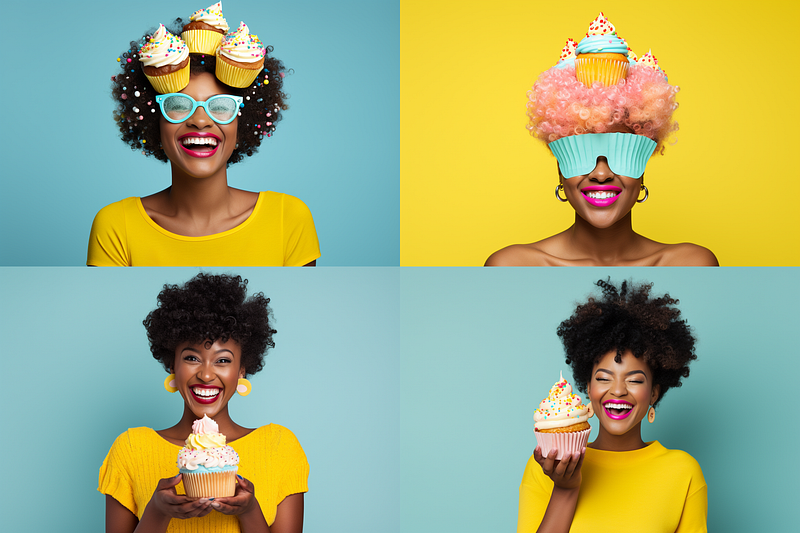
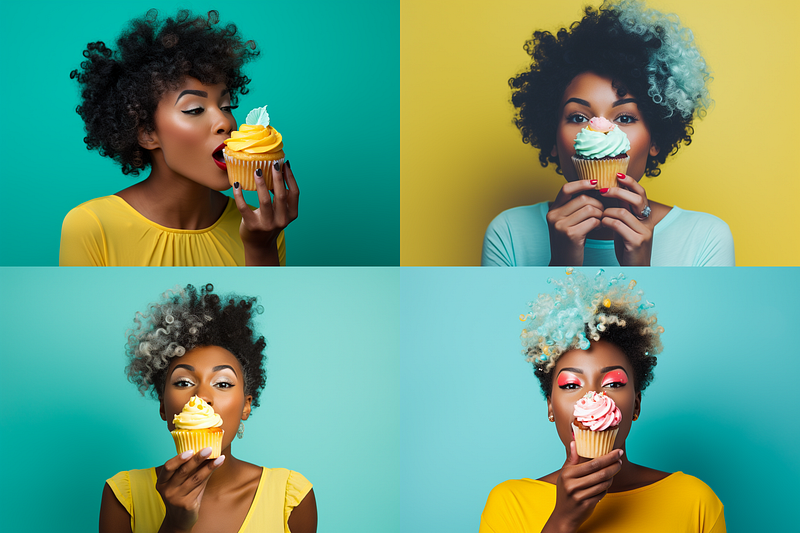
The /describe command will generate four starter prompts. To make a corresponding photo, click the number. Alternatively, you can click “Imagine all” to create all four photos simultaneously.
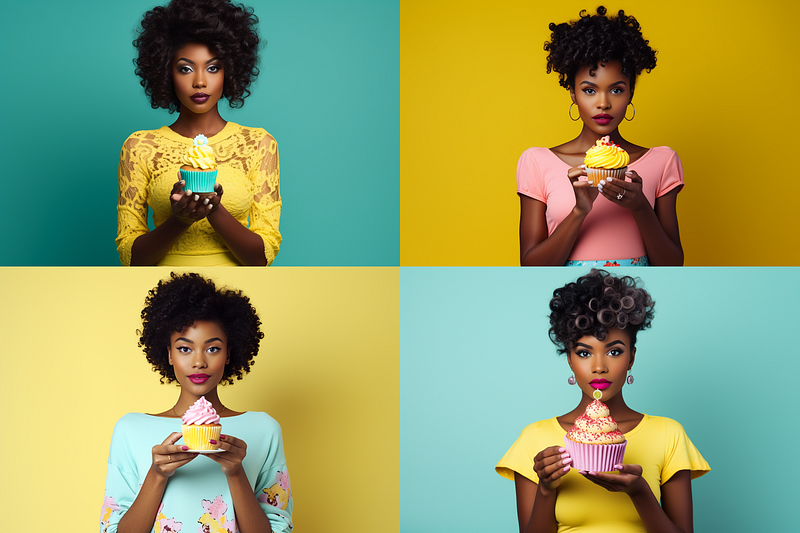
I believe you would agree that the generated images are sharper and more interesting than the original. It’s as if the image has been upgraded aesthetically.
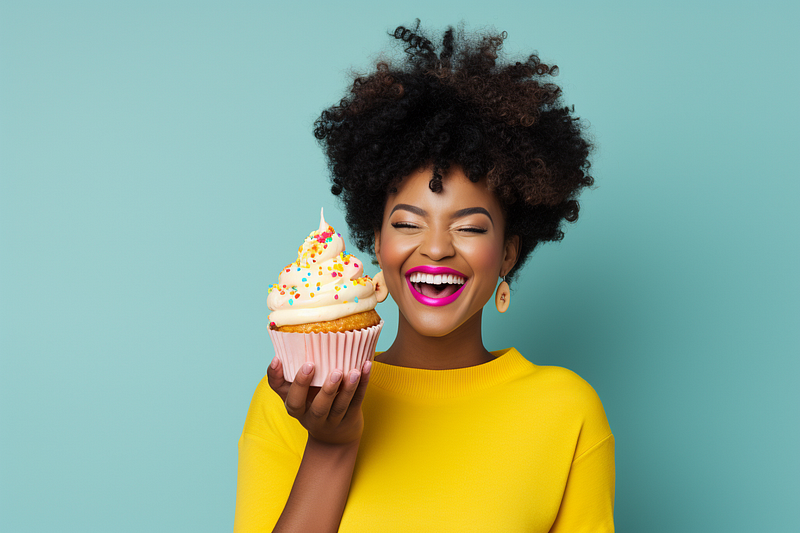
But there are too many choices now! We need to pick one…
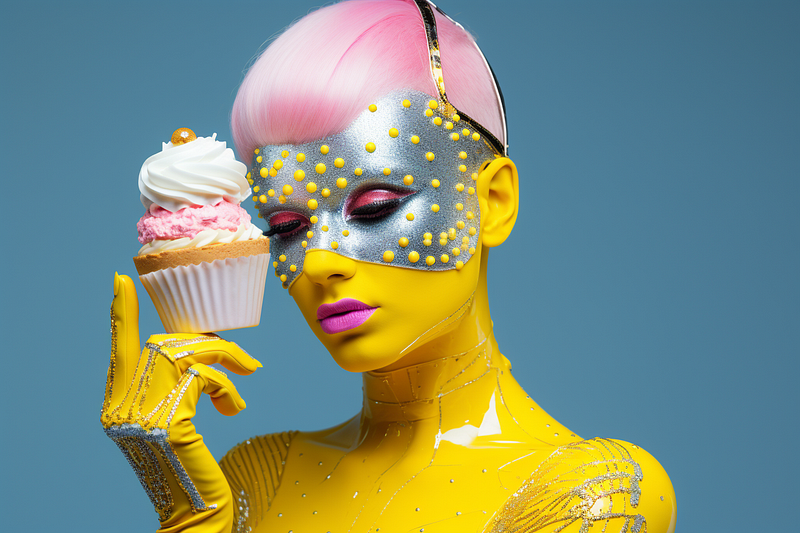
I chose the image below from the Prompt 2 image grid to upscale. She looks so happy. The pointy tip of the cupcake subtly represents the number “1” to mark the celebration.
All done! Mission accomplished. As promised, you don’t even need to write a prompt!
What about you? Which picture do you prefer? Please let me know in the comments section.
Editing prompt
Simple editing
Sometimes, the output from the /describe command is close to what you want, but you want to change it slightly.
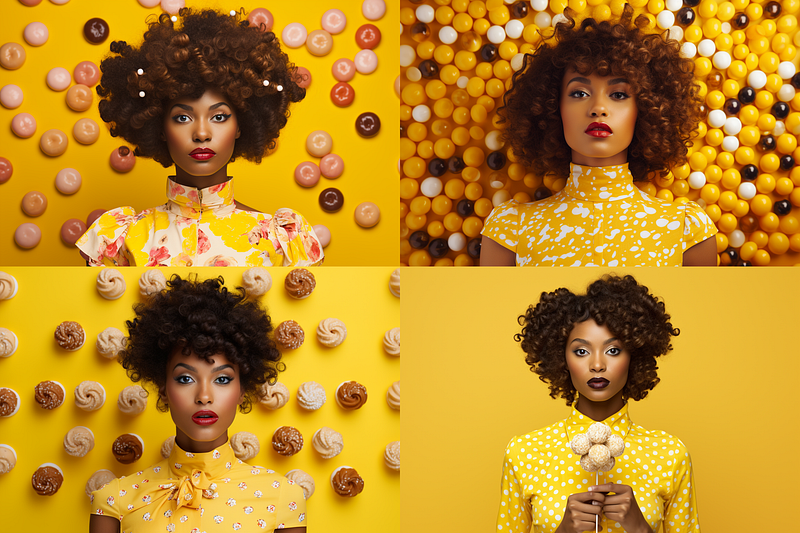
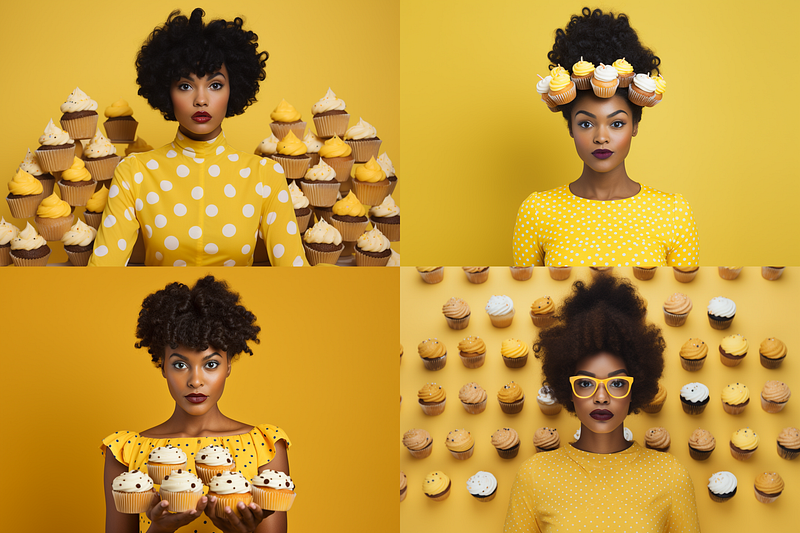
Say, for instance, that you like the background of the pictures in Prompt 2. But you want cupcakes instead of sweets.
It’s easy to change the prompt. Change “sweets” to “cupcakes,” and you’re done.
This is what your edited prompt looks like:
/imagine prompt: young african american woman with cupcakes on yellow background, in the style of maia flore, shot on 70mm, sparklecore, pop inspo, polka dot madness, ferdinand hodler, cult party kei --ar 128:85
So simple, right?
Editing tips for experienced Midjourney fans
Using the original image as the image reference to run with a starter prompt made by the /describe command will get you closer to the original image.
Or, you can change the subject to something that has nothing to do with the image specification to try out new artistic ideas for future projects.
In that case, the starter prompt is a place to get inspiration and explore your creativity.
Explanation
- The
/describecommand is primarily used to learn new words to craft prompts. However, it can also be used to improve or change the appearance of a stock image. It provides you with 16 options that share the same theme or idea. - Not satisfied with the 16 options? To generate another set of 16 options, click the “Imagine all” button. You can also repeat the
/describecommand to generate a fresh set of four prompts. Or click the reroll button for each of the prompts. - The cost is about $0.01 per photo. This is calculated using the $10 per month Basic Plan, which provides 3.3 hours (198 minutes). Given that the average image generation (
/imaginejob) takes approximately 1 minute of GPU time, you can generate 792 images per month (198 x 4 images per grid). - Other higher-tier plans allow you to generate unlimited photos using the “Relax mode.”
- Even someone who has never used Midjourney can create excellent photos without writing any prompts.
- Because Midjourney’s image-creation process is random, each generated image is (almost always) unique.
- Experienced Midjourney users can enhance the image by changing the aspect ratio, outpainting, inpainting, and employing other advanced techniques.
- Always perform a final quality check, such as checking the number of fingers and the subject’s anatomy. The generated image should become more coherent and error-free as the software improves. However, regardless of future improvements, always double-check.
Related stories
Conclusion
- Don’t settle for a “good enough” featured image if you want to be successful as a writer. Midjourney can be used to improve your photo.
- The
/describecommand enables new Midjourney users to create excellent and unique photos without writing any prompts. - For experienced Midjourney users, consider using
/describeas a starting point for your creative and artistic exploration. - Using the templates provided above, you can also credit the original photographer.
- A simple technique is not necessarily inferior. You can still achieve excellent results with little effort.
I hope you like this story!
Please give me a clap or leave a positive comment to let Medium’s algorithm know that this story is helpful and has contributed to its platform’s success.
Your support inspires me to create higher-quality content in the future!
Never miss a story. Follow me on Medium for updates, stories, and tips about Midjourney.
Sign up here for a free email alert when I post a new story.