
Downloading Images from the Internet — Small Python Projects #1
I wrote a Python function that saves online images to my computer based on the url of where the image is stored on the Internet. It was surprisingly easy. Here is how I did it.

The design of the image downloading function
Before writing any code, I made a plan. A plan of how the function should work. And before that I thought about what the function should do.
I wanted the function to take 2 arguments. First, the URL of the image that I want to download. And second, the filename which I will save it to. Somehow, the image should then be needed to be saved on my computer with the desired filename. And finally, the function should return whether the download was successful or not.
Okay, I knew how to write a function that takes arguments and returns something. I also knew that you can read data from the Internet using the requests package. But I didn’t really know how to save an image from an URL. Luckily, with the right search on the Internet, the answer was quickly found.
How to download an online image based on its url in Python
The first step is to get the data that is stored at the URL. This can be done using the requests package. More specifically with the get function, which takes an URL as an argument.
Let me introduce a test subject, the image we want to download:


NOTE: By the time you are reading this, my Medium profile logo may have changed and the shown image might be offline. However, the image and URL just served as an example.
It can be found at the URL: https://miro.readmedium.com/1*bUmm7HiFVODrhgb4oltNvw.jpeg
Here are the first Python statements to get an image in Python by its URL:
import requests

url = 'https://miro.readmedium.com/1*bUmm7HiFVODrhgb4oltNvw.jpeg'
data = requests.get(url)
image_bytes = data.content
Since I will use the get function from the requests package, I first have to import requests. The requests package has to be installed for this to work, this is quite simple. If you don’t know how to install packages, read:
How does an array (list) of bytes represent an image?
As you might know an image is made up of pixels. Each pixel has its own place at a certain row and column. Each pixel also has its own color. A color itself can be expressed by its RGB value. RGB stands for Red, Green and Blue. 3 colors that can be mixed to make any color you can think of based on the ratio of how much of each color gets used.
So, a RGB value consists of 3 values, the amount of red, green and blue. These values are expressed in numbers from 0 to 255. A (8-bit) byte can store a number between 0 and 255, so a RGB value can be noted with 3 bytes.
To learn more about bytes and how they are able to represent images read:
Knowing that 3 bytes can define a color, a collection of 3-byte-sets can form a collection of colors. When the colors are put at the right place an image is formed. An image can thus be seen as a mosaic of pixels. And the color of each pixel can be put in an array of bytes.
Computers can translate the array of bytes to color the pixels of their screens. But the byte-array is also the format that is used to store images. And since we want to store an image on our computer we want to use the bytes-representation in Python.
How to save an array of bytes to a file in Python
Now we have a bytes representation of the file we want to download, we only need to save it to our computer. In other words we have to write it in a file.
In Python you can use a with-open-as statement to open a file and write in it. To make sure we write bytes instead of regular text we will pass an argument 'wb' to the open function. wb stands for write bytes.
with open('Images/downloaded_image.jpg', 'wb') as f:
    f.write(image_bytes)
As you can see in the example above, we first open a file with the open function. We pass a filepath to it at which we want to save our file and the 'wb’ string to open the file in write bytes mode. We then use the write method to actually write the bytes into the file.
It is important to note that in the file folder where the Python script is stored, I made a folder called Images. This Images folder is the place where the files will be saved since I specified this in the filepath that gets passed to the open function.
Making a function from our Python code
Now it is time to transform the code we have written to a function. That way we can re-use it. And we can pass arguments to it, instead of working with hardcoded values. Here is the function:
import requests


def download_image(url,filename):
    try:
        data = requests.get(url)
        image_bytes = data.content
        with open('Images/'+filename, 'wb') as f:
            f.write(image_bytes)
        return True
    except:
        return False
The function is called download_image and the hardcoded URL and filename have been replaced by parameters that will be specified in the function call.
I also added a try-except statement. If the execution of the code reaches the end of the try-clause without problems, it will return True. This signals that the function was executed succesfully. If an error occurs, the except clause is executed in which False will be returned.
Some errors that could occur would be using the wrong URL, one that doesn’t exist or with a typo in it. Or when there is a connectivity issue that makes the get function fail.
An important note is that when you use a filename that is already used, the existing file will be replaced by the new download.
How to use the function
The function can be easily used by calling it and passing the URL of the image and a filename to it. As an example here is how I would use the function to download my Medium account logo as logo.jpg
url = 'https://miro.readmedium.com/1*bUmm7HiFVODrhgb4oltNvw.jpeg'
filename = 'logo.jpg'
download_success = download_image(url,filename)
print(download_success)
When I ran the script, luckily no errors occured and True was printed. True is what was returned by the download_image function and assigned to variable download_success. This means that Python must have made it to the end of the try clause without errors. Then I checked the Images folder I had previously created and…
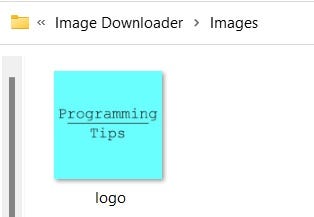
… ta-da, an automatically downloaded image!
This article is part of a series about small Python projects, you can find the next episode here:
Thank you for reading!
You can get full access to all my posts by joining Medium. Your membership fee directly supports me and other writers you read. You’ll also get full access to every story on Medium: