
8 Things I Wish I Knew Before Self-Publishing My First Book on Amazon
Look out for these lessons if you’re thinking of publishing

A lot of us have had a long-held dream to someday publish a book. And why not? It’s a really cool thing to do.
It brings a sense of accomplishment, perhaps some bragging rights, and an incredible joy when you finally get your hands on something you created out of thin air.
Trust me, it’s an amazing feeling.
For the past year, while blogging along, I’ve been jotting down book ideas in my phone whenever they pop into my head (in addition to thousands of article ideas of course — the blogger’s curse!)
Then in August, I had an opportune conversation with one of my artist friends who was out of work, bored, and looking for a fun project to work on.
I mentioned a bunch of my sillier ideas and she was hooked almost instantly.
So, for the next 8 weeks, we hacked away at creating an illustrated book to bring it to life.
Here’s how that process went, what I found most frustrating, and what I’ll do next time I publish a book.
How I created a children's book (for adults) on Amazon using ‘friendsourcing’
1. Outline the ideas and hash it out
As I mentioned above, I had maybe 20 fun book ideas that I wanted to take a crack at someday.
When I first talked to the artist, we had a couple of other friends over (there may have been some gin & tonics involved as well).
Outside of the usual pleasure of having a couple of sips in the afternoon sun with friends, this was a great opportunity to crowdsource the best idea.
I went over all 20 ideas I had and gauged people’s reactions. This book wasn’t meant to be for everyone because of its ironic and satirical nature — but this crowd was in that category.
So we went through, idea by idea. People said if they liked it or not.
And more importantly, sometimes an idea engaged further discussion. If it was controversial, +2 points.
If it made them laugh out loud after the first sentence, +2s.
Did the joke fly over their heads? -2.
You get the idea.
By the end of the discussion, I had 3 ideas out of 20 that I knew would be popular with at least some segment of the general population out there.
I then went home and bounced those 3 ideas off of my friends from around the world for a couple days. I gathered their ideas and feedback — and made a final choice.
Lesson #1: Narrow down your focus before ever putting pen-to-paper.
2. Use friendsourcing (or crowdsourcing)
I mentioned how we narrowed down the idea by bouncing thoughts around a table full of gin & tonics. I can’t mention enough how useful this process was (and not just the drinking).
In fact, it’s probably the most helpful thing I learned throughout this whole process — our initial ideas changed from night to day by the time we finished.
Almost every phase we passed through, from ideation, to writing, to images — I bounced the drafts off of a wide variety of friends of mine.
Their feedback was immeasurably helpful as I was able to leverage the crowd, so to speak.
We can often get stuck in our own head when creating, so any chance to let someone else peak inside the box at what you’re creating is a great opportunity to take a step back and assess.
At the end of the day, you’ll have to choose whether you want to accept their suggestions or not — but either way, at least you know that’s how some people will interpret your work now.
One last point on this section, professionals out there will often mention using crowdsourcing to achieve the same effect. Think of tweeting out your image ideas, or writing a blog article asking for feedback.
These are very viable methods too and I may try them in the future. But right now, I have several wonderful groups of friends from many different countries — so I appreciate their unique (and personal) perspectives.
Lesson #2: Bounce your ideas off as many friends as possible, as many times as they’ll let you.
3. Choose a style
Walking into this project, the only idea I had in my head was that I wanted this to be a fun book to read, heavy on the jokes and heavy on the illustrations.
I wasn’t setting out to write a novella or the next Fight Club — I just wanted people to have a silly book they could pick up and have a laugh while sitting on their living room couch or porcelain thrones.
That meant big pictures and not many words for each one. What else has that? Children’s books of course.
But these ideas probably weren’t appropriate for children (unless they’re accepting Antifa members below 5 years of age these days).
And hey, ironic children’s books for adults is a thing, apparently. I know because I looked it up! In the process, I found some hilarious authors I had never heard of at the same time — which is always a good thing.
Now that we had decided on an ironic children’s book for adults as the category — we had to narrow it down further.
What types of children’s books exist? Dr. Seuss, Roald Dahl, Goodnight Moon, etc.
I must’ve looked through hundreds of children's books in bookstores and on Amazon to find the style that seemed just right. In the end, we went with ABC’s style using 4 line rhymes.
The style seemed fun, ironic enough, and fit the type of art she was going to create — win-win-win.
Lesson #3: Narrow down the desired style and feeling of your book before writing.
4. Create the words first
Then came the content creation. Hot damn did we make this way more tedious than it needed to be.
Firstly, we started with image ideas (she was on a bit of a deadline) rather than the words — mistake #1.
Always write the words of your story before choosing/creating any images.
When I first came up with the initial list of image ideas, the concept of the book was in the voice of a stereotyped MAGA supporter — with extreme views on any subject.
And even though that got a few laughs, the idea didn’t really flesh out when it came to writing the jokes for the book. So after some more friendsourcing, we decided to change the perspective to be as if Trump himself wrote the ABC’s.
This made it much more understandable at first glance and more importantly — helped people realize it was satire and not pro-MAGA propaganda.
But again, since I had already given the list of image ideas to my artist, I had to rework the words around this new perspective instead of the other way around.
As a result, some of the lines weren’t perfect in my perfectionist mind.
That’s also how this monstrosity (pun intended) ended up in the book:
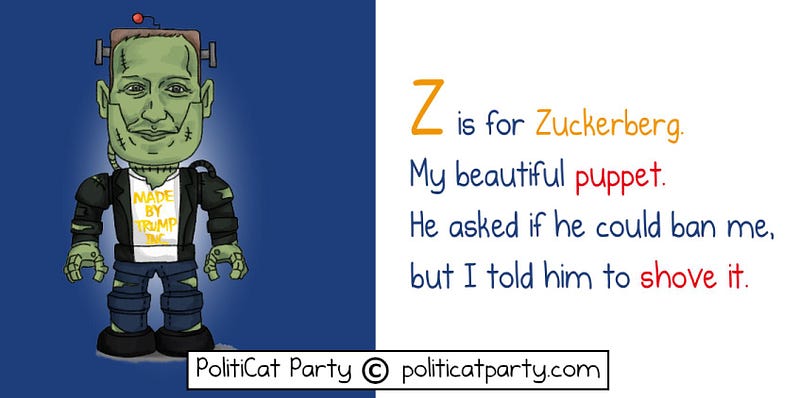
The initial concept was there but once the image was made I couldn’t really go back and ask the artist to completely change the style — that wouldn’t be fair to her.
Lesson #4: Always have the final draft done before creating any illustrations.
5. Help your artist out
My artist friend is absolutely amazing. She can do sculptures, 3D digital design, paintings, sketches, book covers, absolutely everything.
But English is her 2nd language, and while she speaks almost perfectly, her reading skills aren’t as good.
And we quickly realized that would become problematic when we weren’t able to do face-to-face meetings later on.
We initially set out 26 images for each letter of the alphabet and she jotted down notes on how she’d create it. Later on, she would message me asking for specifics on what exactly I wanted for each drawing.
This worked for the most part, but I know it ended up wasting a lot of her time because of miscommunication.
About halfway through I realized I needed to find a way to help her be more efficient with her time and so that we could come up with a better outcome.
So I used two things:
- I drew some really basic sketches of how the image should be laid out
- I found several real life pictures and existing cartoons for each illustration to give her an idea of the direction
When the above 2 were combined, plus the written description, she knew exactly what I wanted going forward.
This helped her save tonnes of time trying to map out what she was doing, and it saved us hours of texting trying to get the point across in writing.
Lesson #5: Sketch out and find real pictures for inspiration when asking an artist for illustrations
6. Be kind and rewind — friendsource your words over and over
My first book only has 58 or so pages. One image and one block of words for each letter of the alphabet, plus some legal pages and the cover.
I ran every single page by different groups of friends for their feedback. Over and over again until I’m sure I annoyed the shit out of several of them.
Side note: Thanks friends! (If you’ll still call me that after all my botherings.)
Even though I was only writing 4 line poems — I ended up rewriting these more times than I could eat a burger in a single sitting when I was 275lbs.
Trust me, that’s a lot.
But it resulted in a much, much higher quality product in the end. The humor was toned down in instances where I went a bit overboard (if you knew me in real life, I have a…misguided tendency to do that on occasion).
The words ended up rhyming better, matching the images more fluently, and making the combined book all around a better piece of craft.
I’d have to guess I wrote the entire book at least 5 times over by the end of it — and well worth it!
Lesson #6: When you’re finished your first draft, friendsource reviews as much as possible.
7. Amazon can be more frustrating than being in line at the DMV (but with longer wait times)
Finally, when our illustrations were created and all the words had been 99% finalized — it was time to put them all together.
And holy hell was that more frustrating than I had ever imagined.
Firstly, my artist friend was using a Macbook whereas I was on my Microsoft Surface — so we didn’t have matching software.
This meant that if she was busy and I wanted to do some minor edits, I flat out couldn’t without changing the entire files.
Secondly, and this is a huge part, Amazon has a LOT of different requirements that I had no idea existed before.
Because this article is already long enough, I wont go into detail here (I’ll update with a link to a new guide-article in the next few days), but here’s a short list of what you should read into before writing your book:
- Book dimensions (they also have a list of standard, non-standard, and unique sizes)
- Trimming
- Bleeds
- eBook cover vs print copy cover
- Front + spine + back cover sizing
- Amazon book creator (and it’s variations)
- File format (PDF, ePub, Word, mobi)
- Pricing for ebook vs print copy (Amazon takes a big bite out of both — in different ways)
- Upload size for ebooks (did you know Amazon charges a download fee per MB? I didn’t!)
- Paper type (for hardcopies)
- Cover finish (matte vs glossy)
- Pricing for each territory
- Keywords (Amazon actually has specific keywords if you want to end up in certain categories more easily)
- Categories (you can ask for more from Amazon support)
- KDP unlimited (oddly similar to Medium’s business model)
- Amazon ads and KDP promotion (you can’t have your ebook sold anywhere else while in KDP Unlimited)
- Advanced book sales pre-launch (I didn’t do this — but my writer friends tell me it has a huge effect)
There’s a lot more intricacies that you can discover after you have a book created, but the above list is a great place to start when embarking on this book creation project.
Again, I’ll add in a link to a guide I’m working on creating so others don’t have to spend a month being frustrated like I did.
Lessson #7: If you’re going into the Amazon, bring a machete. Read about the platform before starting your project.
8. Launching your book
I have a writer friend who’s quite successful on Amazon and with his personal blog. He gave me a lot of tips these last couple of months on how to improve my chances for the book to be successful.
Side note: If you’re reading this, thanks!
Needless to say, there are a lot of intricacies and nuance when it comes to how, when, and where you can promote your book.
To start, I researched a hell of a lot of guides. I also asked every marketer and writer friend of mine for their advice and feedback.
In the end, I made a big list in Excel of ‘marketing attempts’ and jotted down what I wanted to do, how much time it would take, and the outcome after I completed it.
I’ll save that for another article though, as I’m sure some of you are already falling asleep reading this giant story. 😃
I won’t be creating a guide for book marketing as I haven’t been successful at it yet (fingers crossed for in the future though).
But, I will outline some things that I found helpful and learned to do for the next book I make:
- Reviews are everything on Amazon — a rule of thumb is to hit 100 reviews if possible (a huge goal in itself), after that the algorithms should help a lot more
- Leverage your community with free book offers for reviews pre-launch (so that when you launch you’ll already have a bunch of reviews)
- Plan your ‘free days’ if you want to enroll in KDP Unlimited
- Use effective keywords in your book title, Amazon description, and hidden book details
- Don’t buy and review your own book — that’s a big no-no for Amazon if they find out (of course)
- You can order ‘author copies’ for only the printing + shipping cost, so you can give to family, friends, etc if you want to (or sell them at your local bar like I plan on doing)
And here’s a few of the more effective places to research more about Amazon book marketing:
- Amazon has their own guide on book marketing
- Here’s a simple 7 step guide from Written Word Media
- An in-depth book marketing 101 guide from Kindlepreneur
- This author ‘sold’ more than 40,000 free downloads with their book
Lesson #8: Have a marketing and launch plan before writing your book.
Go create a book
That’s it for now! I had an incredible time these past three months bringing this book idea from out of thin air into the physical realm. Not only was it fun, but it was a great way to connect with old friends and to be involved in a project with them.
It’s also spurned my desire to make more of these funny little books. After all, I love making people laugh.
It also gave me a great reason to get my hands wet with marketing again, it’s been more than a year since I last worked in corporate and was able to help guide marketing teams — I didn’t realize how much I missed it!
Lastly — and I can’t repeat this enough — the feeling you get when you first touch a book of your own creation, manufactured in a facility that’s also printed literal masterpieces, is something you just can’t replicate.
So if that’s been on your bucket list for a long time, I hope this article may be enough to give you that little nudge you need to undertake the project.
After all — we didn’t do this full-time for the 3 months — you don’t need to either.
Creating a book, just like writing articles or blogging, can be enjoyed as a side project or hobby.
You just need to know what to do before you do it!
Lessons learned from publishing on Amazon KDP:
- Lesson #1: Narrow down your focus before ever putting pen-to-paper.
- Lesson #2: Bounce your ideas off as many friends as possible, as many times as they’ll let you.
- Lesson #3: Narrow down the desired style and feeling of your book before writing.
- Lesson #4: Always have the final draft done before creating any illustrations.
- Lesson #5: If you’ll be including images — sketch out and find real pictures for inspiration to give to your artist.
- Lesson #6: When you’re finished your first draft, friendsource reviews as much as possible.
- Lesson #7: If you’re going into the Amazon, bring a machete. Read about the platform before starting your project.
- Lesson #8: Have a marketing and launch plan before writing your book.
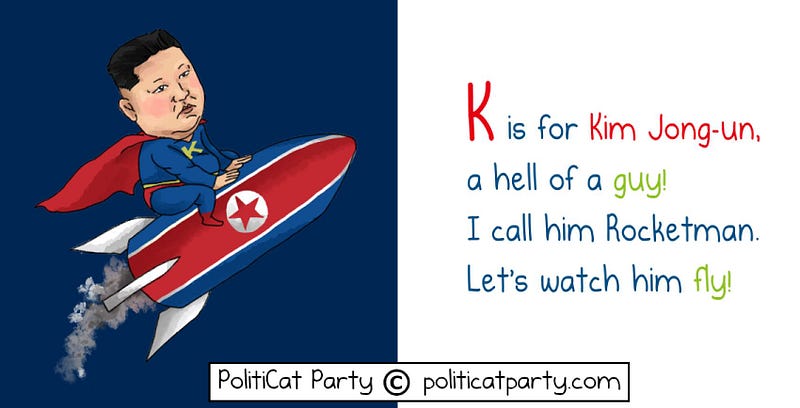
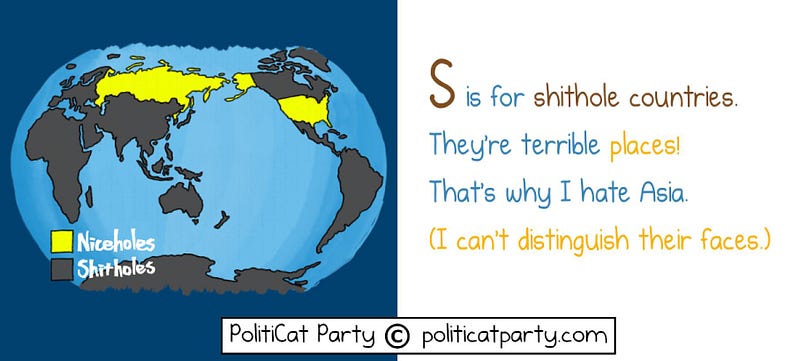
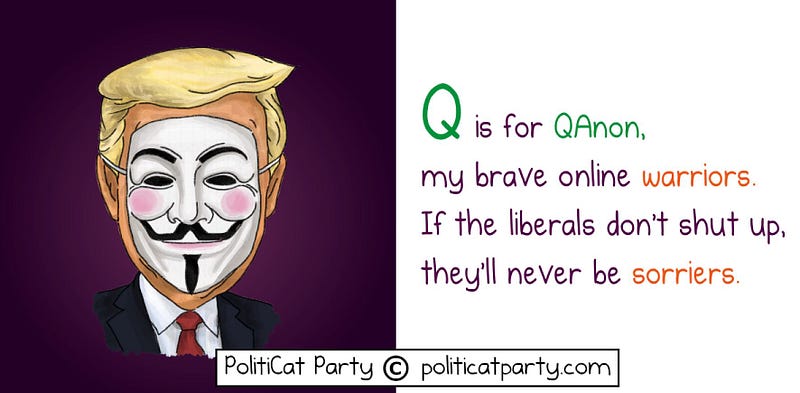
My book!
For any of you interested in seeing my creation, here she is! It’s a bit of dark satirical humor and is meant to be in the voice of DJ Trump — so take that as you will.
It’s also free in KDP Unlimited if any of you are members of that program (and wanted to leave a nice review — wink, wink)
Thanks for reading! If you found this useful, you might enjoy my other guides, humor, and deep dives on my free newsletter!


