
How to Start Your Own Mini Newsletter (A Step-by-Step Guide)
Note: These instructions will be for ConvertKit.
When I wrote this article about creating a Mini Newsletter, I didn’t realize how popular it would be.
It seems many people are interested in starting a newsletter, and that’s a good thing.
When you have your own newsletter, you have control over:
- your audience
- your message
You don’t have to worry about getting kicked off some platform because you said something someone didn’t like. And as you build your list, you can build relationships with your readers, getting valuable feedback from them.
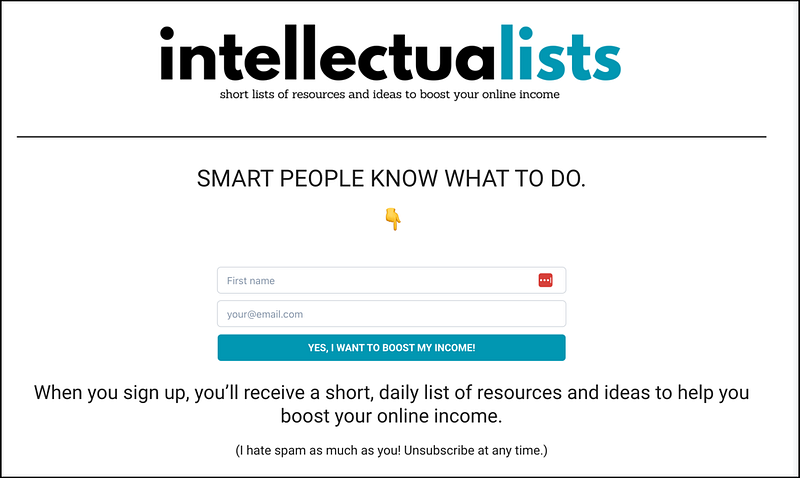
Tip: You can sign up for my intellectualists newsletter to see how I run it.
So while I was happy to see that so many people were interested in starting a newsletter, there’s a problem with my article.
Thanks to this comment from Robert Warren, I realized I only gave a high overview of what to do.
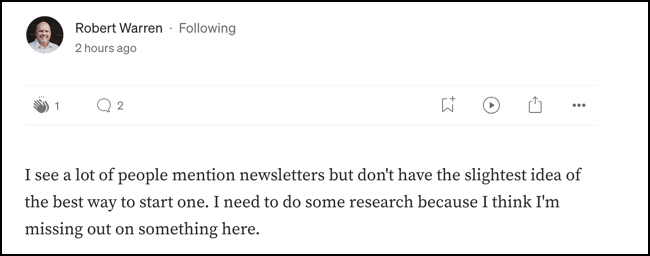
If you want to create a newsletter, but have no idea where to start, keep reading. I’m going to walk you through each step.
(Thanks, Robert, for the inspiration!)
Part I — Create a ConvertKit Account
There are approximately one gazillion email service providers out there. (That’s a 100% fact-checked number.) Some are free up to a certain amount of subscribers, and some aren’t.
The two most popular ones you’ll likely come across are Beehiiv and ConvertKit. I have been a happy user of ConvertKit, so that’s what I would recommend you go with.
This isn’t to say Beehiiv isn’t good. I just have never used it. I do know of some creators who started with Beehiiv and eventually ended up switching to ConvertKit. It’s probably easiest to just start there, but you do you.
If you do decide to try out Beehiiv (or another ESP), I unfortunately don’t have instructions for how to do that. This guide will be for ConvertKit.
Note: I used to be an email marketing manager for my 9–5, and I’ve used plenty of different ESPs. I can tell you with confidence that ConvertKit is a fantastic service, and has everything small creators could want or need.
1. Sign up
You can sign up with ConvertKit here. That’s my affiliate link, but don’t worry. I’m not trying to bamboozle you. It’s free for up to 1,000 subscribers. The free version has limited functionality, but it’s still very good.
(If you do decide to get a paid subscription, I’ll get a small commission at no additional cost to you.)
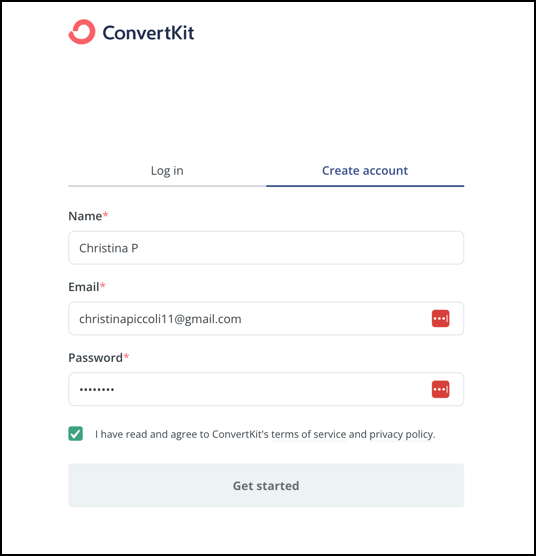
2. Create your account
Fill out your details. Easy enough…
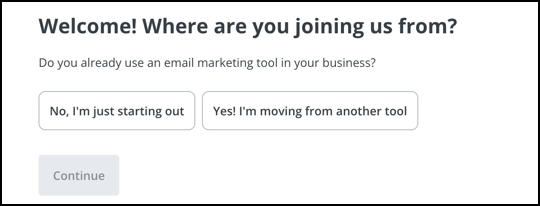
Choose if you’re just starting or moving from another tool. Most likely, you’ll be choosing “No, I’m just starting out.”
Choose the size of your audience. This is across all social media platforms.
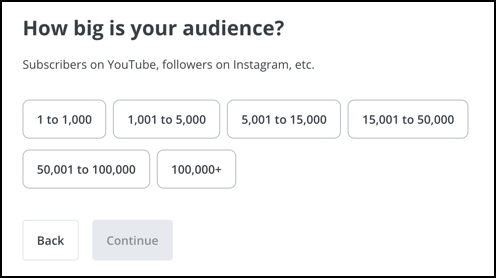
If you’re starting from 0, that’s perfectly fine. Remember…everyone starts from 0.
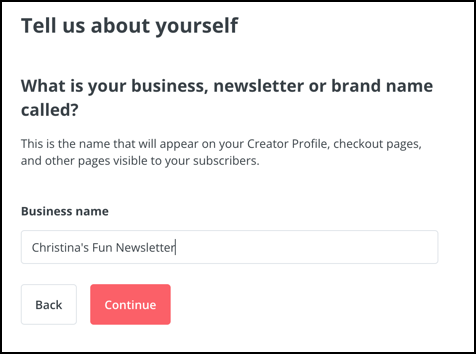
Let them know the name of your newsletter or brand.
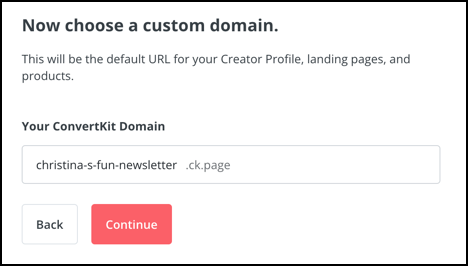
They’ll give you a custom domain. You’ll need this to promote your landing page. (That’s coming up in the next section.) You can hit “Continue” if it looks good.
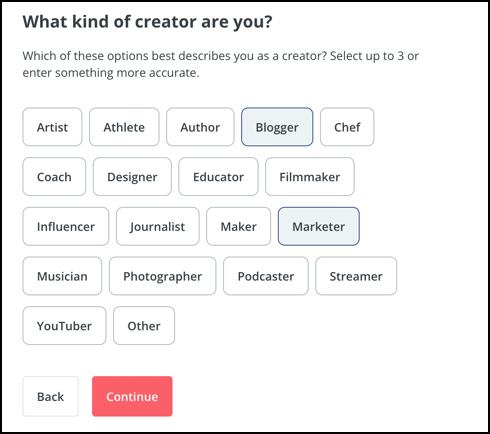
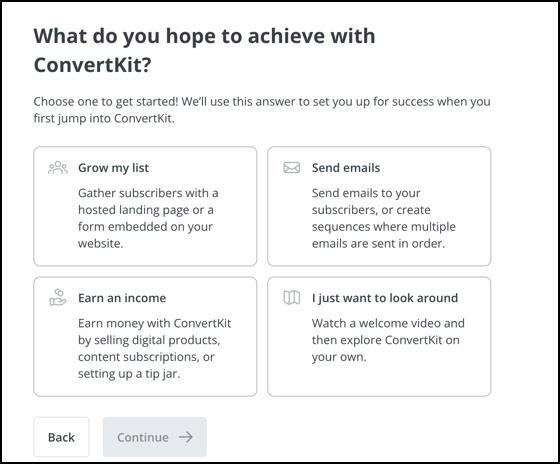
Pick up to 3 things in this section:
Now pick your main goal for your newsletter.
Fill in your website info (if you have one) and/or social media pages. This helps you get approved faster.
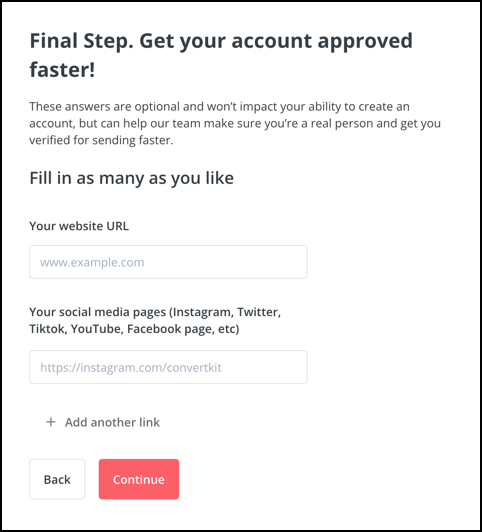
It should be pretty quick to get your account approved from here. It can help to answer these questions if they come up.
2. Create a landing page and collect email addresses
You need a way to get people onto your email list. You do that through a landing page.
I have my landing page on my website:
It’s a bit of a different process, but if you want to know how to do it, let me know in the comments.
If you don’t have a website, no problem. You can easily create a landing page through ConvertKit.
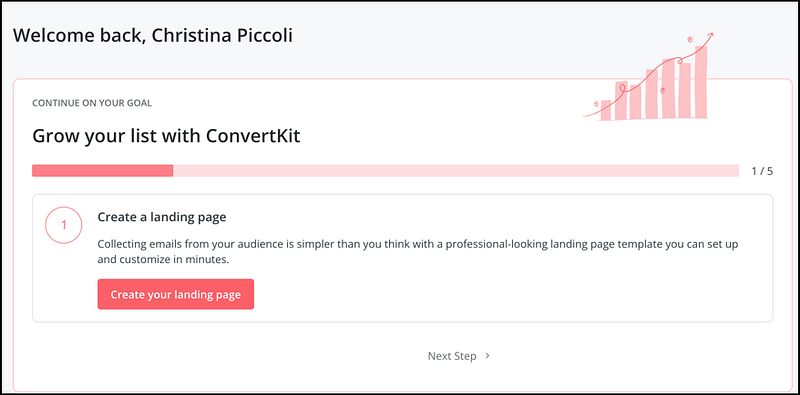
Click the “Create your landing page” button.
There’s a video walkthrough of how to set everything up:
It’s less than 8 minutes, and it walks you through every step, including setting up an incentive if you have one, such as a free workbook.
3. Create a new broadcast
Assuming you’re just getting started, you won’t have any subscribers yet. You have 2 options:
- Send out emails even if you don’t have subscribers just for practice and to get into the habit.
- Wait until you have subscribers before sending.
It’s up to you!
I’ll walk you through how to send an email for when you’re ready.
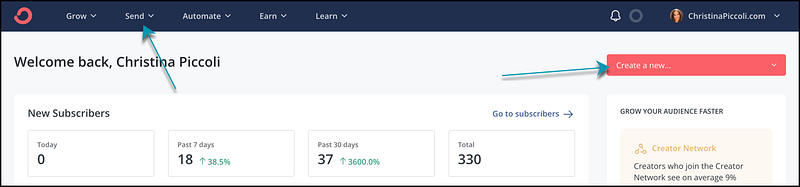
When you’re logged in, you should see your dashboard. From here, you can either click “Send” from the top menu or “Create a new…” then “broadcast” from the dropdown.
Click “Broadcasts” from the pop-up menu.
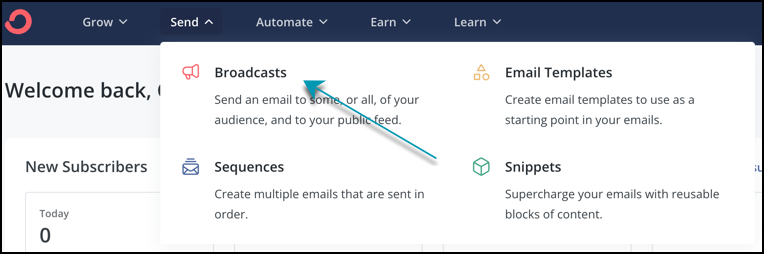
Some of the options will be unavailable to you as a free customer, but having access to Broadcasts is good for now.
Click on the “New Broadcasts” button.

Then you’ll type up your email newsletter.
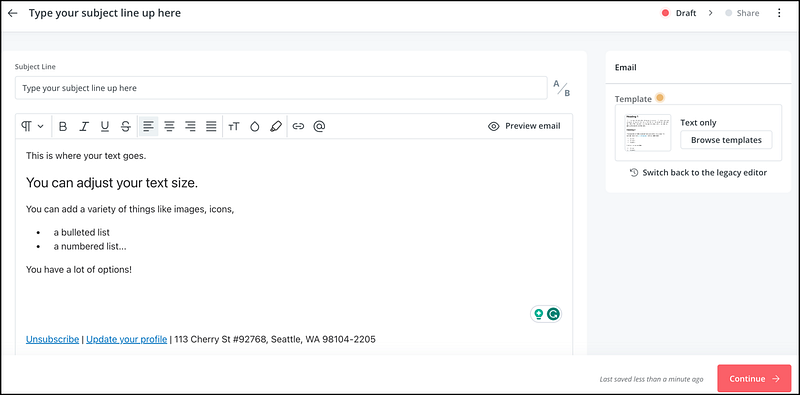
From here you can either:
- Hit “Preview email” and have a copy of it sent to you. I highly recommend doing this to test any links and formatting.
- Hit “Continue”.
(You can also do an A/B split test with your subject line, but you can save that for when you have more subscribers.)
Let’s pretend I sent this email to myself, tested it, and everything looks good. I’m going to hit “Continue”.
4. Schedule your broadcast
You can decide which subscribers to send your email to. Later on, you can tag and segment certain subscribers, but for now, let’s keep it simple and send it to everyone.
If you don’t have anyone on your list and want to practice, you can easily sign up on your landing page with your own email address.
In fact, I recommend doing this to test that everything is working properly.
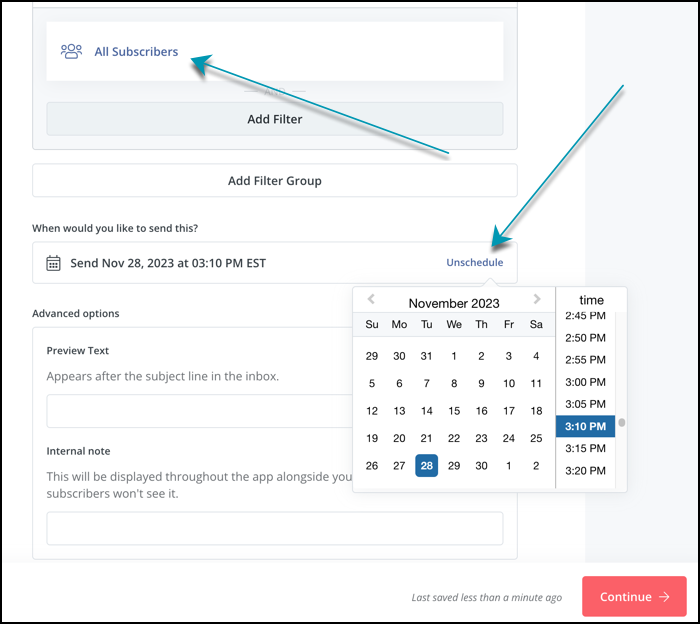
You can choose to send your newsletter right away, or schedule it for a certain date and time.
Part II — Market Your Newsletter
Now you’re all set with your landing page, and you know how to schedule a broadcast.
But how do you get people onto your list?
How do people find your landing page so they can sign up?
There are many ways, both paid and free. I’m not going to talk about the paid ways since it’s not something I’ve done yet. Plus, I like free options. Free is always good!
1. Social media
If you have social media accounts, this is the best place to include the link to your landing page.
If you remember from above, when you create your account, you also create a custom link. That’s the link you’ll use to promote your landing page.
I’ll show you how I do it on my Twitter/X account. (As a reminder, I’m using my website link, but you’ll do the same with your custom ConvertKit link).
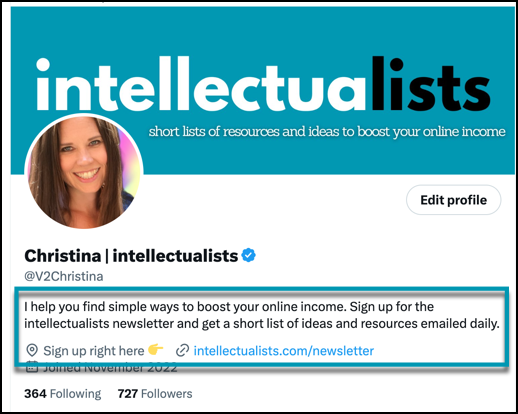
There are other ways you can promote your newsletter on X, but it’s a little more complicated, and I want to keep this guide simple.
The easiest way is to stick it in your profile.
You can do this with any social media account, including Facebook, Instagram, TikTok, Pinterest, and LinkedIn.
2. Medium
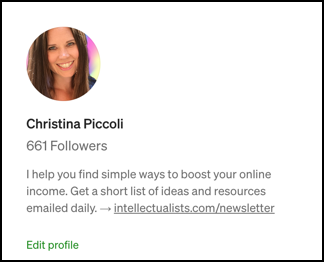
Medium can be an excellent source of new subscribers. There are 3 main places to put your sign up link.
- In your profile. This is similar to X/Twitter or other social media accounts.
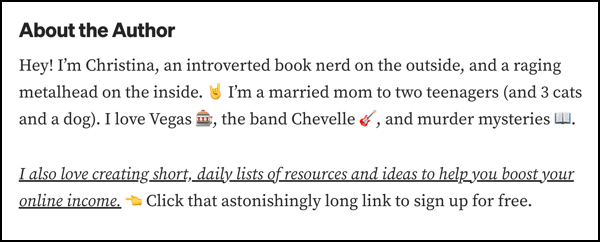
2. In your articles. If it‘s relevant to your article, you can link to your newsletter in the main content like I did above:

You can also add it to the bottom of your articles:
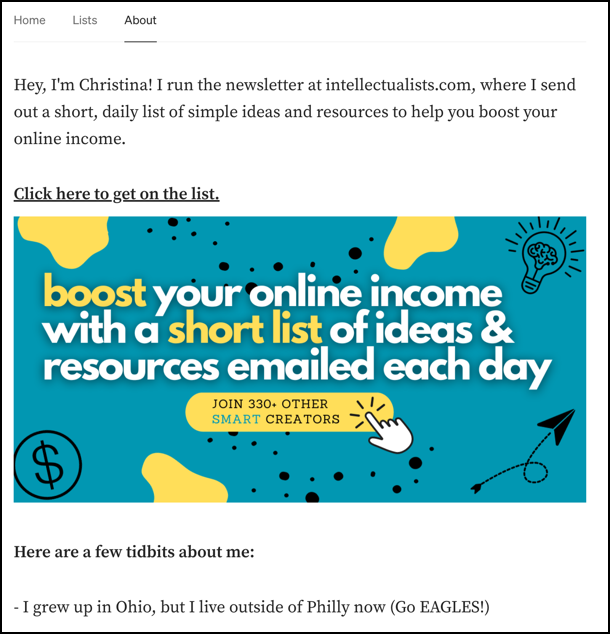
3. On your About page. This is a good spot to tell readers about what you do and link them to your newsletter landing page.
There are other programs out there to help you grow your newsletter, but I really want to keep this simple since it can be overwhelming when there are too many choices.
Start with these, then expand from there.
Final Thoughts
This guide might seem daunting, but I promise if you follow it through, you’ll see it’s not hard at all. Once your account and your landing page set up, it’s smooth sailing from there!
It doesn’t take long to set up a Mini Newsletter. It only takes me about 5 minutes per day. (And you can make it even faster by using this guide to create a template. It’s super easy!)
Getting started on something new is the hardest part, so I hope this guide gives you the confidence to try it.
If you go through the steps and there’s something confusing or missing, let me know and I’ll update this guide.
In the meantime, grab your free ConvertKit account and let me know when you have everything set up. I’ll be glad to check out your newsletter!
About the Author
Hey! I’m Christina, an introverted book nerd on the outside, and a raging metalhead on the inside. 🤘 I’m a married mom to two teenagers (and 3 cats and a dog). I love Vegas 🎰, the band Chevelle 🎸, and murder mysteries 📖.
I also love creating short, daily lists of resources and ideas to help you boost your online income. 👈 Click that astonishingly long link to sign up for free.


