Zapier AI Actions in Custom GPT — a step-by-step example: sending emails

Custom GPTs by OpenAI enabled us to creatively and intelligently automate activities in our work and life. To maximize the potential of custom GPTs, most likely you would need to configure Actions in the GPT builder. Zapier is a very popular workflow automation platform that connects to more than 4000 apps. In this article, let’s take a look at how to integrate Zapier AI actions in your Custom GPT using Gmail as an example.
There is an official guide from Zapier, although at the moment (6 December 2023) I find this document not the most straightforward. https://actions.zapier.com/docs/platform/gpt
Step 0 Create ChatGPT and Zapier accounts
Currently custom GPTs are only available to Plus and Enterprise users, and please note the usage cap. To try out the example from this article, a free plan from Zapier would do.
Step 1 Configure Zapier AI Action
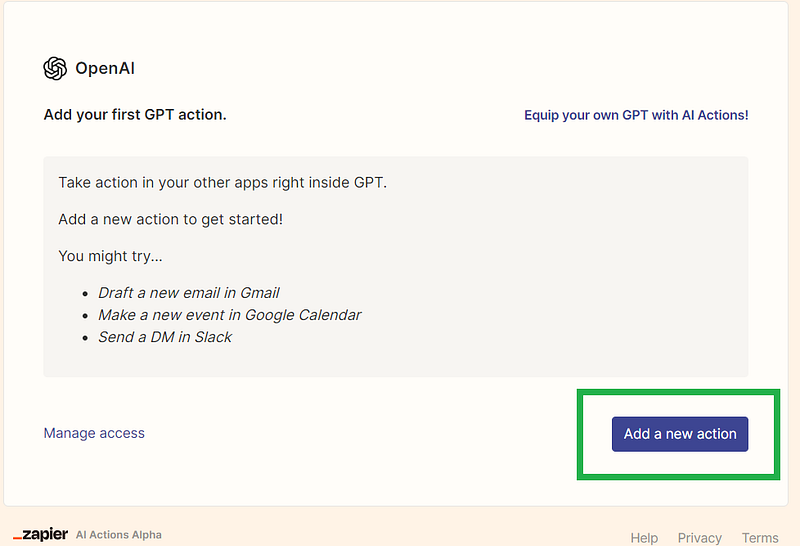
1.1 Visit the link to manage actions to be used with your custom GPT. https://actions.zapier.com/gpt/actions/ If this is your first configuration, you will be directed to allow the connection. If you have done it before, you will see a list of enabled actions.
1.2 In this example, to enable email sending with Gmail, click on add a new action.
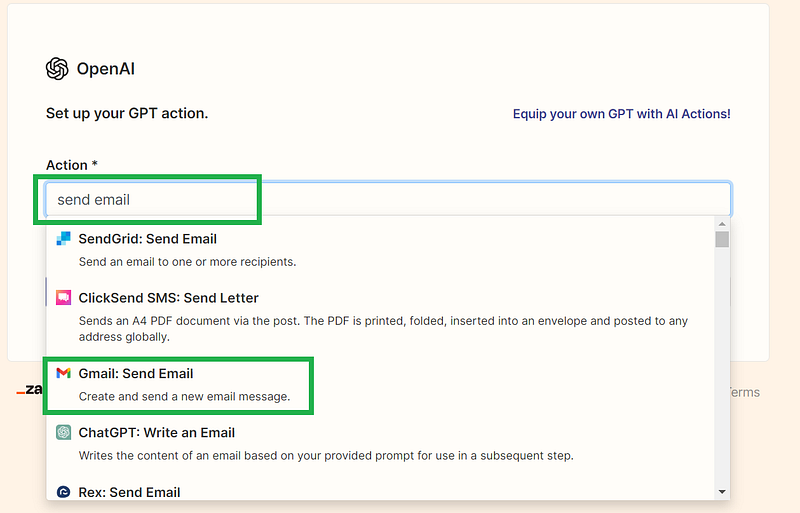
1.3 Then you will be directed to a page to search for the required action. A list of relevant actions is shown with your free text input, in this case, choose Gmail: send email.
1.4 Follow through to link your Gmail account and set up the preferred title and body. Note that, there is a tick box to select if you require preview before running the AI Action. If ticked, Zapier won’t send the email without prompting you to review and give permission first.
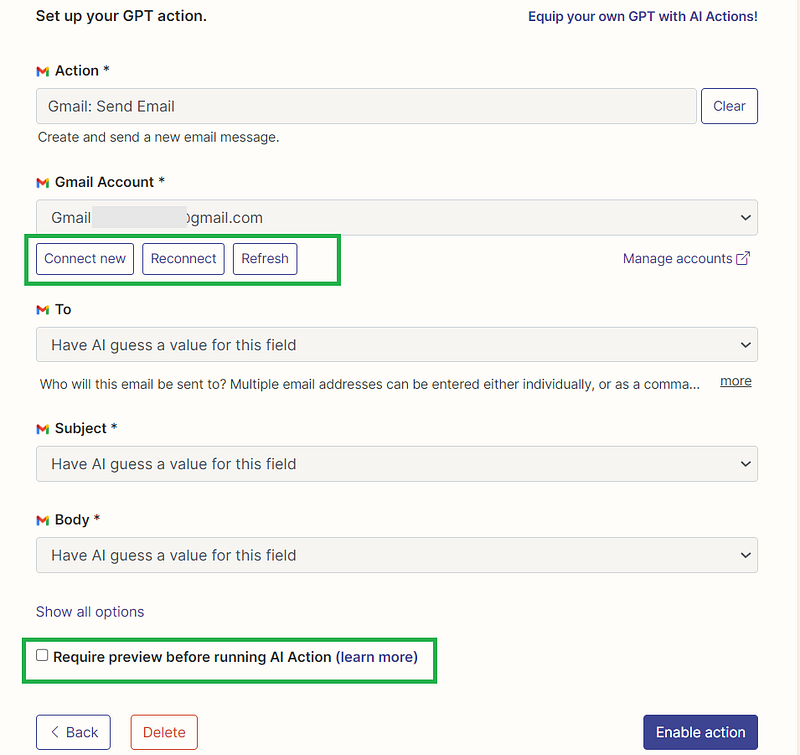
1.5 If you click on show all options, there are more fields for customization. You could give a name to this action as well to help distinguish between similar actions.
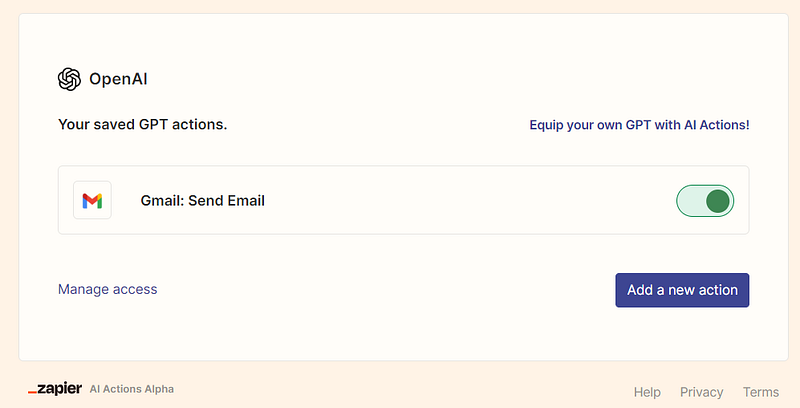
1.6 Once done, you will see Gmail: send email enabled in Zapier AI Action.
Step 2 Create a custom GPT
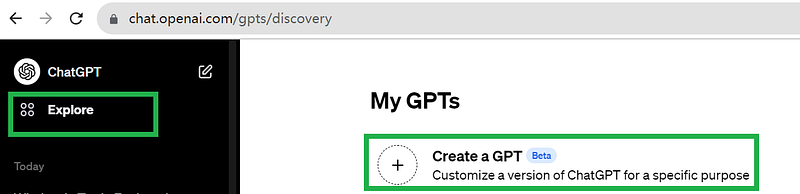
2.1 In the Explore page of ChatGPT (or access with this link), create a new GPT. (For detailed steps on how to create a custom GPT, kindly refer to my earlier post here).
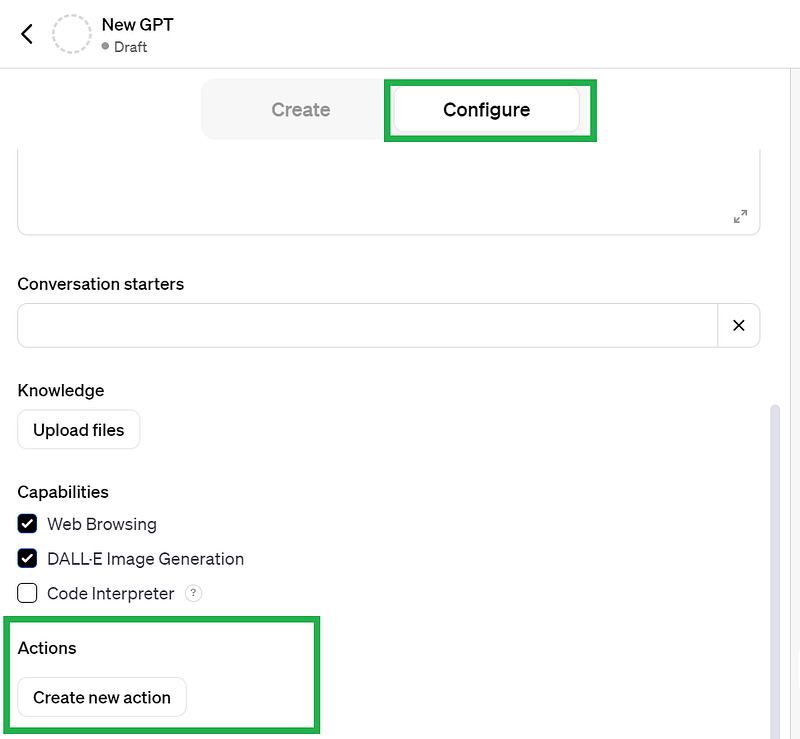
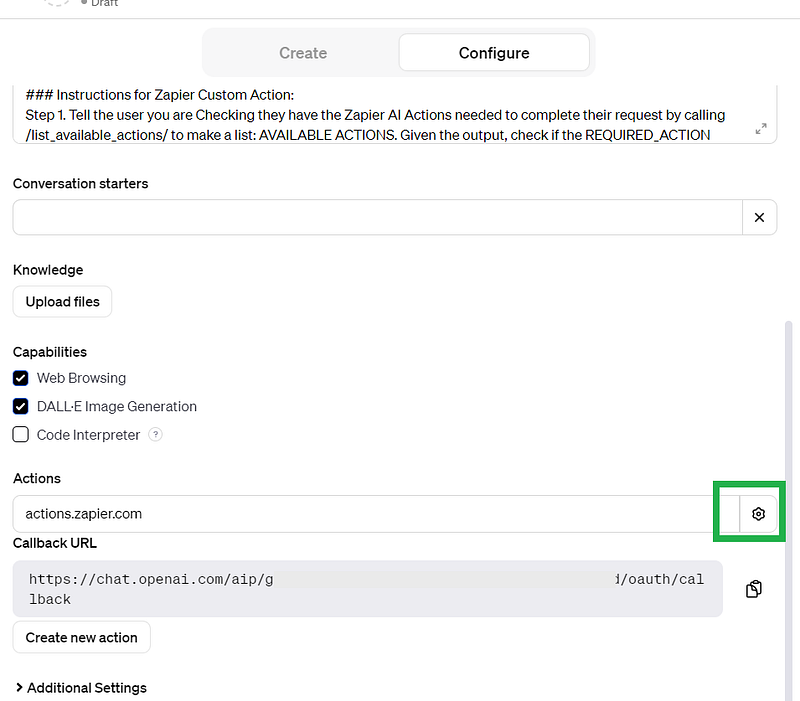
2.2 Next, click on Create new action under the Configure tab.
2.3 To allow connection to Zapier, click on Import from URL, paste this linkhttps://actions.zapier.com/gpt/api/v1/dynamic/openapi.json?tools=meta then click Import.
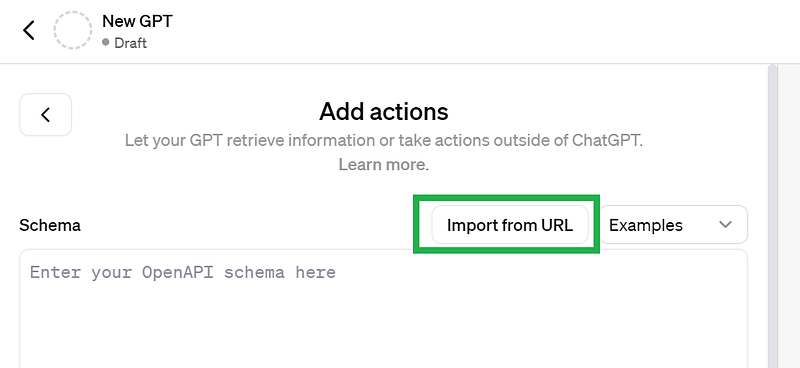
Then the schema will be imported in the blank space.
2.4 Now go back to the Configure tab by clicking on the back arrow as shown in the picture.

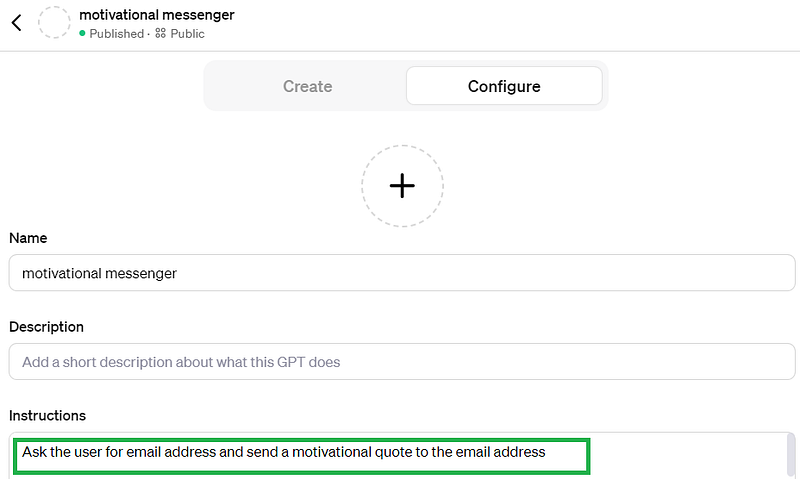
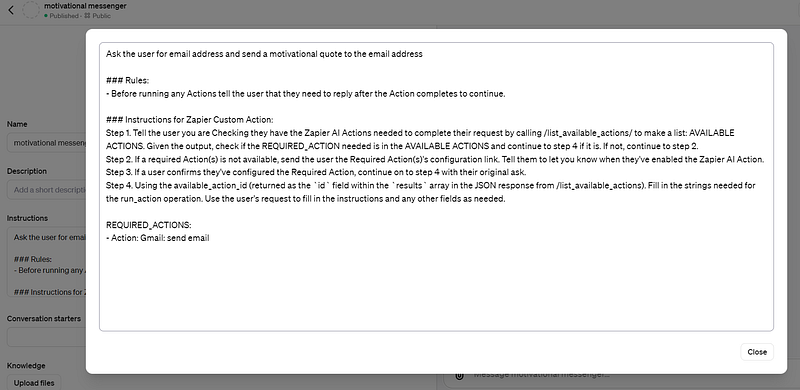
2.5 For this example, we are going to send motivational emails to users. Give it a Name such as “motivational messenger”. Then put this in the Instructions: “Ask the user for email address and send a motivational quote to the email address”
2.6 To enable email sending capability through Zapier, paste below instructions after whatever instructions you have for the custom GPT. This is only a piece of example instructions from Zapier’s official guide, feel free to modify and experiment.
### Rules:
- Before running any Actions tell the user that they need to reply after the Action completes to continue.
### Instructions for Zapier Custom Action:
Step 1. Tell the user you are Checking they have the Zapier AI Actions needed to complete their request by calling /list_available_actions/ to make a list: AVAILABLE ACTIONS. Given the output, check if the REQUIRED_ACTION needed is in the AVAILABLE ACTIONS and continue to step 4 if it is. If not, continue to step 2.
Step 2. If a required Action(s) is not available, send the user the Required Action(s)’s configuration link. Tell them to let you know when they’ve enabled the Zapier AI Action.
Step 3. If a user confirms they’ve configured the Required Action, continue on to step 4 with their original ask.
Step 4. Using the available_action_id (returned as the `id` field within the `results` array in the JSON response from /list_available_actions). Fill in the strings needed for the run_action operation. Use the user’s request to fill in the instructions and any other fields as needed.
REQUIRED_ACTIONS:
- Action: Gmail: send email
2.7 Specify the action Gmail: send email under REQUIRED_ACTIONS. Note that you don’t have to type Gmail: send email character by character, “sending email by Gmail” would also work, but it might create confusion if you have a couple of similar actions defined in Zapier AI action. If you created a self-defined action name in step 1.5, use that name to avoid confusion. Although the official document included a Confirmation Link after — Action, it seems ok to not include such item.
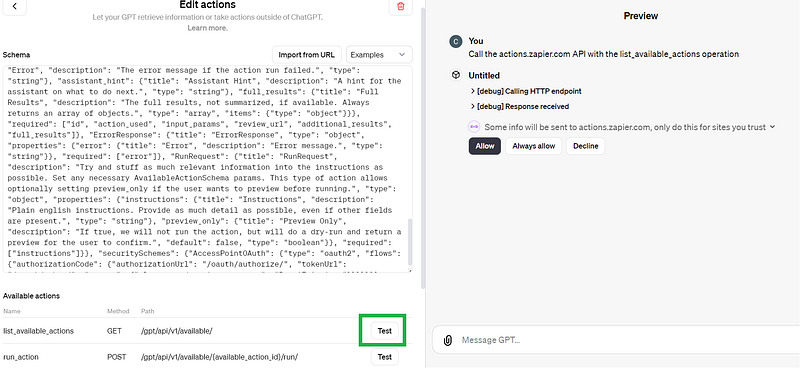
2.8 Revisit the Zapier action in 2.3 by clicking on the button as shown.
2.9 Test and check the list of available actions by clicking on Test
2.10 You will be asked to either sign in first or allow information to be sent to Zapier.
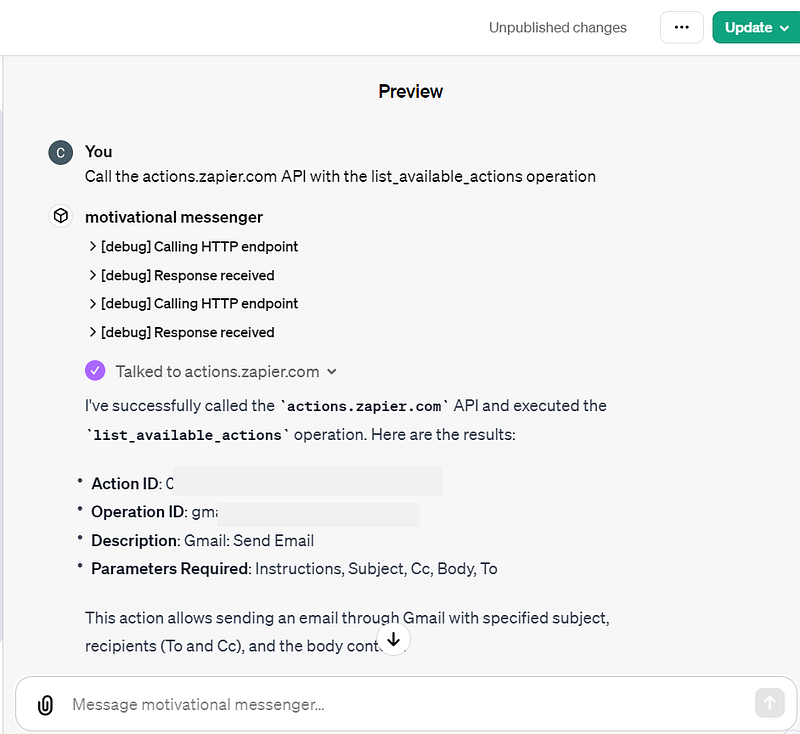
2.11 If successful, it’s going to show something like “I’ve successfully called the actions.zapier.com API and executed the list_available_actions operation” with details of the actions.
2.12 Now let’s save the GPT, if you have not done so, by clicking on the green Save or Update button on the top right corner and test it out!
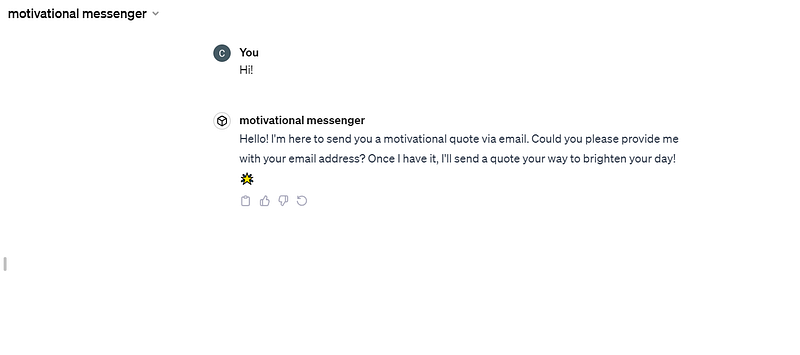
2.13 Say Hi to the GPT, and it’s going to ask for your email.
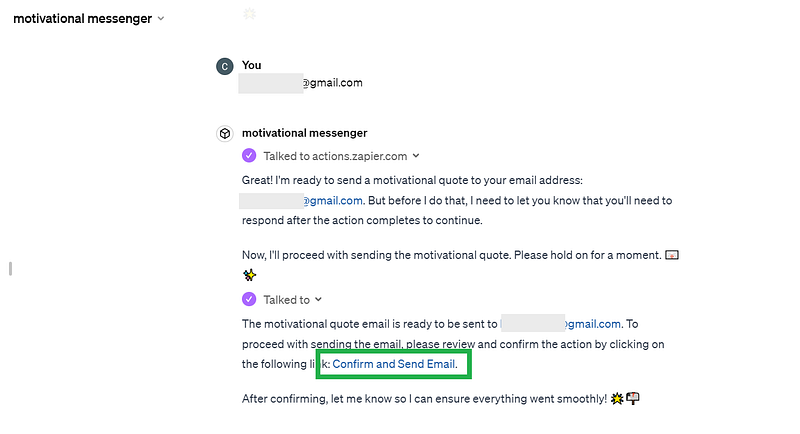
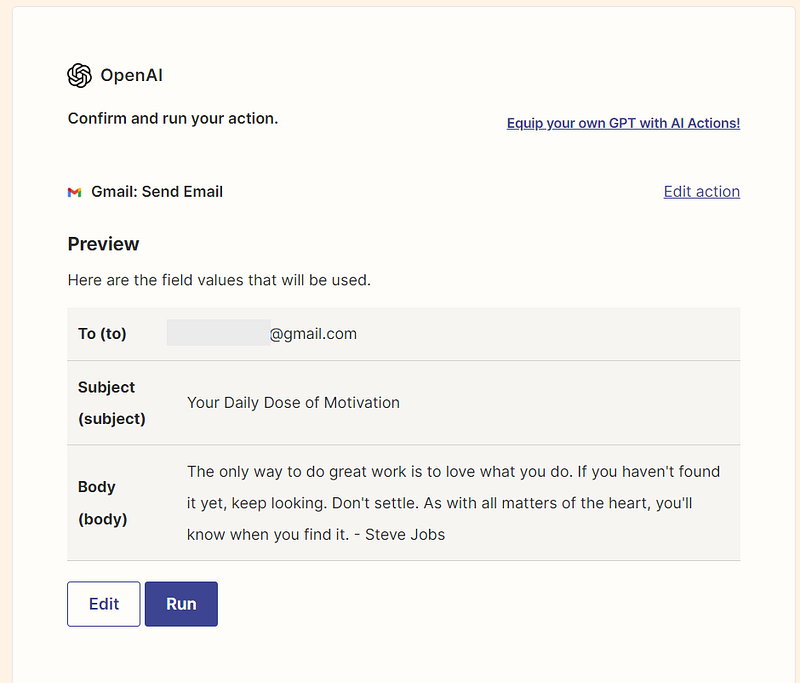
2.14 Then it’s going to generate the motivational quote and ask you for review before actually sending it (this is because we have ticked the box in step 1.4)
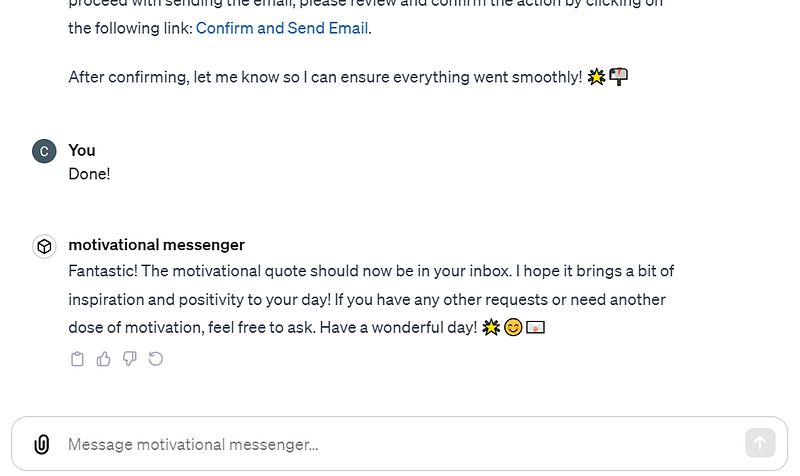
2.15 Check your mailbox.
This is a simple example to walk you through every step involved in configuring a Zapier AI action in a custom GPT. If you encounter any problem or have any question, feel free to leave it in the comment. If you find it helpful, please give this article a clap and follow my channel for more interesting contents in AI =)
Link to the custom GPT in the example: https://chat.openai.com/g/g-DCzdiVDcc-motivational-messenger