
Writing Software: How I Saved $165 By Using Obsidian Instead Of Roam
Bonus: Get Free Sync Across iOS Devices
I used to love Roam Research for capturing all my thoughts.
Roam’s key features that made it one of the most indispensible software for the last 1 year include:
- Ability to easily organize my thoughts into bullets and sub-bullets
- Ability to move these bullets, including their children, above or below other bullets … easily re-organizing the structure of an essay
- Ability to focus and zoom-in on a parent bullet and its children … removing the ‘noise’ in the form of other content surrounding it — temporarily — to help focus on writing that section
- Seamless Sync across devices (specifically Apple laptop and iOS devices in my case)
- Ability to have a separate vertical panel (to the right of the main editing window) where I can capture quick thoughts and braindump (H/T Ev Chapman)
But, in a year where the war has brought about hyper-inflation, resulting in almost all commodities increasing in prices and people reviewing their current subscriptions to continue making ends meet, the $165 per year invoice — that Roam suddenly presented to me one day in a pop-up window — hit me hard.
I then started researching alternative software that would provide most of my requirements (stated above) at a fraction of the cost and … managed to find one … Obsidian.
How to setup your content in Obsidian such that it gets sync’d across iOS devices via iCloud
Each page is stored as a Markdown (.md) file
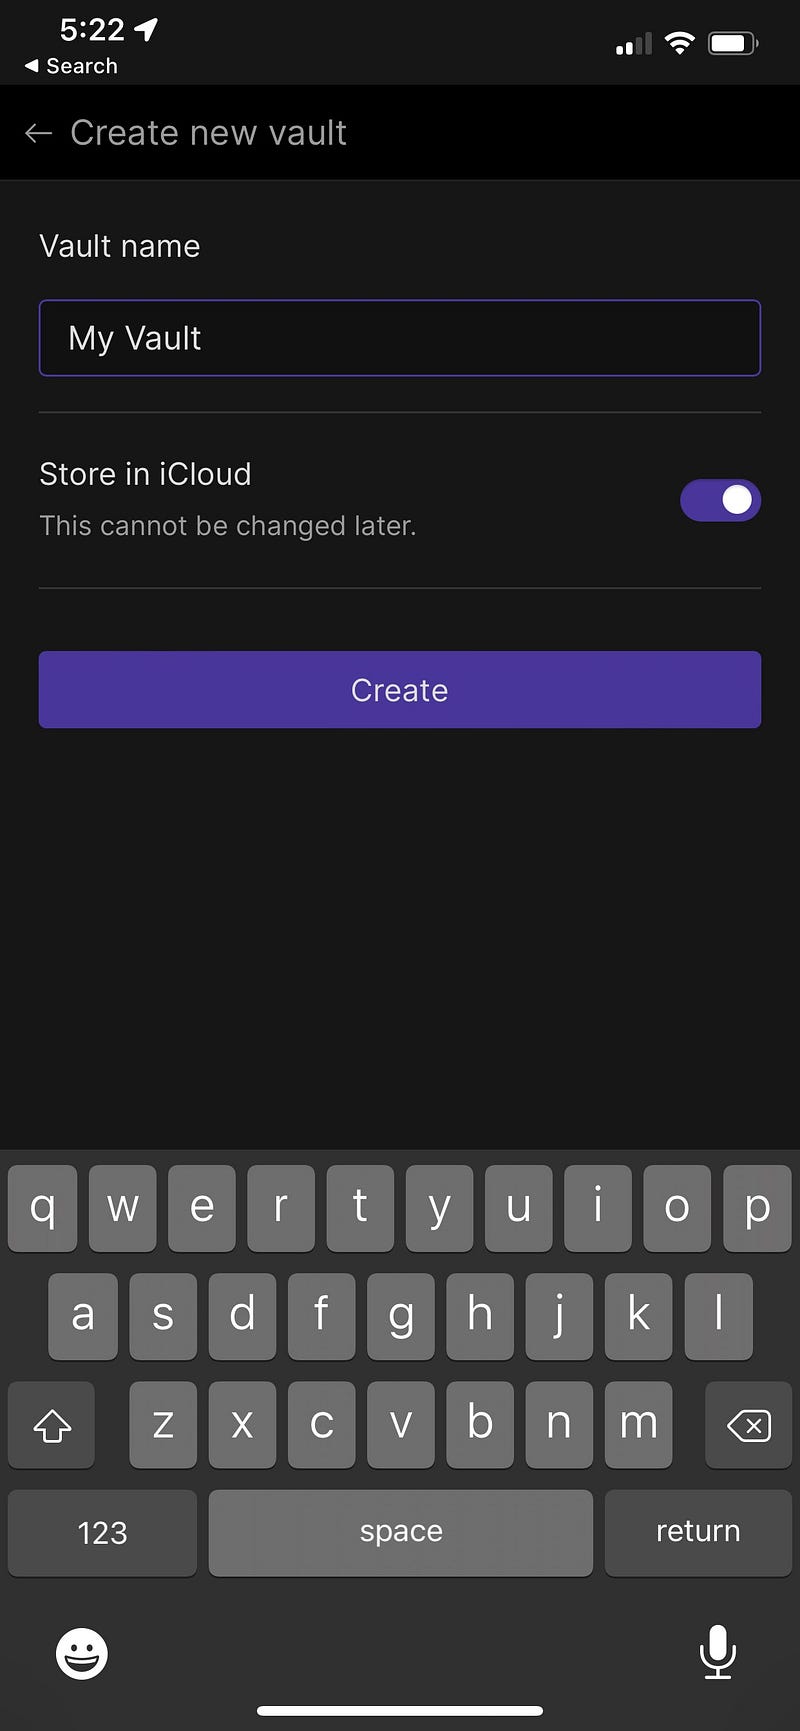
Open Obsidian app first in iOS, then choose to create a new vault and make sure you select the ‘Store in iCloud’ option as shown in the picture below.
Then, create a new page and type some text.
Just type a paragraph or two … at this point, we are making sure that the sync works across devices and that you can open this successfully on your MacBook/other Apple laptop.
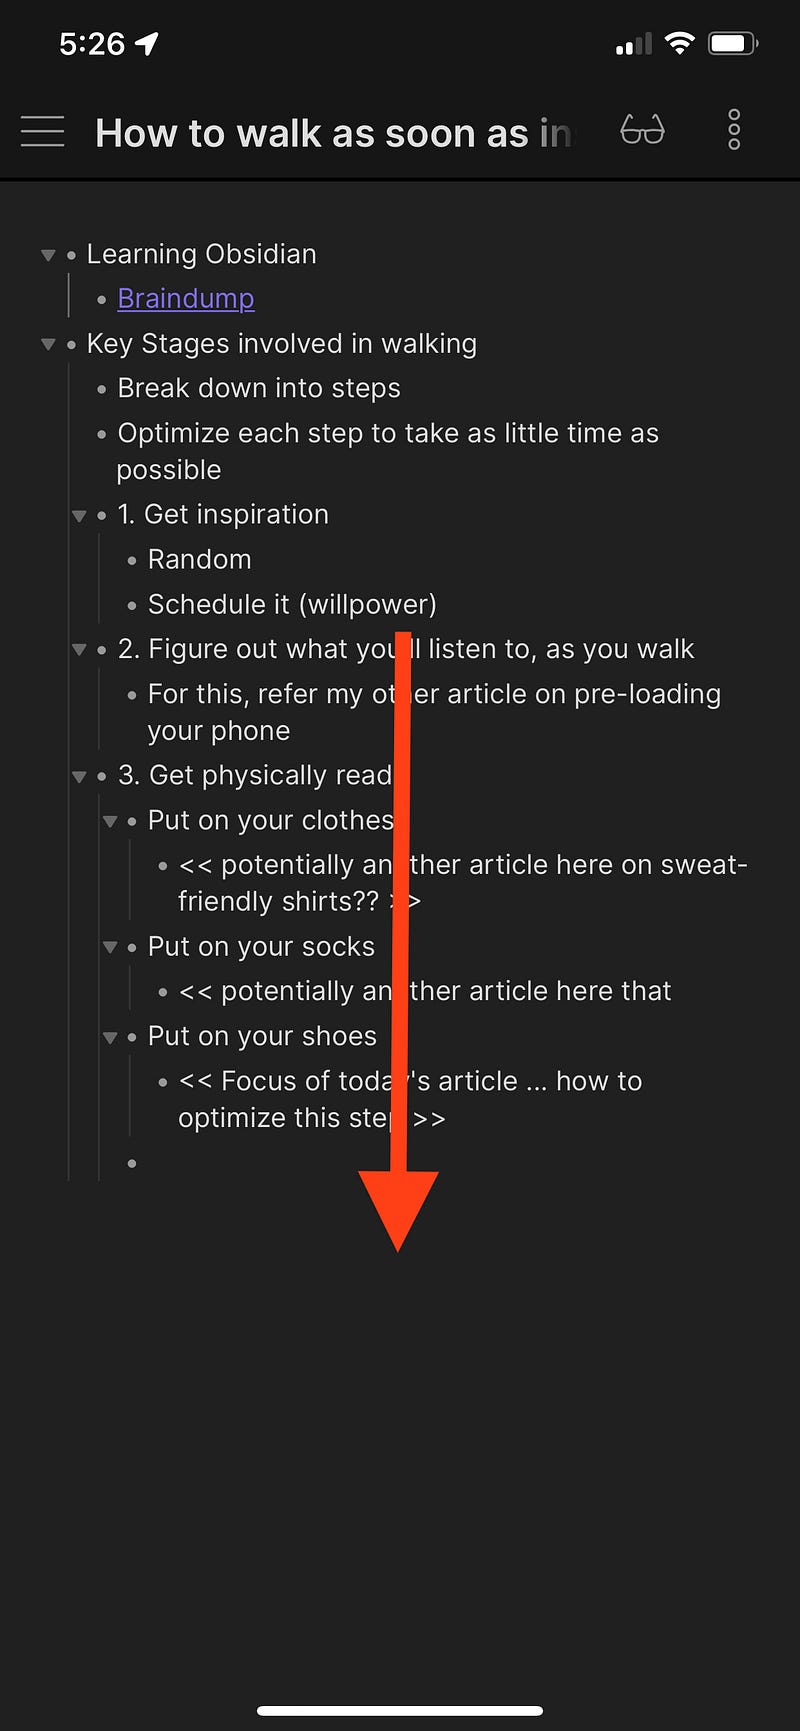
Then, starting from the middle of your iphone screen, swipe down as shown in the red line in the picture below.
Take care not to swipe all the way from the top of your iPhone as that will open the iOS panel instead of Obsidian’s panel.
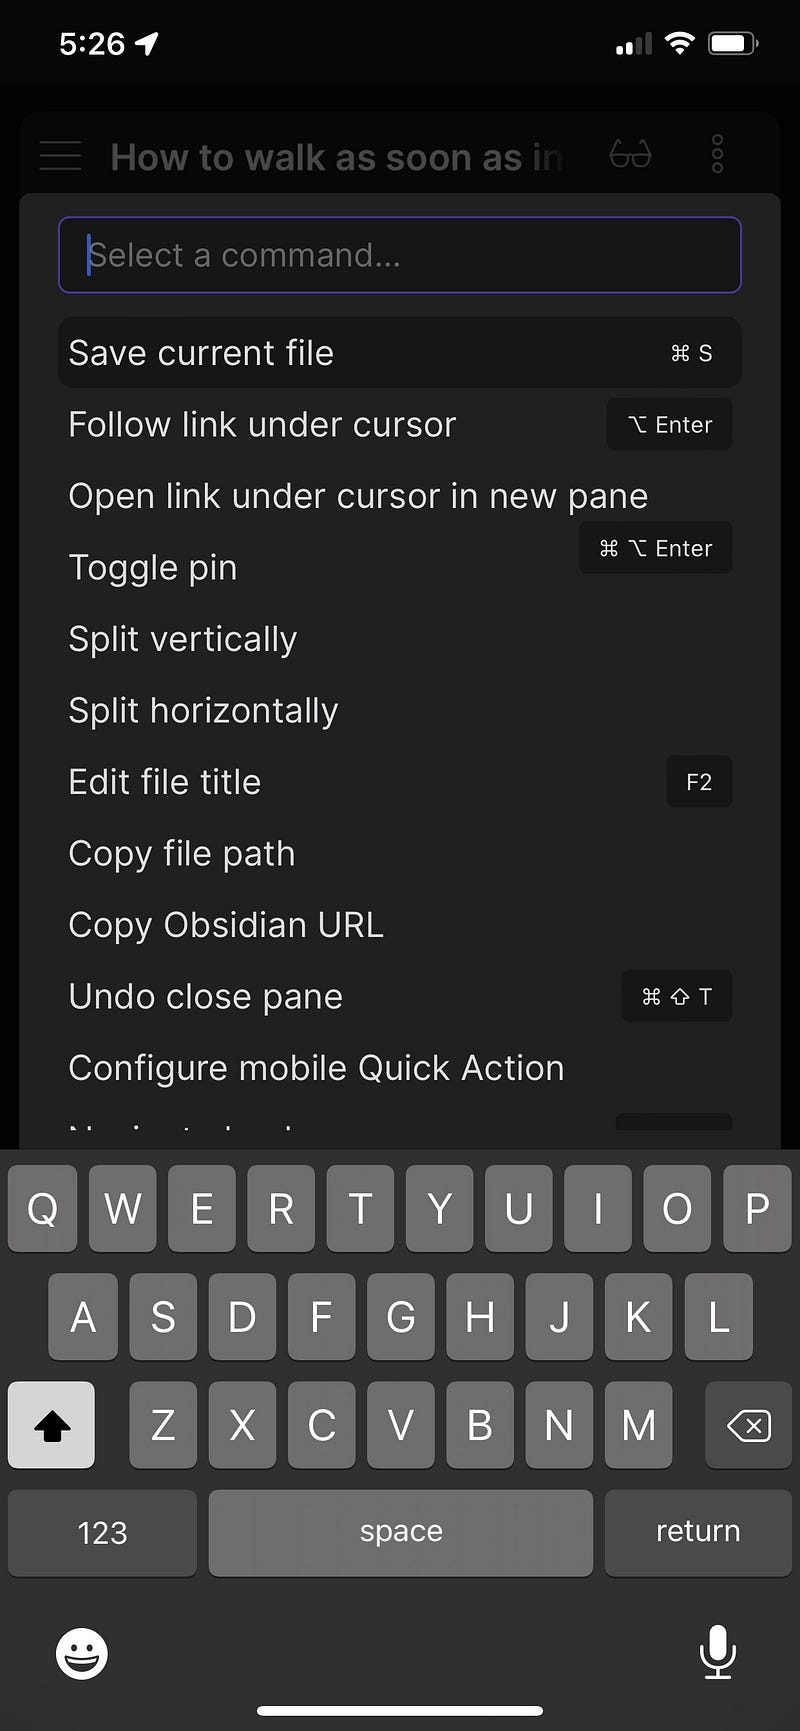
Then choose the ‘Save Current File’ which should be the first option.
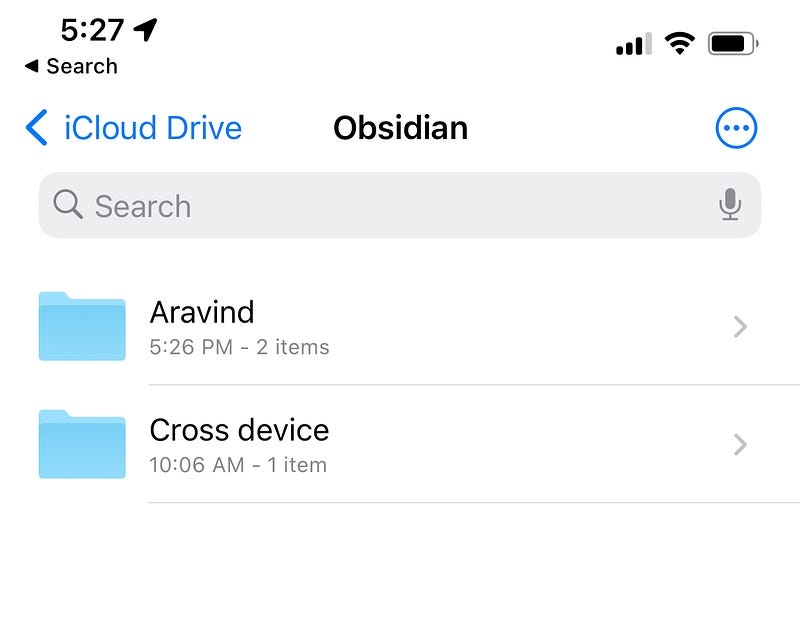
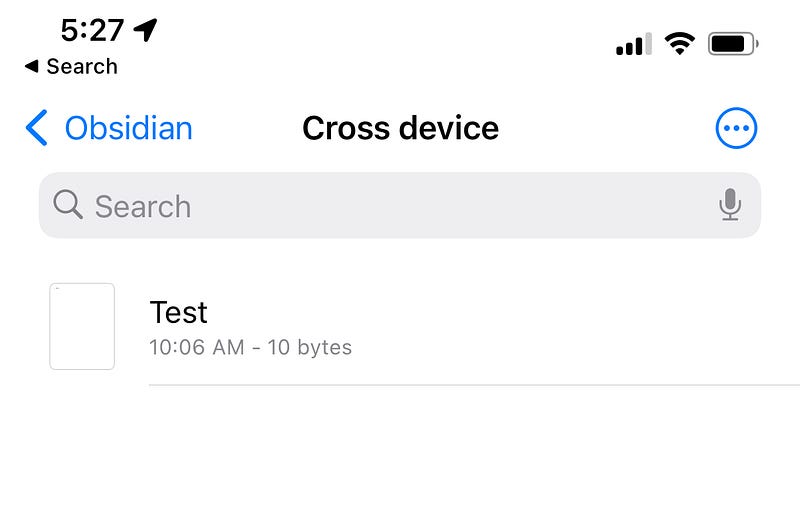
On your mobile phone, open Files app and navigate to iCloud Drive.
Confirm that you can see the Obsidian folder and underneath that, confirm that you can see a file under another folder with same name as your vault name.
Now, on your laptop, open Finder, navigate to iCloud Drive and confirm that you can see the Obsidian folder/sub-folders. If not, you may need to wait for a minute or two for iCloud to sync from your mobile to your laptop.
Once you can see the Obsidian folder on your laptop, then install Obsidian for Desktop (macos) from the obsidian website.
Open Obsidian App on your macOS and choose “Open folder as Vault”, navigate to iCloud folder and select the sub-folder (i.e. Vault Name) that you created earlier.
Voila … you should now have the same content open on your laptop.
Any change you make on your laptop will be sync’d to your mobile and vice versa … free of cost (technically you are paying iCloud subscription cost to get this capability but its free from an “additional cost for another software” perspective)
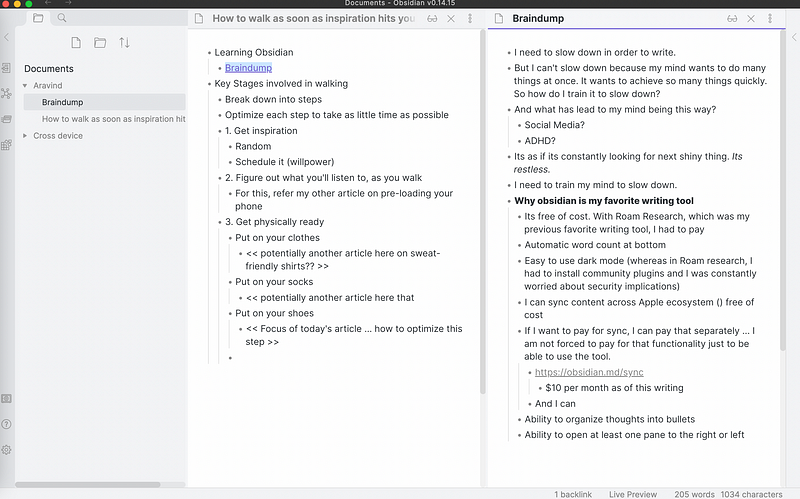
How to open a Braindump area in right hand pane in Obsidian
With cross device sync sorted, I wanted to meet my next requirement which was to be able to open 2 documents side-by-side in Obsidian
- Left hand side … the main editing window for whatever happens to be the primary article being worked upon at that moment in time.
- Right hand side … a ‘Braindump’ to capture any and every random thought that I get throughout the day (or when writing articles such as this one!)
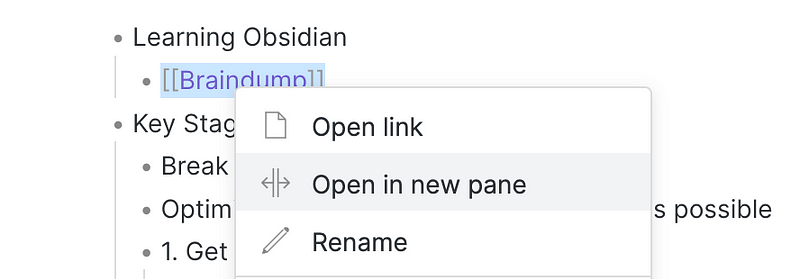
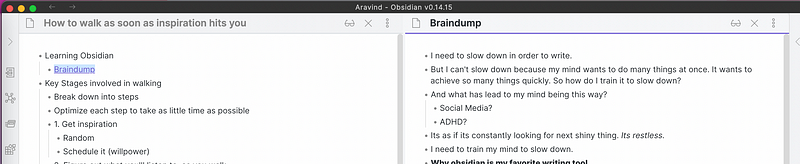
This step is fairly easy on the desktop, just type 2 square brackets and some text in-between and this will create a pointer to a new file, as shown in the screenshot.

Then, either click on the link to auto-create the file or right-click and choose “create this file” if not already created.
After creating the file, right-click on the “Braindump” text once again and this time you should see an option called “Open in new pane” as shown in image below
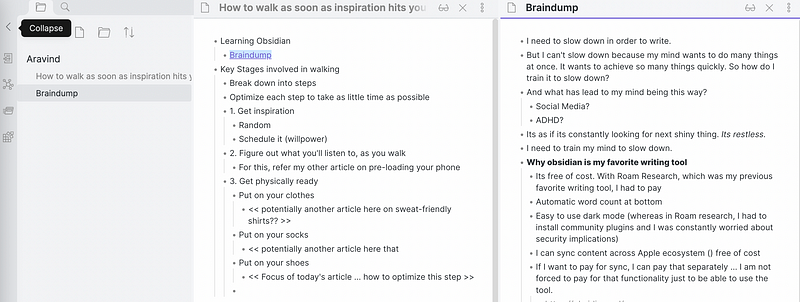
Voila … now I have 2 panes side-by-side, exactly how I wanted it.
BONUS TIP: Hide the left hand navigation pane so that you can focus on writing.
As shown in the image below just click on the left hand option to ‘Collapse’ the pane. This will keep the main central writing pane and the right hand Braindump pane open … a clean and minimalistic way to help me write without distractions.
EXTRA BONUS TIP: Perform the same split-pane setup on your iOS (e.g. iPhone) device
Having the braindump on my laptop is fine, but inspiration often strikes when I am out and about and I wanted the same setup on my mobile.
The steps are slightly more complicated (not intuitive) on the mobile and it took me some time to figure it out, so here it is:
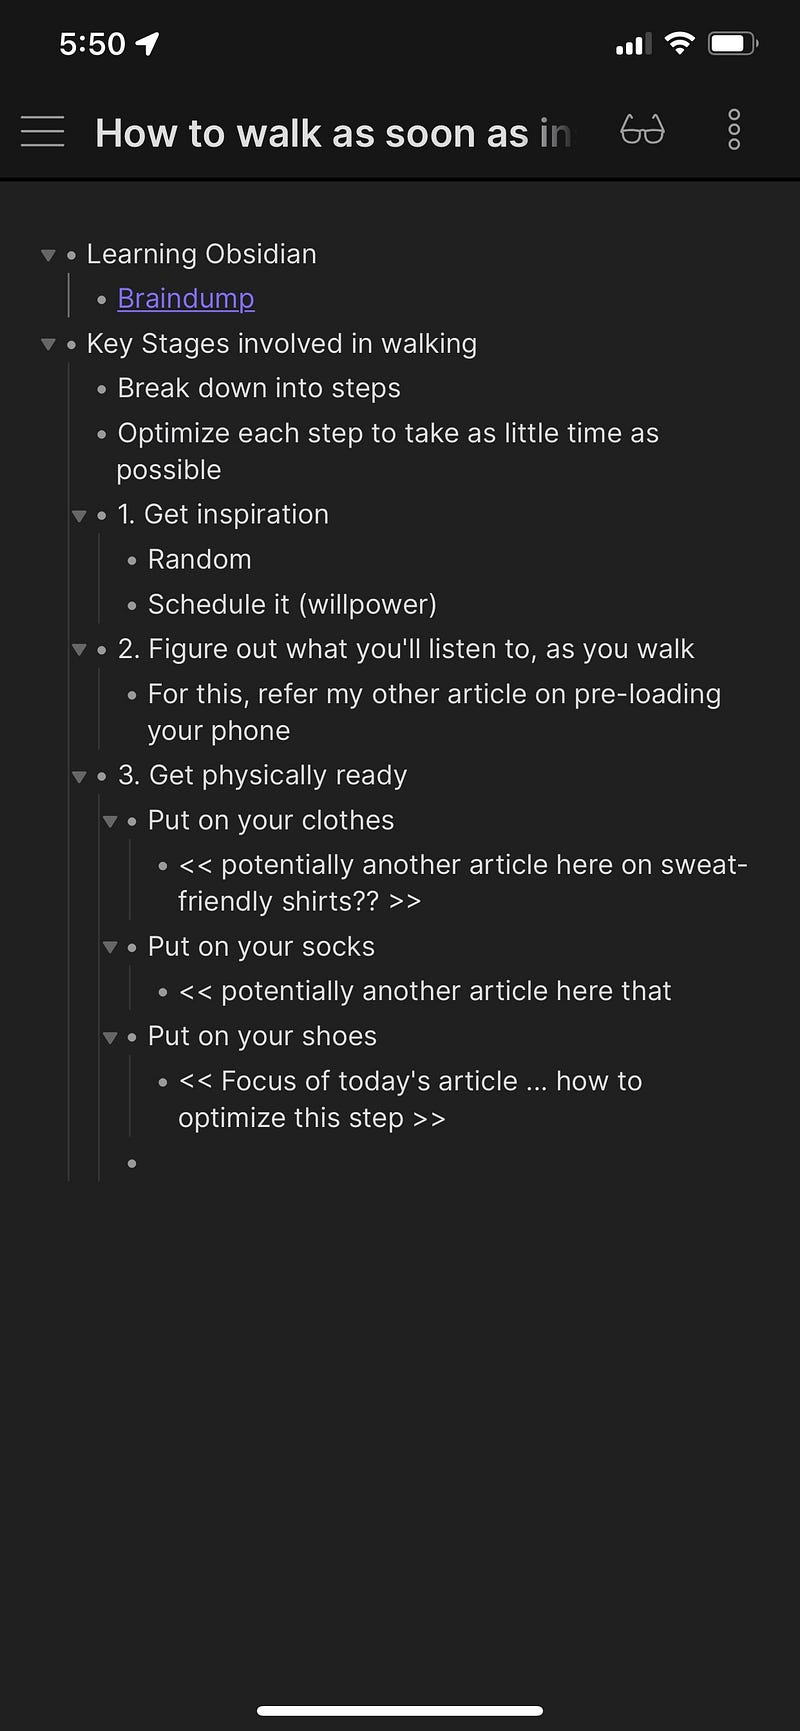
Start with the main article (i.e. the one that will stay in the left pane later) open, as shown:
Then, move the cursor directly underneath the text (filename) called Braindump as shown in the image.

Next, as you did earlier in this article, swipe down from the middle of your iphone screen towards the bottom to reveal a context menu like so:
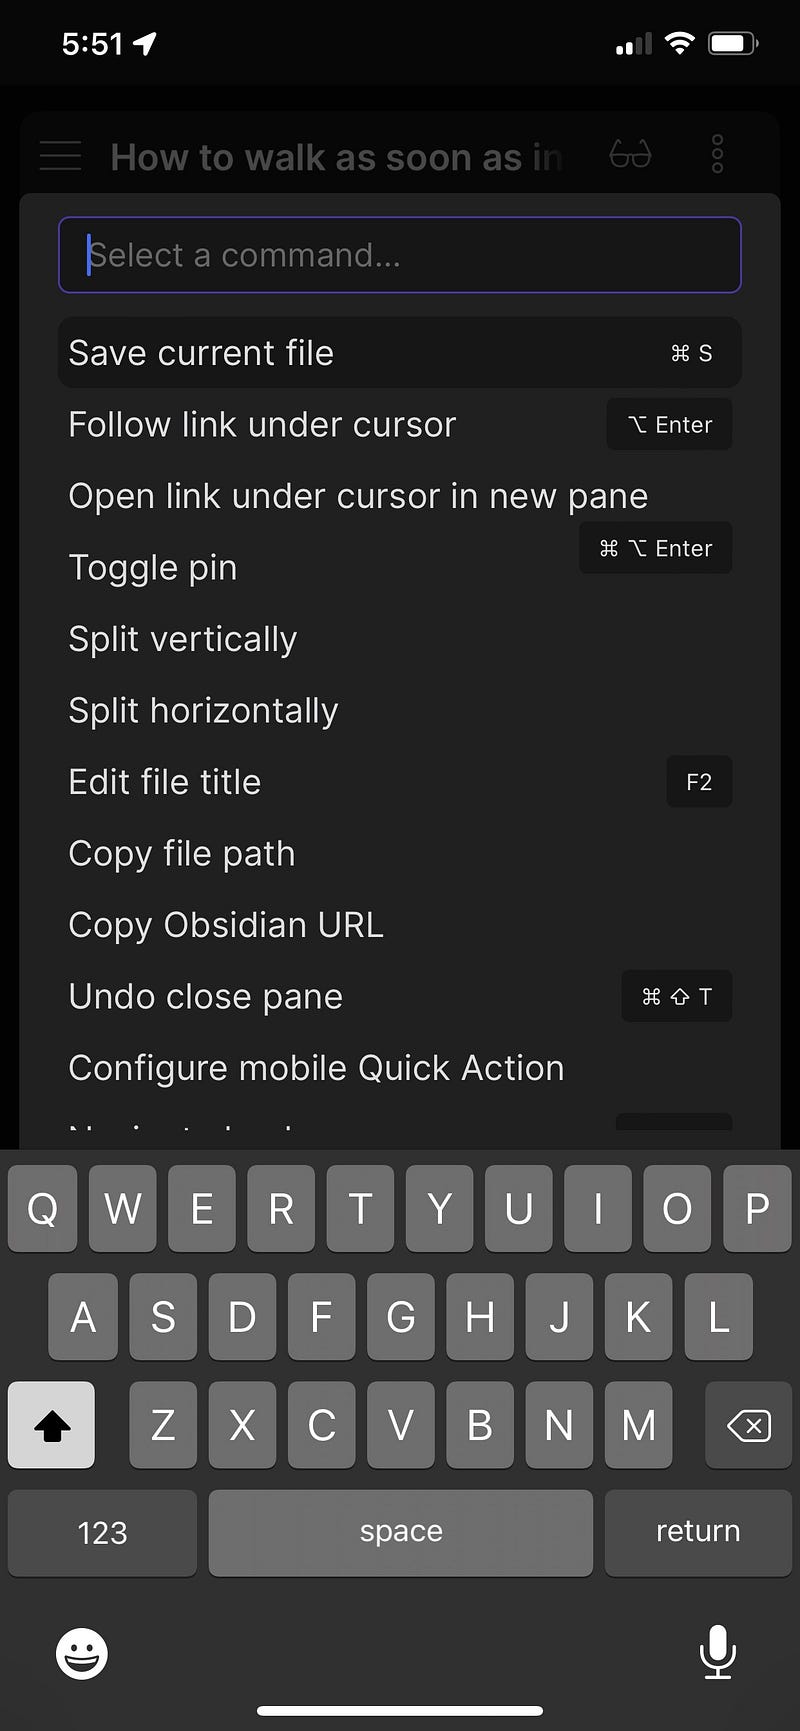
In this, choose (touch with your finger) the 3rd option — “Open link under cursor in new pane”…
Rotate your iphone to landscape mode for easier editing..
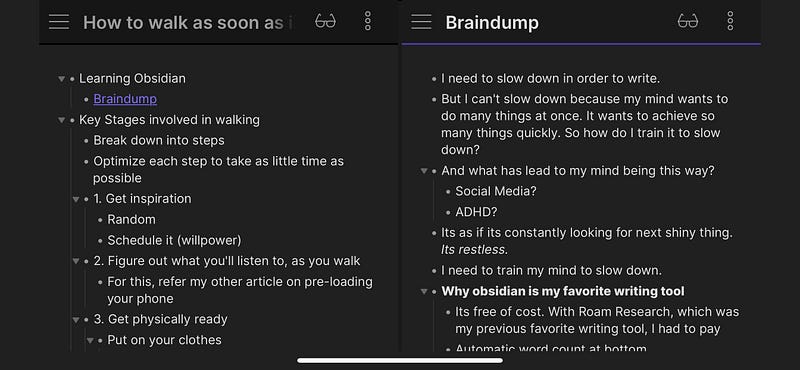
And Voila! … you have the same setup on your iPhone (or iPad) as you had on your laptop … perfection!!!
Final Thoughts
- I will forever be grateful for Roam Research for helping me write down my thoughts in a free-flowing and structured way. Up until that point when I first used it last year, I had never come across such software before.
- Roam Research continues to offer scholarships for young people (<22) and researchers.
- For rest of the people looking for a tool that offers similar capabilities as Roam at a more competitive price point, Obsidian could be a great fit.
- Tools evolve continuously and pricing tiers also change … let’s see how this landscape evolves in the coming years.
- But one thing is certain … with softwares such as Roam and Obsidian, there has never been a better time for digital writers to capture their thoughts easily.