
Write once, run on any cloud with Pulumi

Automating repetitive tasks is a basic cornerstone for maximizing efficiency and operational excellence at the industrial level. Coding your cloud infrastructure streamlines the development process, and also makes iterative development for your applications easier to manage. There are a number of sophisticated tools at your disposal as far as Infrastructure as Code (IaC) is concerned. Each of those tools has its own rules (mostly a Domain Specific Language — DSL) and concepts of implementation, so before you can become efficient, you need to spend some time understanding how they work to begin the implementation process.
Pulumi is a platform for creating, deploying, and managing cloud infrastructure along with offering multi-cloud support like most other IaC tools. The distinction between Pulumi and other tools is that with Pulumi you can program the infrastructure in the language you’re familiar with. This means you can start coding your cloud deployments without spending any time on learning a new language.
How Pulumi works:
This IaC tool operates using a state-driven approach. Pulumi leverages existing, familiar programming languages, including TypeScript, JavaScript, Python, Go, and .NET, and their native tools, libraries, and package managers. Following a declarative approach using the SDK, you allocate a resource object whose properties and attributes indicate the desired state of your infrastructure.
When a Pulumi program executes, the flow is as follows
- A language host computes the desired state for a stack’s infrastructure. It sets up an environment where it can register resources with the deployment engine.
- The deployment engine compares this desired state with the stack’s current state and determines what resources need to be created, updated or deleted.
- The engine utilizes a set of resource providers (AWS, Azure etc.) in order to manage the individual resources.
Getting started:
Let’s explore the workings of Pulumi with an AWS lambda function that translates any non-English content to English when a text file is uploaded into an S3 bucket.
After you have created an account, the first requirement is to install the SDK. Depending on your OS, you can install by running
- brew install pulumi — MacOS
- choco install pulumi — Windows
- curl -fsSL https://get.pulumi.com | sh — Linux
Configure your service provider’s CLI so that Pulumi can carry out the operations for deployment. Since we are using AWS, we can either export the AWS_PROFILE name if there are multiple profiles (in the case that default profile is to be used you ignore this step) configured, or after creating a Pulumi project (next step) you can run this
pulumi config set aws:profile <profilename>Creating a project & deploying:
Javascript is the language we’ll work with for creating this project. Inside an empty directory, run
pulumi new aws-javascriptYou will first be prompted to log in to Pulumi when you initially start working with the CLI. After login, the CLI will create a project with your inputs (tip: leave us-east-1 as default since certain AWS services are not available in all regions) and automatically install base dependencies.
A typical JS Pulumi project will consist of the following files.
- Pulumi.yaml — Defines the project.
- Pulumi.dev.yaml — Contains configuration values for the stack we initialized.
- index.js — The Pulumi program that defines our stack resources.
Let’s begin adding in the code required to create our serverless function for text translation. There are two approaches to creating and deploying the function.
Manual function:
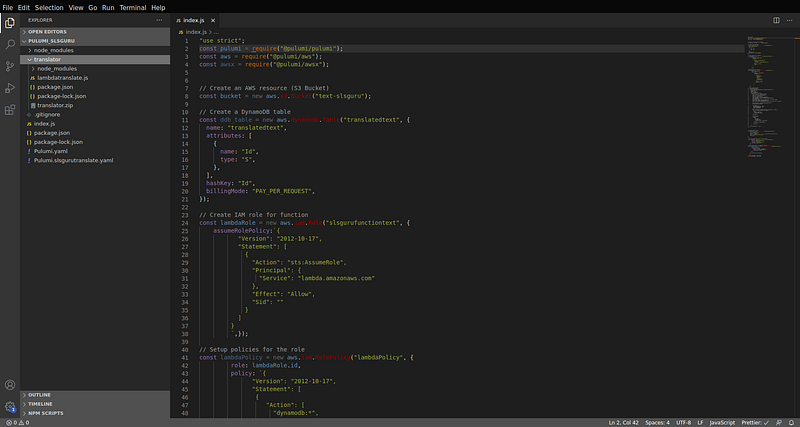
Replace the contents of index.js with the following code.
Create a folder named translator at the root of the directory and add the following code.
Observe the index.js code; you’ll see that the lambda function code is zipped along with the required dependencies. npm init inside the translator folder and run npm i uuidv4. Then zip the contents of that folder.
Your project directory should look something like this.
Deploy by running
pulumi upThe resources get created with an auto-generated suffix id. You can disable that by adding the name attribute to the individual resources. (refer dynamoDB table creation code block)
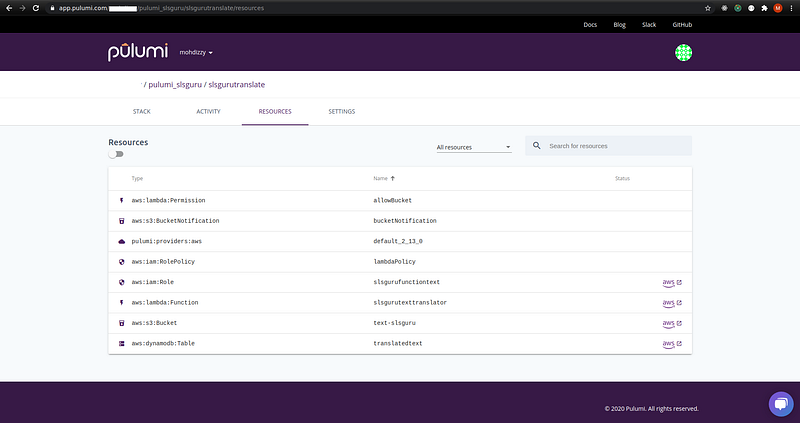
At your Pulumi console, you can review all your created stacks and it’s related resources.
Upload a sample .txt file containing content that is not in the English language. The translated text will be sent to the created DynamoDB table.
Magic function:
There is another approach to create serverless functions. Pulumi calls it the magic lambda function. Essentially, the function code is written inline along with other configuration settings (the aws.lambda.CallbackFunction should be used to add the settings) such as role, memorySize, timeout etc., and Pulumi handles the creation and configuration of the resources.
Replace the index.js with the following code.
With the uuidv4 (npm i uuidv4) dependency installed, re-deploy the program by running
pulumi upPulumi will automatically recognize the changes and make adjustments as needed.
The difference in this Pulumi program is that we call the onObjectCreated method on the bucket resource signifying that when an upload to this bucket is done, trigger the defined function. In addition to specifying the attributes of the function, the lambda function code is authored inline with Pulumi taking care of everything else. Even the dependencies are automatically included when the function is being created on AWS.
Magic functions are an interesting concept to event-driven programming, and managing infrastructure as code. These functions are actually derived from a term Pulumi calls “Crosswalk for AWS”, which supports the creation of underlying infrastructure by using a collection of libraries (more on this can be found here). Both implementations achieve the same result but the second approach requires lesser effort and makes the entire process of creating serverless applications look fluid.
pulumi destroy - deletes all resources from the cloud.
pulumi rm stack <stackname> - will remove the stack entirely from the Pulumi service, along with all of its update history.
Conclusion:
We have explored the inner workings of Pulumi and have seen how simple it is to write and deploy cloud infrastructure in the language of your choice. Unlike other IaC tools, while using Pulumi you don’t have to spend time learning a new language or familiarizing with specific concepts of implementation. Even if you have been using other infrastructure or configuration management tools, the transition to Pulumi can be done with very little effort (refer to docs to learn more). You can also mix and match by maintaining integrations with other provisioning tools to best suit your needs.
Who is Serverless Guru?
Serverless Guru helps companies build scalable and cost-effective applications on the cloud. We help train companies on how to leverage IAC, serverless, and cloud-native services. We help migrate existing applications to the cloud and optimize existing applications on the cloud to be more cost-effective. We are a Serverless development partner and an AWS Consulting partner.

Mohammed Izzy
Serverless Developer — Serverless Guru
Twitter — @mohd_izzy
If you would like to learn more about Serverless Guru, follow us on Medium, Twitter, Instagram, Facebook, or LinkedIn!
Thanks for reading 😃


